
Table of Contents
- Step 1: Download
- Step 2: Install & Activate
- Step 3: Register Your Plugin
- Step 4: Completing the Process
- Step 5: Ready to Go!
Purchased A License On CodeCanyon?
Please find our quick setup guide in this post.
Step 1: Download
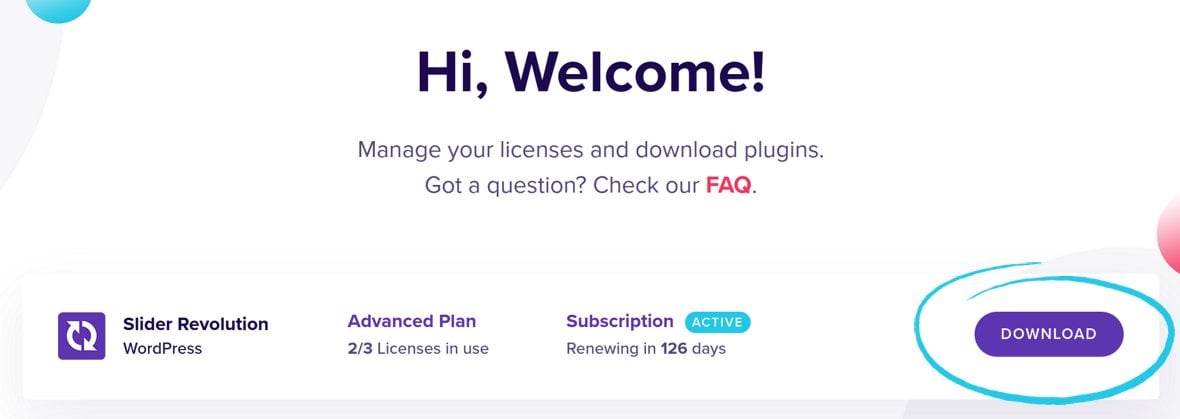
After purchasing Slider Revolution go ahead and log into your member dashboard at: https://account.sliderrevolution.com/
Once logged in, the first thing you’ll want to do is download a copy of your plugin. To do that, click the purple Download button on the right end of the Slider Revolution bar:
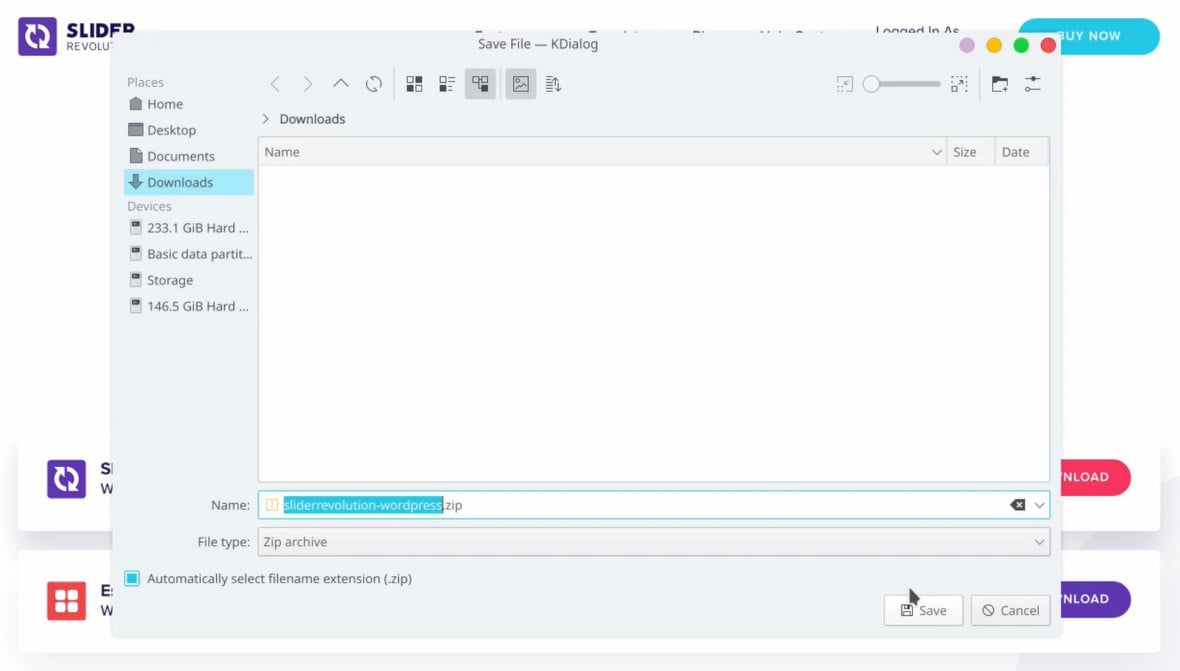
You’ll be prompted to download a zip file that contains the Slider Revolution plugin. Go ahead and save that zip file somewhere easy to find on your computer.
Step 2: Install & Activate
The next step is to install Slider Revolution into your WordPress site.
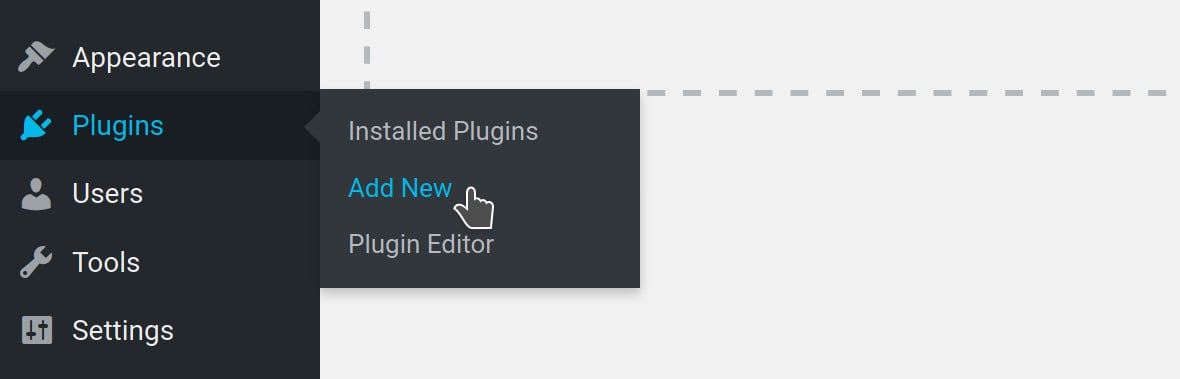
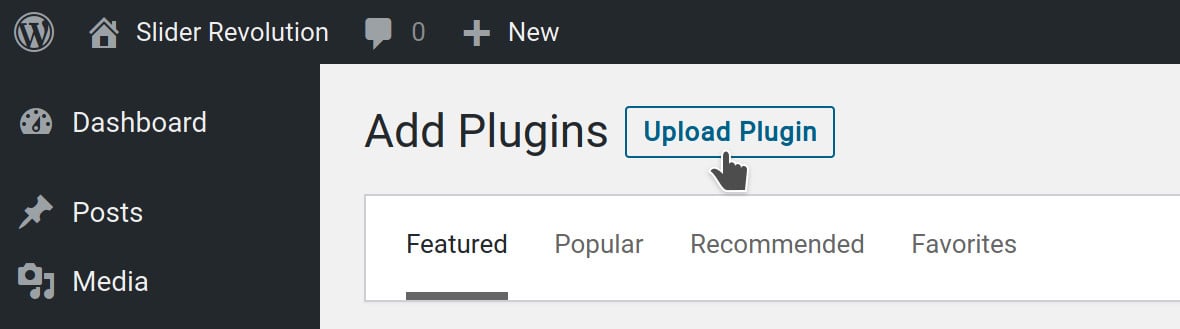
Head to your WordPress site’s admin area and in the left sidebar go to Plugins > Add New:
Click Upload Plugin:
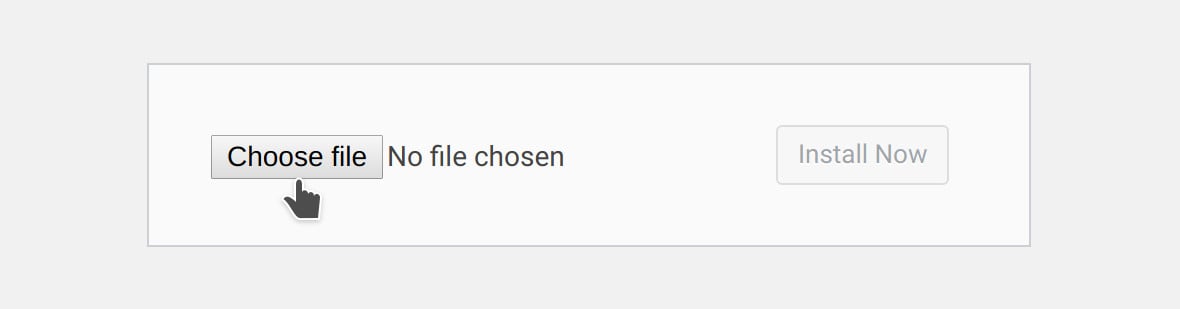
Then click the Browse or Choose File button:
In the file browser dialogue box select the zip file you just downloaded:
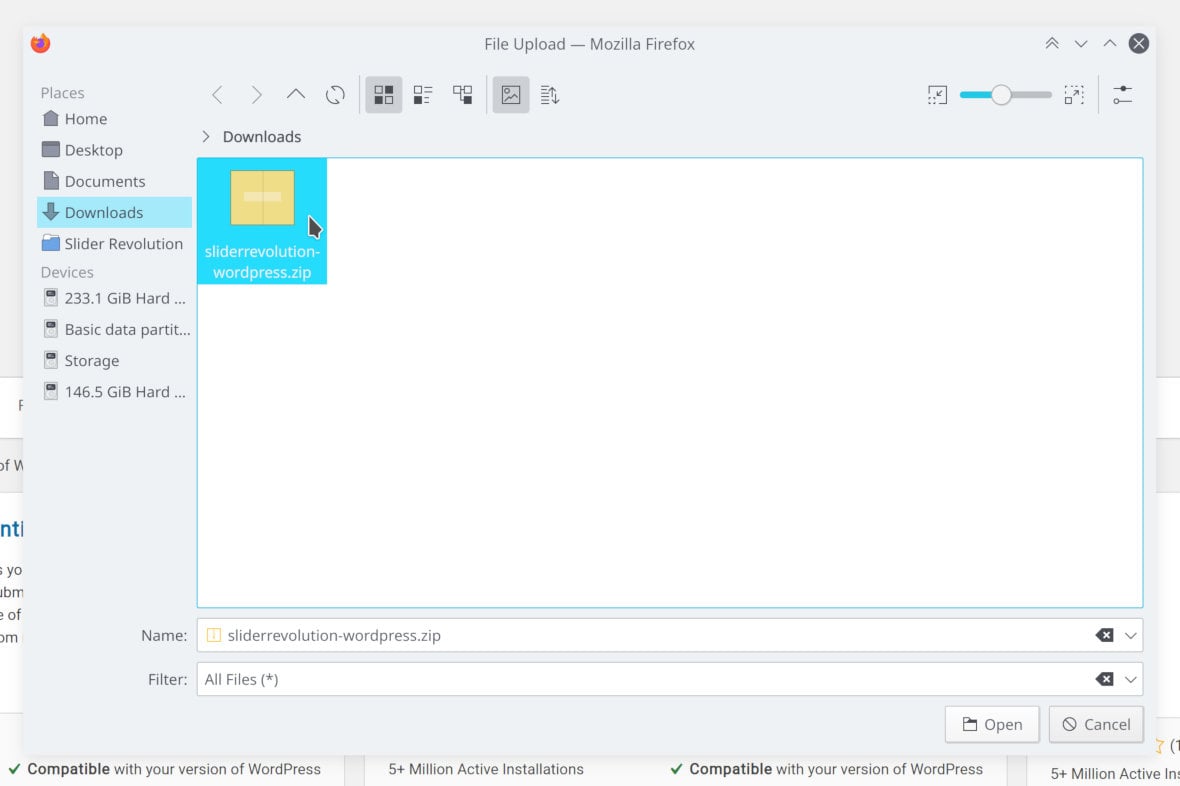
Click Install Now and the plugin will be automatically installed:

When the installation is complete, click the Activate Plugin button that appears:
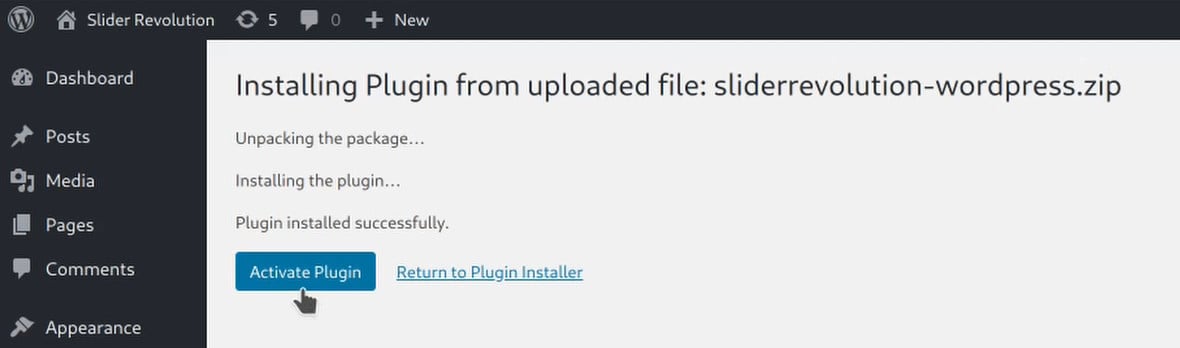
Next up, register your plugin to make sure you’re accessing all the premium features included with your Slider Revolution purchase.
Step 3: Register Your Plugin
Back in your member dashboard, expand the subscription plan bar for Slider Revolution. You’ll need a keycode, which you can see in the fields on the left of the plan bar:
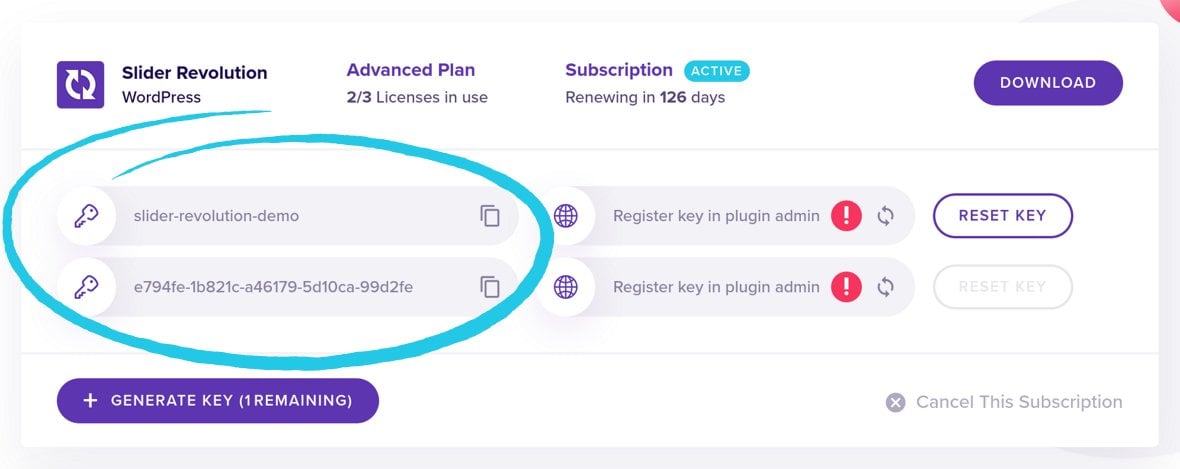
If you don’t have a keycode free you can click the purple Generate Key button at the bottom of the plan bar to generate a new one:

You’ll now need to copy one of your keycodes, ready to paste into your WordPress admin area. To do this click the copy icon to the right of the keycode you want to use:

Return to your WordPress site and in the sidebar menu click Slider Revolution to go into the plugin’s admin area:

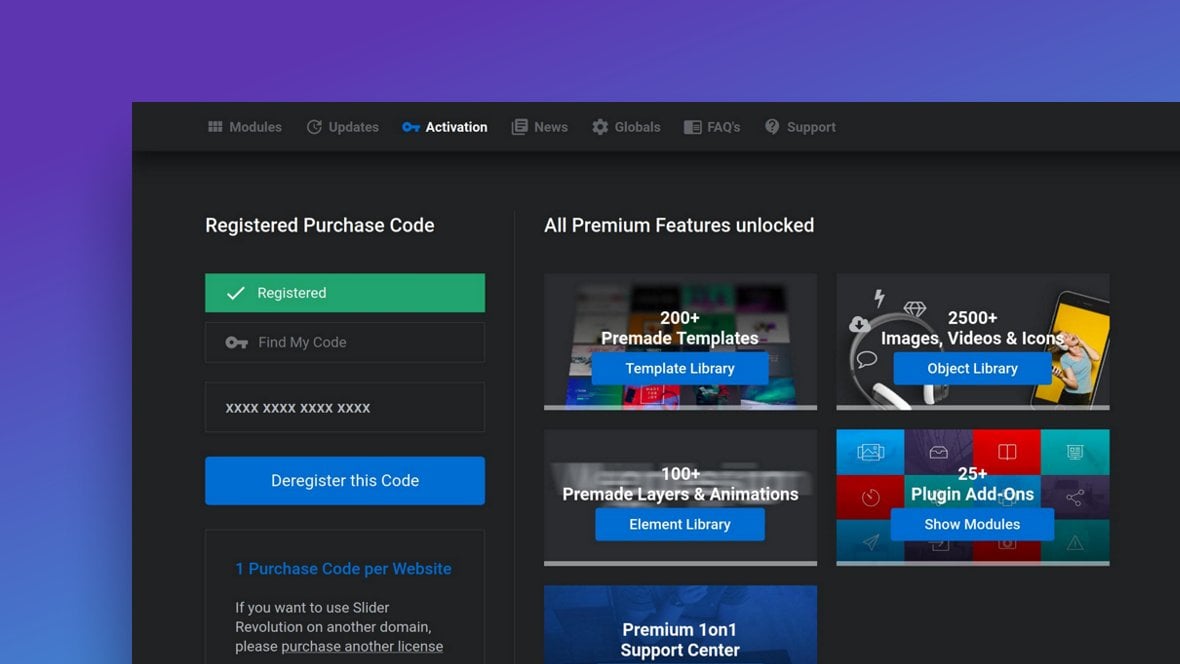
Once you’re in the Slider Revolution admin area, locate and click the Activation link on its top bar:

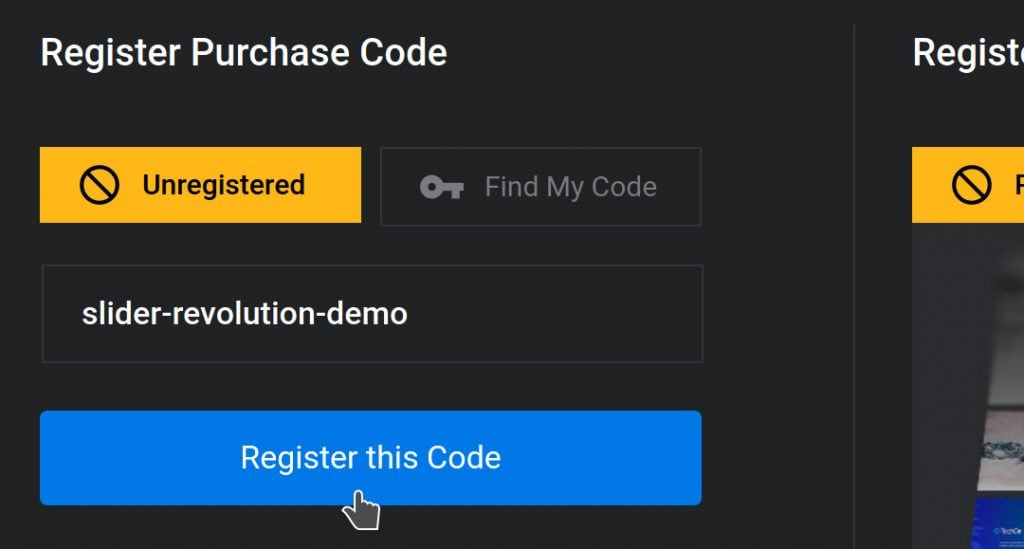
This will scroll you down a little ways to the registration area. Paste your keycode into the field you see there, then click the Register This Code button:
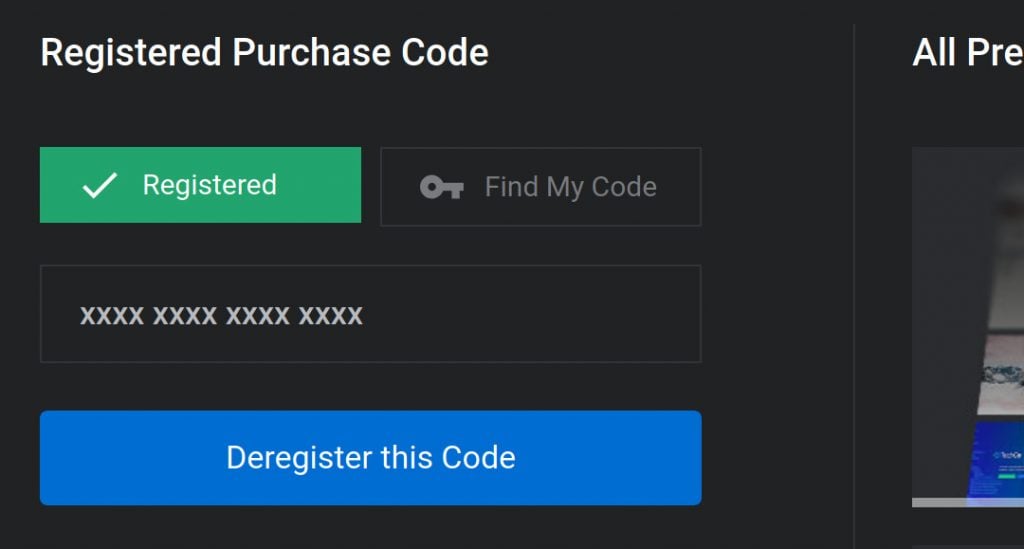
You’ll see the green Registered mark appear, and you now have access to all your templates, elements, addons and more.
Step 4: Completing the Process
Go back to your member dashboard one last time, click the refresh icon corresponding to the key you just used, and you should see your site’s domain appear along with a blue check-mark:
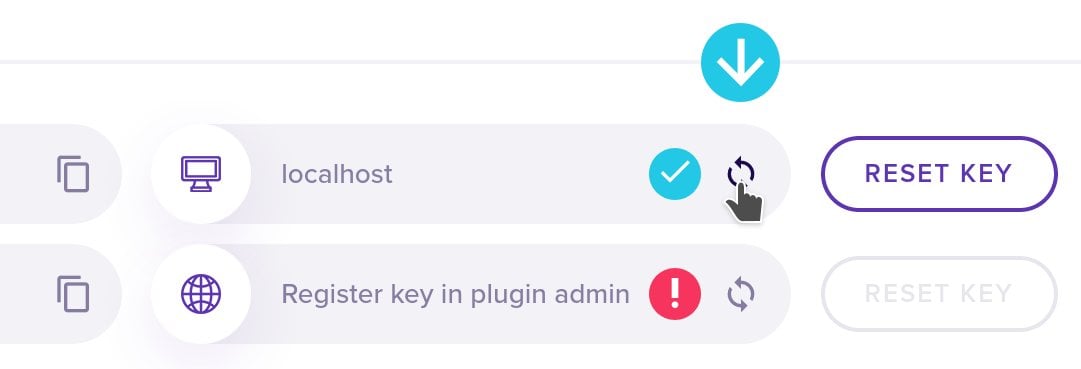
You can use each key on one live site, and one localhost environment for staging purposes.
Step 5: Ready to Go
You’re now all set to start creating amazing content with Slider Revolution.
To get started, we recommend you take a look at our Help Center. We have extensive docs, tutorials and lots of other learning material there to get you off and running fast.
Thanks again for purchasing Slider Revolution, and have fun building beautiful websites!


This is very useful information, we appreciate your step-by-step method. Thanks Again!
Thanks for having a written/transcript guide, especially as your video is not lcosed captioned.
I got this plugin with WordPress. Do I have to pay for it to use it? I have slider that was made with Slider Revolution and need to change it. It doesnt seem to do much other then ask for an activation code.
Hi, you can use the free version (when it came with a theme) but certain features need the pro version. Here is an overview: https://www.sliderrevolution.com/premium-slider-revolution/
If you have any further questions please do not hesitate to let me know.
Best regards, Dirk @ Slider Revolution
Hi, Thank you for the information. I am interested in buying a license of slider revolution for 1 website and I have 2 questions:
1)
I am currently using a free version of slider revolution (version 6.4.4) that came with my theme. I recently updated my theme (to Impreza version 8.17.4) and since the update, the revolution slider loads A LOT slower. Will it load faster again once I buy the license and can update to the latest version of Slider Revolution?
2)
I would need to also use the license on my staging site – it is, however, not in a localhost environment but on a live server as a subdomain (URL: https://staging.mywebsite.com). Will a one website license work on both my live site (URL: https://mywebsite.com) and my staging site?
Thank you.
Julia
Hello Julia,
Thank you for reaching out and showing interest in Slider Revolution.
Performance Issue:
The issue you’re experiencing with the loading speed might be due to multiple factors. One significant benefit of purchasing a license and updating to the latest version of Slider Revolution is that you get access to all the latest performance improvements and optimizations we’ve made since version 6.4.4. While I can’t guarantee that the speed will be instantly better, updating to the latest version ensures that you are getting the best possible version of our software. Additionally, after updating, if you still encounter speed issues, our support team would be more than happy to help you pinpoint and resolve any potential bottlenecks.
Licensing for Staging:
We understand the importance of staging environments in website development. Yes, with a one website license, you can use Slider Revolution on both your live site and its corresponding staging site. Our licensing system is flexible and recognizes staging environments, including subdomains like the one you mentioned.
Should you decide to proceed with the purchase, you’ll also get access to our dedicated support team for any further questions or issues you might encounter.
Thank you for considering Slider Revolution. We hope to have you as part of our community soon!
Warm regards,
Dirk @ Slider Revolution
Hello again, Concerning my 1st question: the slow loading time of slider revolution had to do with WP Rocket and I was able to fix it with these instructions: https://docs.wp-rocket.me/article/1634-using-revolution-slider-with-wp-rocket . Can you help me with my 2nd question though (whether I can use the same one-website-license of SR on my live site and my staging site (which is on a subdomain of my live site)? Many thanks, Julia
Hi Julia (again 😀 , just answered your other comment too),
We understand the importance of staging environments in website development. Yes, with a one website license, you can use Slider Revolution on both your live site and its corresponding staging site. Our licensing system is flexible and recognizes staging environments, including subdomains like the one you mentioned. https://www.sliderrevolution.com/faq/licensing-information-for-staging-sites-and-localhost/
Should you decide to proceed with the purchase, you’ll also get access to our dedicated support team for any further questions or issues you might encounter.
Thank you for considering Slider Revolution. We hope to have you as part of our community soon!
Warm regards,
Dirk @ Slider Revolution