
Table of Contents
Stuck Slides?
Sometimes, after you finish designing a [definition_tip term=”module”]module[/definition_tip], you might find its [definition_tip term=”slide”]slides[/definition_tip] stop auto progressing as expected.
In this guide, we will step through some methods to find and fix the cause of this issue.
Module Settings
First, we will check the module’s layout Type and Slideshow options to confirm that the settings enable auto-progressing slides.
Note: After configuring each setting below, keep testing your module on a live page.
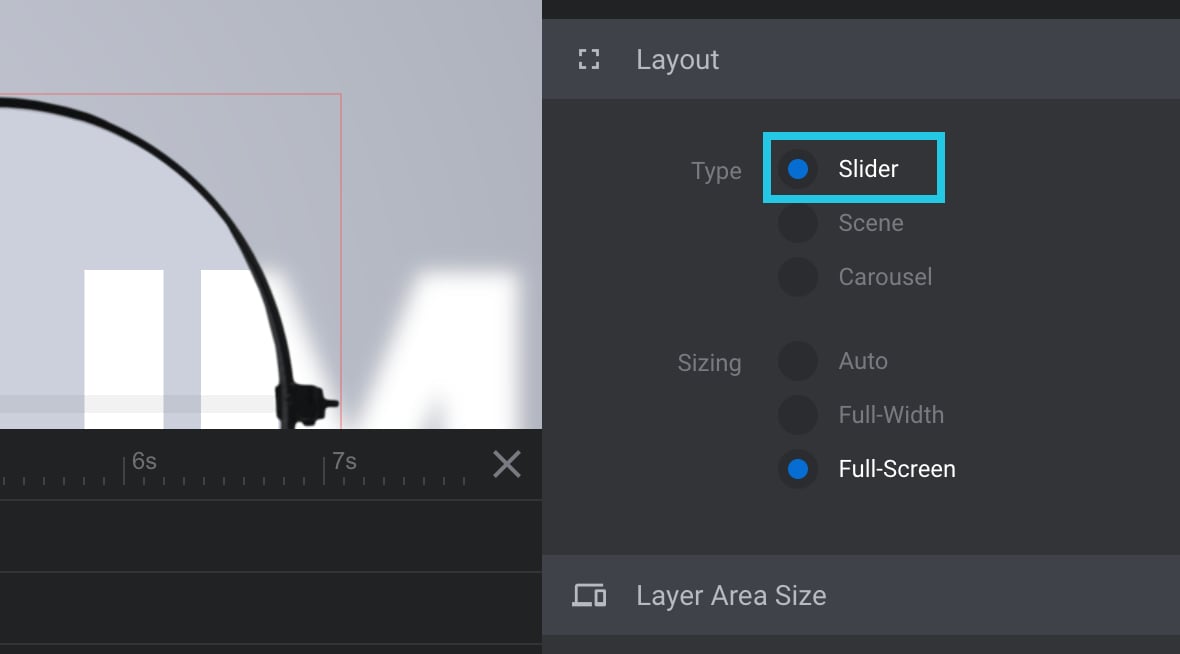
Module Layout Type
Every Slider Revolution module uses one of three layout types: [definition_tip term= “Slider”]Slider[/definition_tip], [definition_tip term= “Scene”]Scene[/definition_tip] or [definition_tip term= “Carousel”]Carousel[/definition_tip].
You can read more about module layout types on the Blank Modules page of our manual.
The Scene layout type is intended to be used for single-slide-based modules. As such, if your module is configured to use the Scene layout type, it will only show the first slide and will not move forward to the subsequent slides.
Follow the steps below to check your module layout type.
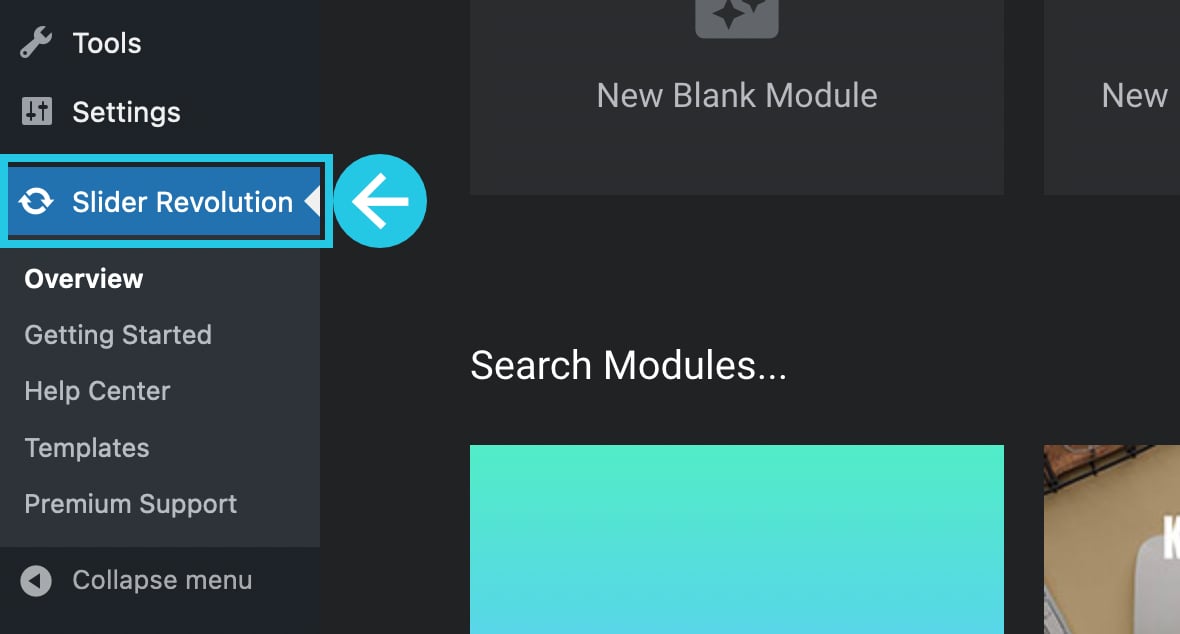
Go to your website dashboard:
Go to the Slider Revolution plugin:

Select your module to edit:

Under the Module General Options tab in the right sidebar, go to the Layout sub-section:
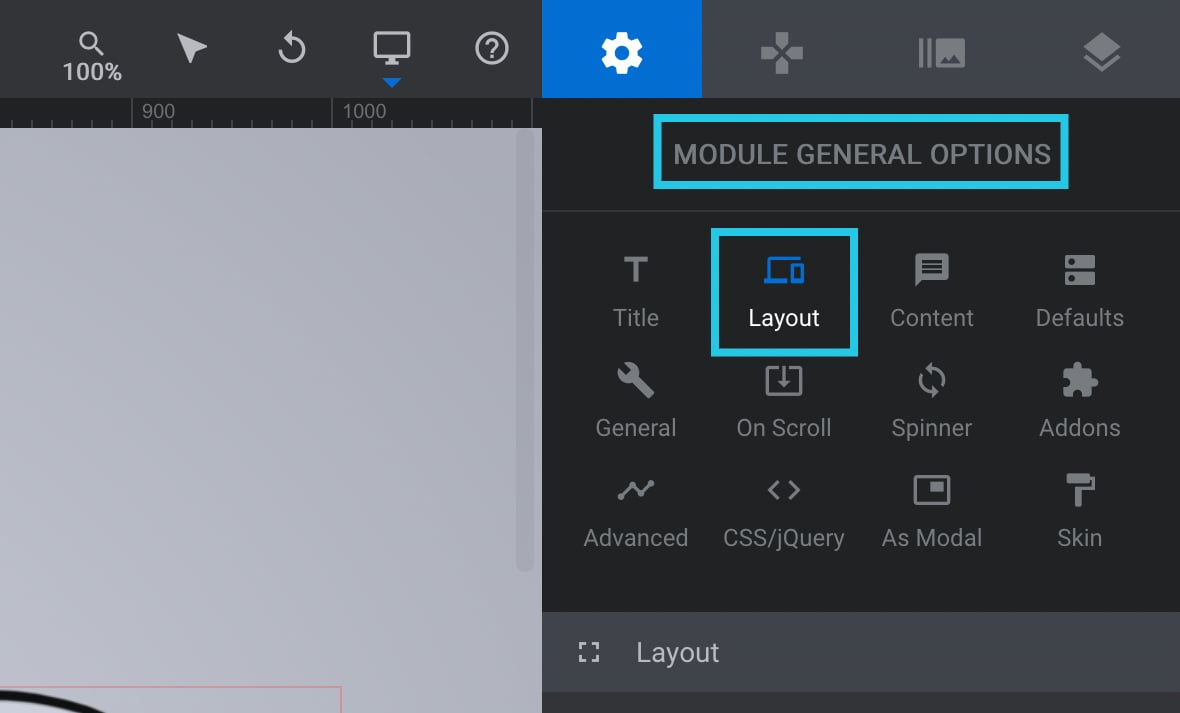
Scroll down to the Layout panel:
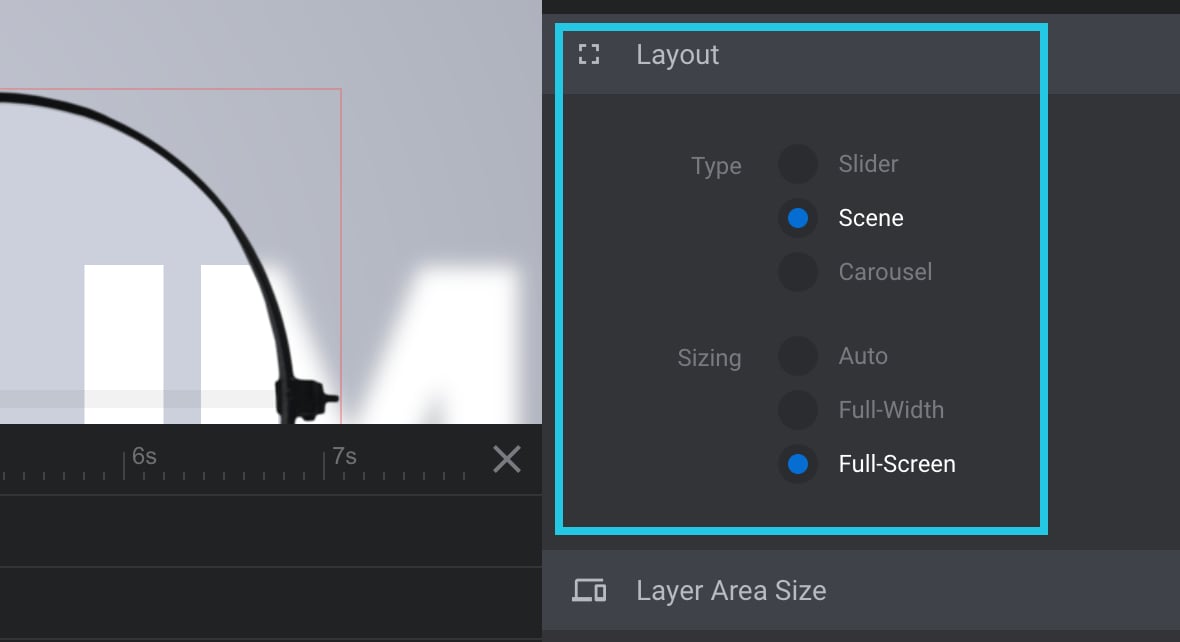
Set the Type option to either Slider or Carousel if not already selected:
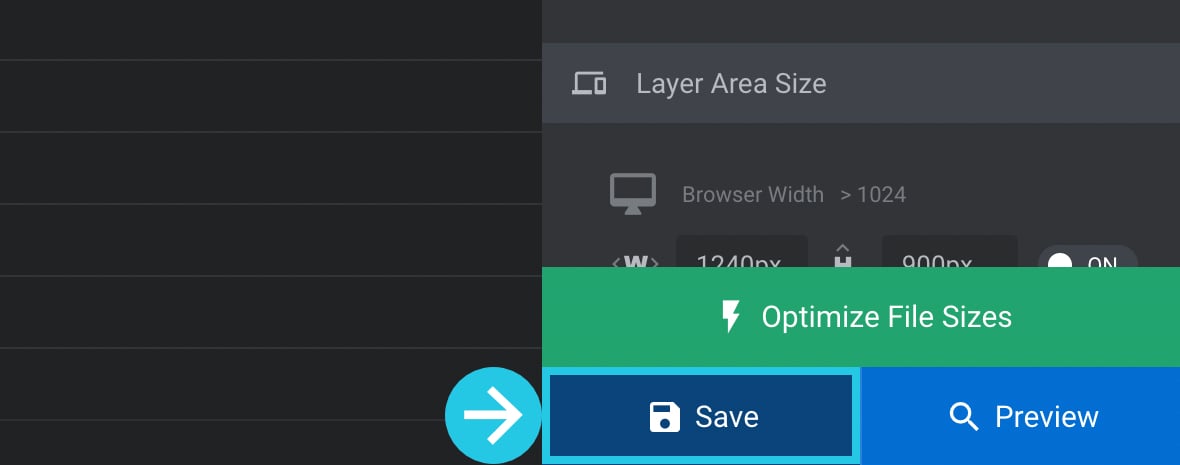
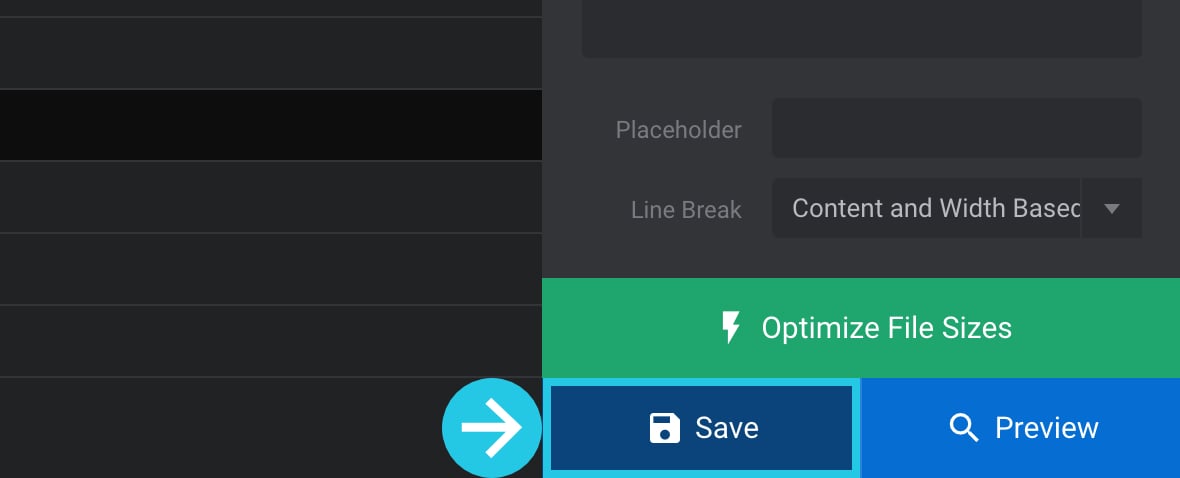
Click the Save button:
Slideshow Settings
This section will check the settings of three options in the Slideshow panel. These options are Auto Rotate Slideshow, Loop One Slide, and Stop after N Loops. Each option can potentially prevent a module from auto-progressing.
Go to your website dashboard:

Go to the Slider Revolution plugin:

Select your module to edit:

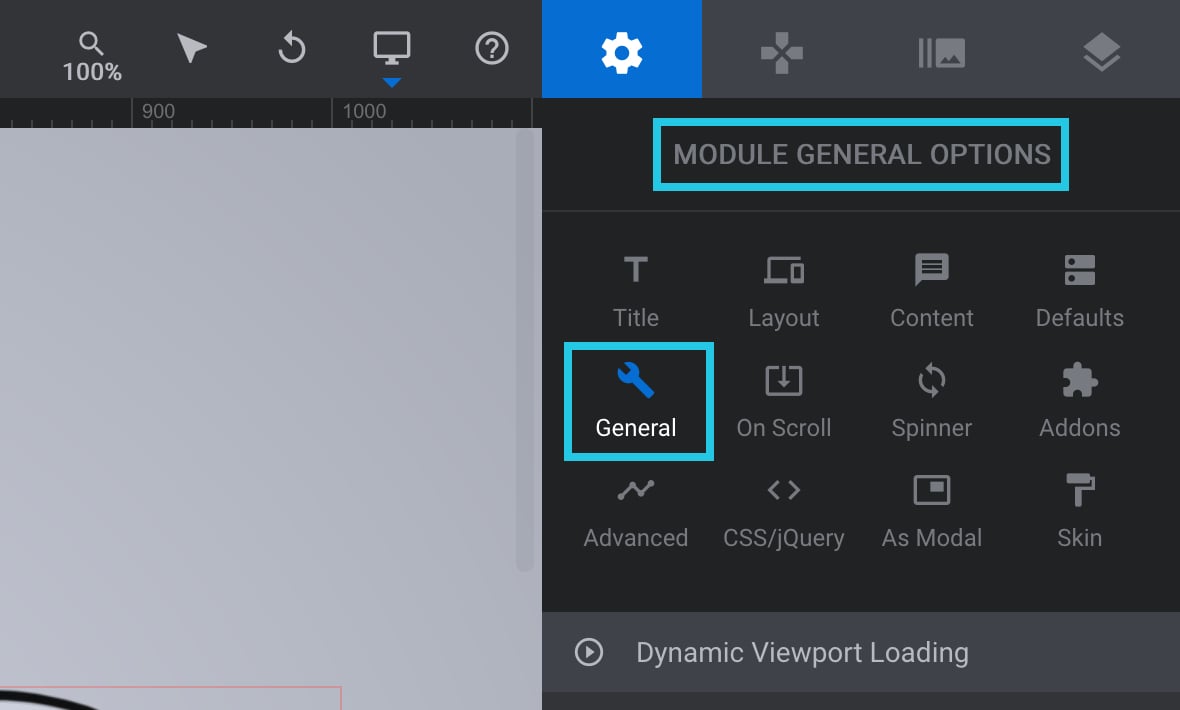
Under the Module General Options tab in the right sidebar, go to the General sub-section:
Scroll down to the Slideshow panel:
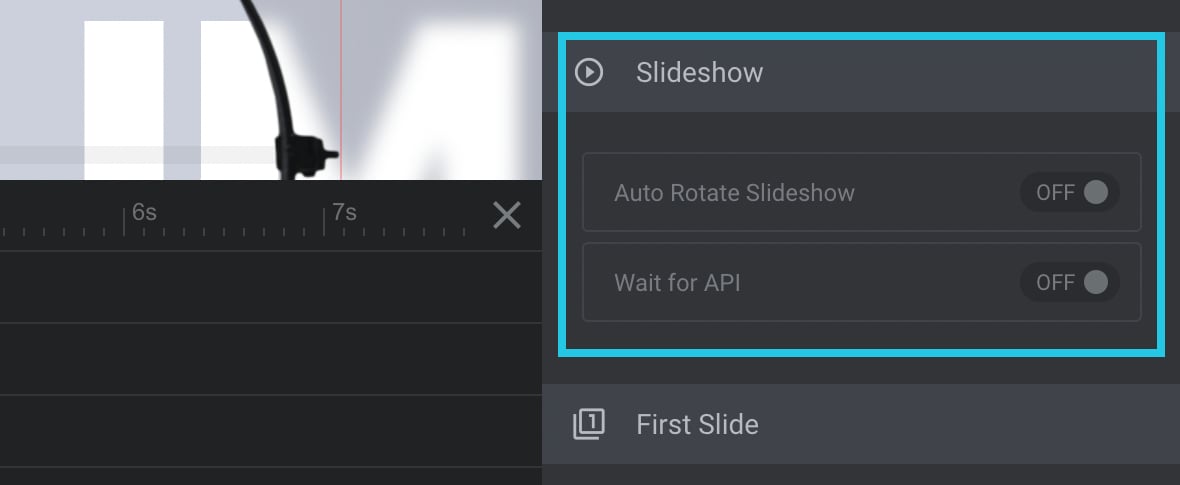
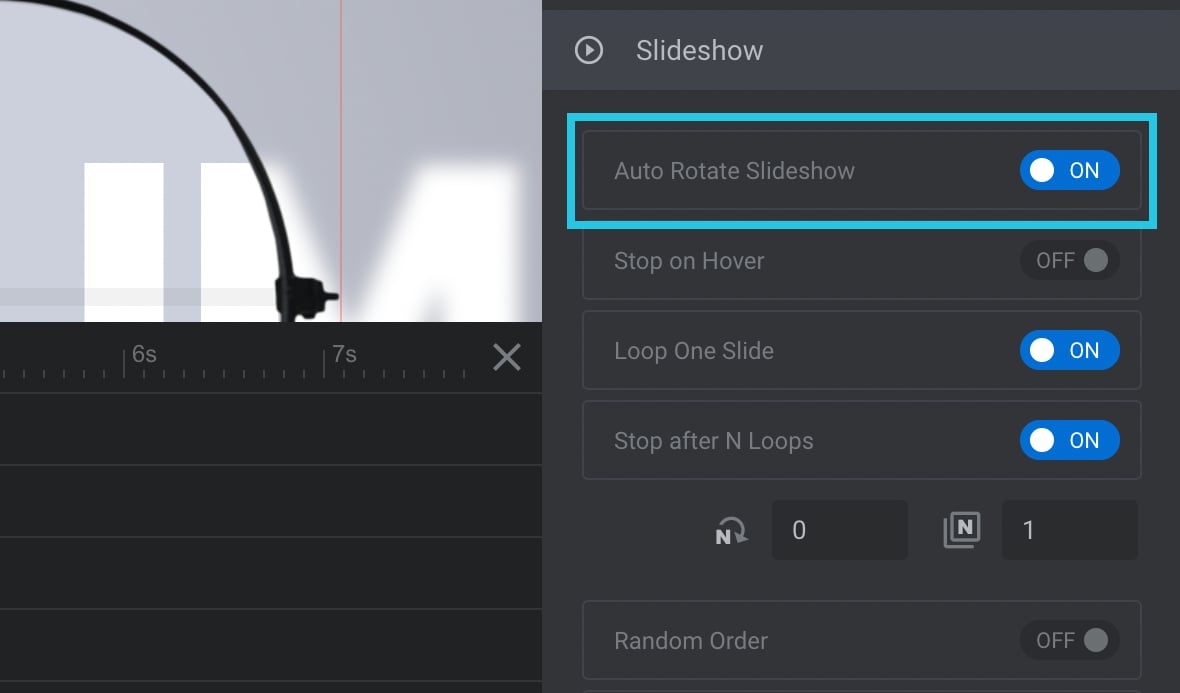
Toggle the Auto Rotate Slideshow option to ON if not enabled already:
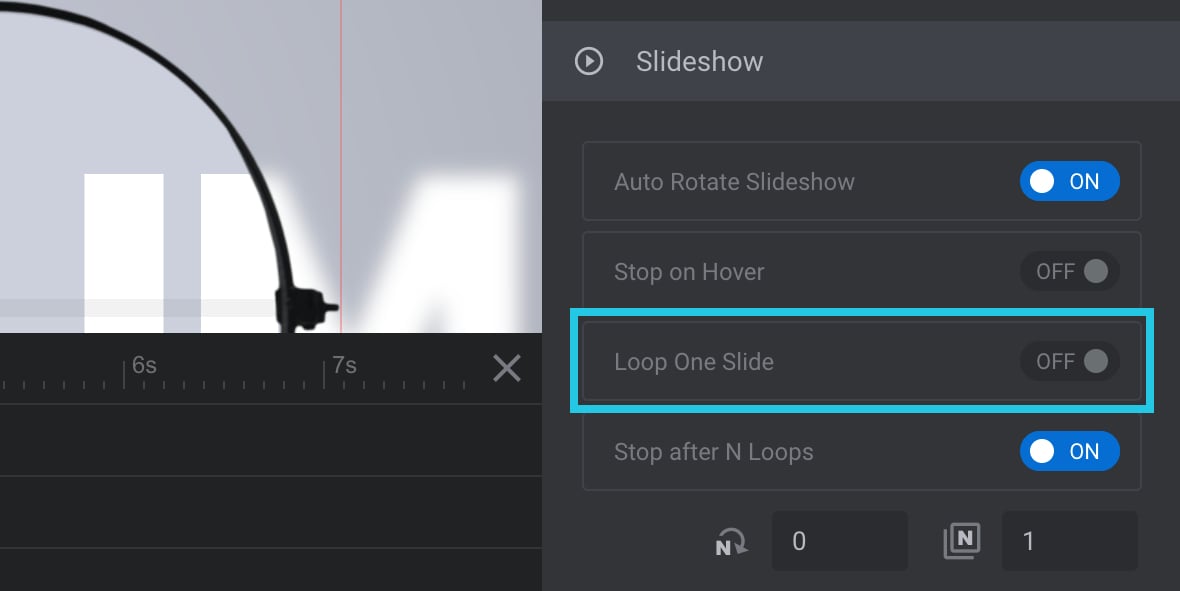
Switch the Loop One Slide option to OFF if enabled:
Toggle the Stop after N Loops option to OFF:
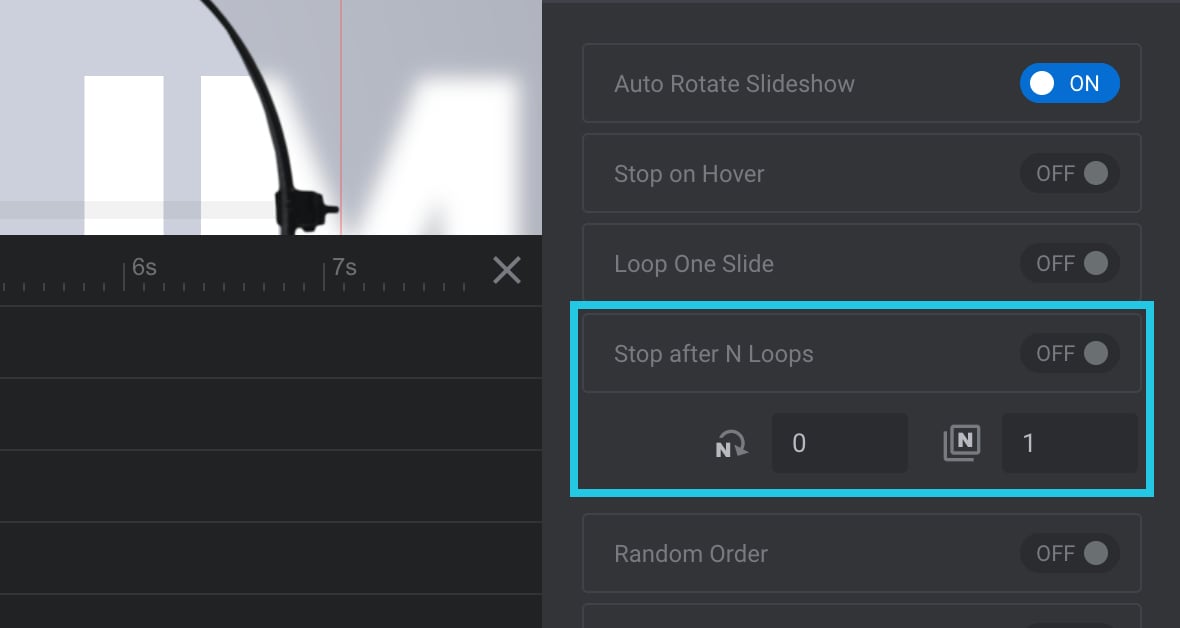
The above option stops slide progress after the configured number of the loop at a specific slide. Learn more about the Stop After N Loops option.
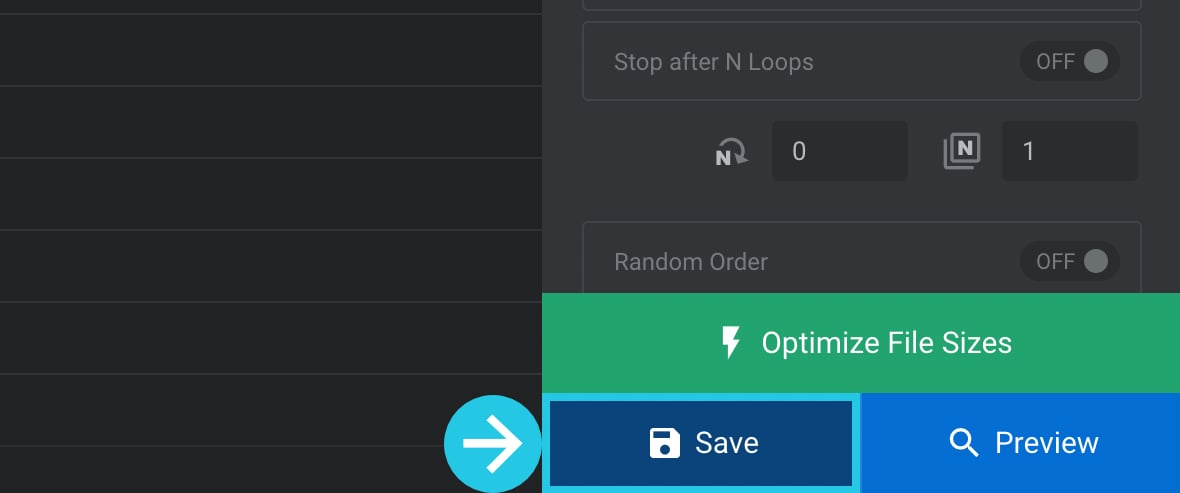
Click the Save button:
Broken HTML Content
If you checked all the steps above and the slides are still not moving forward, there is a chance that either:
- You have forgotten an opening or closing HTML tag.
- Or, you have used unsupported code. For example, JavaScript/jQuery code is used in text layers, which is not supported.
Go to your website dashboard:

Go to the Slider Revolution plugin:
Select a module to edit:

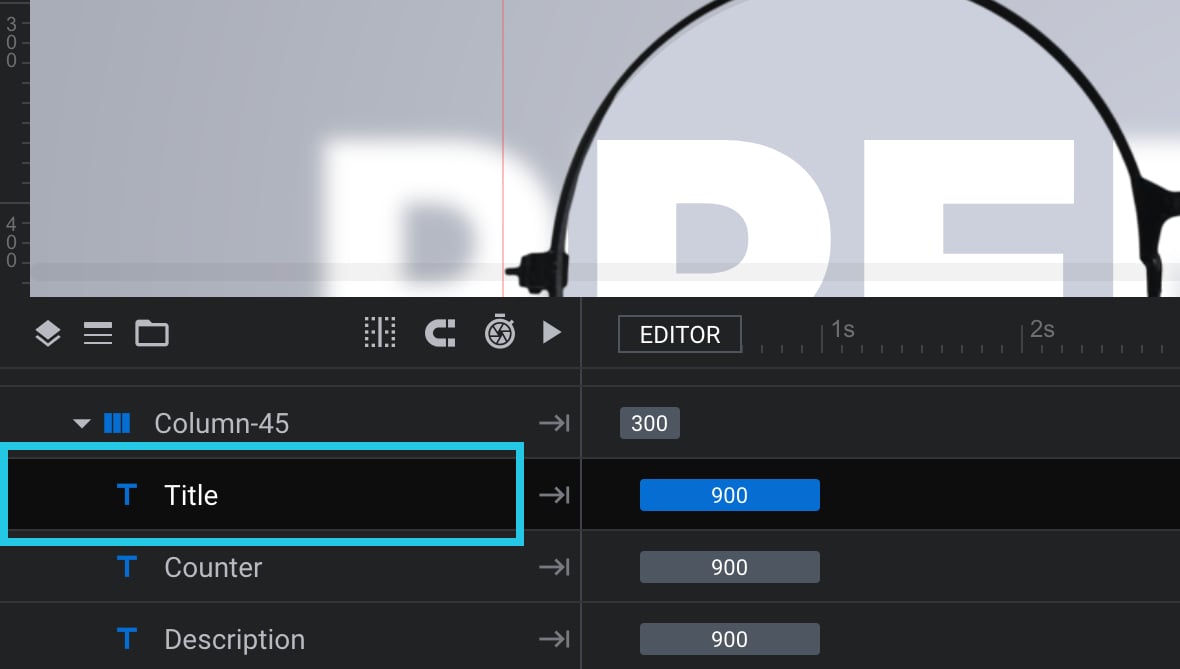
Select a Text layer with HTML content from the [definition_tip term=”timeline”]timeline[/definition_tip]:
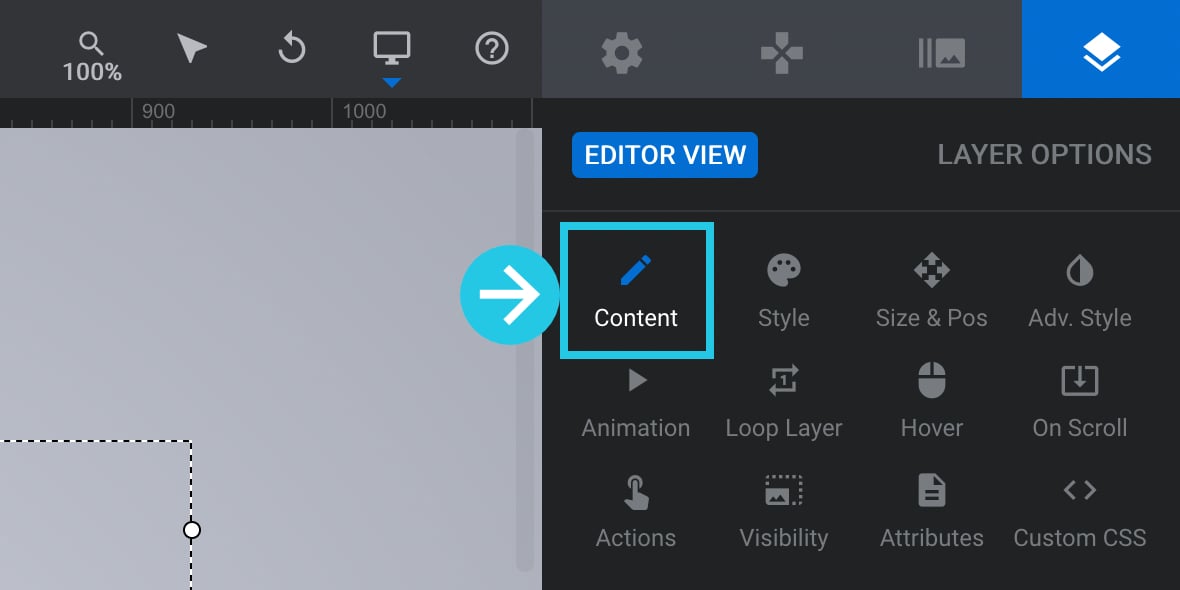
The Layer Options tab will be opened in the right sidebar:

Go to the Content sub-section:
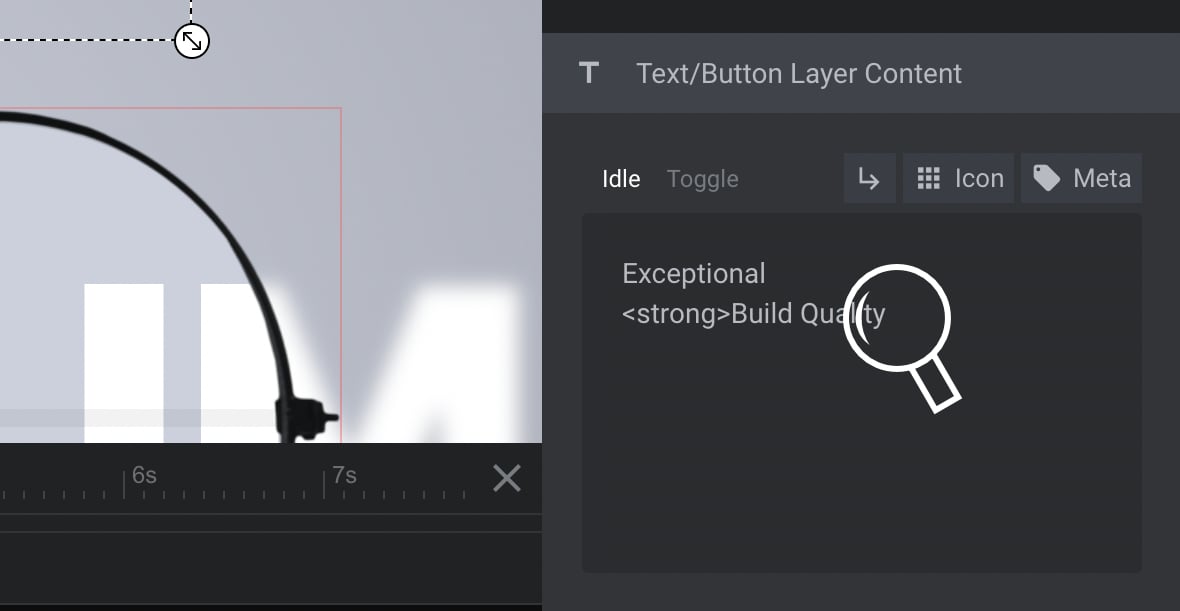
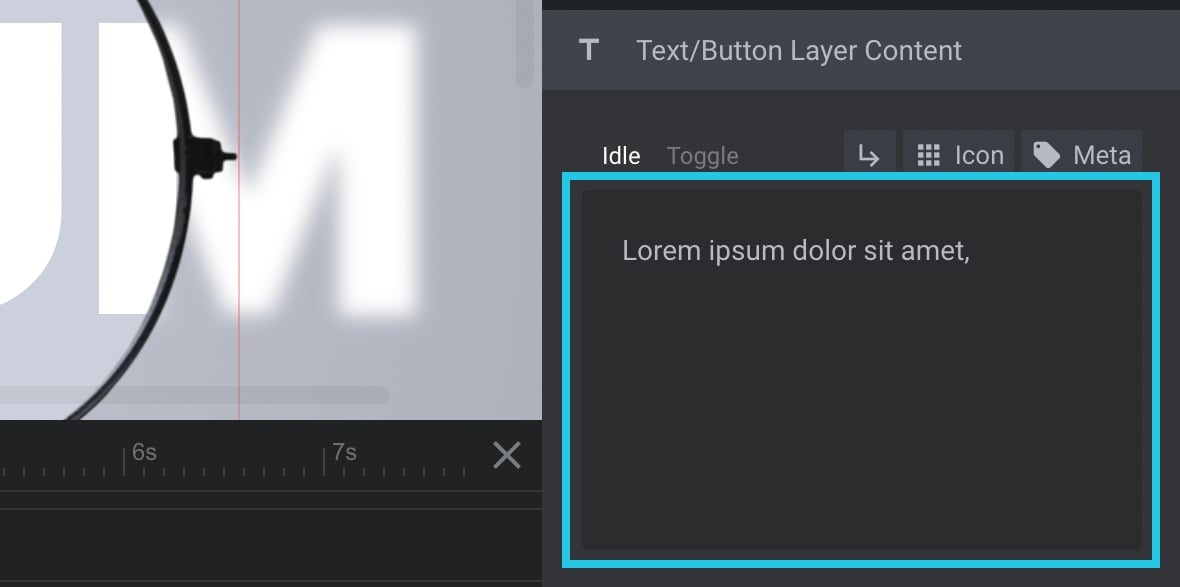
Go to the Text/Button Layer Content area:
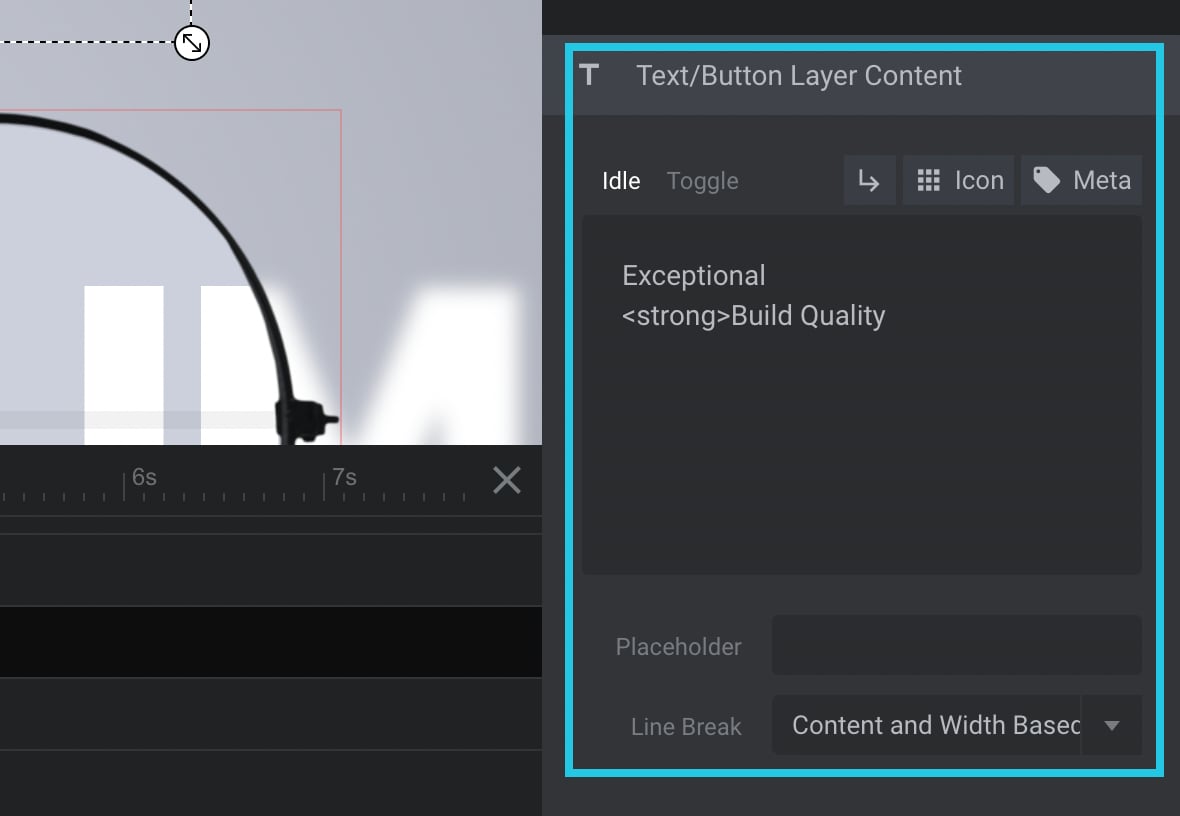
Search for any missing opening or closing HTML tags, e.g. <strong> with a missing closing </strong> tag:
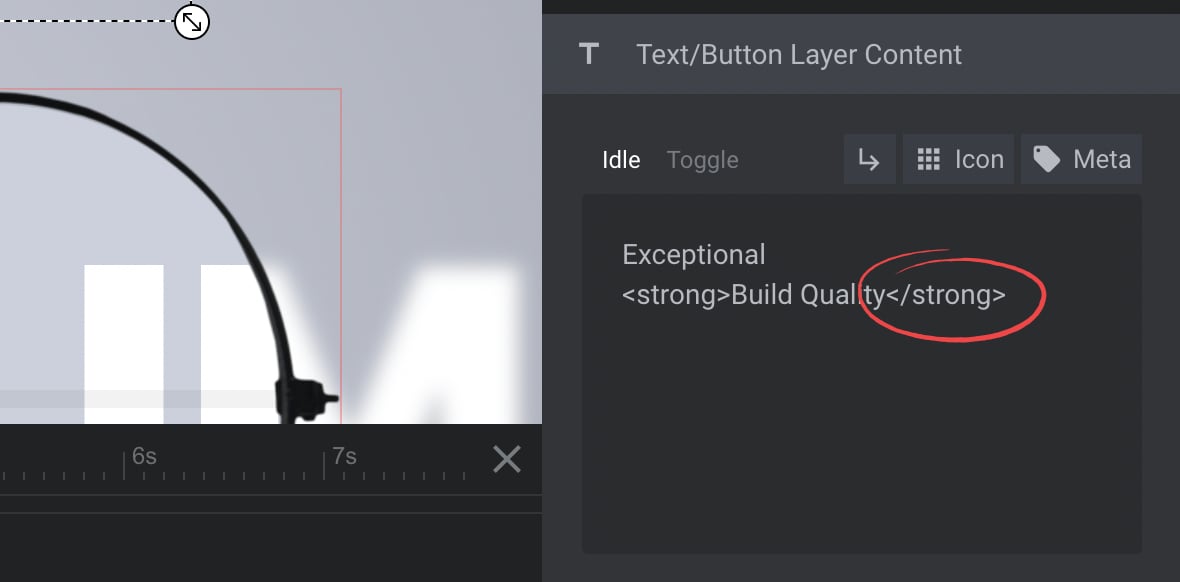
Fix the missing tag, e.g., by adding a closing </strong> tag:
Look for any JavaScript or jQuery code:
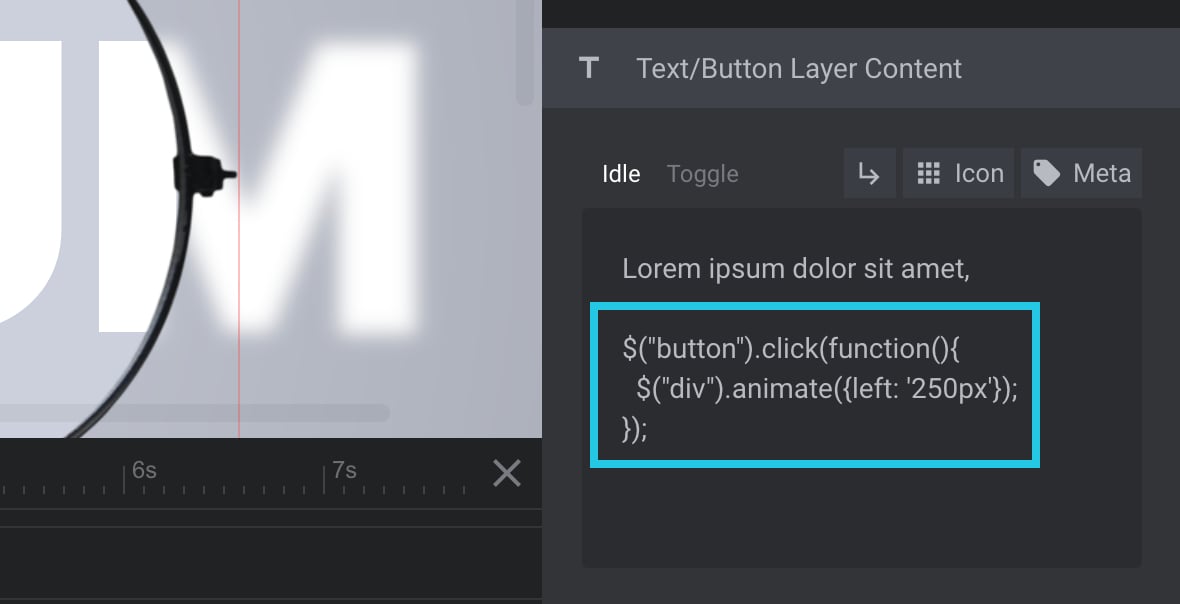
Remove the JavaScript/jQuery code from the Text/Button Layer Content area:
Click the Save button:
Run a Conflict Test
The Module Editor is not always perfect. Sometimes a plugin or theme installed on your site may introduce an incompatibility or conflict that prevents the Module Editor from operating normally, but don’t lose hope! With some troubleshooting knowledge, you can get things working again in no time.
Perform a conflict test described in detail in our How to Test for Conflicts guide to check if this is the case.
Note: Always be cautious if you are testing for conflicts on a live site. A backup before you begin is recommended.
Plugin Conflict Test
When you have a plugin conflict, the best way to fix it is by turning off all of your plugins and checking if that helps.
If the problem goes away, keep reactivating your plugins one at a time until you find what’s causing it.
If the issue returns, there is a perfect chance the last plugin you reactivated is the source of the conflict.
Theme Conflict Test
It is essential to check if there are any conflicts with your current theme before activating another one. This way, you can avoid the problem from coming back after switching back and forth between them.
If it does, then the theme is likely the source of the conflict.
Contact Us
If you are encountering any problems or have any queries, feel free to contact our support team by opening a ticket or sending us an email ([email protected])


Hi Slider Revolution Support Team, I have been unable to figure out why our slides are not progressing. http://www.nsilabsolutions.com. I checked all tags and code to ensure it was not the issue. I also walked through all the recommendations in the self-help tutorial. It said if none of those things (in the tutorial) resolved the issue, to reach out to support. So here I am reaching out to support.
-IT Mgr
Hello,
thanks for contacting us! Your request requires one of our support agents to have a closer look.
In order to give our clients the best support possible, we are having a support ticket system reachable via the link below.
Please use it for your upcoming questions concerning one of our products. This will guarantee the fastest answer possible. Support requests here cannot be answered, unfortunately. Thank you!
Please use our ticket systems over at:
https://support.sliderrevolution.com or https://support.essential-grid.com
Cheers Dirk @ Slider Revolution