
Table of Contents
- The Quirks and How They Affect You
- Understanding Qualifying Actions for Sound Playback
- Encouraging a Qualifying Physical Click / Touch
- Creating Custom Controls
When working with audio & video layers [?]
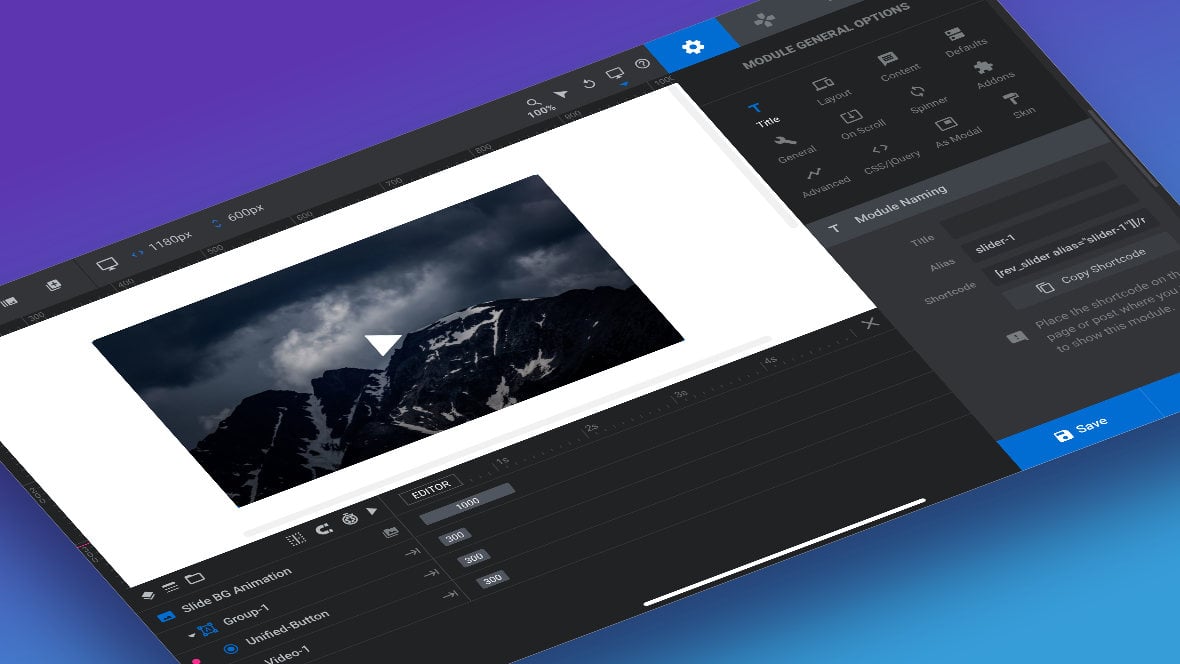
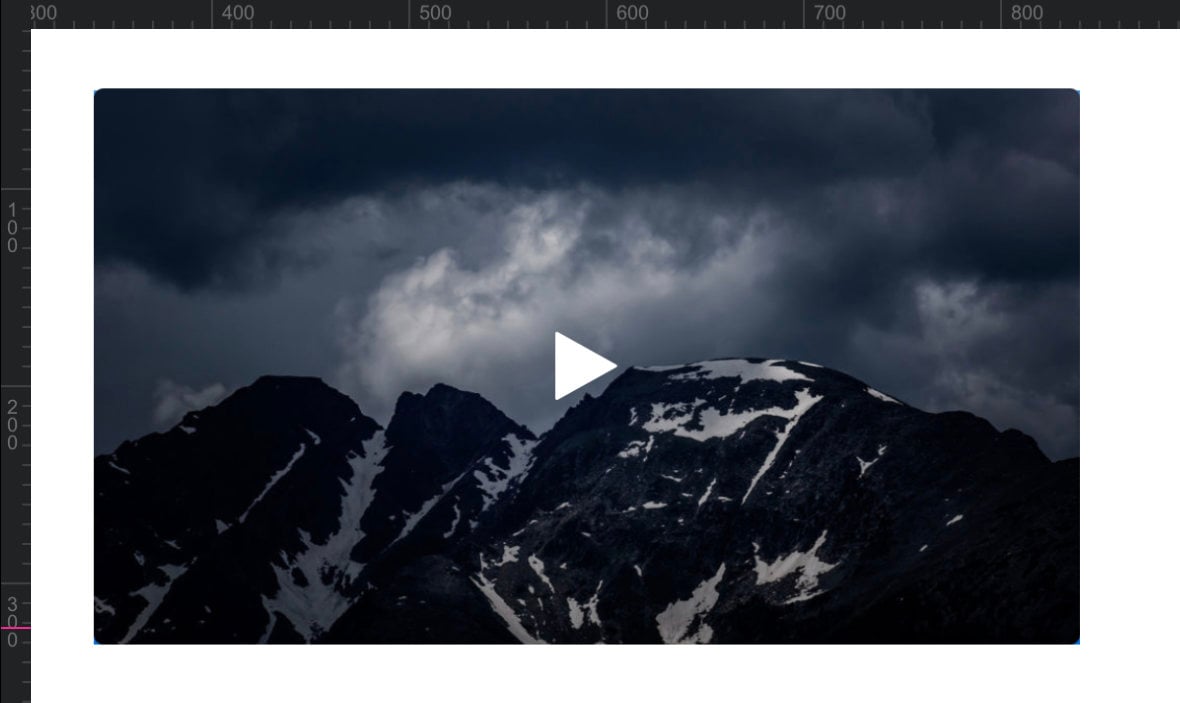
Layers are containers for visual, audio or layout items and are added to slides. For example, text, button, image, audio, video, group and row are all types of layers.
Layers are added to slides via the module editor. there are a couple of “quirks” you may find you need to work around, such as needing to satisfy certain requirements in order to play sound, or mute buttons being missing from controls on mobile devices.
These quirks are caused by browsers and/or third party video hosts, meaning they are outside of the direct control of Slider Revolution [?]
Slider Revolution is a website content creation tool with a focus on captivating animation and stunning visual effects.
It began its life as a plugin for creating slideshows, but has evolved into a fully fledged piece of design software.. However, despite that being the case, there are a number of workarounds that are made possible through Slider Revolution.
In this guide we’ll learn exactly how each of these quirks affect you, and what the best options are to handle them.
The Quirks and How They Affect You
There are two significant quirks we’ll be focusing on in this guide. First, we’ll make sure we fully understand them. Then, we’ll learn ways to deal with them.
Quirk 1: Playing Sound Not Possible Without User Interaction
IMPORTANT: Browsers do not allow autoplaying audio, or autoplaying videos with sound. There must be user interaction before any sound will play.
How This Affects Video Layers
You can still set a video to autoplay, but it will begin muted.
For the video to be unmuted a visitor has to perform a qualifying action that indicates they are happy for sound to be played. We’ll cover what these actions are and how you can factor them into your modules [?]
A module in Slider Revolution acts as a container for slides, which in turn act as containers for layers. Modules are created and edited with the module editor.
A "module" is a single, self contained piece of content. You can think of this as being similar to the way a post or page in regular WordPress is a self contained piece of content.
A module can represent any kind of content Slider Revolution is capable of creating, such as a slider, carousel, hero unit, navigation menu, posts display and so on.
Multiple modules can be combined to form rich content such as complete sites and landing pages. shortly.
How This Affects Audio Layers
Audio layers cannot autoplay, or even play at all, unless a qualifying action has been performed by the user.
However, it is possible to autoplay audio layers with sound after such a qualifying action has been performed somewhere else. We will learn how to leverage this in modules shortly.
Where Do the Rules Come From?
The rules about autoplay and sound are made at the web browser level as a part of an effort among vendors to “…improve the user experience, minimize incentives to install ad blockers, and reduce data consumption on expensive and/or constrained networks”.
Quirk 2: Missing Mute / Unmute Button on Mobile for YouTube and Vimeo
On mobile devices you may find video controls for YouTube and Vimeo don’t provide users with a mute / unmute button.
We of course want the ability to ensure our site visitors can turn sound on and off as they choose, and this need is made even more significant by the fact that sound cannot be made to play automatically. We don’t want our mobile visitors to be stuck watching muted videos, with no switch to turn on sound.
We’ll learn how to take advantage of Slider Revolution’s buttons and actions to solve this problem in just a moment. For now, let’s start by getting a better understanding of how browsers decide when sound is allowed to play.
Understanding Qualifying Actions for Sound Playback
In order to properly set up audio in your modules, you first have to understand the qualifying actions the browser waits for a user to perform before it will allow sound.
What classifies as a qualifying action is effectively decided on by Google, so if you would like to get the full details of these rules you can read Google’s information page about their autoplay policy.
That said, not all of the information in that document is relevant to working with Slider Revolution, so we’ll get to the point by pulling out the parts relevant to your process while creating modules.
There are three qualifying actions that can trigger the browser to allow sound, and they boil down to:
- The user has previously physically clicked their mouse or tapped their touchscreen.
- They have added your site to their home screen.
- They have crossed the “Media Engagement Threshold”, meaning they are on a desktop device and have previously played a video larger than 240×100 pixels, with sound, for more than 7 seconds.
Any one of these three actions will qualify sound to play, but in the context of publishing Slider Revolution modules, it is a physical click or touch that you will encourage users to perform.
Sure, a percentage of your users might add your site to their home screen, but likely not consistently enough that you can depend on this action for enabling sound. And there are too many factors going into a user crossing the “Media Engagement Threshold” for that action to be relied on either.
So in short, to reliably enable sound playback, you must focus on encouraging visitors to perform a physical click or touch in a way that fits the design of your module.
Let’s look at some of those ways now.
Encouraging a Qualifying Physical Click / Touch
Click Type 1: Click on Default Video or Audio Controls
The most obvious way for a visitor to use a physical click to enable sound is for them to click the play and/or unmute button on the video or audio layer’s controls:
If the case of a video with autoplay switched off, clicking the play button on the controls will start playback with sound. (Note that the Mute at Start setting needs to be toggled to OFF for this to work).
If the video has autoplay switched on, and it has begun playing silently, clicking the unmute button will turn sound on.
Media Posters Necessitate Two clicks
Be aware that if you are using a media poster on your video and have autoplay switched off, the user will need to click twice. The first click will be to hide the poster & reveal the controls, and the second click will be on the play button to play the video.
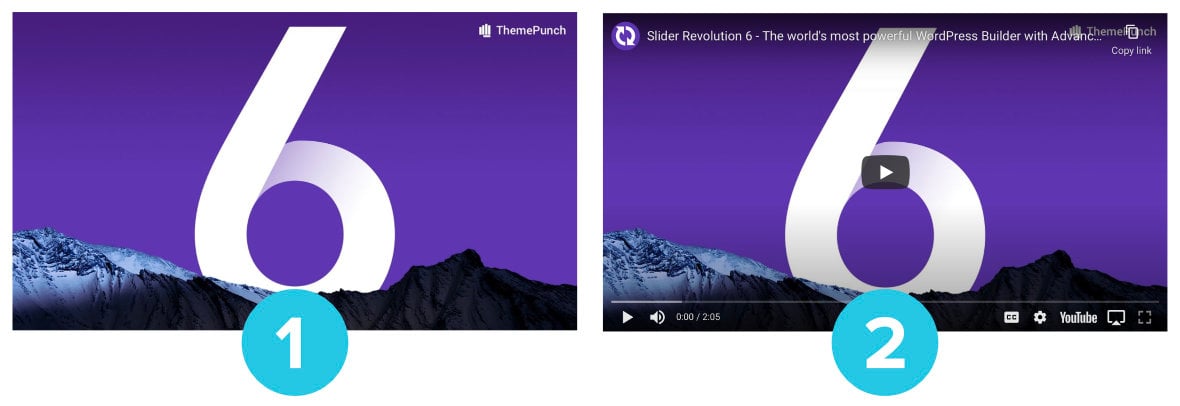
So rather than using a media poster, you may elect to create a cover image that also acts as a play and unmute button. We’ll see how to do this below in the section titled “Create a Play and Unmute Button or Cover“.
No Mute Buttons on Mobile YouTube and Vimeo
Additionally, mute and unmute buttons for YouTube and Vimeo may not appear on mobile devices. Well cover how to create custom buttons to solve this problem in the section titled “Better Controls on Mobile for YouTube and Vimeo“.
Click Type 2: Click on Video Without Controls
On a video layer that has controls hidden, the user can start playback with sound by clicking anywhere on the video.
However, if you have your video set to autoplay you should not depend on this functionality alone because there will be no way for the user to unmute sound. Clicks on an autoplaying video with no controls will just pause and unpause, leaving sound muted.
To solve this problem you can create a custom unmute button, which you can learn to do in the “Create an Unmute Button” section below.
Click Type 3: Requiring a Click to Advance Slider
If you have an audio layer that absolutely must autoplay with no direct interaction, one option is to create a slider [?]
A slider is a type of module that contains multiple slides. You can only see one slide at a time, a distinguishing features that makes sliders different from carousels.
The slides of a slider can be panned through either by using navigation controls such as arrows and tabs, or by clicking and dragging. They can also be set to automatically transition from one slide to the next. that requires the user to click on navigation in order to proceed to the next slide [?]
A "slide" in Slider Revolution is a container into which multiple layers can be added, with layers in turn acting as containers for various forms of media such as images, text, video, audio, buttons, and special effects.
Slides are added to modules and edited via the module editor.
Within the module editor, each slide has its own animation timeline, background and collection of layers.
A single module can have one or many slides. A module with one slide is called a scene, and a module with multiple slides is called a slider or carousel.. This can be achieved by setting Pause Slider to “Stop Slider Progress” in the Progress sub-section of the Slide Options tab:

Then head to the Navigation Options tab and make sure there is some kind of navigation item for the user to click on, by toggling either Arrows, Bullets, Tabs or Thumbs to ON:
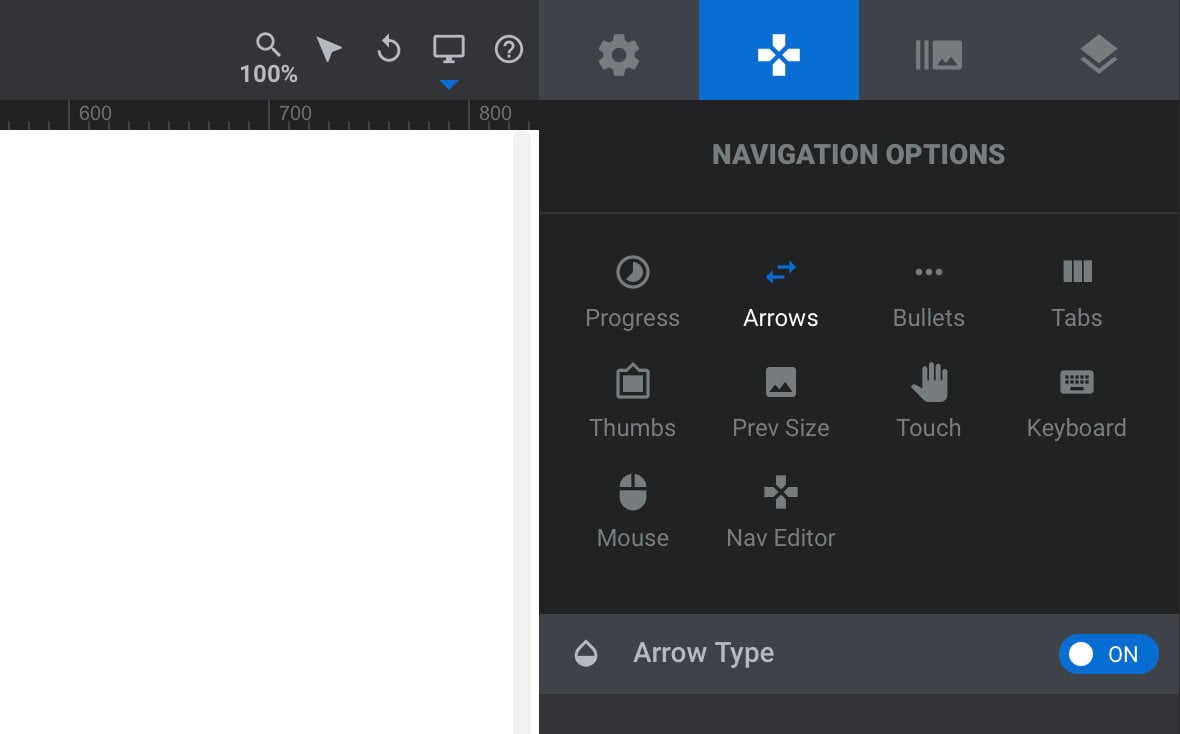
Now when the user clicks a navigation item to advance to the next slide, that click acts as a qualifying action that subsequently enables autoplaying sound.
This means you can put your audio layer on the second slide, or any thereafter, and autoplay will work.
Adapting the Click to Advance Method for Video
Note that the method described above only works to enable autoplaying sound on audio layers, not video layers. However, there is a way to adapt the method so it seems to autoplay a video from the user’s point of view.
The first step is to split the video with sound into two files: an audio file and silent video file.
These files can then be placed into separate audio and video layers with both set to autoplay at the same time.
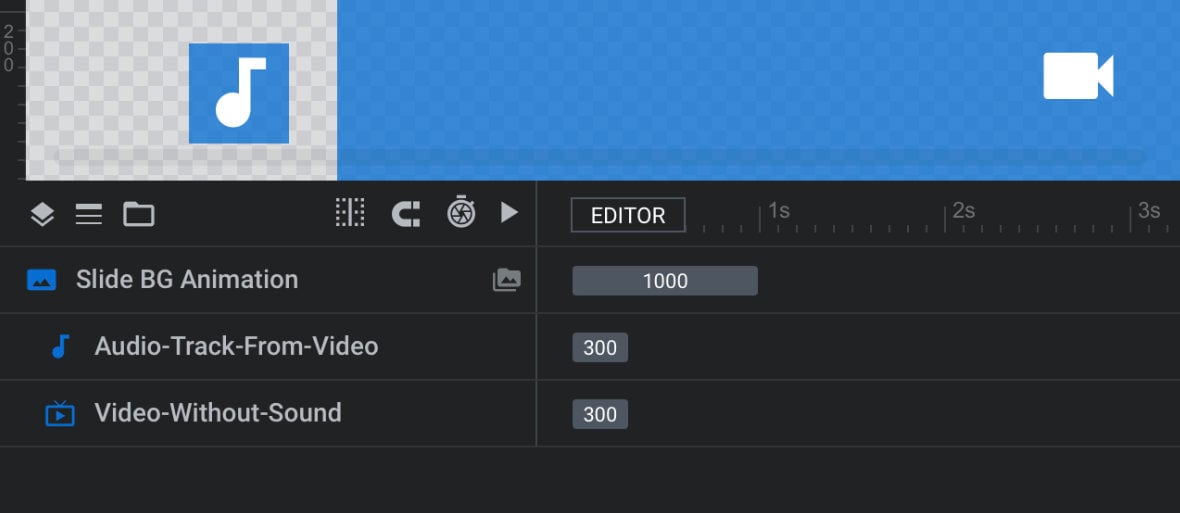
The method of requiring a click to advance the slider will allow the audio layer to autoplay, and all silent video layers are allowed to play by default, so the two layers playing in unison will present the same way as a single autoplaying video.
If you do go with this approach, make sure both layers have their Stop Other Media option toggled to OFF under the layer’s Content sub-section so they don’t block each other from playing.
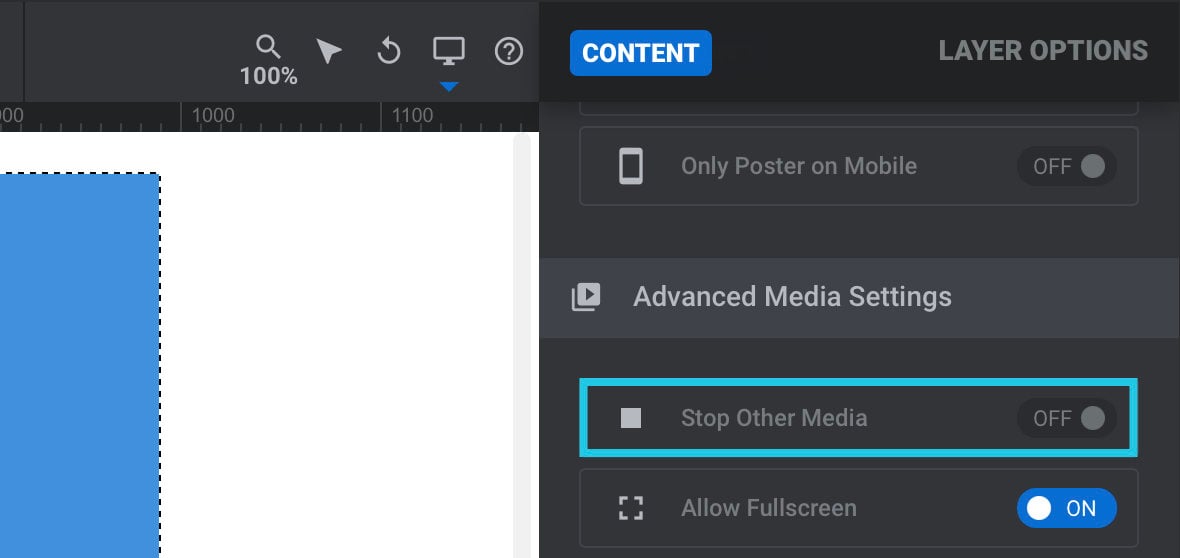
Also in the Content sub-section, make sure you set Preload for both files to “auto” so they are loaded and ready to start at the same time:

Creating Custom Controls
Now that we’ve learned about the rules for playing sound, let’s learn about how you can create custom control buttons to deal with some of the remaining issues we’ve outlined.
Create an Unmute Button
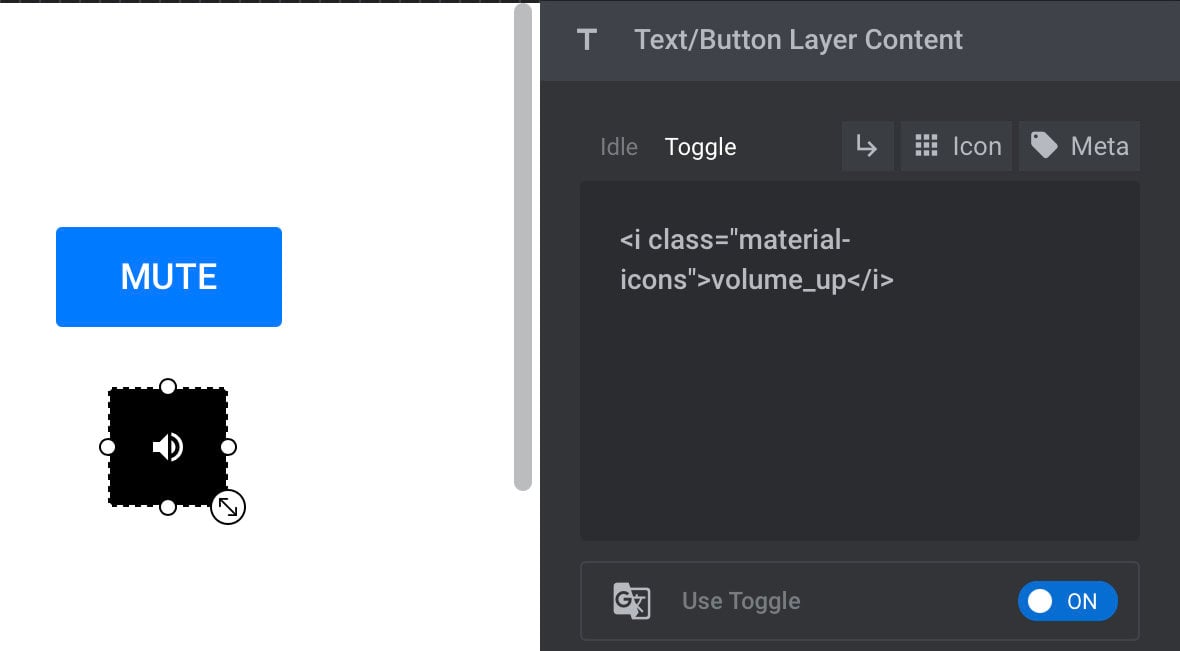
To ensure visitors can easily see a way to unmute sound on a video you may choose to create a custom unmute button.
To do this, create a button layer and set its Idle content to something that indicates to users it’s an unmute button, such as text that reads “unmute”, or a muted speaker icon:
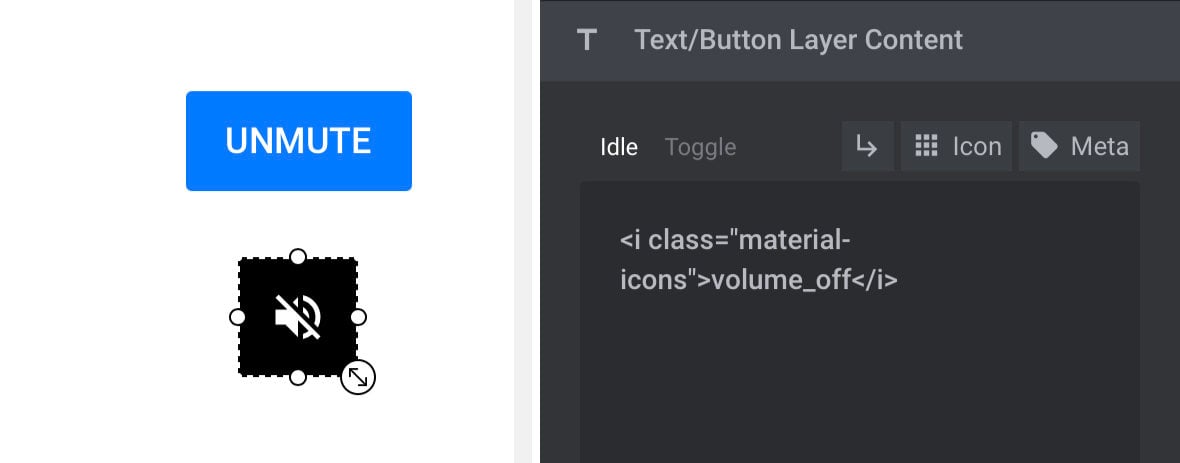
Hint: Search icons for the term “volume” to bring up suitable graphics.
Then set the button’s Toggle content to something that indicates it’s a mute button, such as text that reads “mute”, or a speaker icon. Set the Use Toggle switch to ON:
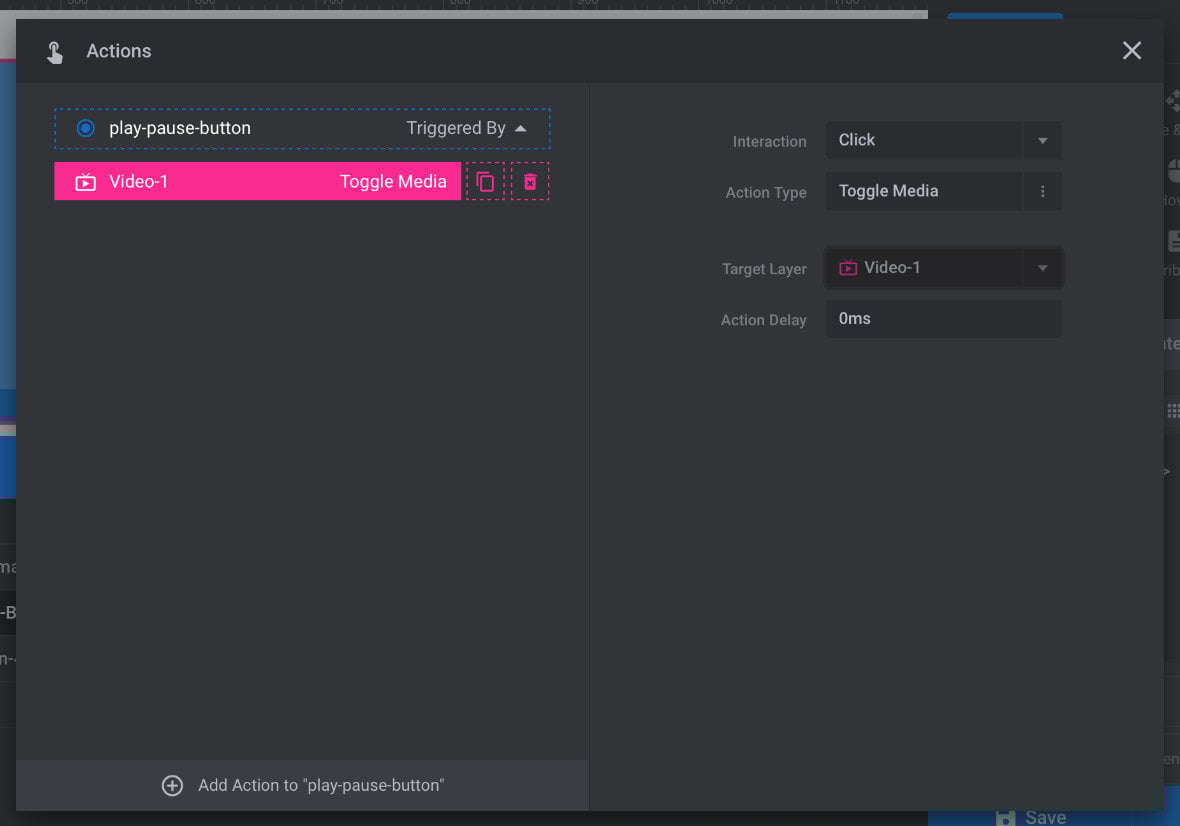
Then open the actions dialogue box for that layer and add a Toggle Mute Media action that’s triggered by a click interaction, and target it to the video layer you want the button to effect:
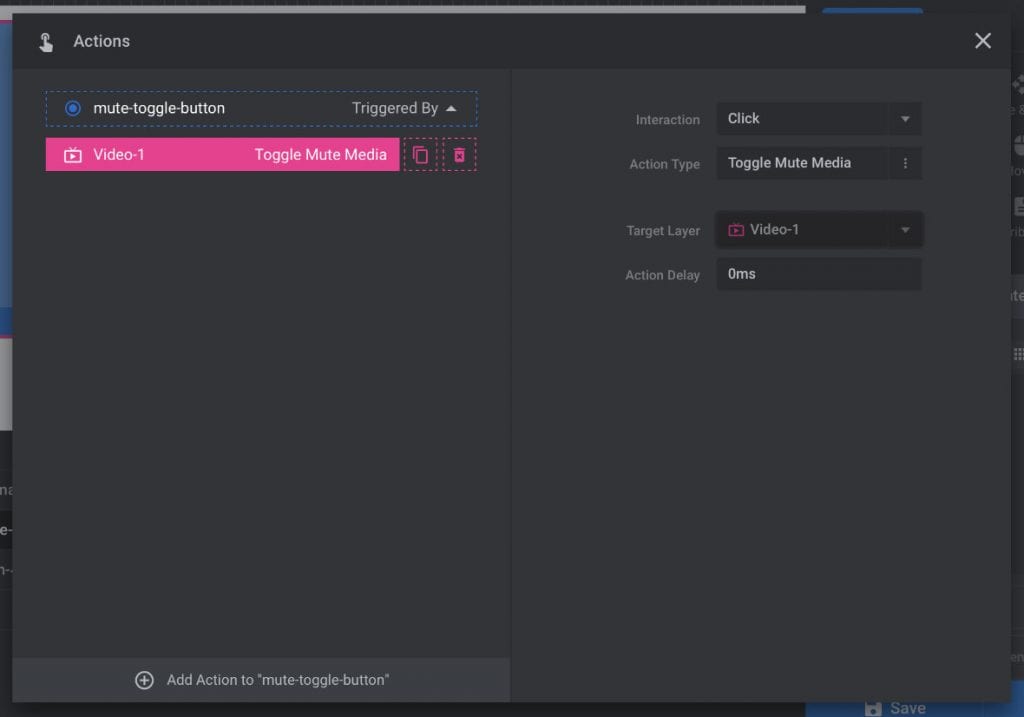
Now when the button is clicked it will toggle the mute state of the video, so you can be certain visitors have a way to enable or disable sound as required.
Better Controls on Mobile for YouTube and Vimeo
On mobile devices video controls for YouTube and Vimeo may not provide users with a mute button, and it’s possible to solve this problem by creating a mute toggle button using the method described above.
However, if you’re going to make one custom button anyway, you might actually like to turn off the default controls entirely and replace them with your own. This way you can keep your design consistent across all your buttons, and between YouTube and Vimeo videos as well
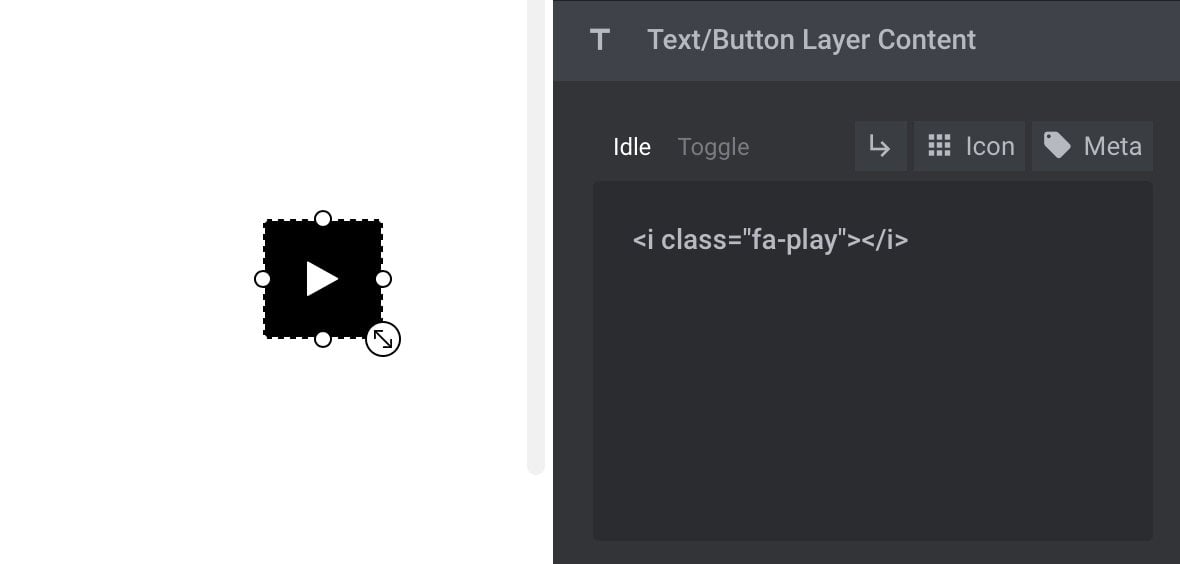
You already learned how to create your own mute toggle button, so the only other button you really need for mobile users is a play/pause button.
The process for making a play/pause button is almost entirely the same as we used for the mute button.
Create a button layer, and set its Idle content with text and/or an icon that indicates “play”:
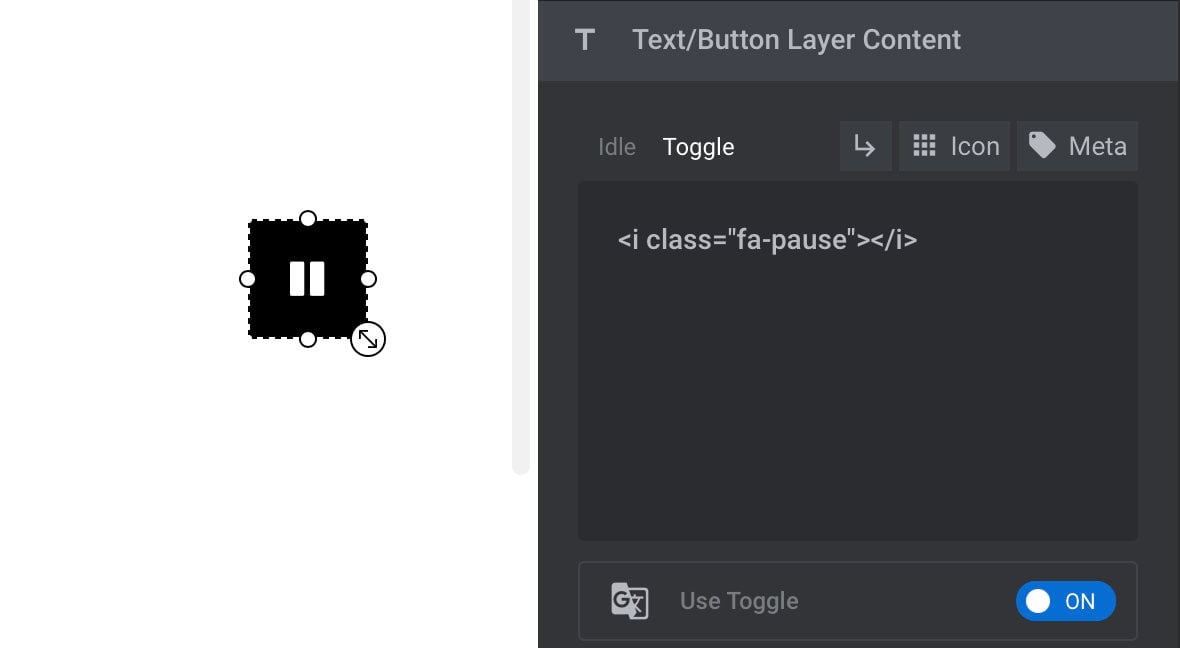
Then set its Toggle content to indicate ”pause”, and set the Use Toggle switch to ON:
Give the button the Toggle Media action, triggered by a click, and targeted at the video layer you want to control:
With your own custom buttons in place you can be confident users on mobile will have access to play, pause, mute and unmute videos as they please.
Create a Play & Unmute Button or Cover
Instead of having separate play/pause and mute toggle buttons, you may opt to combine the functionality into a single button, or even into a cover image you can use in place of a media poster.
Create Unified Play & Unmute Button
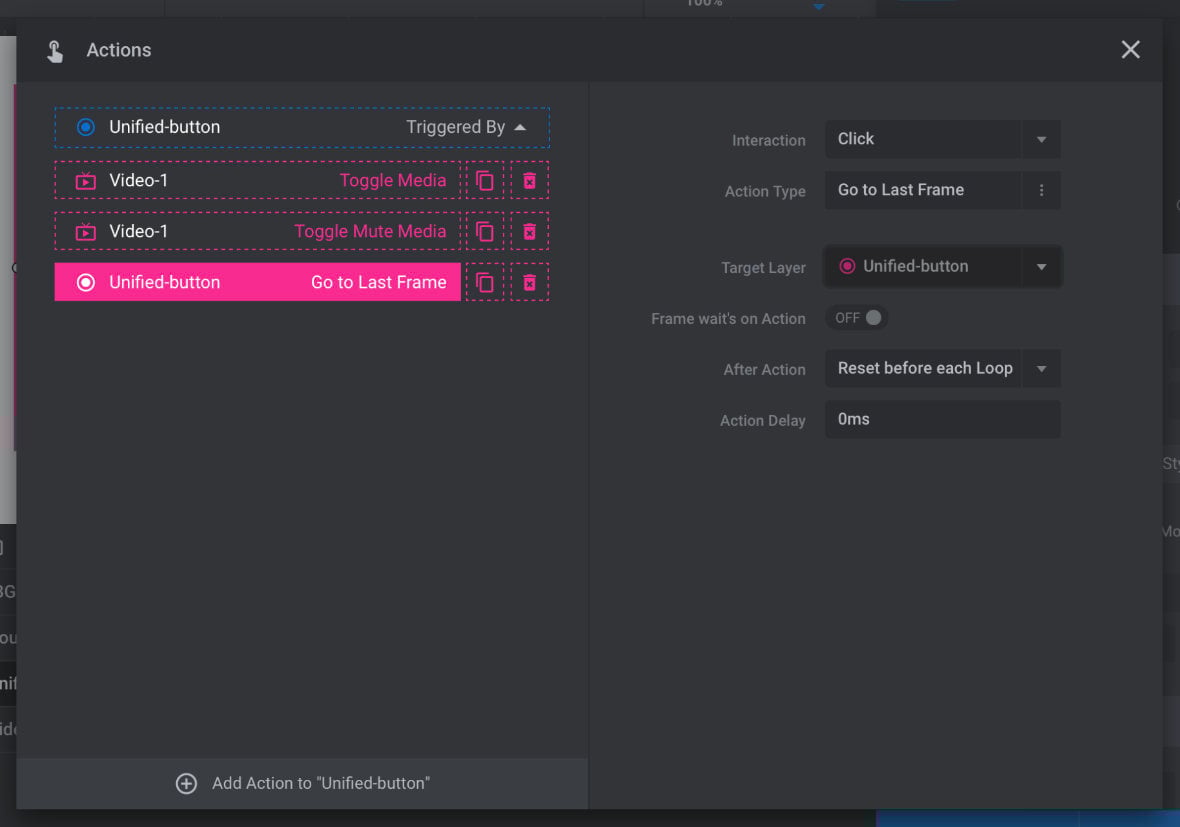
To create a single unified button, use the same process as we did to create a play/pause button, with the only difference being you add both the Toggle Media and Toggle Mute Media actions to that one button:
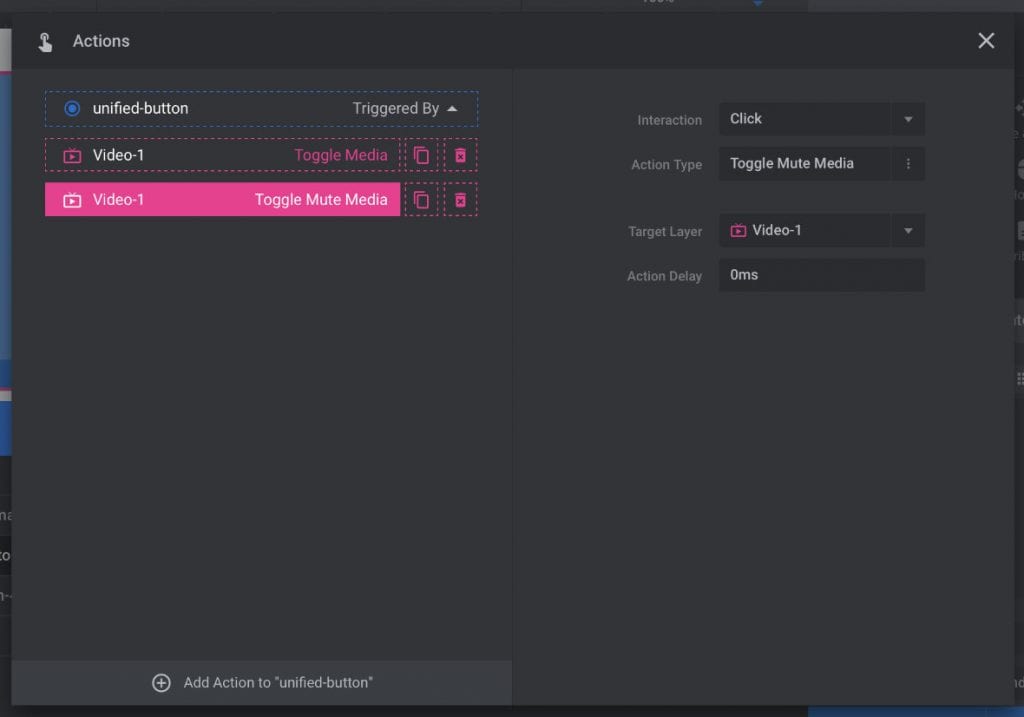
The content for this button can be the same as you used on the play/pause button. Even though that content doesn’t explicitly display the button’s mute toggle functionality, the behavior will still be what users would expect, i.e. playing a video starts sound and pausing it stops sound.
Convert Unified Button to Cover Image
In itself, a unified button like this probably isn’t all that helpful in comparison to separate buttons. But where it really comes in handy is as a replacement for a media poster.
You can take the unified button you just made and, with a few styling tweaks, turn it into a cover image that doesn’t require two clicks to play with sound the way a media poster does.
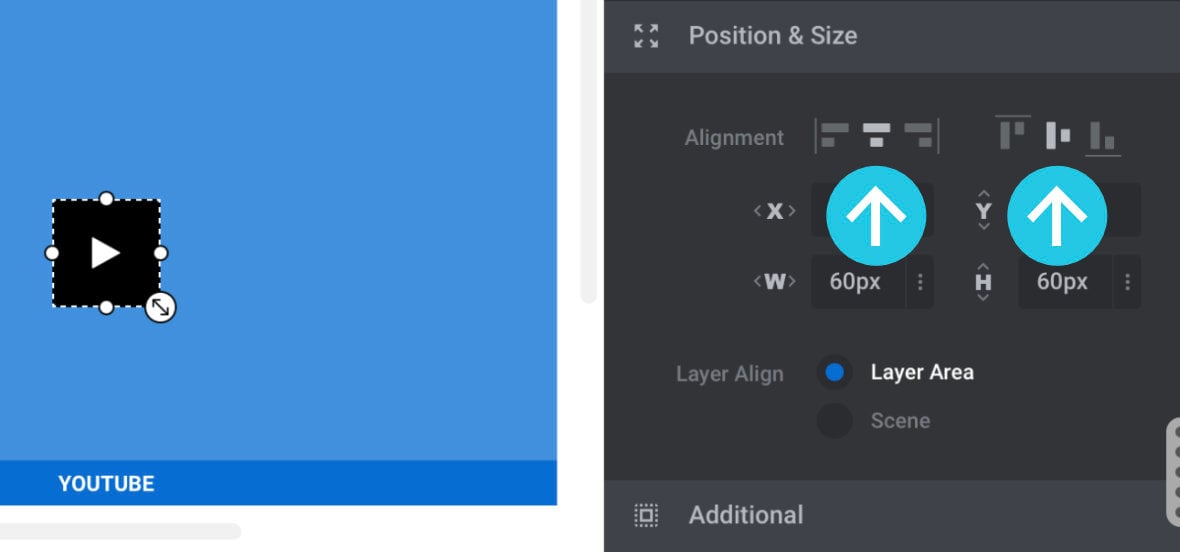
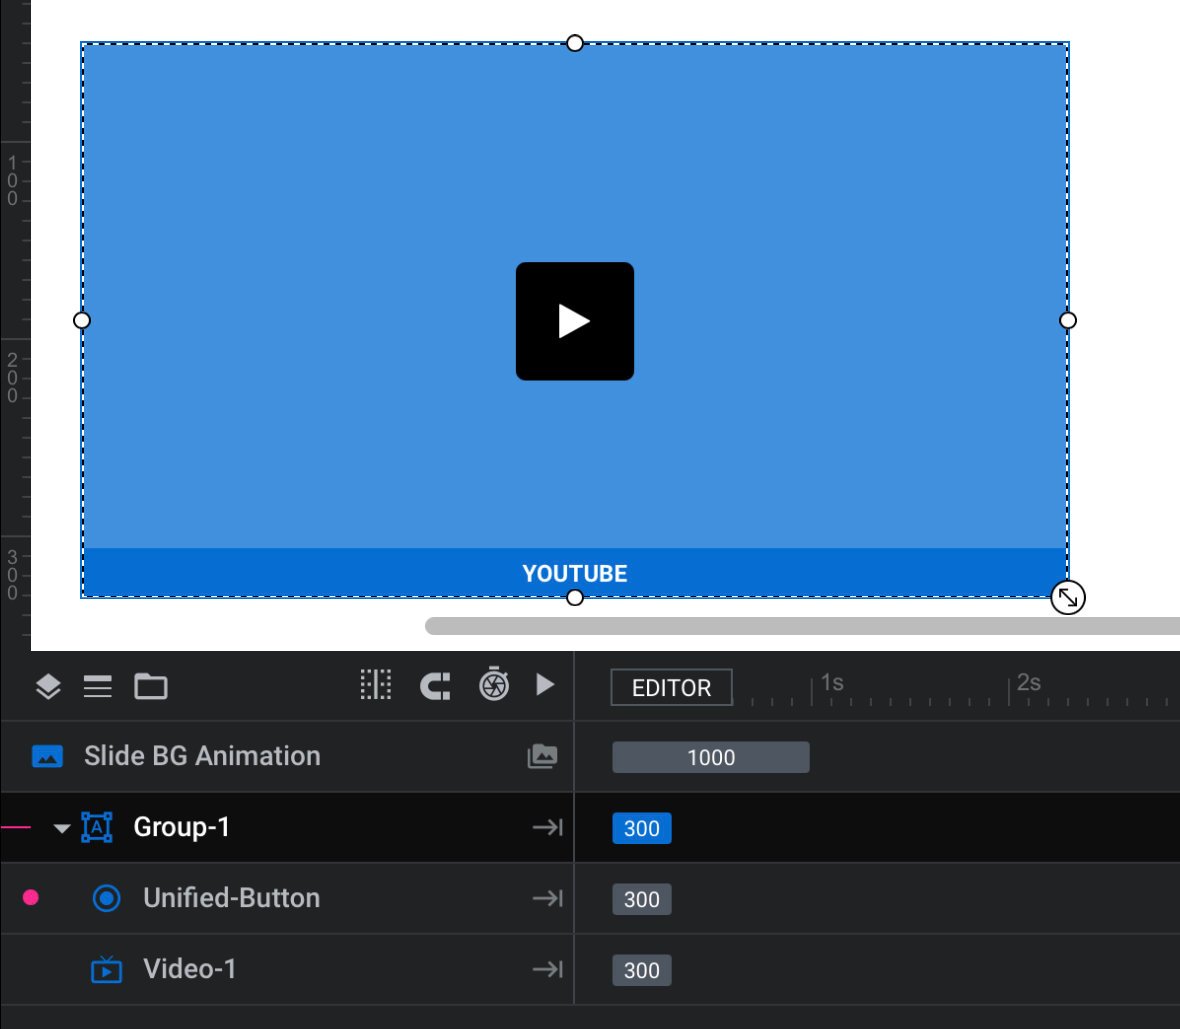
First add a group layer to your slide. Make the group the same width and height as the video, and place it in the same position:
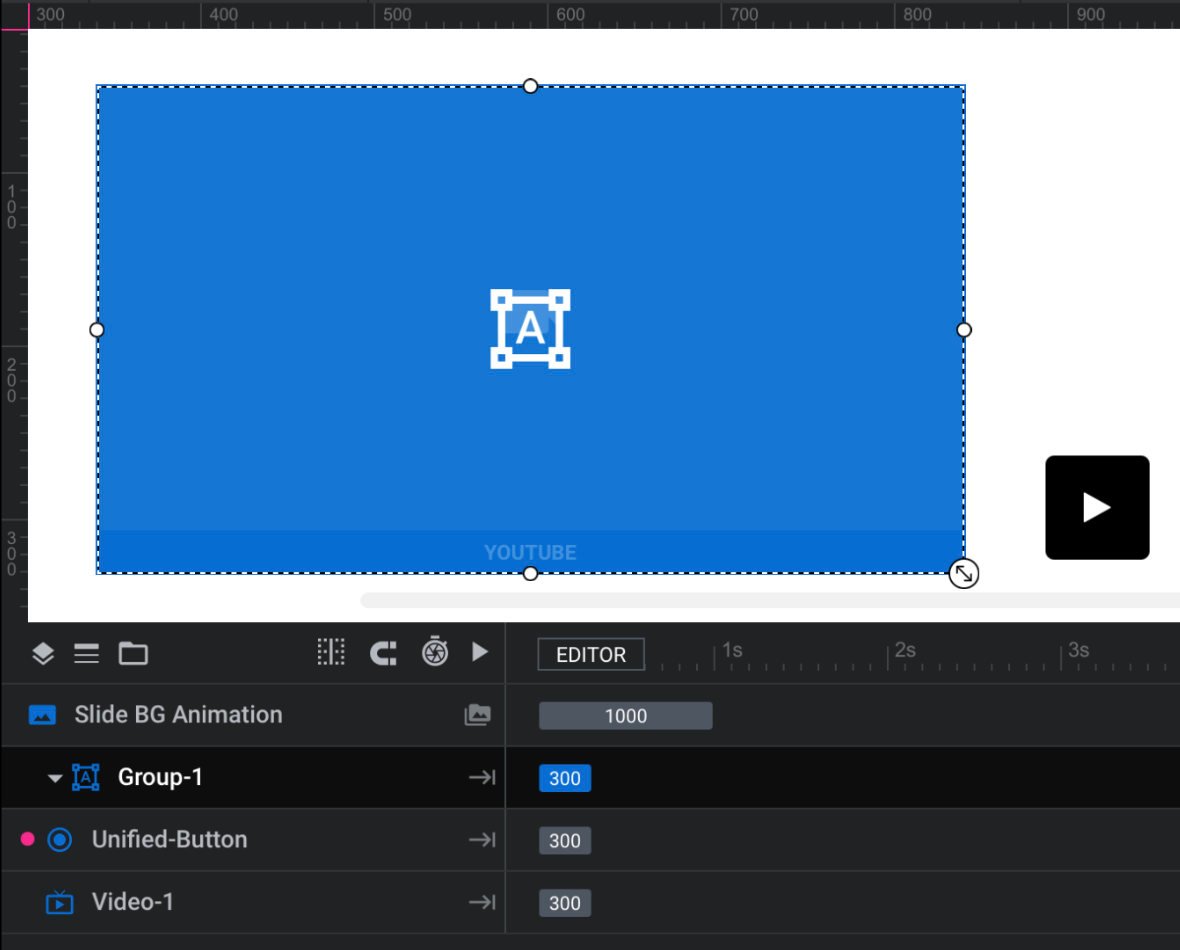
Then, using drag and drop in the timeline, nest both the video and button inside the group, ensuring the button is stacked on top of the video:
Now horizontally and vertically center both the video and button:
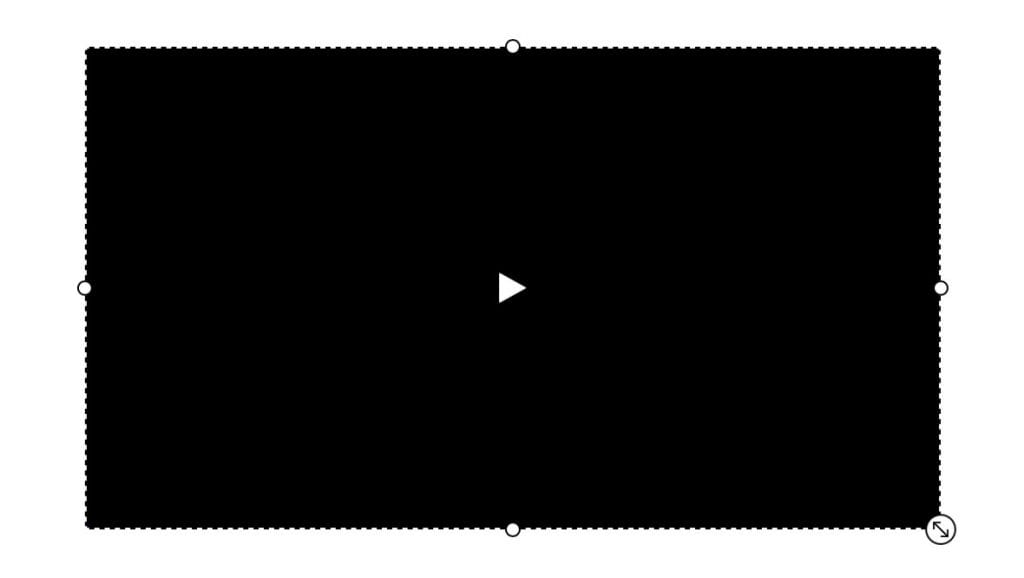
At this point the video should fill the whole area of the group, and the button should be centered over it:
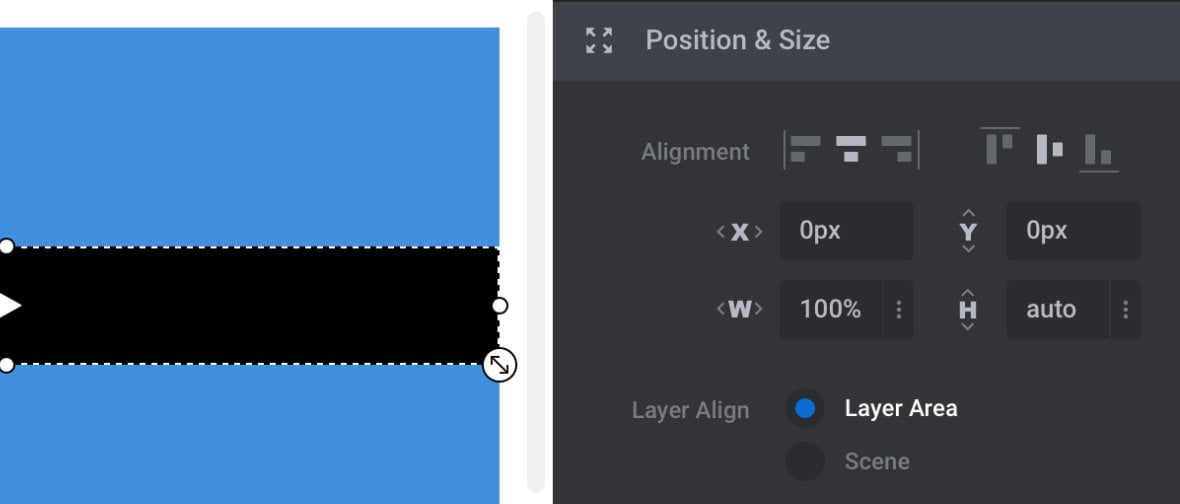
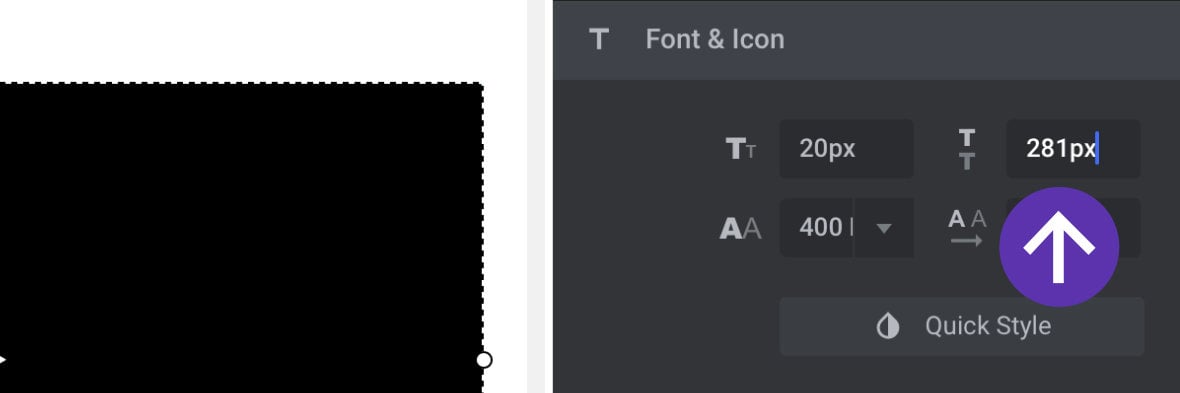
Set the width of the button to 100% and the height to auto:
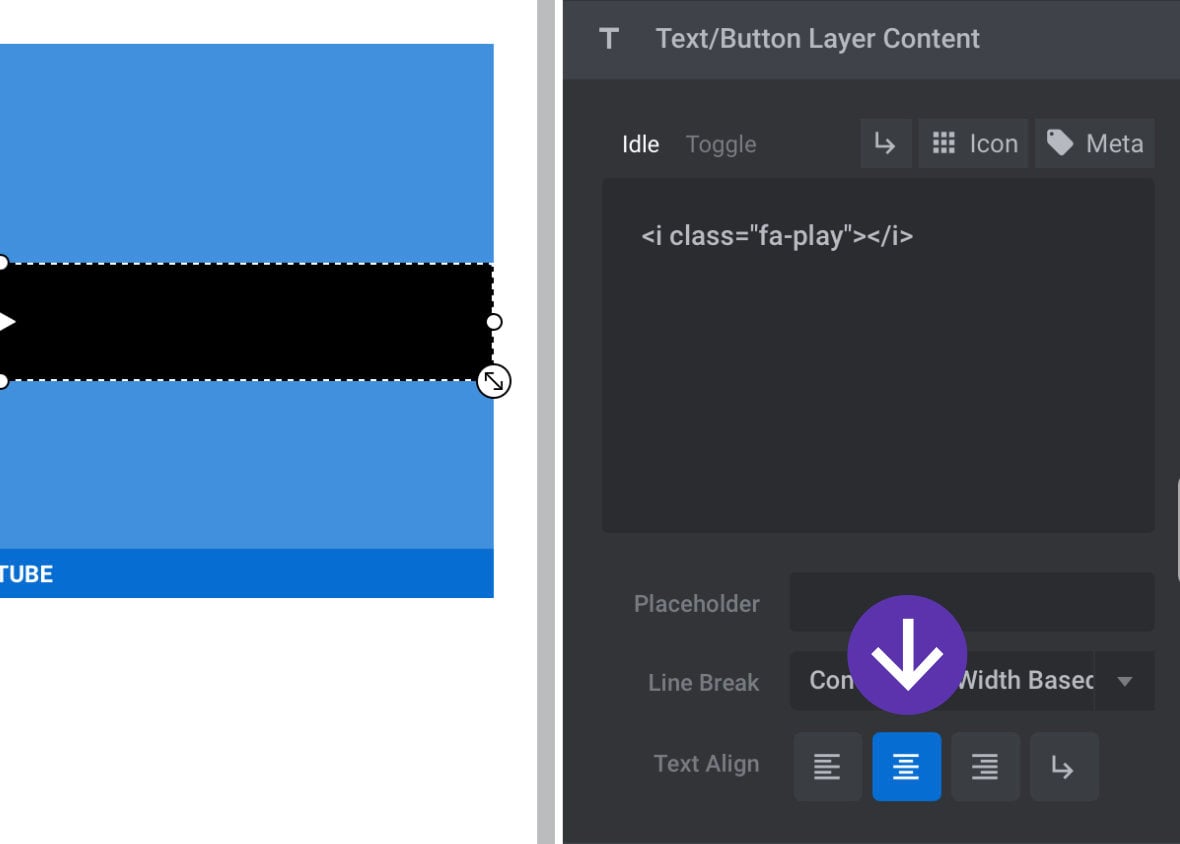
Then center the button text:
And set its line height to match the height of the group layer and video:
The button should now fill the area of the group, totally covering the video, with its content horizontally and vertically centered:
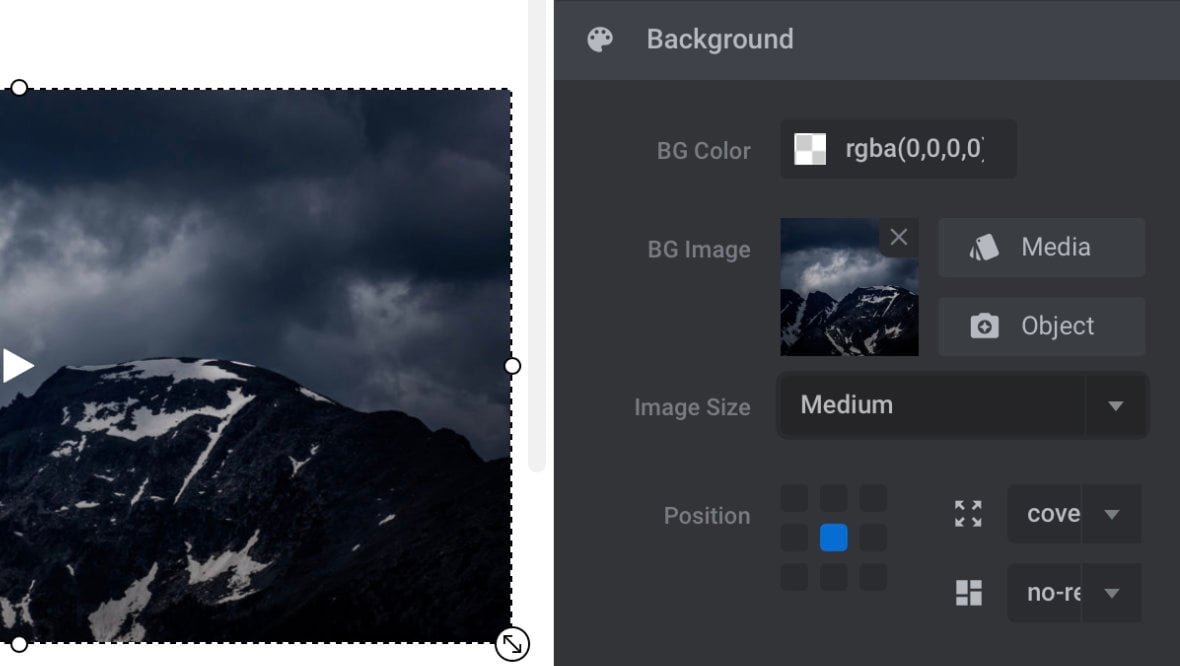
The next step is to set the button background color to be transparent, and set the image you want to use as a cover to be the button’s background image:
Finally, add one more action to the button, the Go to Last Frame action targeted at the button’s own layer. This will hide the cover button once it has been pressed, allowing the video to be seen:
You should now have a cover image doubling as a fully functional play and unmute button:
Wrapping Up
That covers some of the main quirks around video and audio that arise from third parties, and sets you up with a collection of solutions and work arounds.
And it just goes to show that even in areas Slider Revolution doesn’t directly control, it still gives you access to all kinds of creative ways to work with media!


Thanks for article but have one question, since I have set video to autoplay with sound ON, but it always start muted. Only way found to activate sound is to enable controls but this is not that nice to see to my customer. How comes it is muted although set opposite way?
How can I have it to start with sound actually ON?
Thank you
fabrizio
Hello,
thanks for contacting us! Your request requires one of our support agents to have a closer look.
In order to give our clients the best support possible, we are having a support ticket system reachable via the link below.
Please use it for your upcoming questions concerning one of our products. This will guarantee the fastest answer possible. Support requests here cannot be answered unfortunately. Thank you!
Please use our ticket systems over at:
https://support.sliderrevolution.com
Cheers Dirk @ Slider Revolution
I tried making a unified cover image/button. It worked great on desktop. On mobile, however, the button disappears and the video plays on click, but the video’s controls don’t work anymore. It seems like there is an invisible button covering the entire video and obstructing the video controls.
Hi,
could you send us the example link so we can have a closer look and deeper analysis? Please send it to https://support.sliderrevolution.com as it fits better there. Thanks!
Best regards, Dirk @ Slider Revolution