
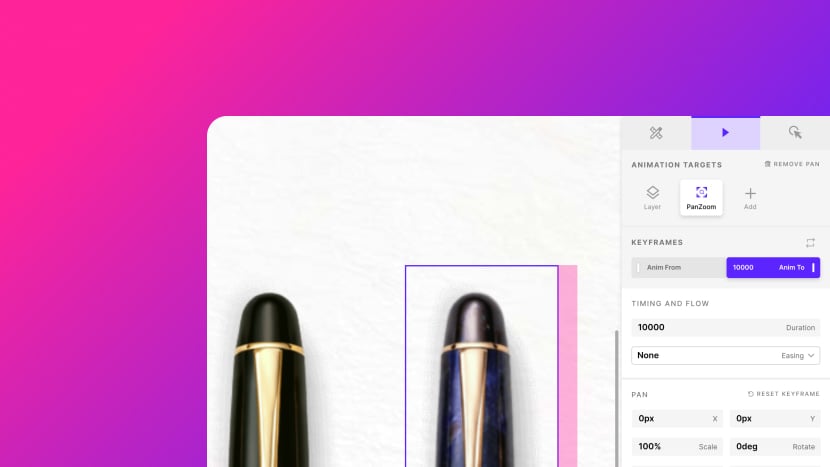
Animation Targets: Pan Zoom Animation
UI Navigation Map: Animation Targets: Pan Zoom Animation

Go to the Module Editor, in the Right Sidebar click the Animation icon in the Mode Switcher to enter Animation Mode, select an image, video or shape layer or the Slide Background, choose Advanced at the bottom of the sidebar, click Add under Animation Targets and choose Pan Zoom Animation, then select a keyframe:
- PanZoom Target
- Timing and Flow Section
- Duration
- Easing
- Pan Section
- Reset Keyframe
- X
- Y
- Scale
- Rotate
- Anchor X
- Anchor Y
- Cover on Rotation
- Timing and Flow Section
In Slider Revolution, a layer is a single element placed on a slide, such as a piece of text, an image, a button or a shape. Its animation is made of keyframes, each holding the layer's values at one moment, and the layer moves from one keyframe's values to the next.
A layer's animation is split into animation targets, each animating one part of the layer. The Pan Zoom Animation target zooms, moves and turns the picture inside an image, video or shape layer, or inside the Slide Background, while the frame around it stays where it is. This is the effect often called Ken Burns.
This article covers the settings the target holds at a keyframe. How keyframes are added and selected is covered in Animation Advanced Mode. Ready-made moves for this target are applied in Essentials Mode, described in Essentials Mode: Slide Background Pan & Zoom and Essentials Mode: Additional Animations.
To add the target, go to the Module Editor and, in the Right Sidebar, click the Animation icon in the Mode Switcher to enter Animation Mode. Select an image, video or shape layer, or the Slide Background from the last row of the Timeline.
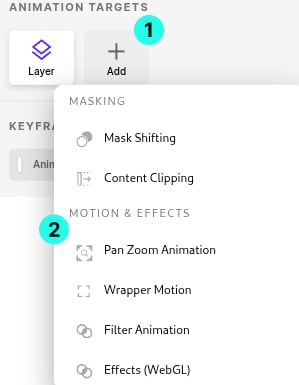
Choose Advanced at the bottom of the sidebar, then click Add 1 under Animation Targets and choose Pan Zoom Animation 2.
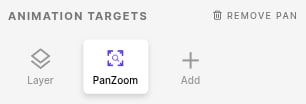
The new target appears as a tile, PanZoom. Click it and select a keyframe in the Keyframes section to see the target's values at that moment. A new target holds a ten second move from its Anim From keyframe to its Anim To keyframe.
A target that is no longer wanted is removed with the Remove button at the top right of Animation Targets, which reads Remove Pan.
The pan and zoom can also be paused while the pointer is over the module, with Pause Pan & Zoom on Hover in the SlideShow tab of the SlideShow, Order & Progress panel. The setting shows while Auto Progress is on.
It pauses the pan and zoom of the current slide's background and layers, and plays them again when the pointer leaves the module. It has no effect while Scroll Based Timeline in the Scroll & Parallax panel is active.
The devices that play the pan and zoom are set with Pan & Zoom Runs On in the Browser & Device panel.
PanZoom Target
The PanZoom target is offered for image, video and shape layers and for the Slide Background, and its settings are the same for all of them. It has keyframes of its own, timed separately from the layer's other targets.
A shape layer shows the effect only when it has a background image. On the Slide Background, the effect shows only when the background is an image, not a video.
Its settings are a Timing and Flow section and a Pan section.
Timing and Flow Section
Section Visibility
- Visible when a keyframe other than the first is selected.
- Hidden when the first keyframe, Anim From, is selected.
In the Timing and Flow section of the PanZoom target set how long the picture takes to move into the selected keyframe, and the curve it follows.
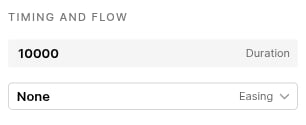
Duration (Number, milliseconds)
Sets how long the picture takes to move from the previous keyframe's pan and zoom to this one. A new PanZoom target uses 10000 milliseconds, a slow ten second move.

Easing (Dropdown)
Sets the curve the picture's pan and zoom follows into the keyframe. The field shows None until a curve is chosen, and the picture then moves at a constant speed. Each family below is offered as easeIn, easeOut and easeInOut. Linear and the three Late curves are single entries.

Options:
- Linear: A constant speed from start to end.
- Power0 to Power4: Curves of increasing strength,
Power0being nearly linear andPower4the most pronounced. - Quad, Cubic, Quart, Quint: The same curves under their mathematical names, in order of increasing strength.
- Sine: A shallow curve based on a sine wave.
- Expo: A sharp curve that starts or ends very fast.
- Circ: A curve that starts or ends abruptly, based on a quarter circle.
- Strong: The strongest of the plain curves.
- Back: Overshoots the end value, then returns to it.
- Elastic: Overshoots and oscillates around the end value, with each swing smaller, before stopping on it.
- Bounce: Reaches the end value and rebounds from it several times, each rebound smaller, before stopping on it.
- Late, Late2, Late3: Custom curves that hold near the start and do most of their movement at the end.
Pan Section
In the Pan section set where the picture sits inside its frame at the selected keyframe, how far it is zoomed and turned, and the point it zooms and turns around.

Reset Keyframe (Button)
Returns the selected keyframe's settings in the PanZoom target to their defaults.
X (Number, pixels)
Sets how far the picture is moved horizontally inside its frame at the keyframe, in pixels. Positive and negative values move it in opposite directions. Moving between keyframes with different values pans the picture sideways.

Y (Number, pixels)
Sets how far the picture is moved vertically inside its frame at the keyframe, in pixels. Positive and negative values move it in opposite directions. Moving between keyframes with different values pans the picture up or down.

Scale (Number, percentage)
Sets how far the picture is zoomed at the keyframe. 100% fills the frame, higher values zoom in and lower values zoom out. Moving from 100% at one keyframe to 120% at the next zooms in slowly.

Rotate (Number, degrees)
Sets how far the picture is turned in the plane of the slide at the keyframe, in degrees. A small difference between keyframes turns the picture slightly during the move. A turned picture can leave empty corners in the frame, which Cover on Rotation fills.

Anchor X (Number, percentage)
Sets the horizontal position of the point the picture zooms and turns around, as a percentage of its width. 0% is the left edge, 50% the center and 100% the right edge.
The field shows 50% until a value is entered.

Anchor Y (Number, percentage)
Sets the vertical position of the point the picture zooms and turns around, as a percentage of its height. 0% is the top edge, 50% the center and 100% the bottom edge.
The field shows 50% until a value is entered.

Cover on Rotation (Toggle)
Sets whether the picture is zoomed in further while it is turned, so the corners of the frame stay filled. The setting belongs to the target rather than to one keyframe, so it applies to the whole animation.

Options:
- On: The zoom is increased as needed so a turned picture still fills the frame.
- Off: The picture keeps the zoom set in Scale, and a turned picture can leave empty corners in the frame.
