
Controlling Auto Rotation of Slides
Learn how to activate automatic progression in your modules, and configure extra, related options as well.
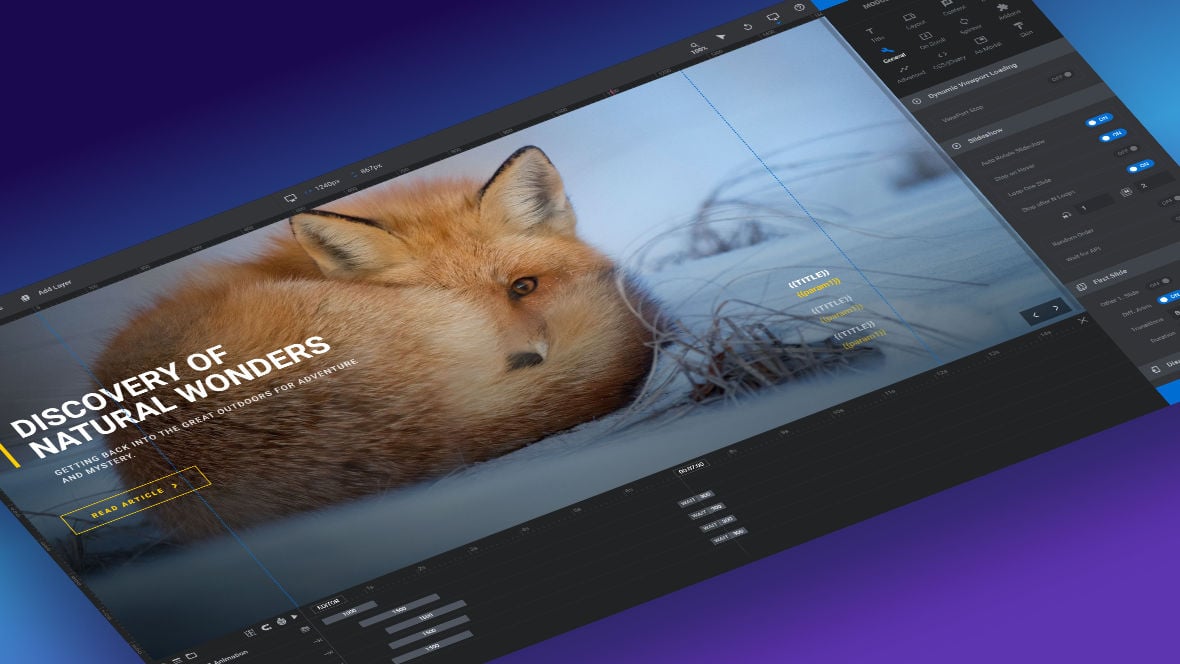
Table of contents
Activating Auto Rotation
Automatic slide rotation is active by default in new modules. But if you need to change the auto rotation setting of a module go to the Module General Options tab, General sub-section, Slideshow panel:
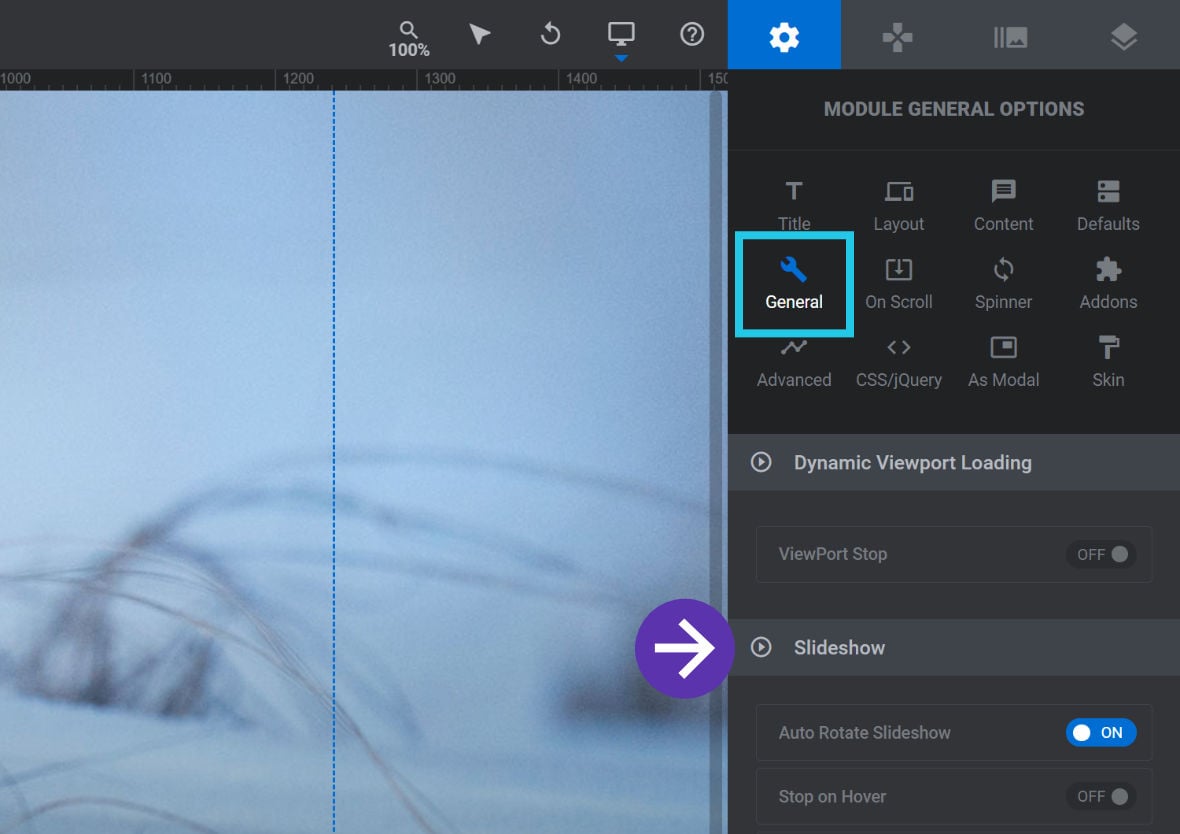
There you will find the Auto Rotate Slideshow option. Toggle it to OFF and the module will stop on its first slide. Toggle it to ON and slides will automatically progress from one to the next:

Toggling that option may be all you need for your purposes. But while we’re on the topic we’ll also cover some additional options that provide further configuration for how your slides auto progress.
Extra Slideshow Panel Options
Let’s take a look at the extra options in the Slideshow panel that relate to auto rotating slides.
Stop on Hover
Toggle the Stop on Hover option to ON if you’d like visitors to be able to temporarily pause progression by hovering their mouse over the module:

This is particularly useful if you have important text on a slide and you want to ensure interested readers have time to absorb it.
Stop After N Loops
If you wish, you can have a module initially automatically progress, but then stop after a certain number of loops and at a specific slide.
To use this feature toggle the Stop After N Loops option to ON then configure both the Stop After Loops and Stop At Slide options.
Stop After Loops
The Stop After Loops option sets how many complete loops of the module should be performed, after which the module will be stopped:

Stop At Slide
The Stop At Slide option sets the slide at which the module should be stopped, after it has completed the number of loops set in Stop After Loops:

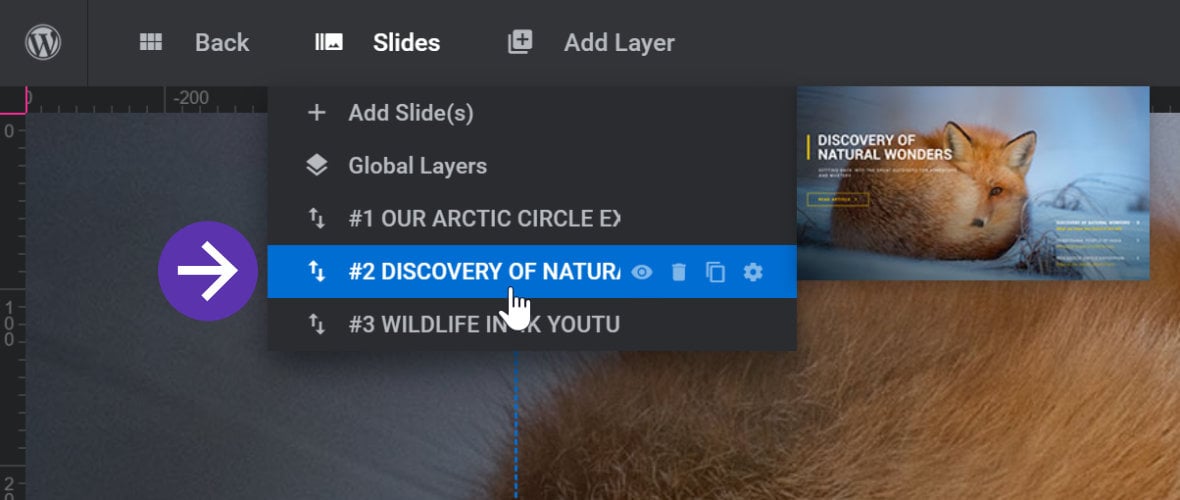
You can find the number of the slide at which you wish to stop by hovering over the Slides menu in the top bar, and taking note of the number listed to the left of the slide name:
How “Stop After Loops” and “Stop At Slide” Interact
When using the Stop After N Loops feature, the module will first loop through the entire module the number of times specified by Stop After Loops. It will then continue playing until it reaches the slide specified by Stop At Slide.
For example, if Stop After Loops is set to 1 and Stop At Slide is set to 2, the module will play all the way through once then start playing again, stopping at the second slide.
Or, if Stop After Loops is set to 0 and Stop At Slide is set to 3, the module will not complete any loops, it will just stop as soon as it reaches the third slide.
Setting Time Until Auto Progress
A key element of having auto progressing slides is determining how long a slide will appear before rotating to the next one.
Slide duration can be set as a default across a module, but can also be overridden on individual slides. Let’s see how to set slide duration in both of these ways.
Default Slide Duration
To set a uniform amount of time all slides should stay on screen before progressing, go to the Module General Options tab, Defaults sub-section, Default Basics panel:

In that panel you can set the Slide Duration option, as a milliseconds(ms) value:

That value will then become the default duration for all slides.
Individual Slide Duration
To override the default duration for an individual slide, open that slide in the Module Editor then go to the Slide Options tab, Progress sub-section:
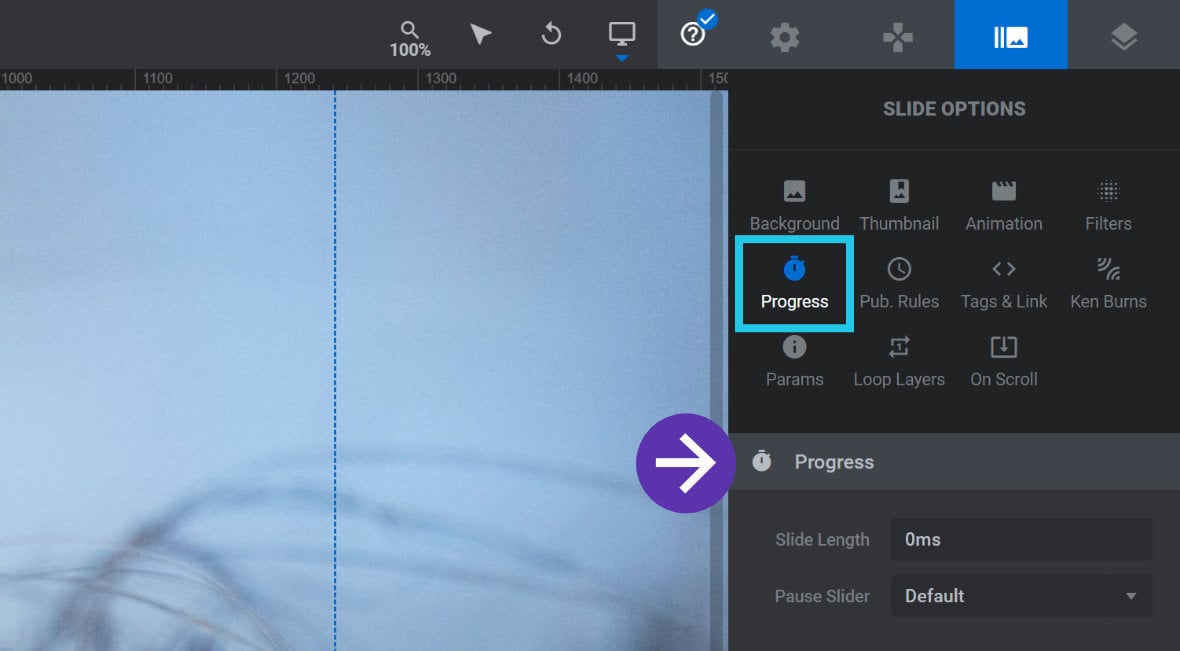
In the Slide Length option set the duration for the slide, in milliseconds(ms):
