
Customizing Particle Waves
Learn about all the options available to you for custom particle wave creation.
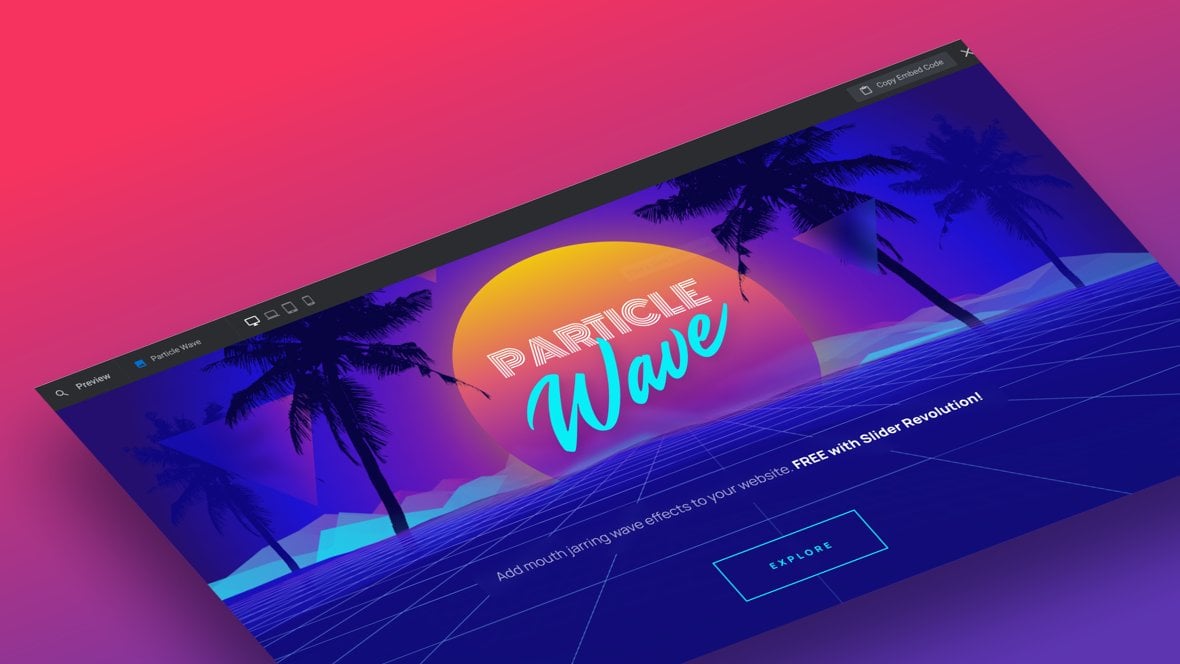
Table of Contents
Customizing or Making Your Own Particle Waves
On the last page of the manual we saw how Particle Wave layers [?]
Layers are containers for visual, audio or layout items and are added to slides. For example, text, button, image, audio, video, group and row are all types of layers.
Layers are added to slides via the module editor. can be added to a slide.
After adding a particle wave layer, there are several ways you can customize it to suit the module [?]
A module in Slider Revolution acts as a container for slides, which in turn act as containers for layers. Modules are created and edited with the module editor.
A "module" is a single, self contained piece of content. You can think of this as being similar to the way a post or page in regular WordPress is a self contained piece of content.
A module can represent any kind of content Slider Revolution is capable of creating, such as a slider, carousel, hero unit, navigation menu, posts display and so on.
Multiple modules can be combined to form rich content such as complete sites and landing pages. design you are creating.
And when you’ve created a particle wave you love, you can save it as a custom preset and use it again any time you want.
In this guide we’ll cover all the available configuration options you can use to customize or make your own unique particle waves.
But before we get into that, let’s quickly go over how you can manage custom presets.
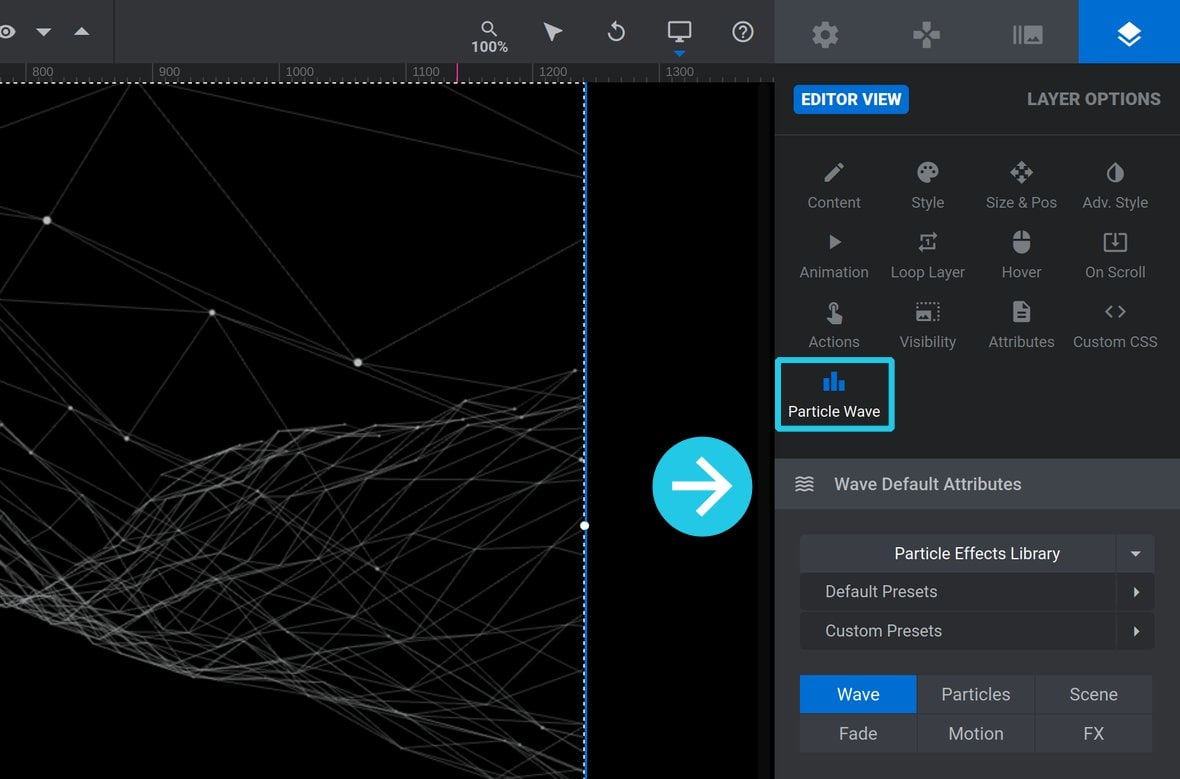
Note: Every option discussed in this guide can be found by selecting an existing Particle Wave Layer then going to the Layer Options tab, Particle Wave sub-section, Wave Default Attributes panel:
Managing Custom Presets
After customizing a particle effect it can be saved as a custom preset in the Particle Effects Library for use later. Let’s see how.
Saving a Custom Preset
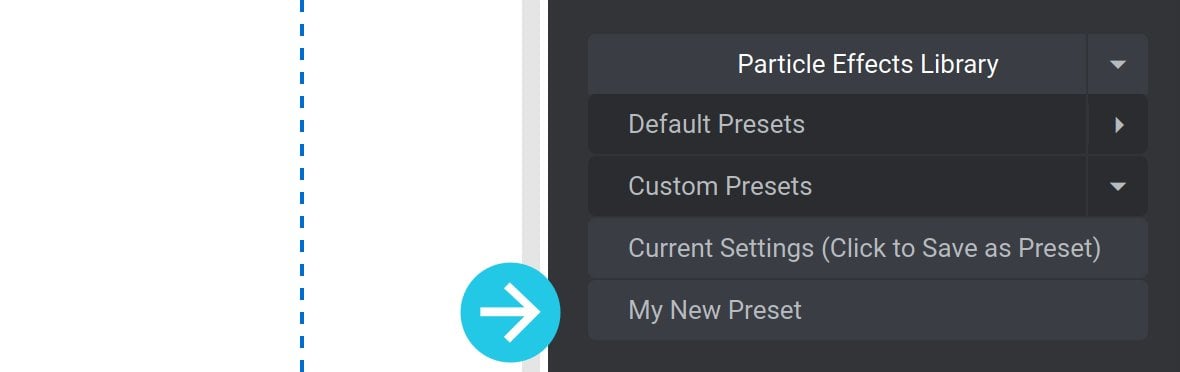
To save a custom preset, click to expand the Particle Effects Library and Custom Presets, then click the line labeled Custom Settings (Click to Save as Preset):
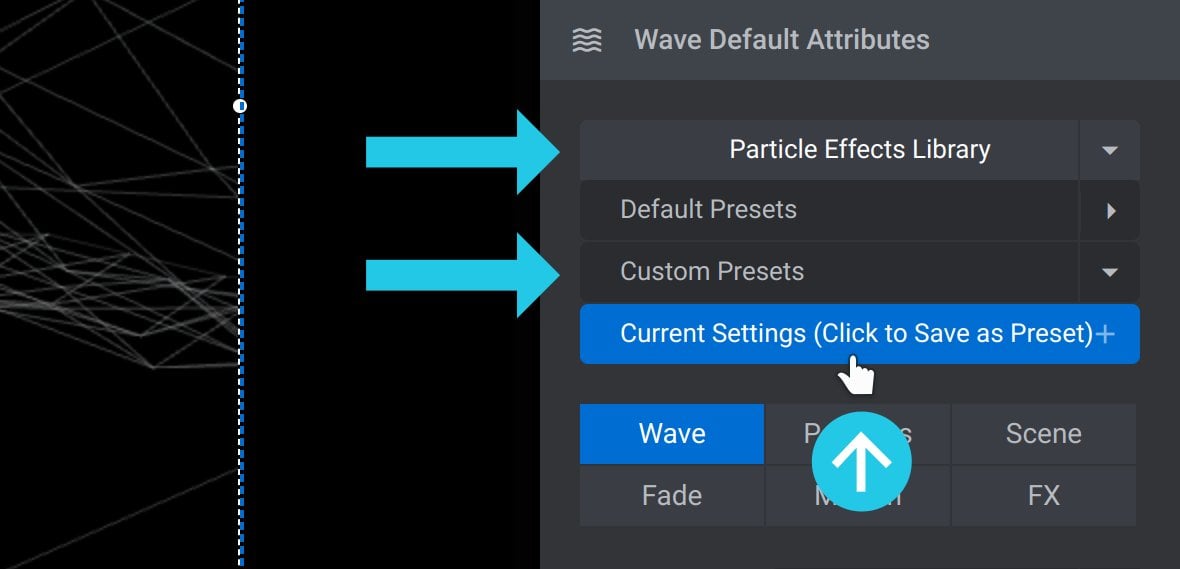
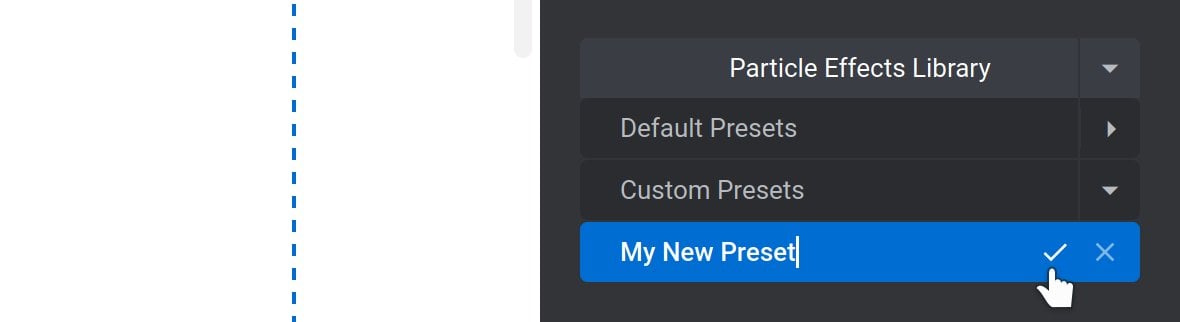
The line will turn blue and placeholder text such as “Give name” or “custom” will appear:
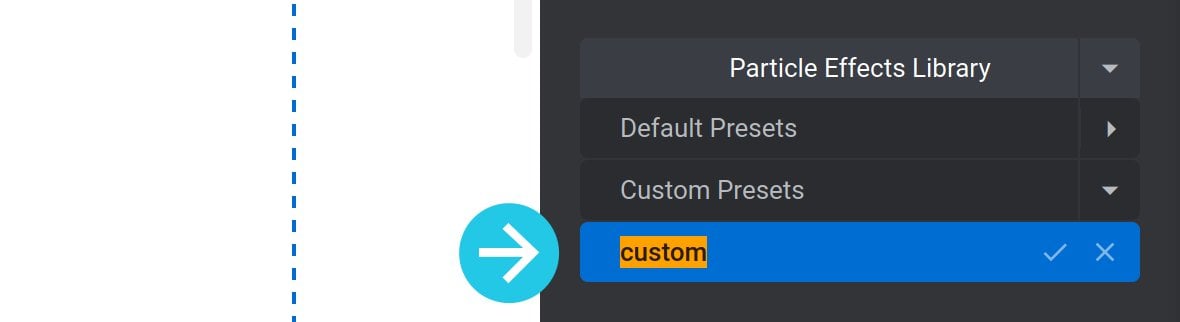
Replace that text with a name for your custom preset, then click the tick at the end of the line:
Your custom preset will be saved and you’ll now see it listed under Custom Presets:
Deleting a Custom Preset
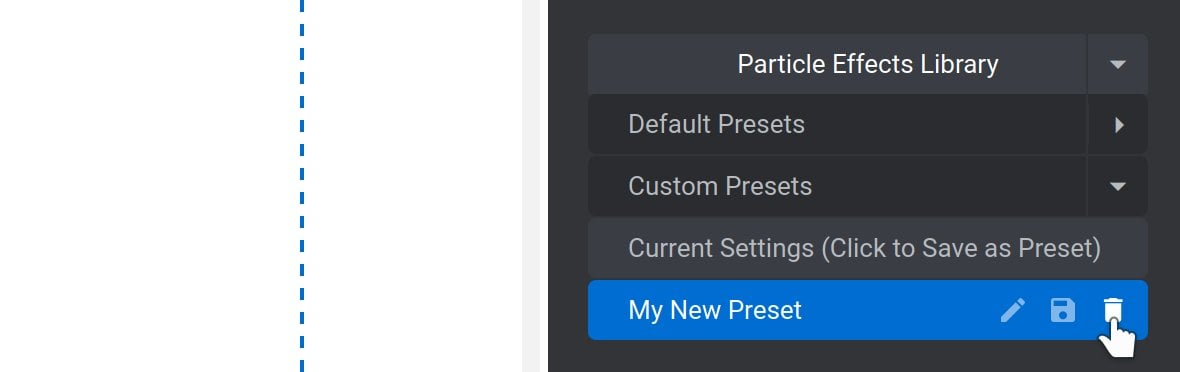
If you need to delete a custom preset, hover over it, then click the bin icon at the end of the line:
Customizing Wave Attributes
Below the Particle Effects Library you’ll see tabs for 6 categories of options you can modify in order to create a custom a particle wave effect:
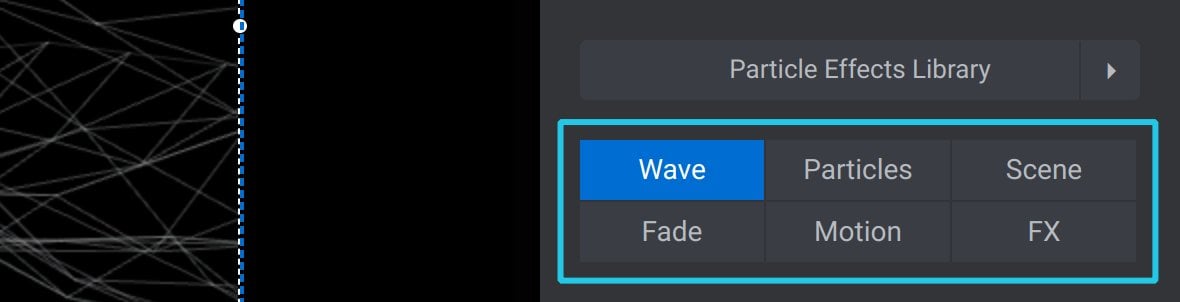
Those categories are:
- Wave – wave type, speed and shape
- Particles – size, shape and color of particles and lines used in the wave
- Scene – rotation of the wave, and camera angle viewing it
- Fade – fade the wave at its edges
- Motion – animate the motion of the whole wave
- FX – apply blur or glitch effects
Let’s dig into the options available under each category and learn how to use them.
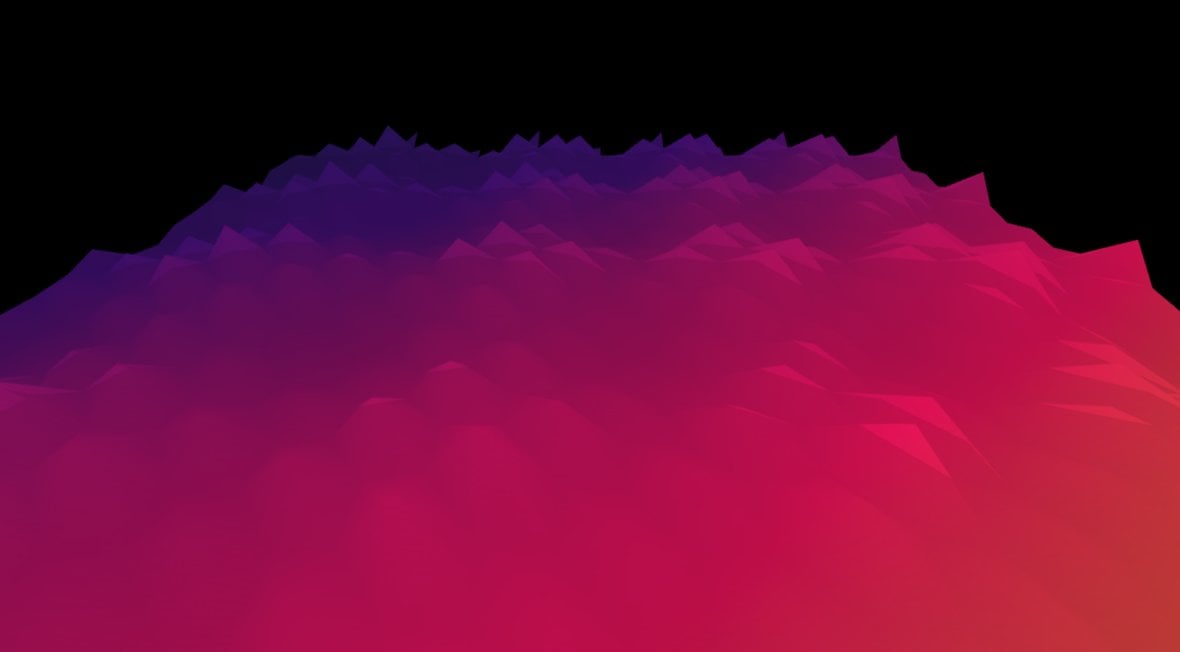
Note: If you’d like to experiment with these options as we go along, probably the easiest way to do so is with a “Spider Web” preset used over a dark background [?]
A "background" in Slider Revolution is a type of layer that is always present in every module, and is always visually behind all other layers.
A background can be transparent, a flat color, a gradient, an image, or a video. It can be animated in the same way as other layers can be, however it cannot be deleted..
Wave
The Wave category of options allows you to set the type of wave animation effect to use, how quickly that animation should move, as well as various aspects of the shape of the animation:
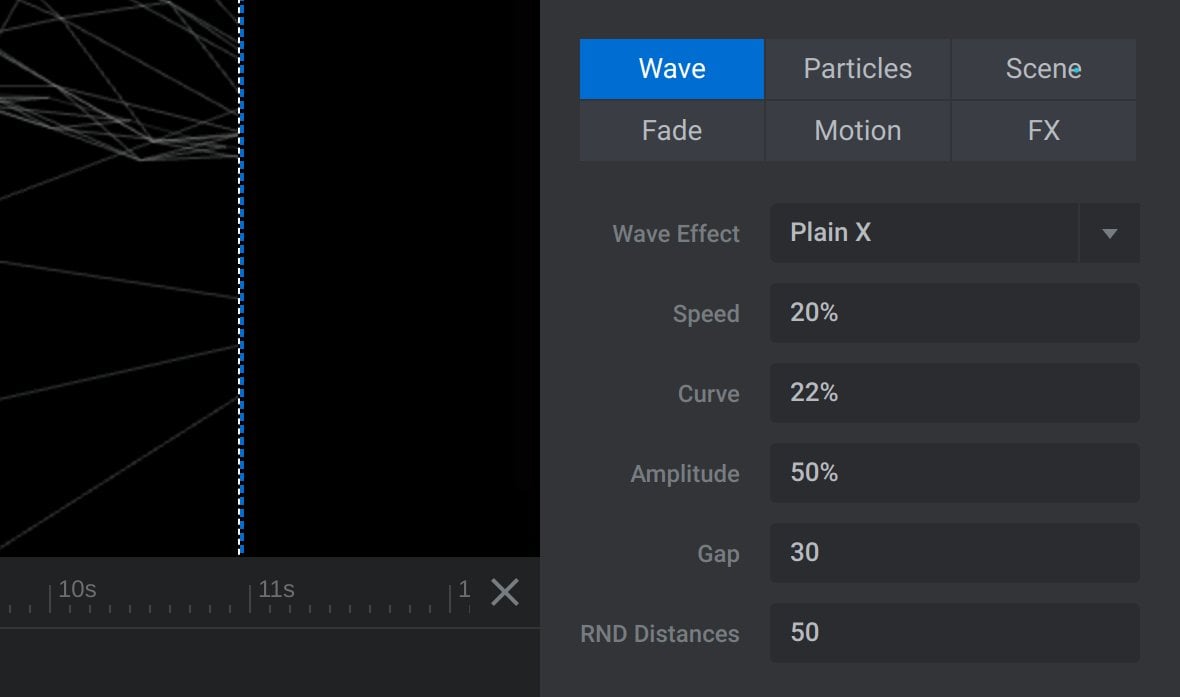
The Wave category contains the following six options:
Wave Effect
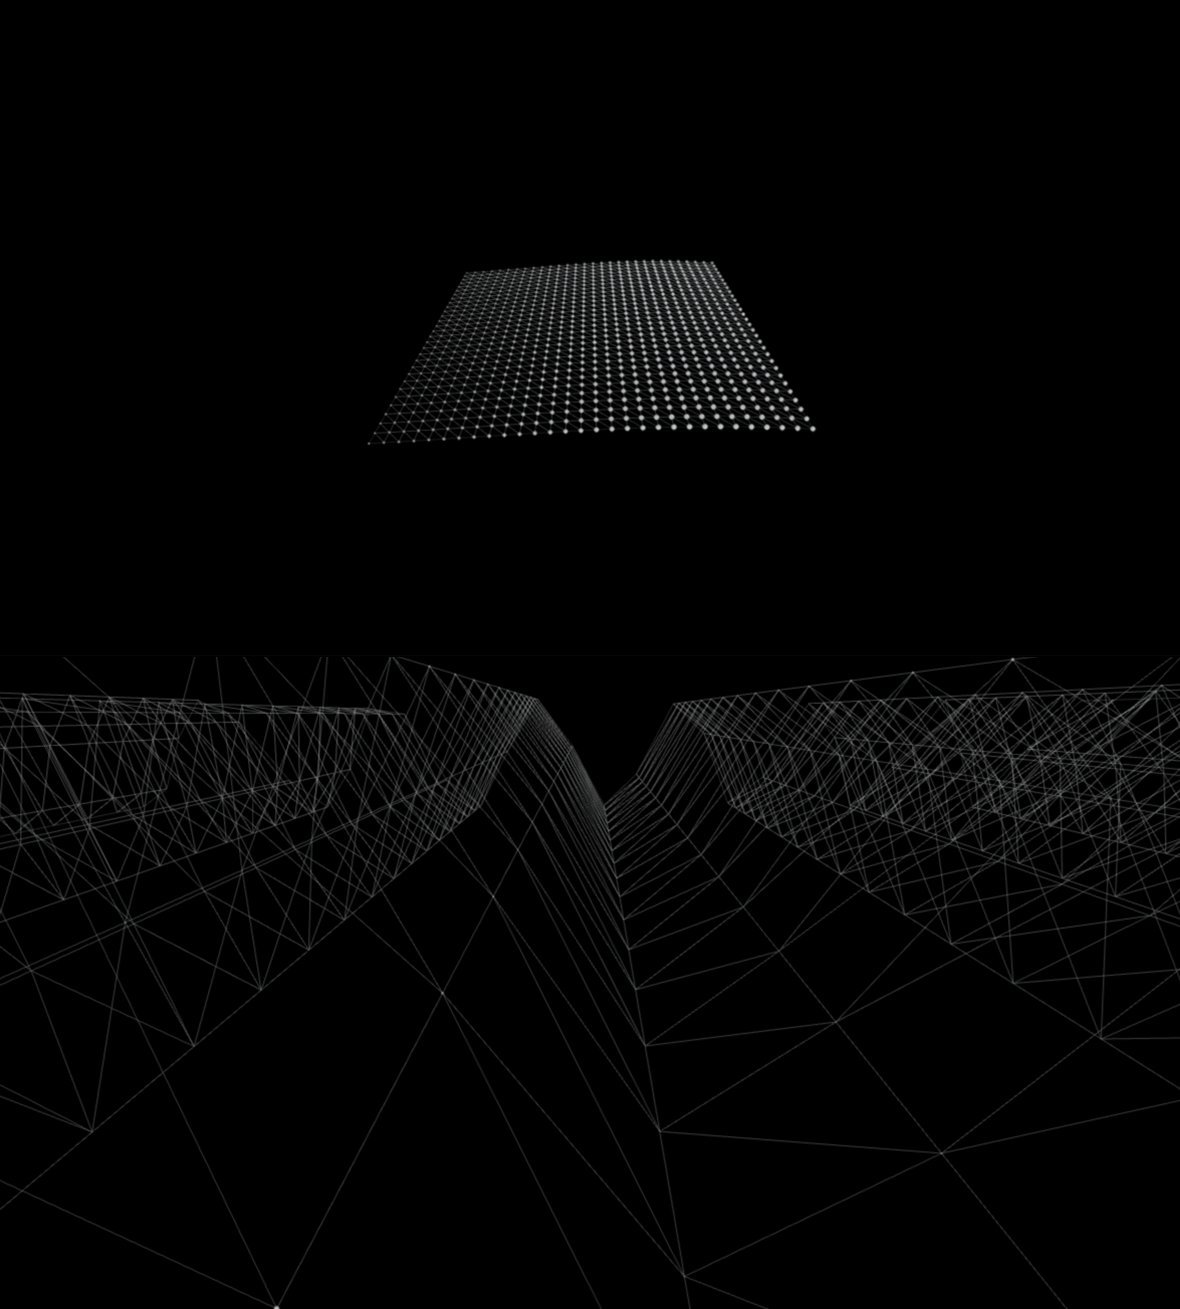
Particle waves are made up of a grid of particles, and they generate their wave-like undulation by sequentially moving those particles up and down:
You can think of this as being like the “Mexican wave”, only with particles creating the wave undulation instead of people.
The Wave Effect option allows you to choose the direction in which the particles should undulate in order to create a wave effect:
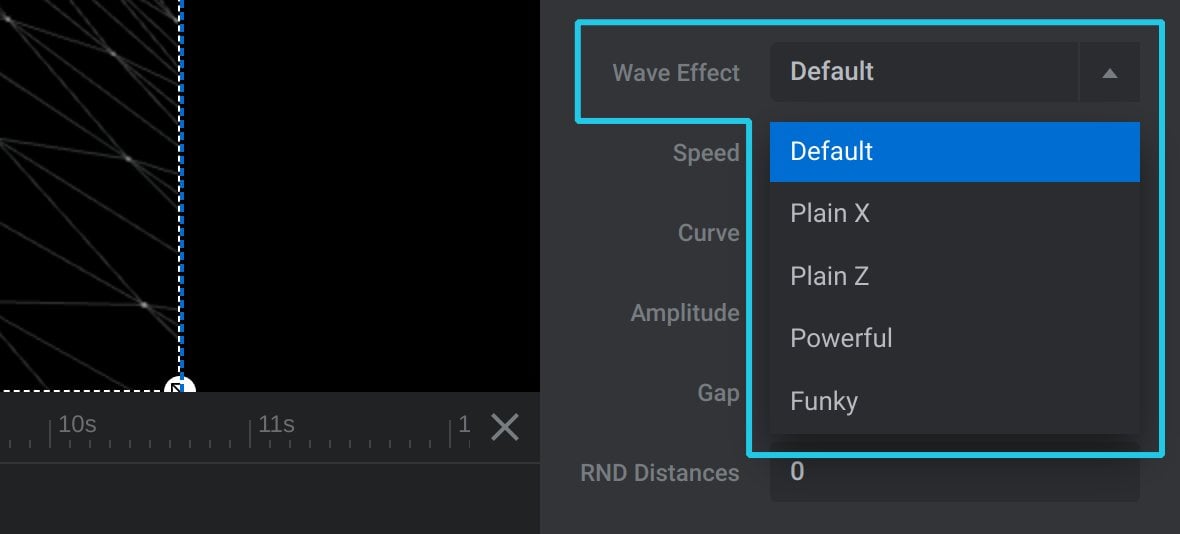
Default
Undulates simultaneously from right to left and front to back
Plain X
Undulates from right to left
Plain Z
Undulates from front to back
Powerful
Like the default effect but with more powerful waves.
Funky
A randomized ebb and flow of wave undulation.
Note: The Wave Effect option is not available if you are using the Hexa line type, described below.
Speed
The Speed option controls the rate at which the wave undulates. It is set as a percentage between 1%, representing barely perceptible undulation, and 100%, representing the maximum speed of undulation:

Curve
The Curve option controls how flat or curvy the wave is:

It is set as a percentage between 1%, representing a flat wave, and 100%, representing a highly curvy wave:
Amplitude
The Amplitude option controls how far each particle, or each part of the wave, will move as it undulates:

It is set as a percentage value between 1%, representing almost no movement, to 100%, representing the maximum amount of movement.
Gap
The Gap option controls how far the particles that form the wave are spread apart:

It is set as number between 5 and 100, where 5 will create a small wave with very compact particles, and 100 will create a wide wave with particles spread apart:
RND Distances
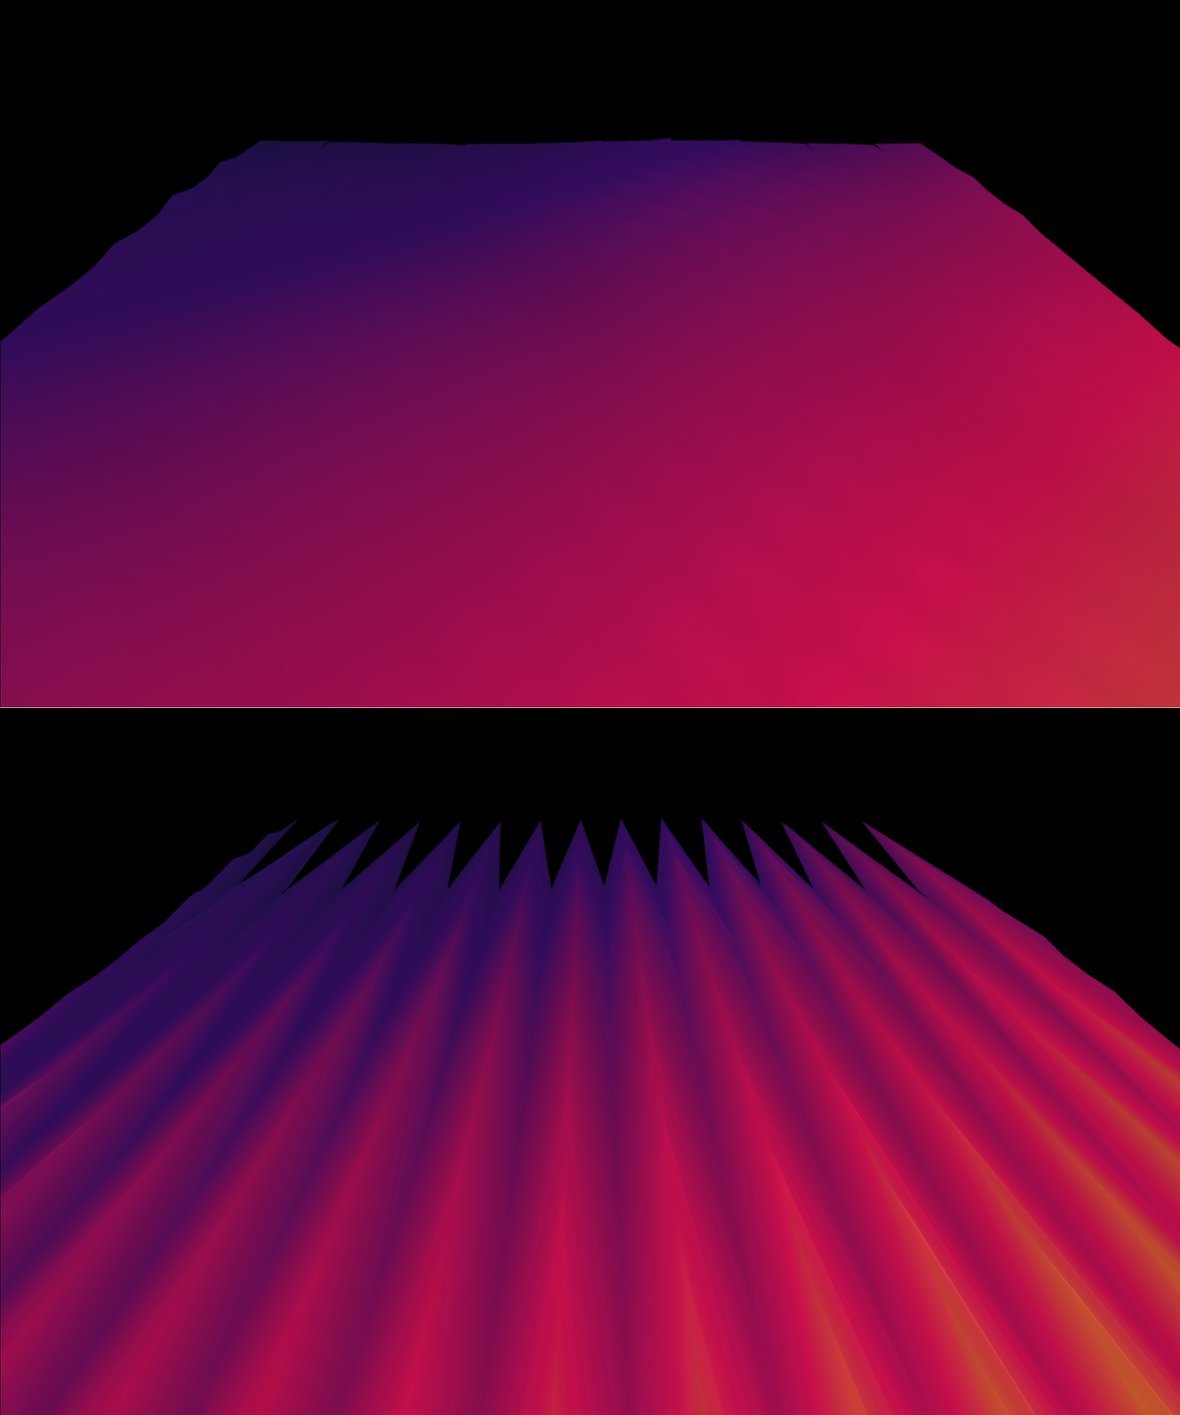
Each particle wave can have a certain degree of “spikiness”:
This “spikiness” is generated by randomly offsetting each particle from its original position.
The RND Distances option controls how spiky a wave is by setting how much of this randomisation there should be:

The option is set as a number between 0, representing a perfectly smooth wave, and 100, representing the spiciest wave possible:
Particles
As mentioned earlier, particle waves are made up of a grid of particles. The Particles category of options allows to configure the appearance of those particles, as well as the lines & fills between them:
The Particles category contains these two options:
And these four panels:
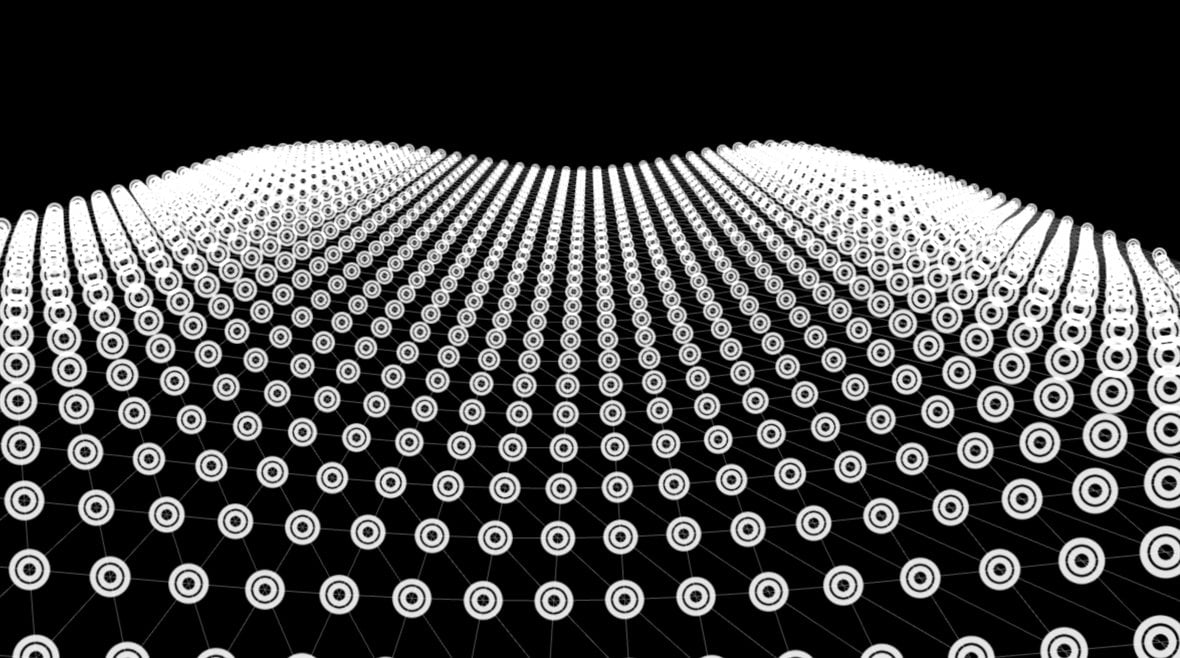
Show Particles
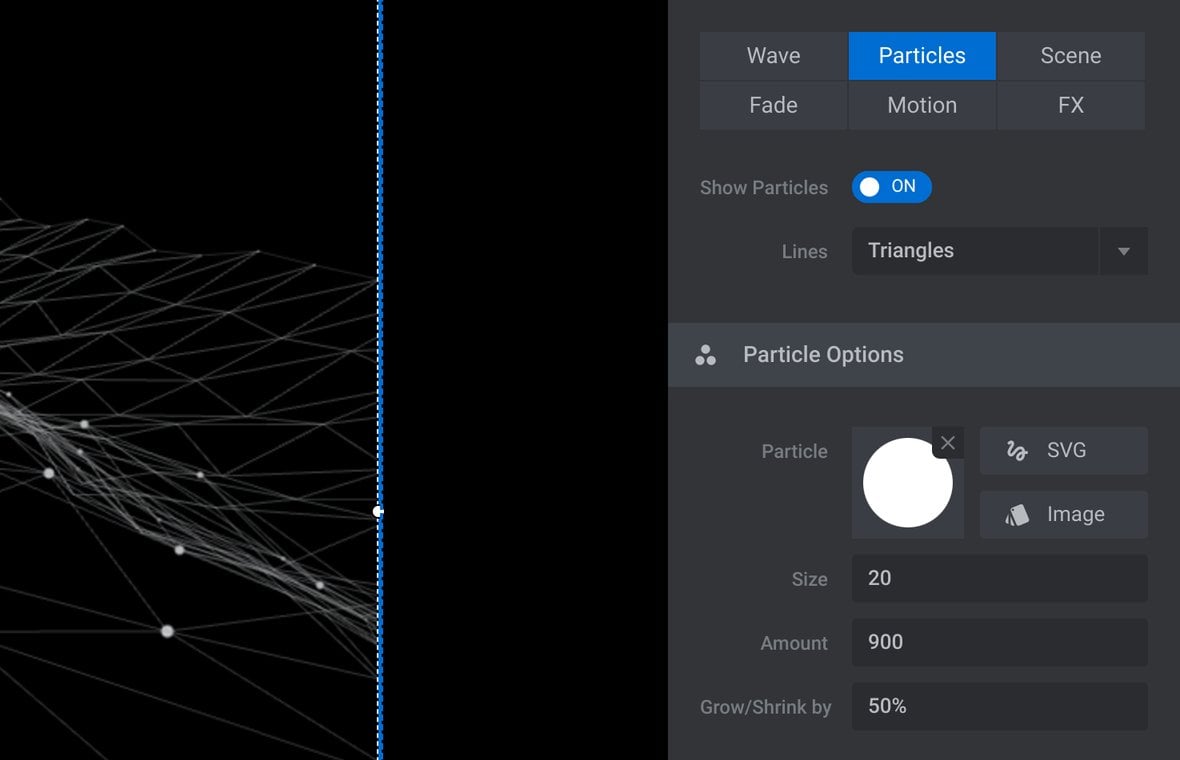
At the top of the Particles category you will see the Show Particles option:

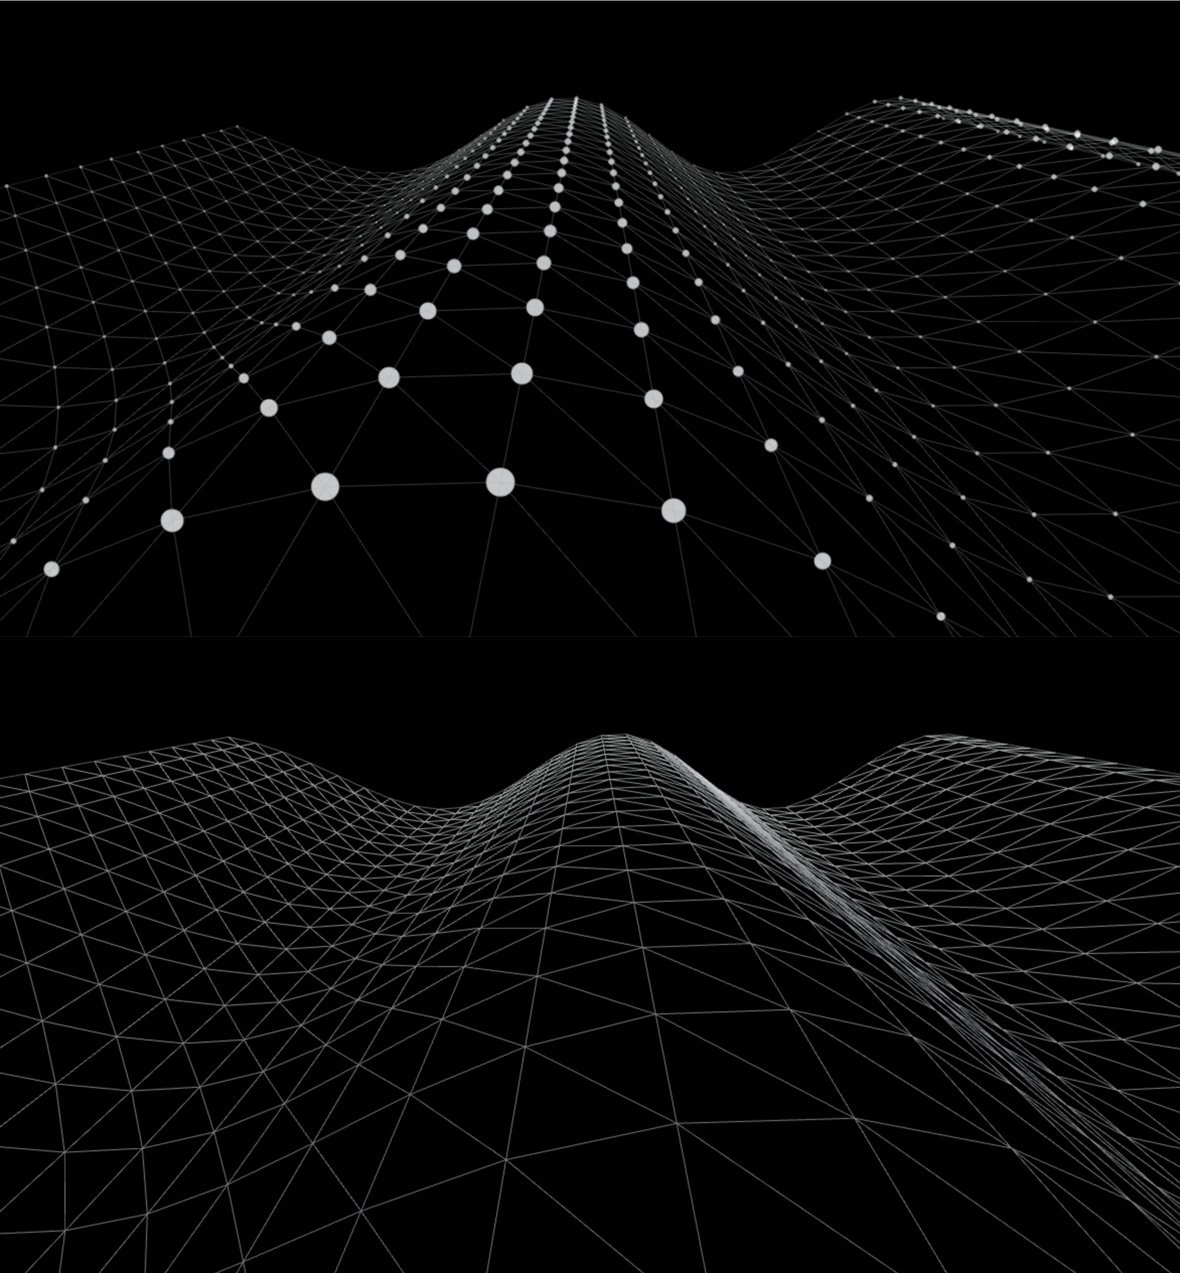
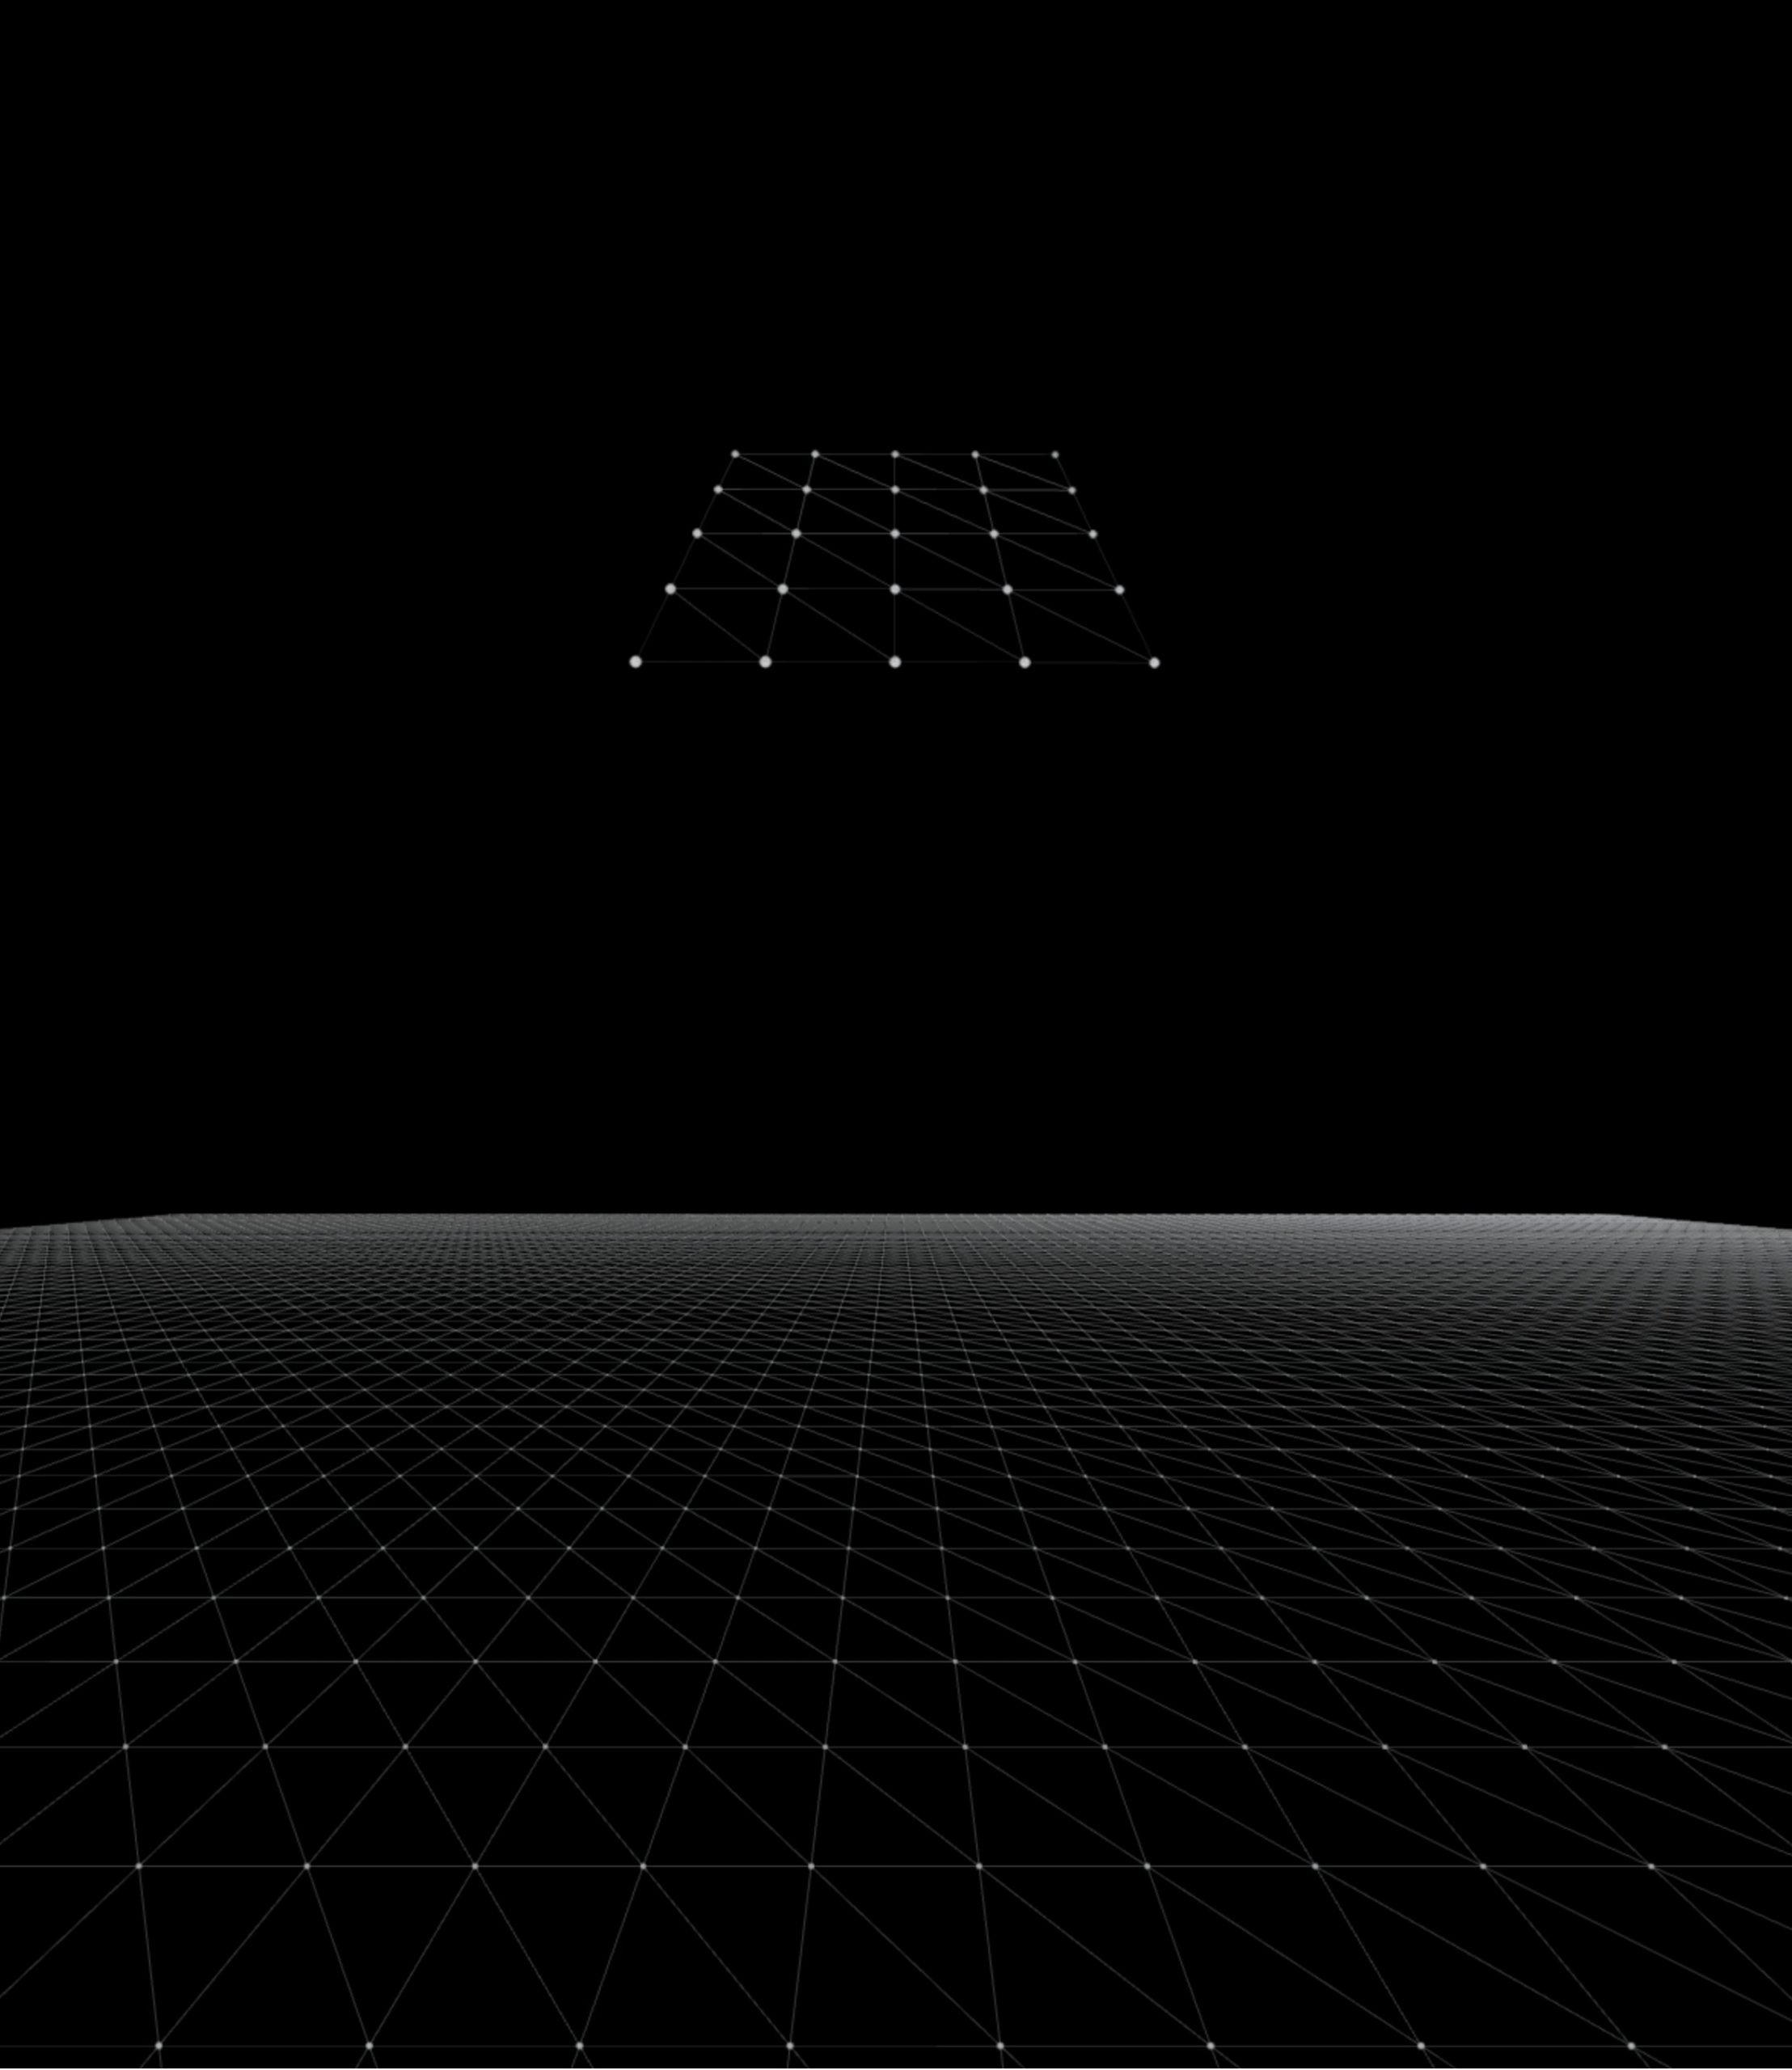
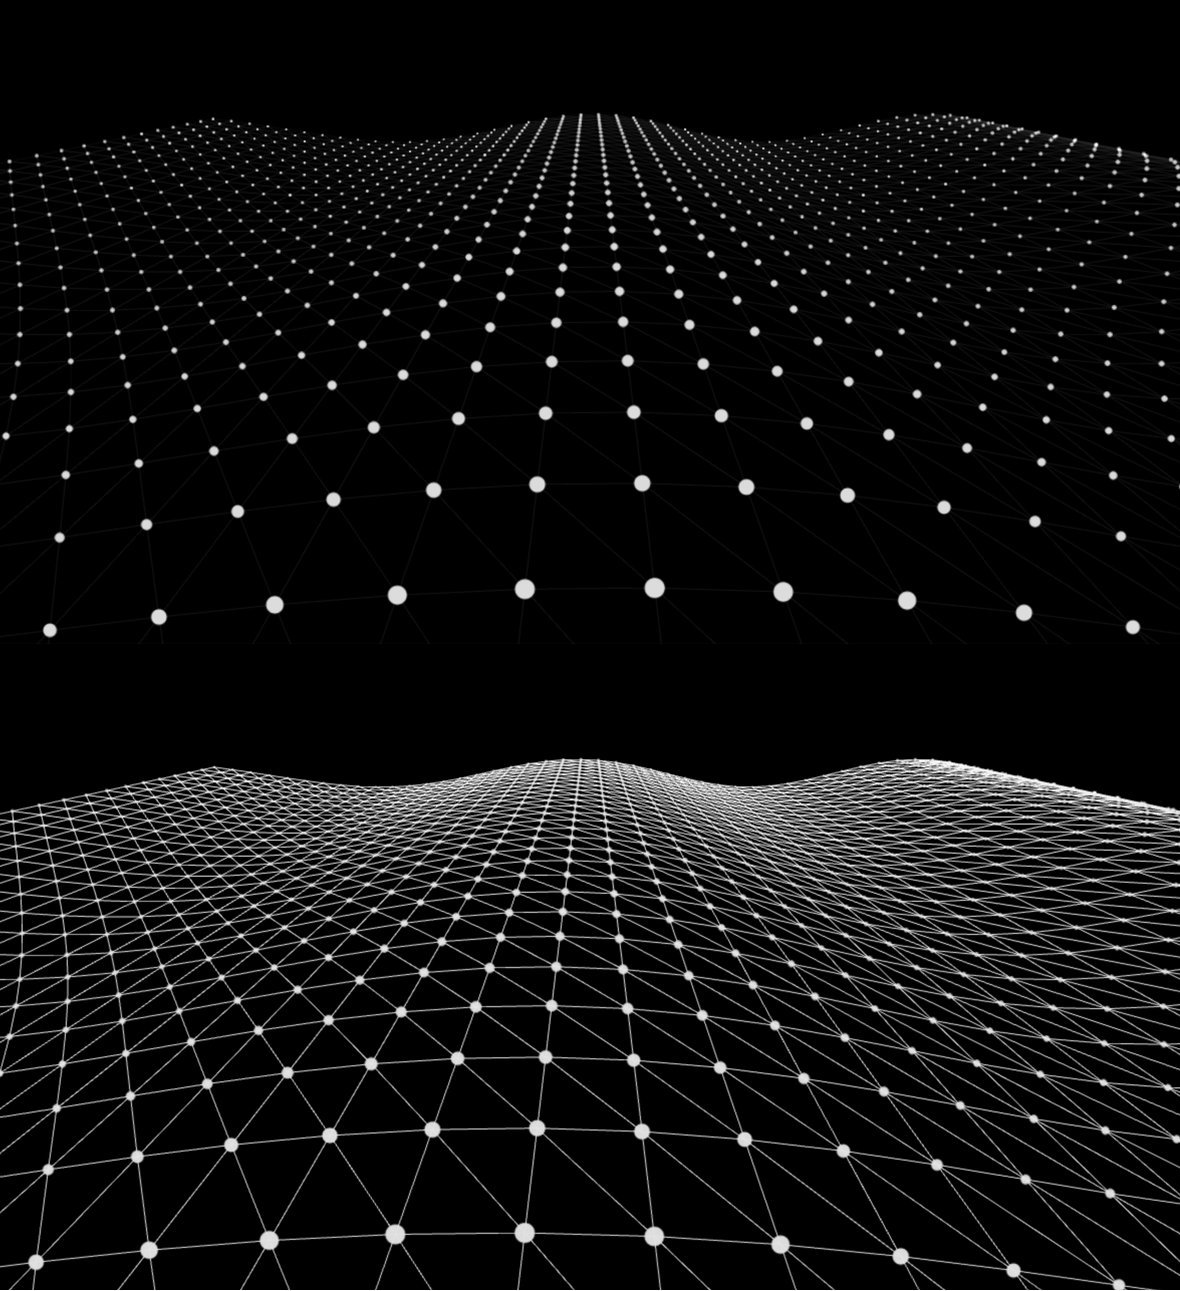
Toggle the Show Particles option to ON to show little particle graphics, such as circles for example, throughout the wave:
Toggle the option to OFF if you’d like to instead just show connecting lines and fills:
Note: The Show Particles option will only appear if you set the Lines option (below) to Triangles or Boxes.
This is because if you use the Hexa line type you cannot also use particles. And when you turn lines off, particles are essential, otherwise there would be nothing visible in the wave.
Lines
The Lines option allows you to select the type of connections between each point on the wave:
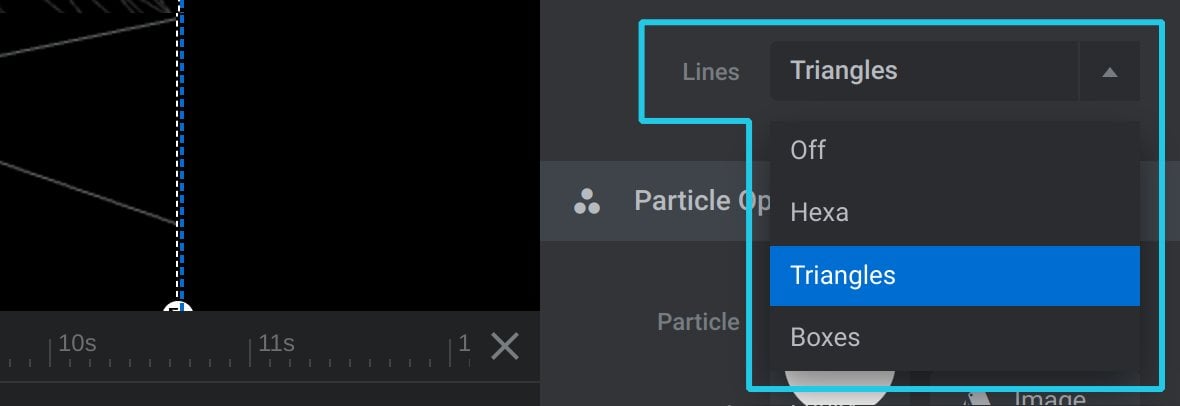
There are four settings to choose from.
Off
Use the Off setting if you don’t want any type of line or connection between points.
Note: If Lines is set to Off, particles are automatically turned on.
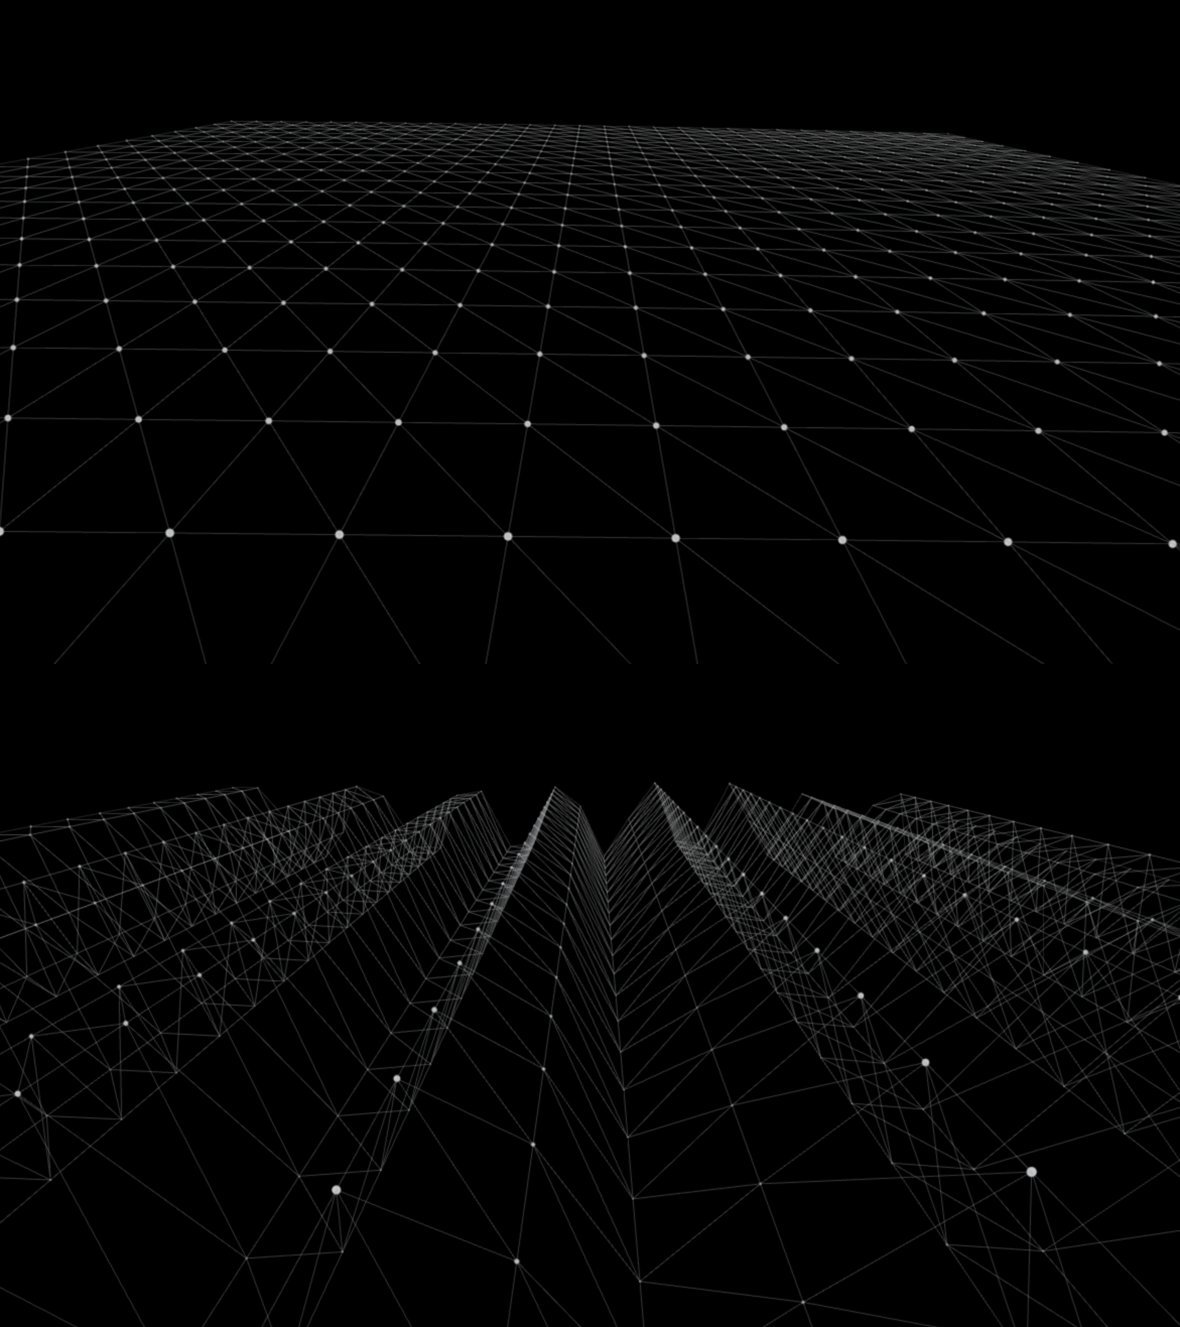
Hexa
The Hexa line type creates a wave out of hexagons, slotted together like in a beehive. In between the hexagons are points that can fluctuate up and down, creating an an abstract look like a field of pyramids:
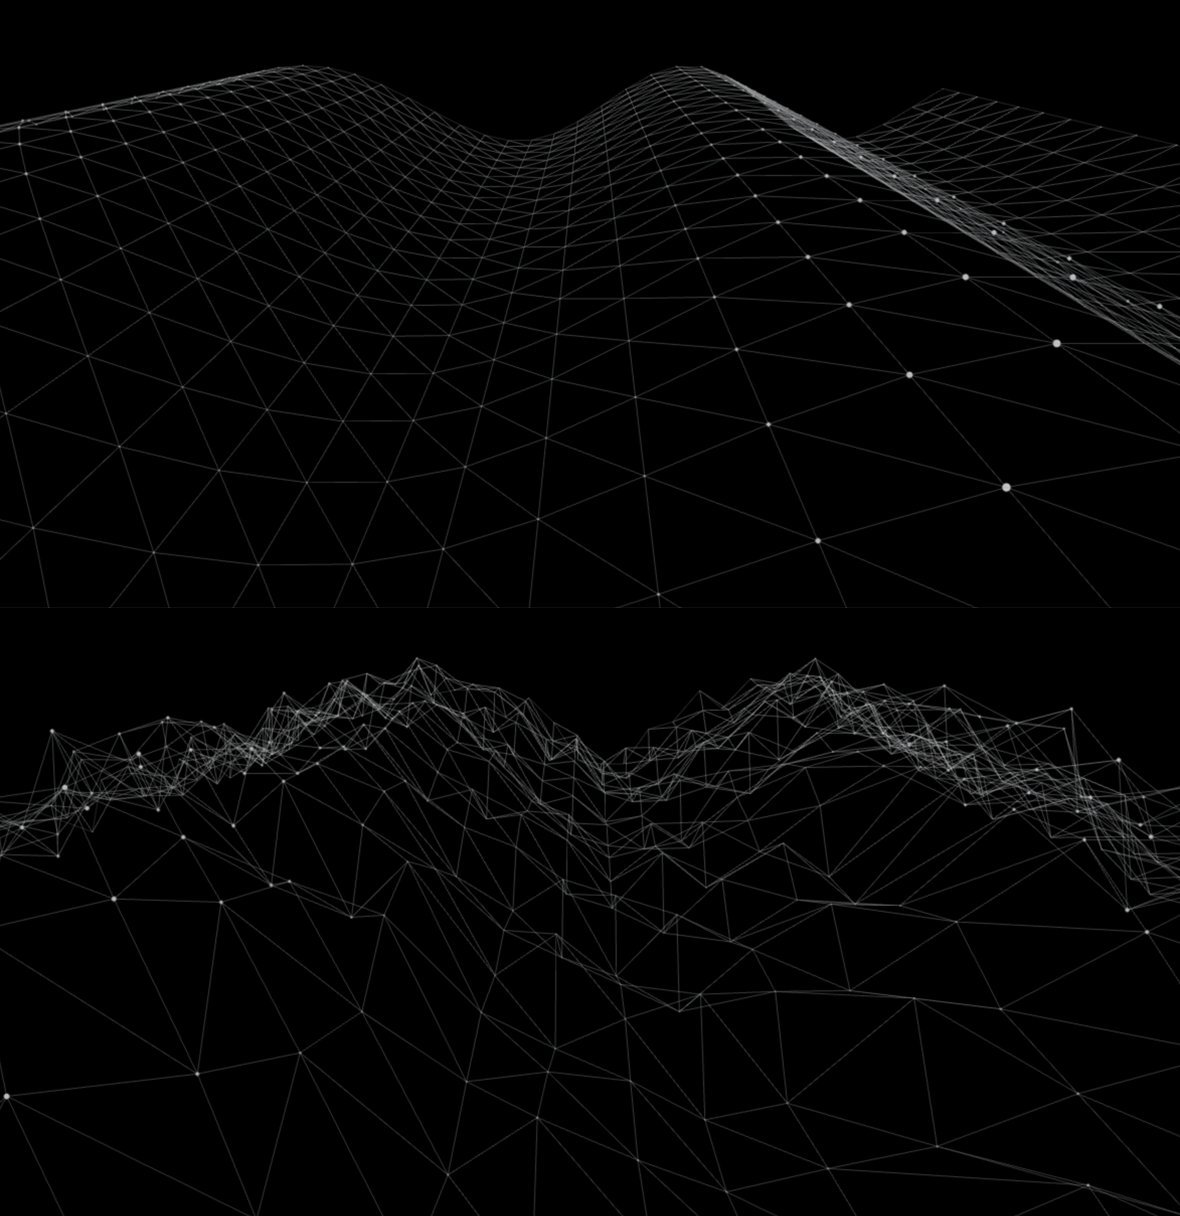
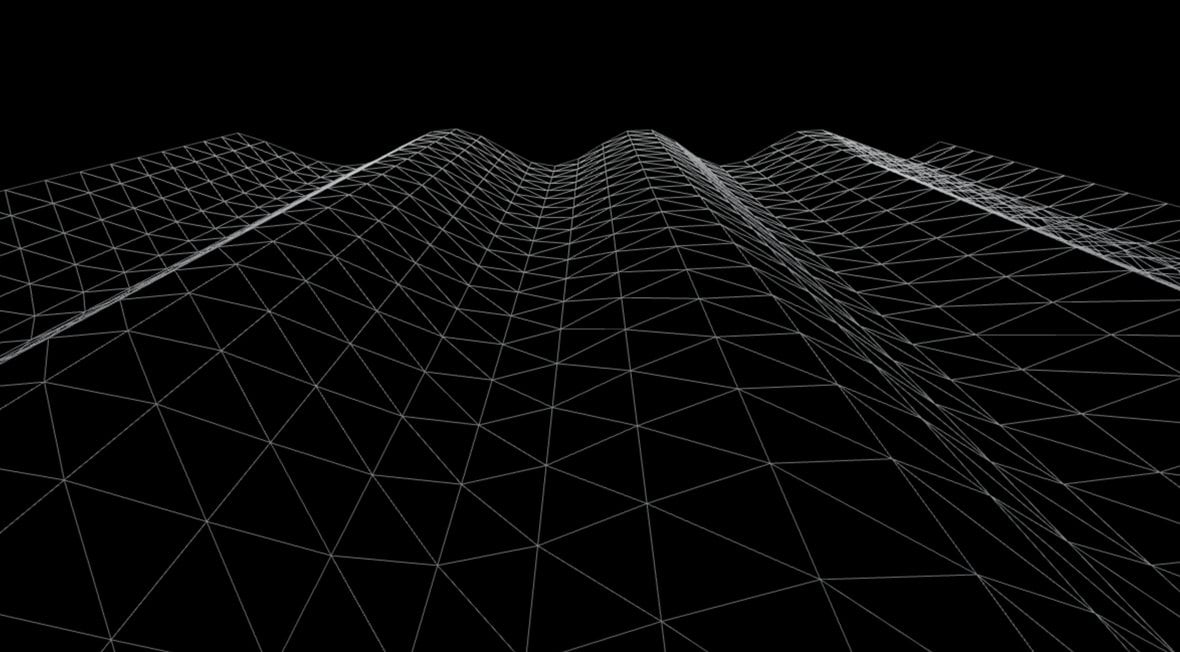
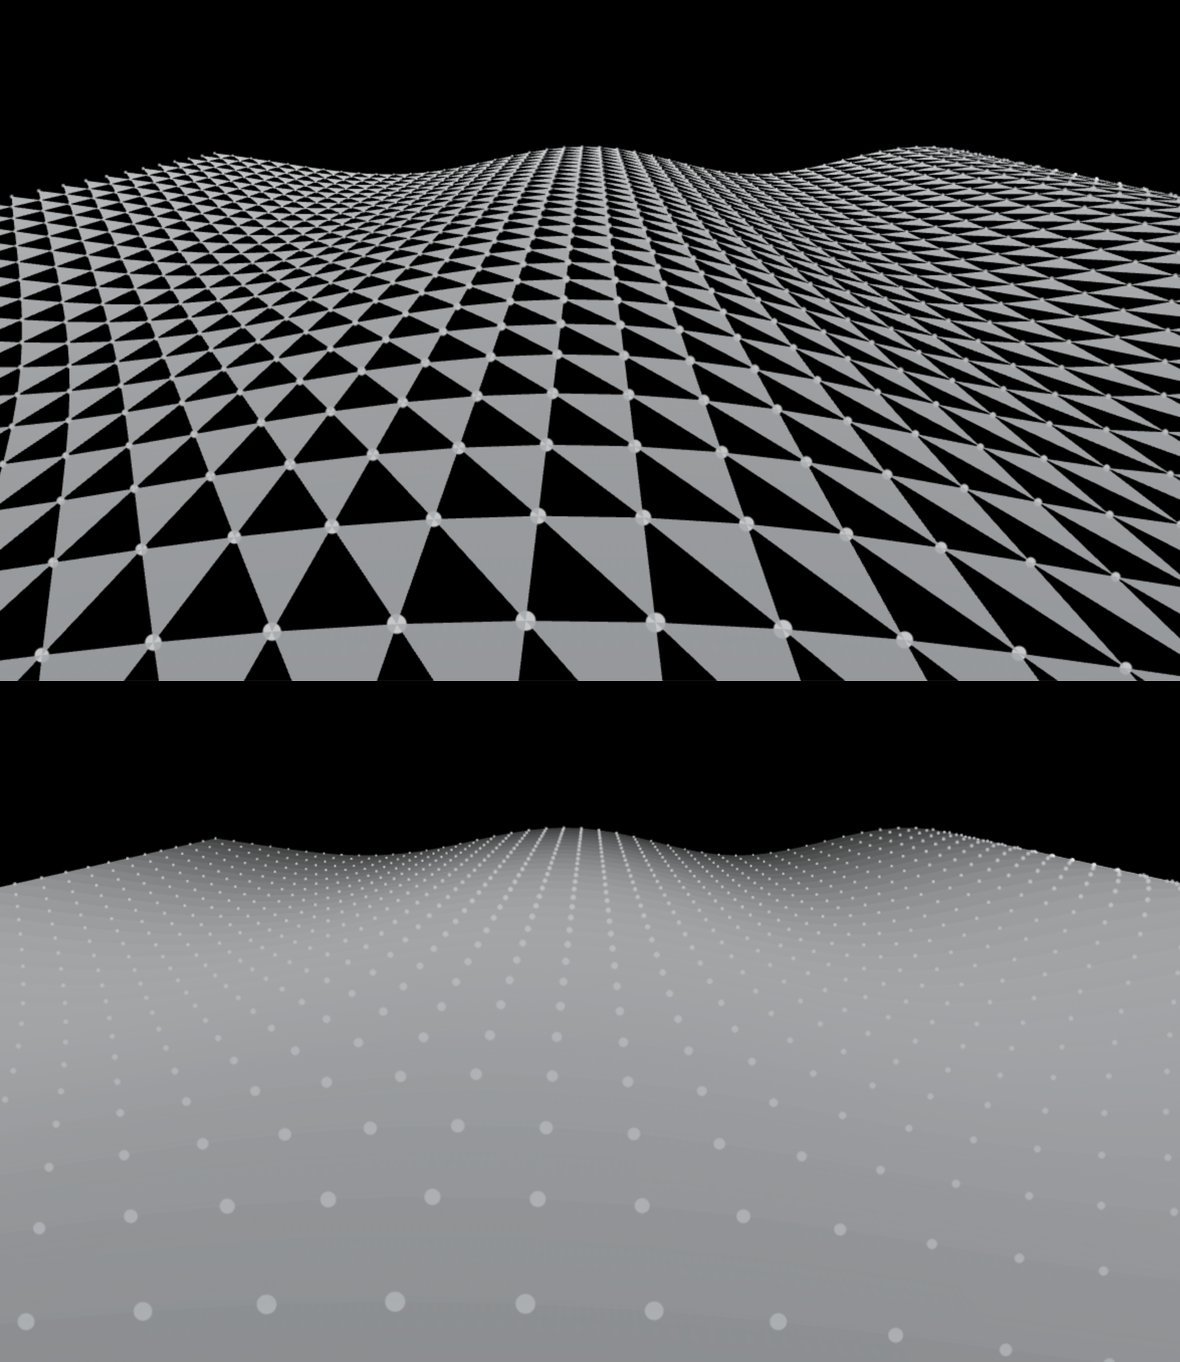
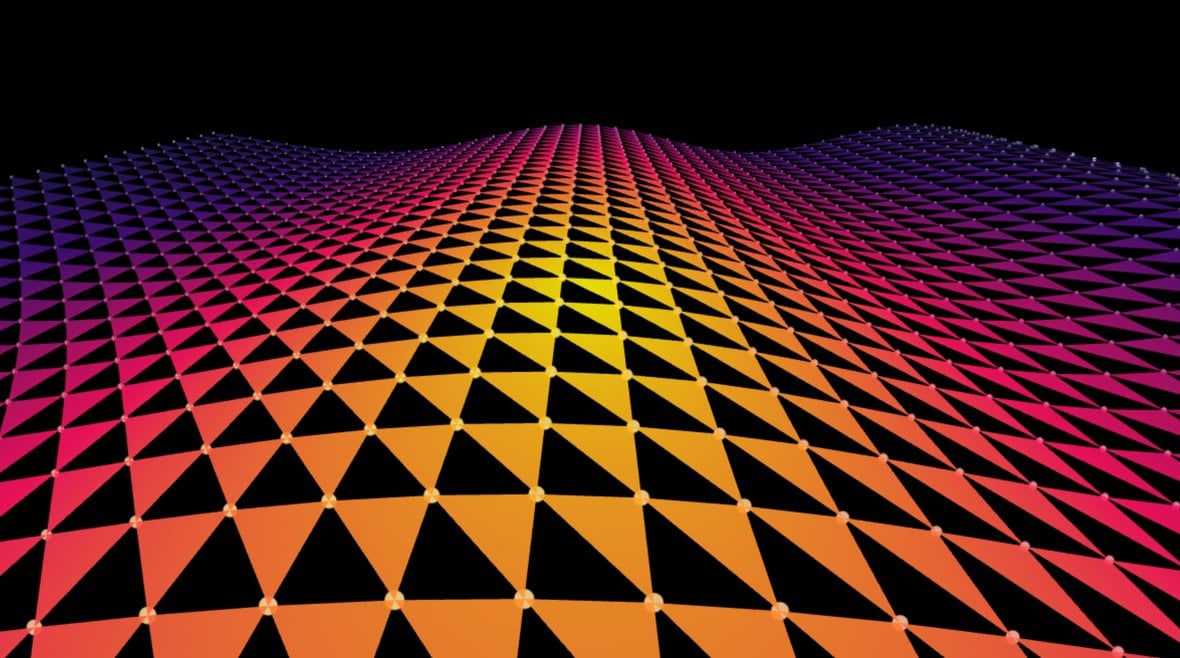
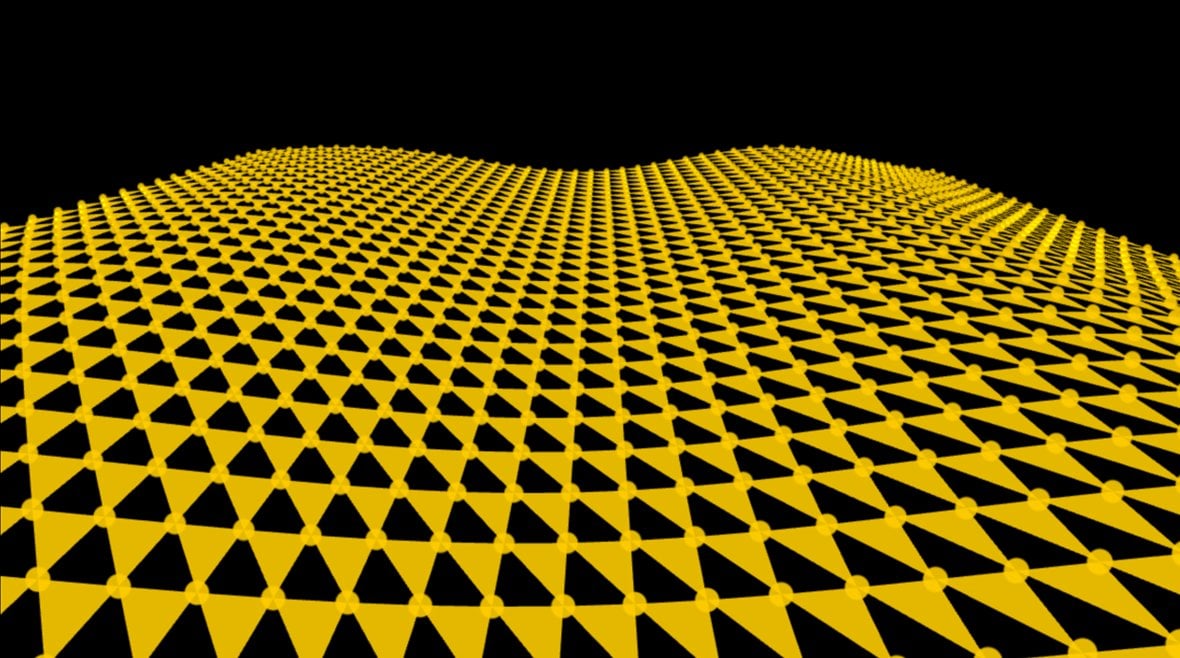
Triangles
Using the Triangles line style adds a pair of triangles between every set of four points:
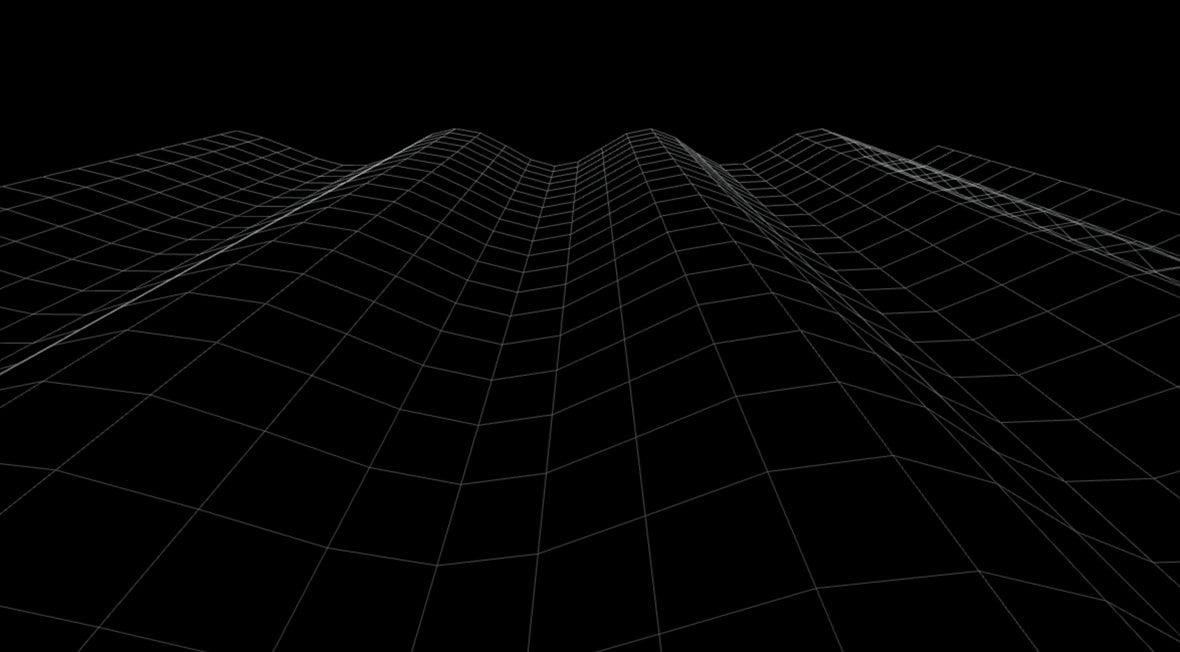
Boxes
The Boxes line style creates a square out of every set of four points:
Particle Options Panel
If the Lines option is set to anything other than Hexa, the Particle Options panel will appear below:
The Particle Options panel contains these options:
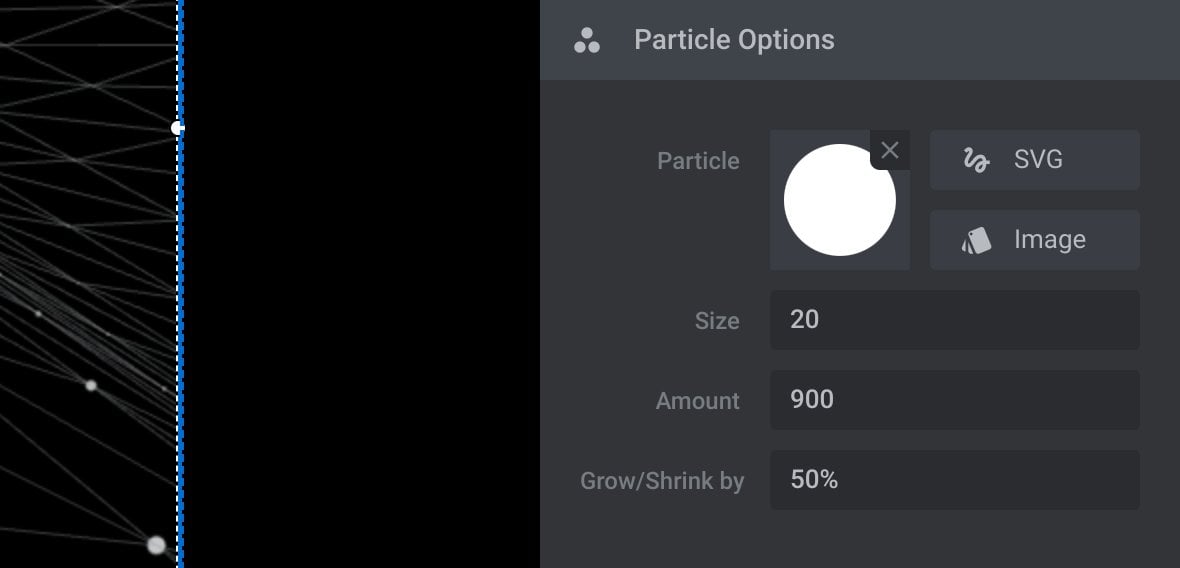
Particle
At the top of the Particle Options panel you’ll see the currently active particle graphic, which is a circle by default:

If you wish, here you can select a different graphic to display in the effect. There are two ways to do so.
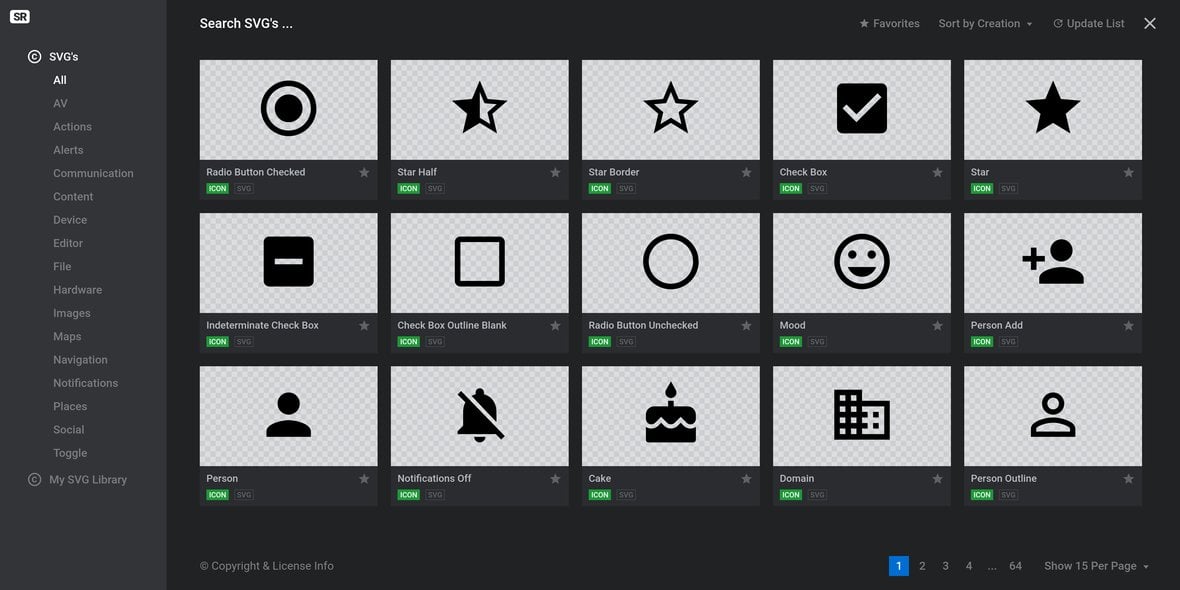
The first is to click the button labelled SVG:

This will open up a window with an additional 900+ SVG shapes to choose from for your particles:
The second way is to click the button labeled Image:

This will open the WordPress media library, which you can use to add your own custom graphic.
You’ll see a thumbnail of your selected graphic appear:

To remove a custom graphic and go back to the default circle, click the small X at the top right corner of the graphic.
Size
The Size option controls how large particles are in 3D space:

The value is set as a number between 5, representing the smallest size, and 500, representing the largest size:

Because a particle wave exists in 3D space, whatever the Size is set at, particles closer to the front will still appear larger than the particles towards the back.
Amount
The Amount option sets the number of points that will make up the wave:

The value is set as a number between 25 and 10,000. The higher the amount the larger the wave:
Whatever number you enter will be rounded to the nearest number that can make an equal sided grid.
For example, if you enter 25 a 5×5 grid will be created. But if you enter 30 the number will be rounded and you’ll still get a 5×5 grid.
The next number that would actually increase the size of the grid is 36, as it will create a 6×6 grid. After that is 49, which will create a 7×7 grid, and so on.
Grow/Shrink by
The Grow/Shrink allows you to determine the amount by which particles will grow at the top of the wave and shrink at the bottom of the wave as it undulates:

This option is set as a percentage, between 0% and 100%.
If given a value of 0%, particles will stay at their default size throughout undulation. They will still appear to change in size as part of generating the effect of depth in 3D space however.
If given a value of 100% they will grow substantially at the top of the wave, then shrink down to nothing at the bottom of the wave:
Connection Options Panel
In the Connection Options panel you can configure the lines and fills that connect the wave’s particles together:
It can contain the options:
Hexa Shifter
The Hexa Shifter option allows you to set how far the points across the field of hexagons are raised:

It is set as a number between 0, the default, and 10, the maximum amount the point can be shifted:
Note: The Hexa Shifter option only appears if the Lines option is set to Hexa.
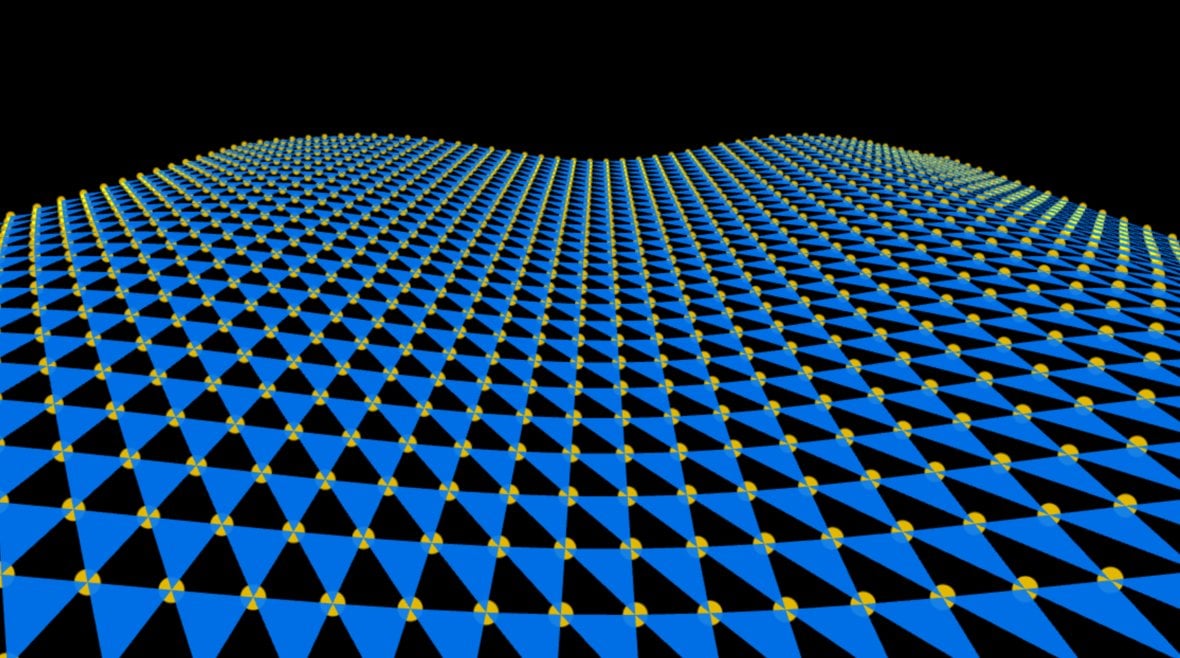
Fill
Toggle Fill to ON to add a fill color or gradient to triangle or box shapes:

If using the Triangles line type, one in each pair of triangles will be filled, and if using the Boxes line type all the boxes will be filled:
The color of the fill is determined by the options in the Color Settings panel, which we will go through shortly.
Note: The Fill option will not appear if the Lines option is set to Hexa.
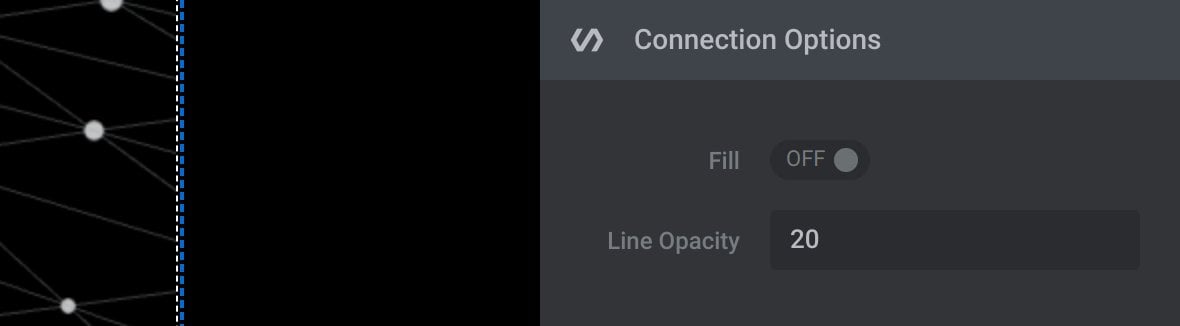
Line Opacity
The Line Opacity option allows you to set how transparent your lines should be:

It’s set as a number between 5, the most transparent, and 100, completely solid:
Note: The Line Opacity option only appears if the Lines option is set to Triangles or Boxes.
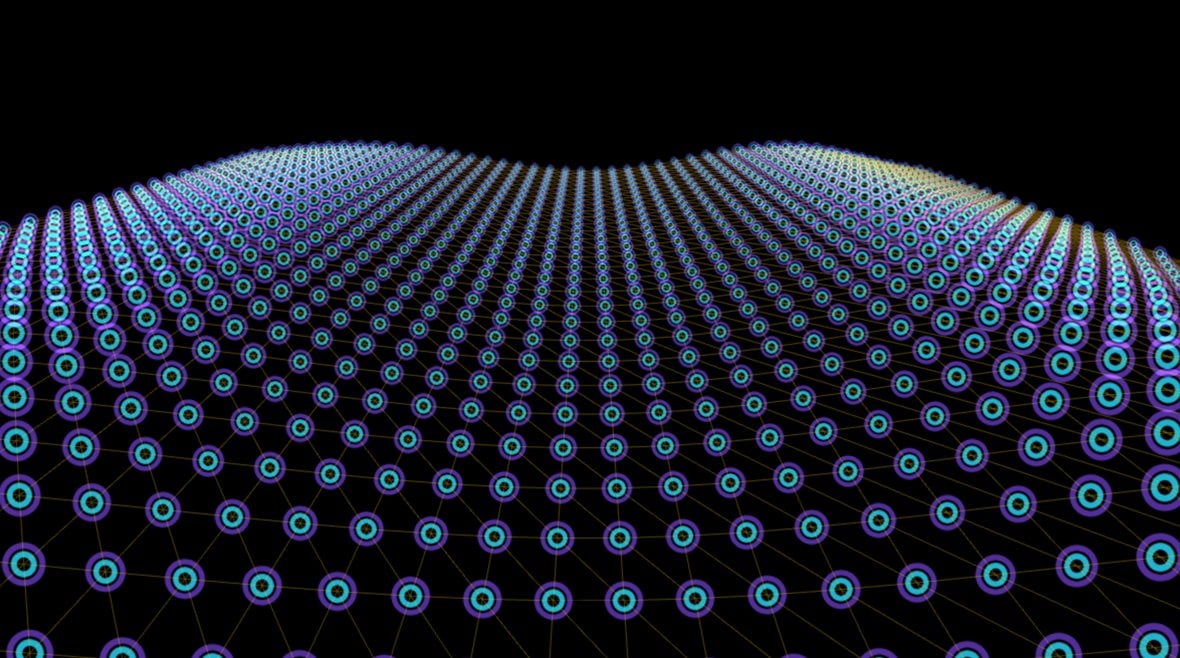
Color Settings Panel
In the Color Settings panel you can control the colors of the particles, lines and fills used in your wave:
The Color Settings panel can contain these seven options:
Options
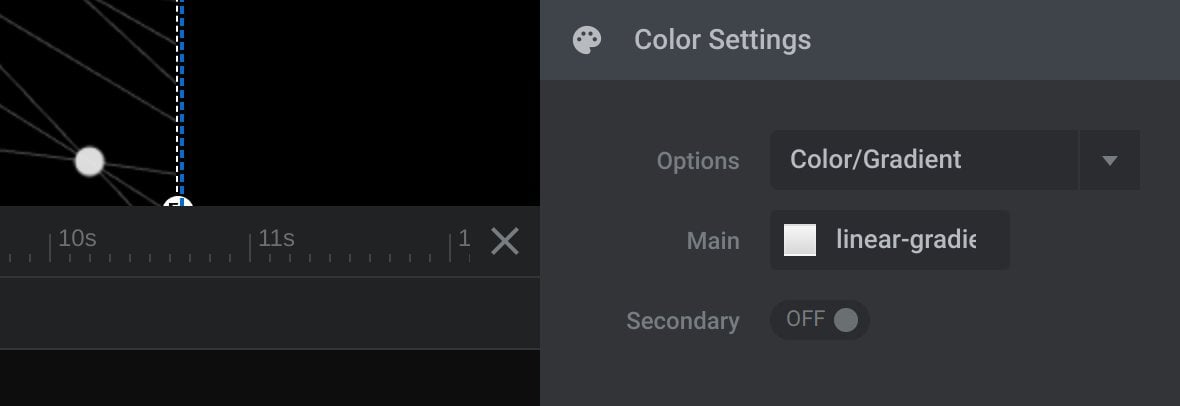
Use the Options dropdown to choose from three ways to manage the colors in your wave:
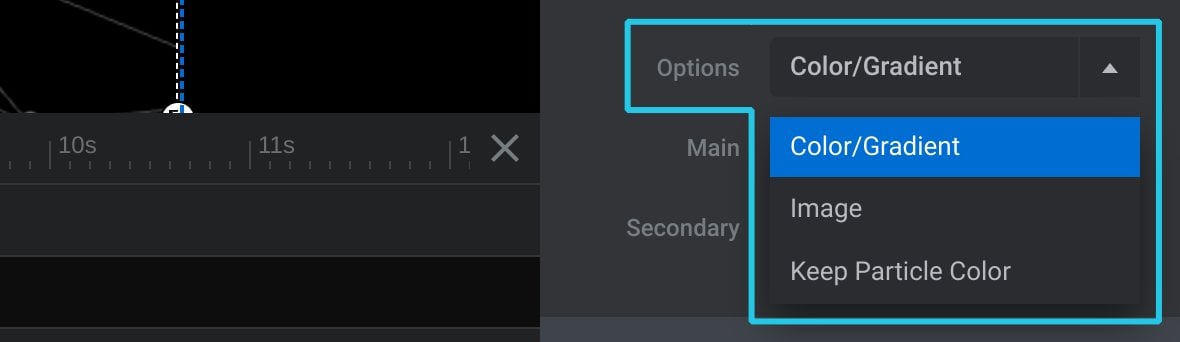
Choose Color/Gradient to set a flat color or gradient across the wave:
Choose Image and you can apply any image of your choosing across the entire wave:
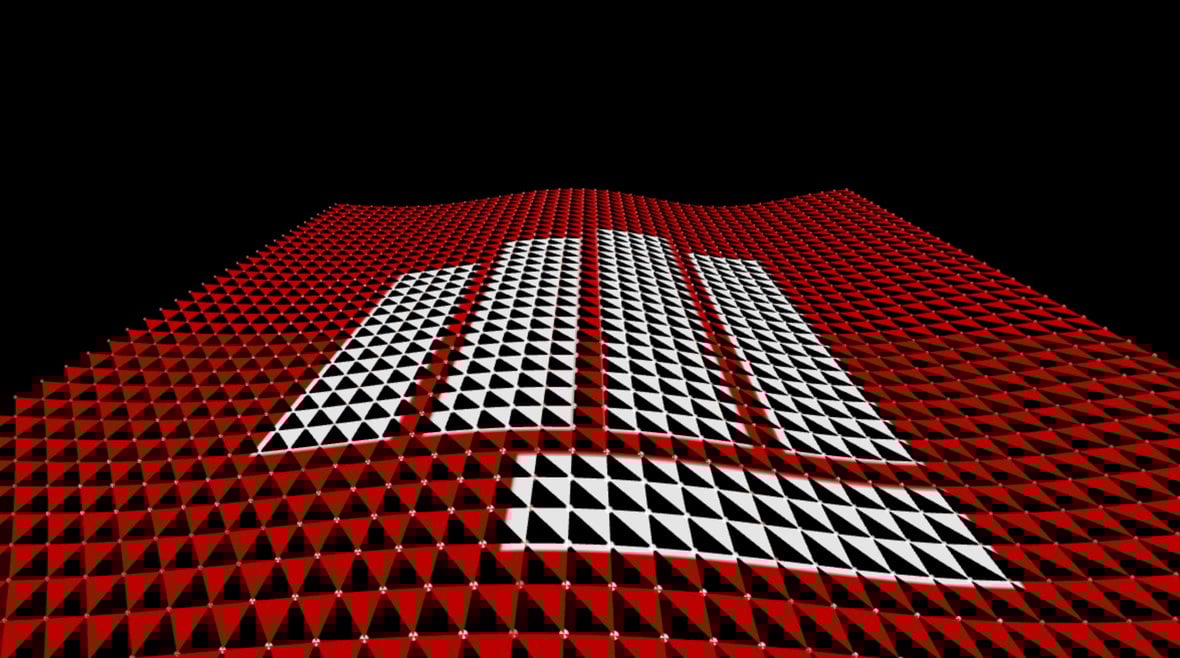
If you choose Color/Gradient or Image, particles will be tinted by the color or image you choose:
However if you want your particles to retain the original color, as per the source SVG file, you can instead choose Keep Particle Color:
In this case, the lines and fills will be retain whichever color or image was applied to them most recently, so be sure choose how you want them to be colored before switching to Keep Particle Color.
Main
If Options is set to Color/Gradient, an option named Main will appear:

Use this option to set the main color for your wave. By default it will color your particles, lines and fills:
Secondary
If Options is set to Color/Gradient or Keep Particle Color, an option named Secondary will appear:

Toggle this option to ON if you’d like your lines and fills to have a different color to your particles.
Lines/Fill
If the Secondary option is toggled to ON you’ll see an option named Lines/Fill:

Use the Lines/Fill option to apply a color to your wave’s lines and fills, leaving your particles colored separately:
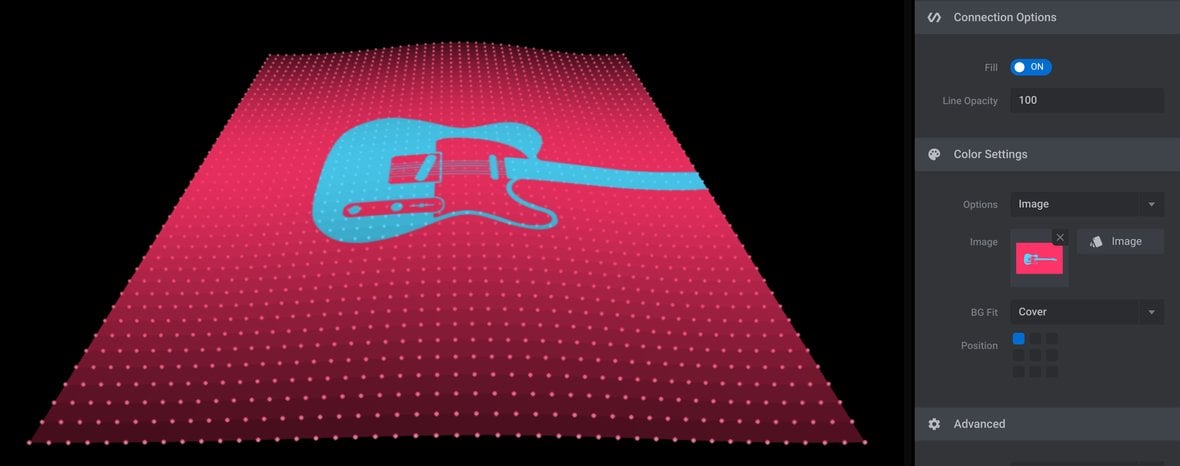
Image
If Options is set to Image, another option named Image will appear:
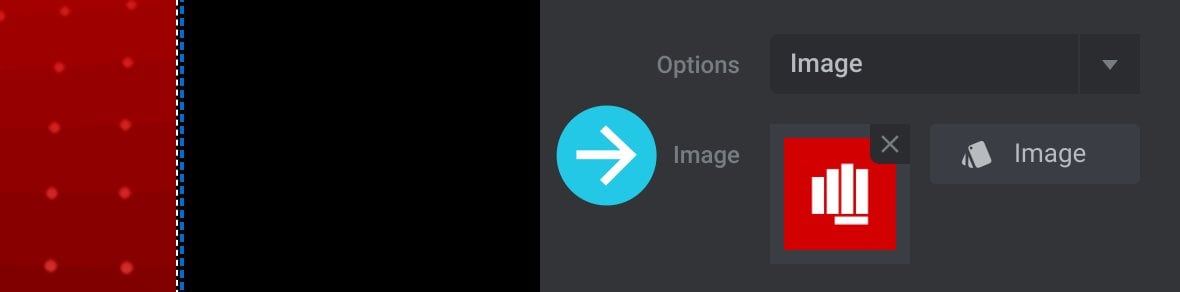
Click the button labeled Image to open the WordPress media library and select an image to apply to your wave.
You’ll see a thumbnail of your selected image appear:
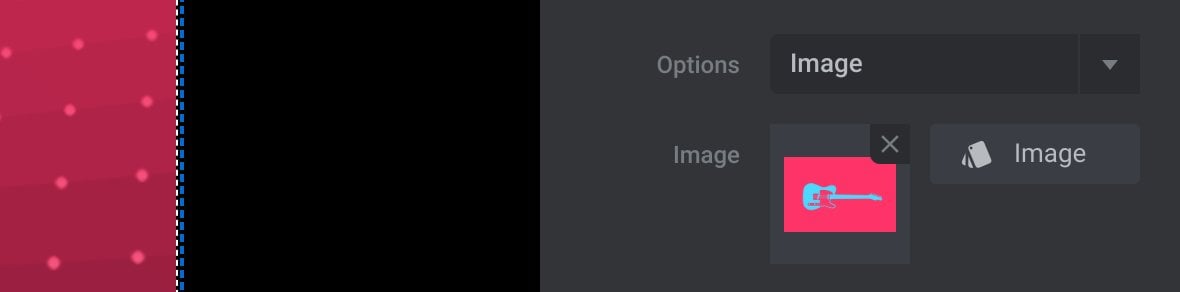
To remove a custom image, click the X button in the top right corner of the thumbnail:
BG Fit
If Options is set to Image, an option named BG Fit will appear:
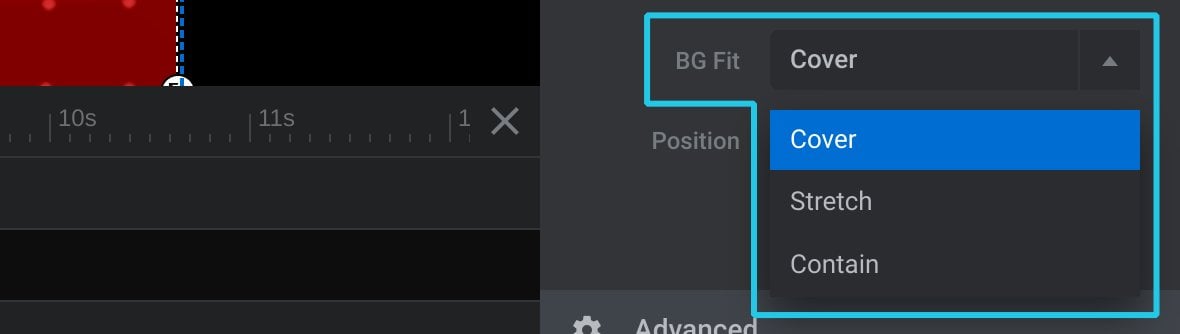
This option controls how the image spreads itself across the wave.
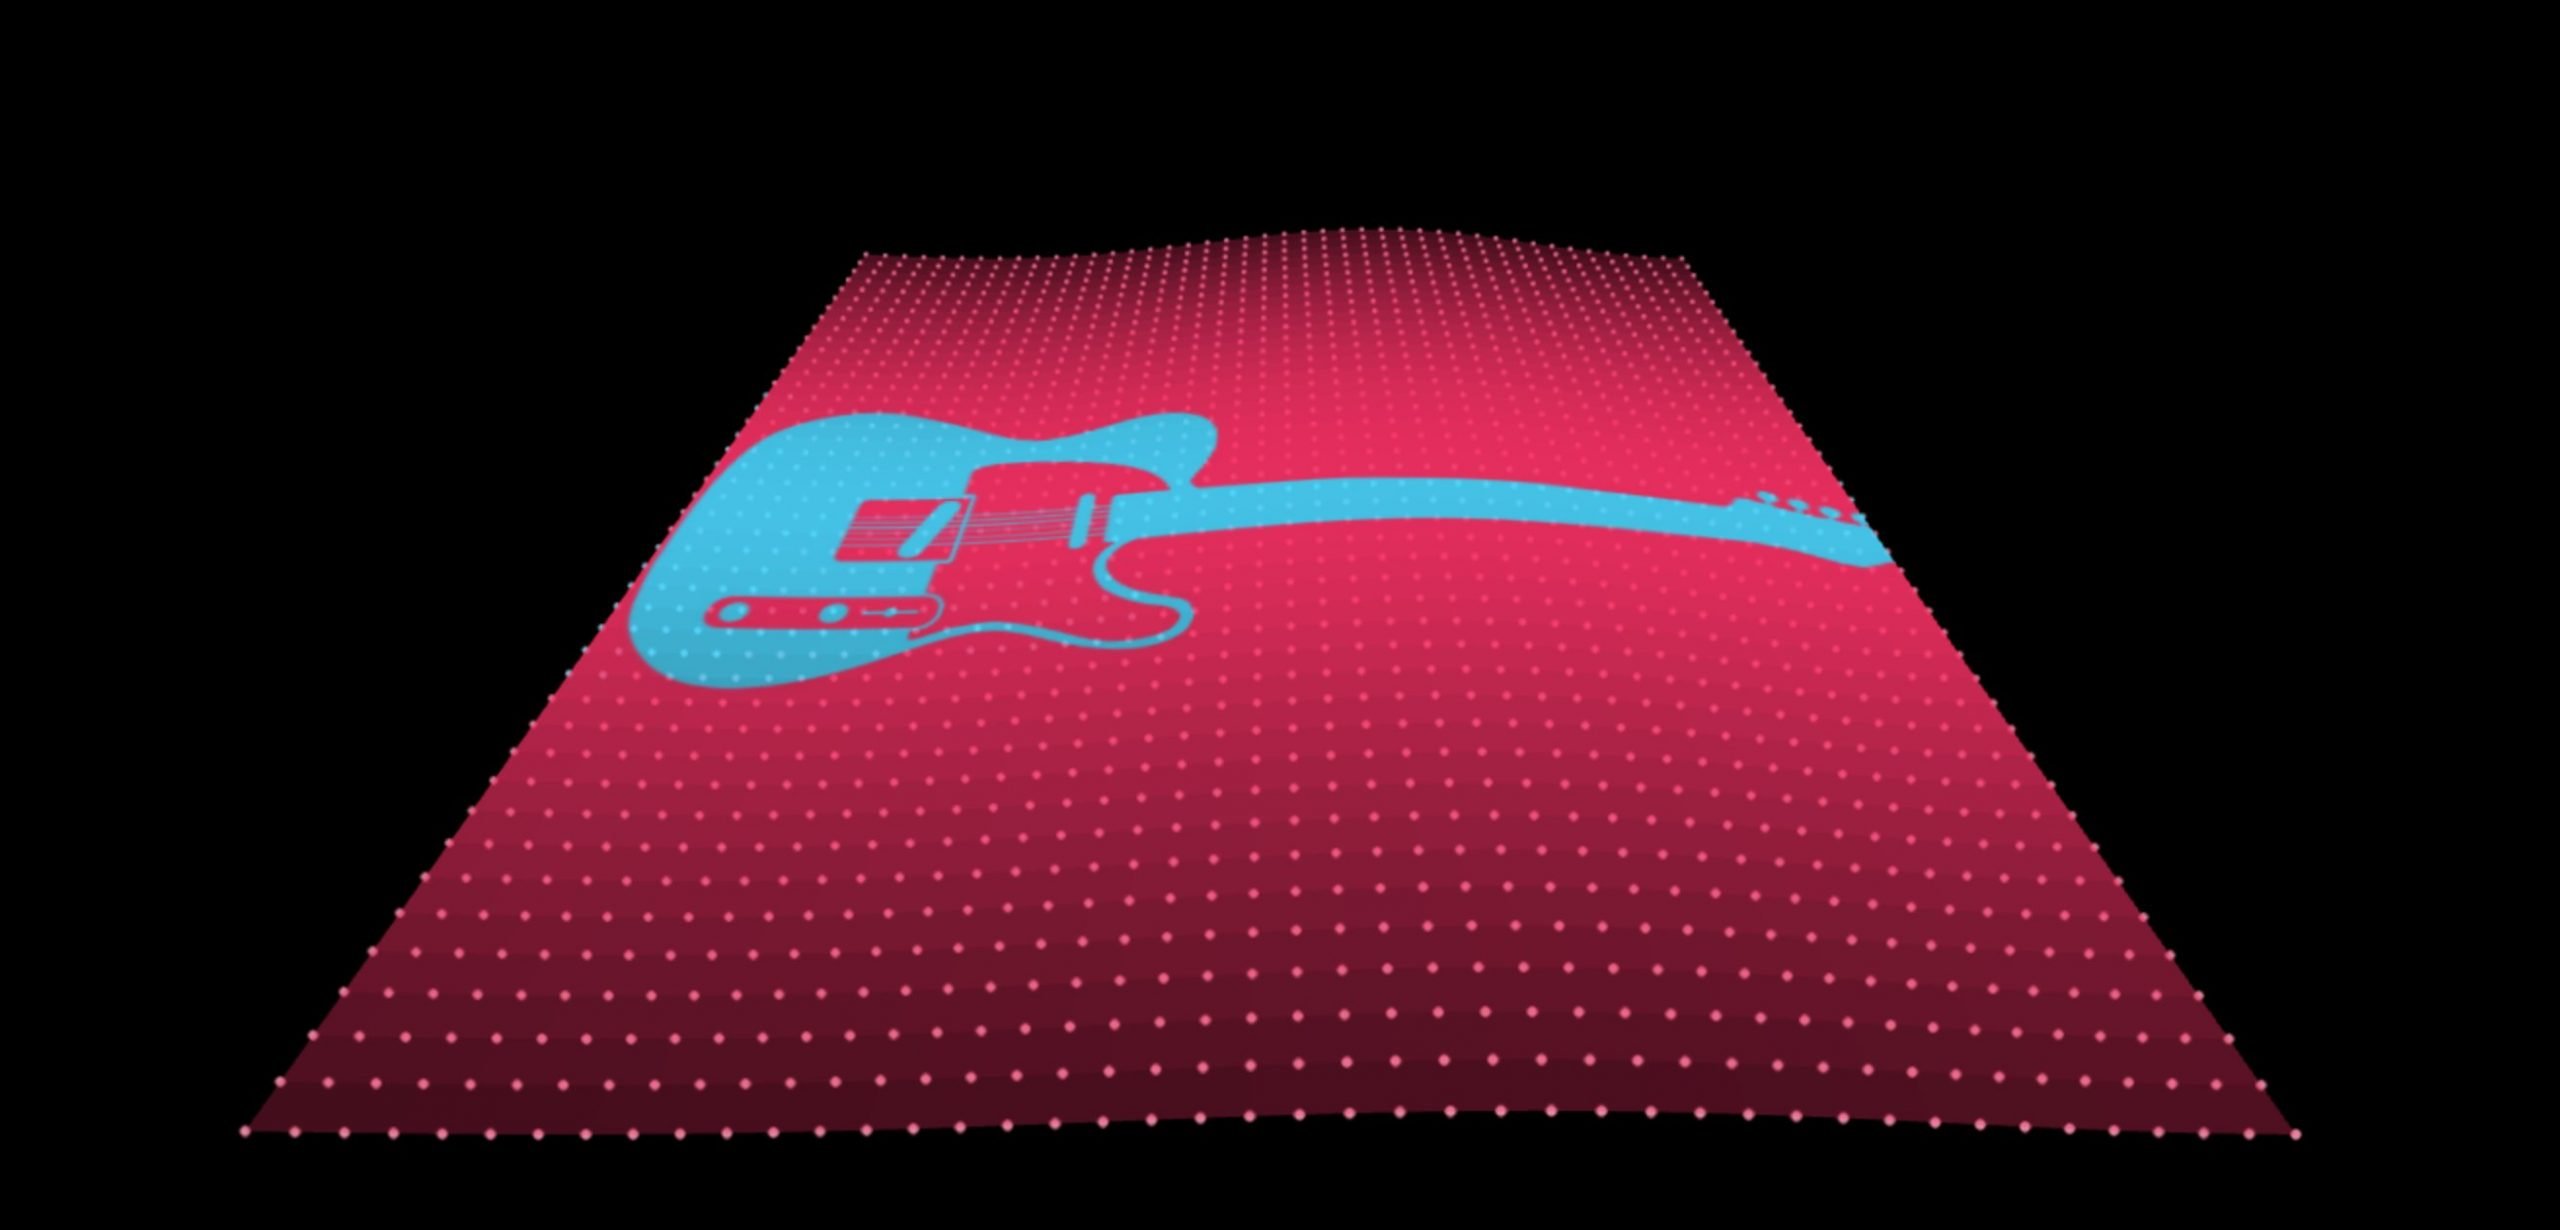
Choose Cover to keep the aspect ratio of the image and cover the whole wave with it, even if a portion of the image might be clipped:
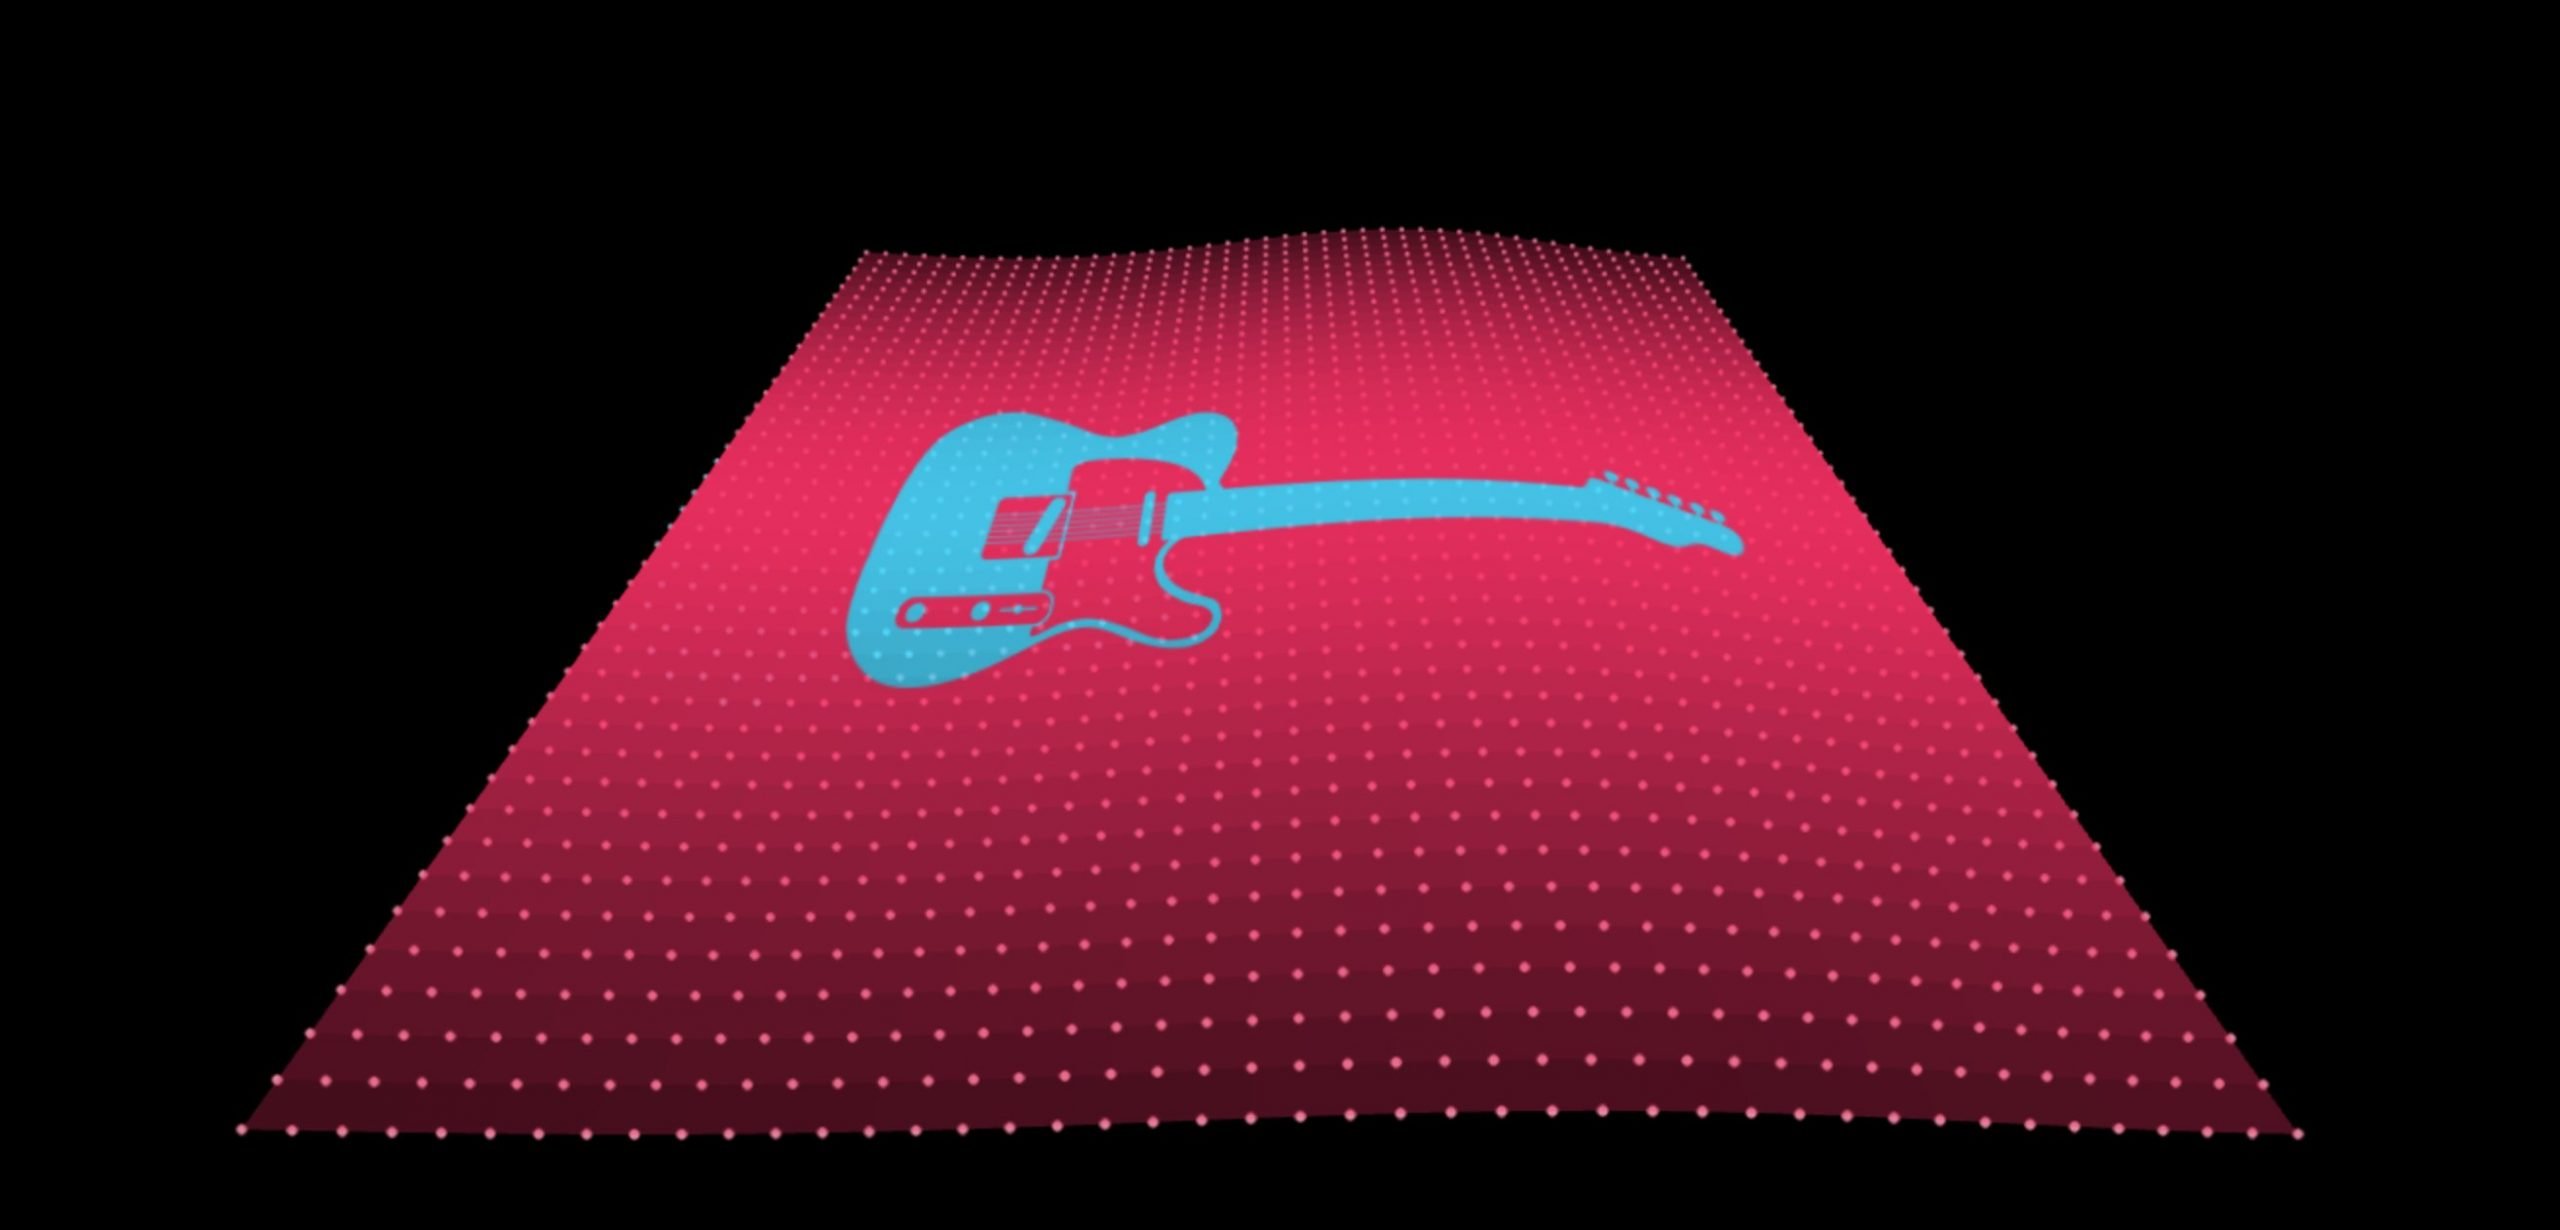
Choose Stretch to ignore the aspect ratio of the image and stretch it to fit the exact size of the wave:
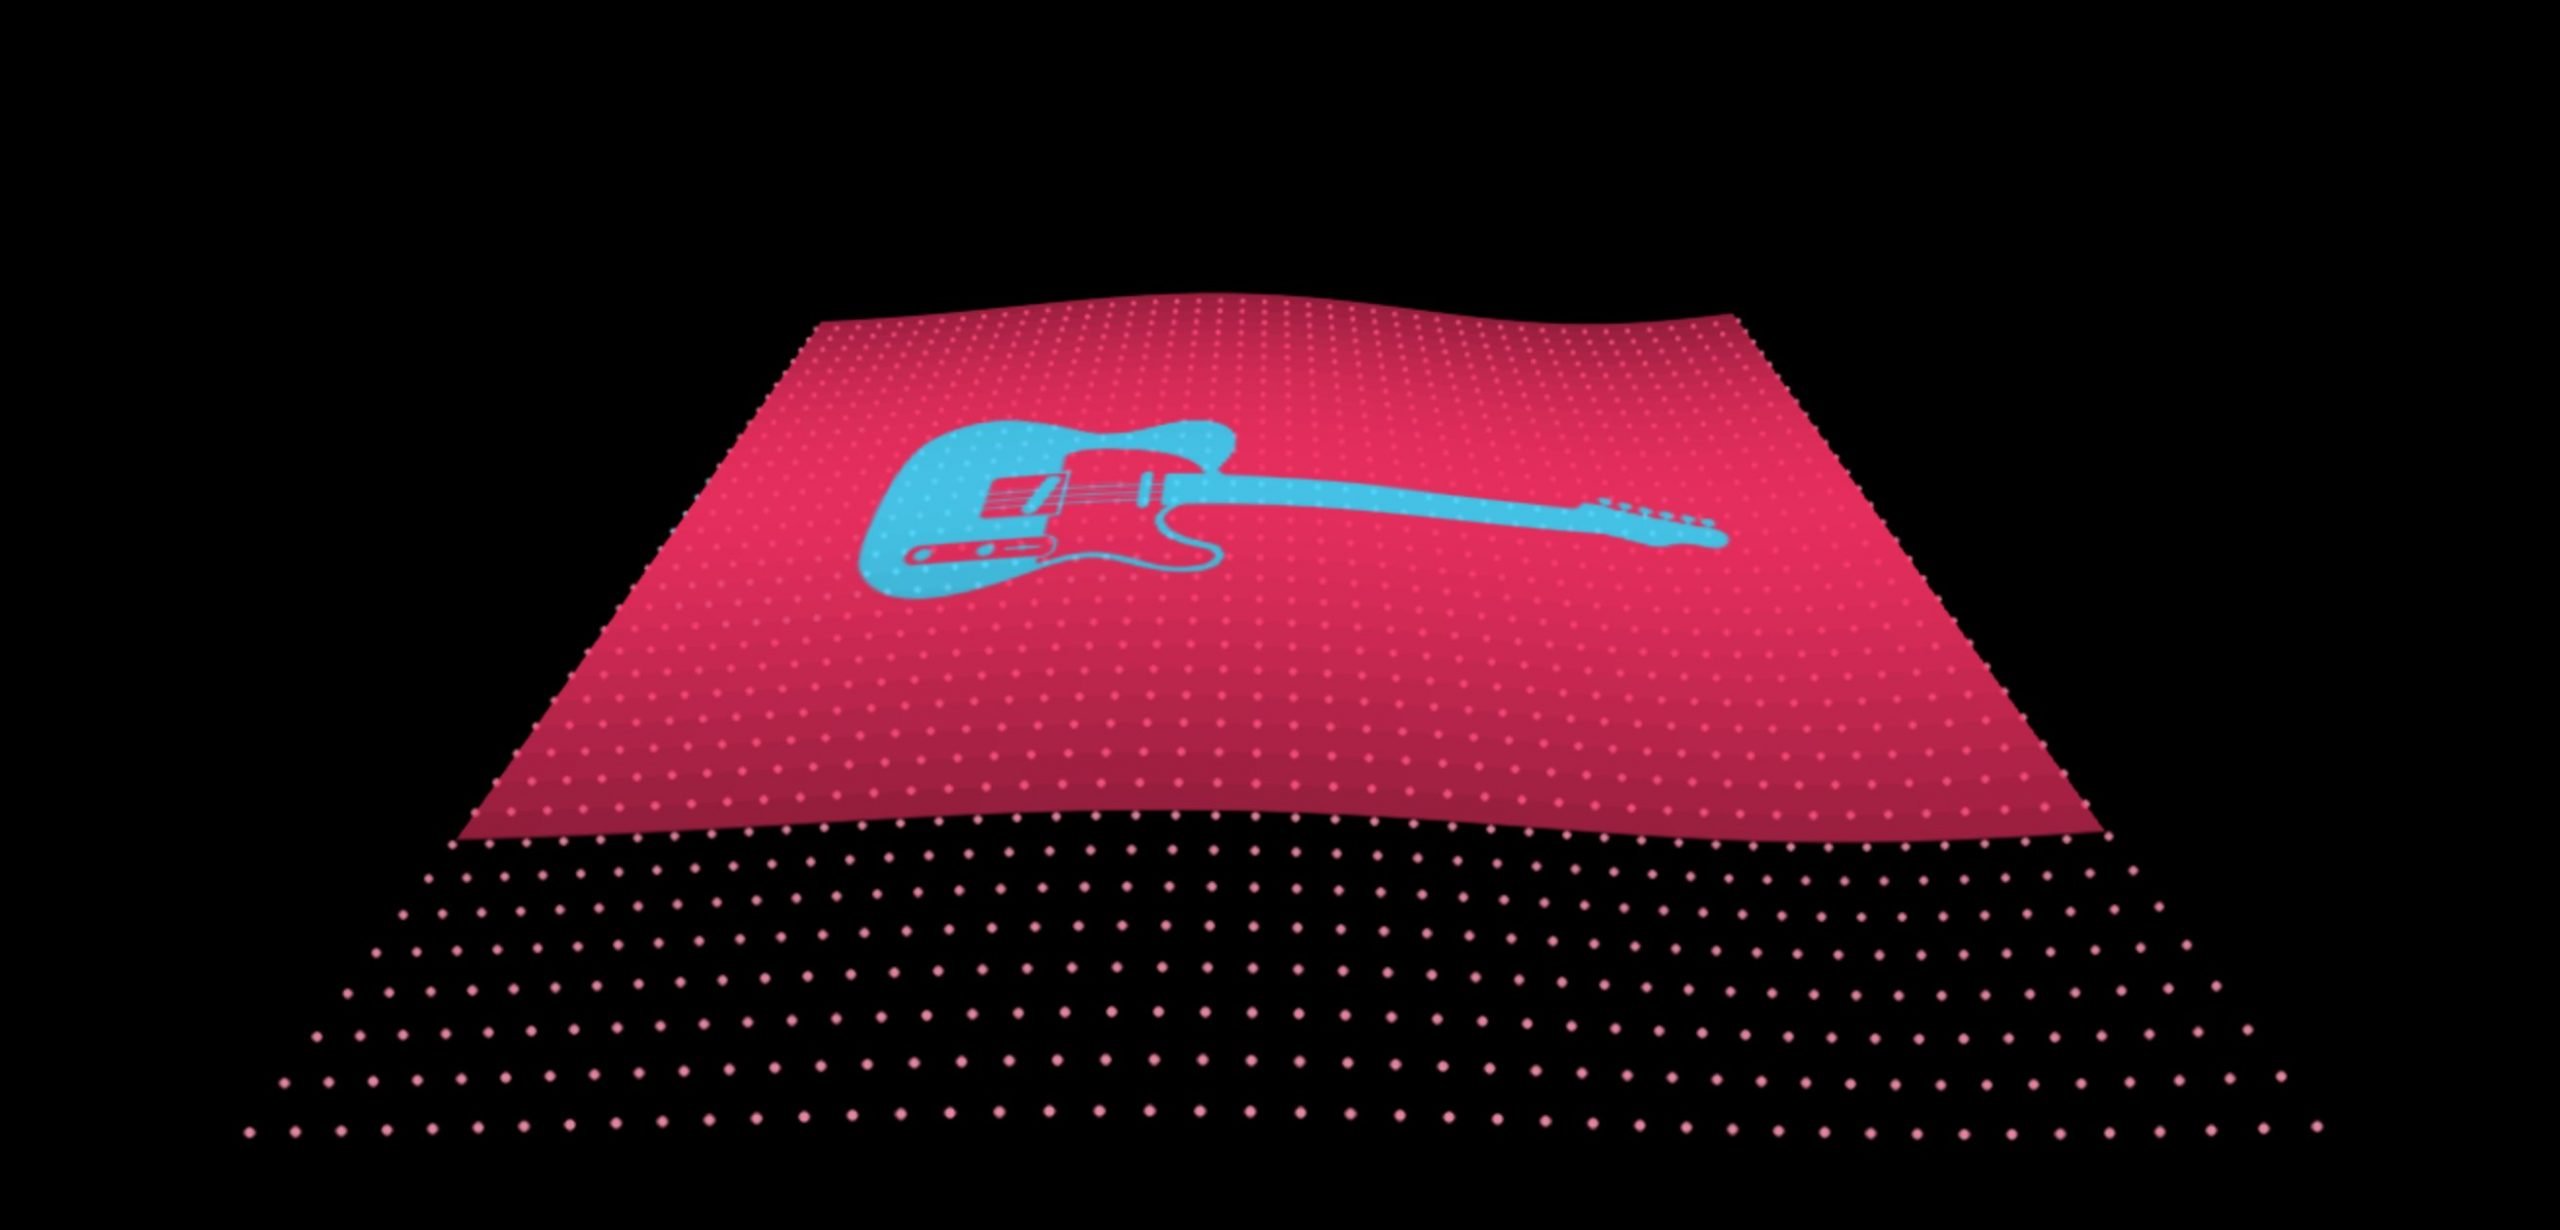
Choose Contain to keep the image’s aspect ratio, but scale it to fit inside the wave without clipping any part of the image. The image will be aligned with the top edge of the wave:
Position
If Options is set to Image and BG Fit is set to Cover, an additional option named Position will appear.
The Position option is represented by a 3 x 3 grid. The grid corresponds with the corners, edges and center of the wave:

Because an image set to Cover will usually be clipped, the Position option allows you to set the image’s alignment, and thereby control which side(s) will be clipped.
For example, to clip the bottom and right edges, set the image’s position to the top left:
Advanced Panel
The Advanced panel contains just the one option, Blending Mode, as described below.
Blending Mode
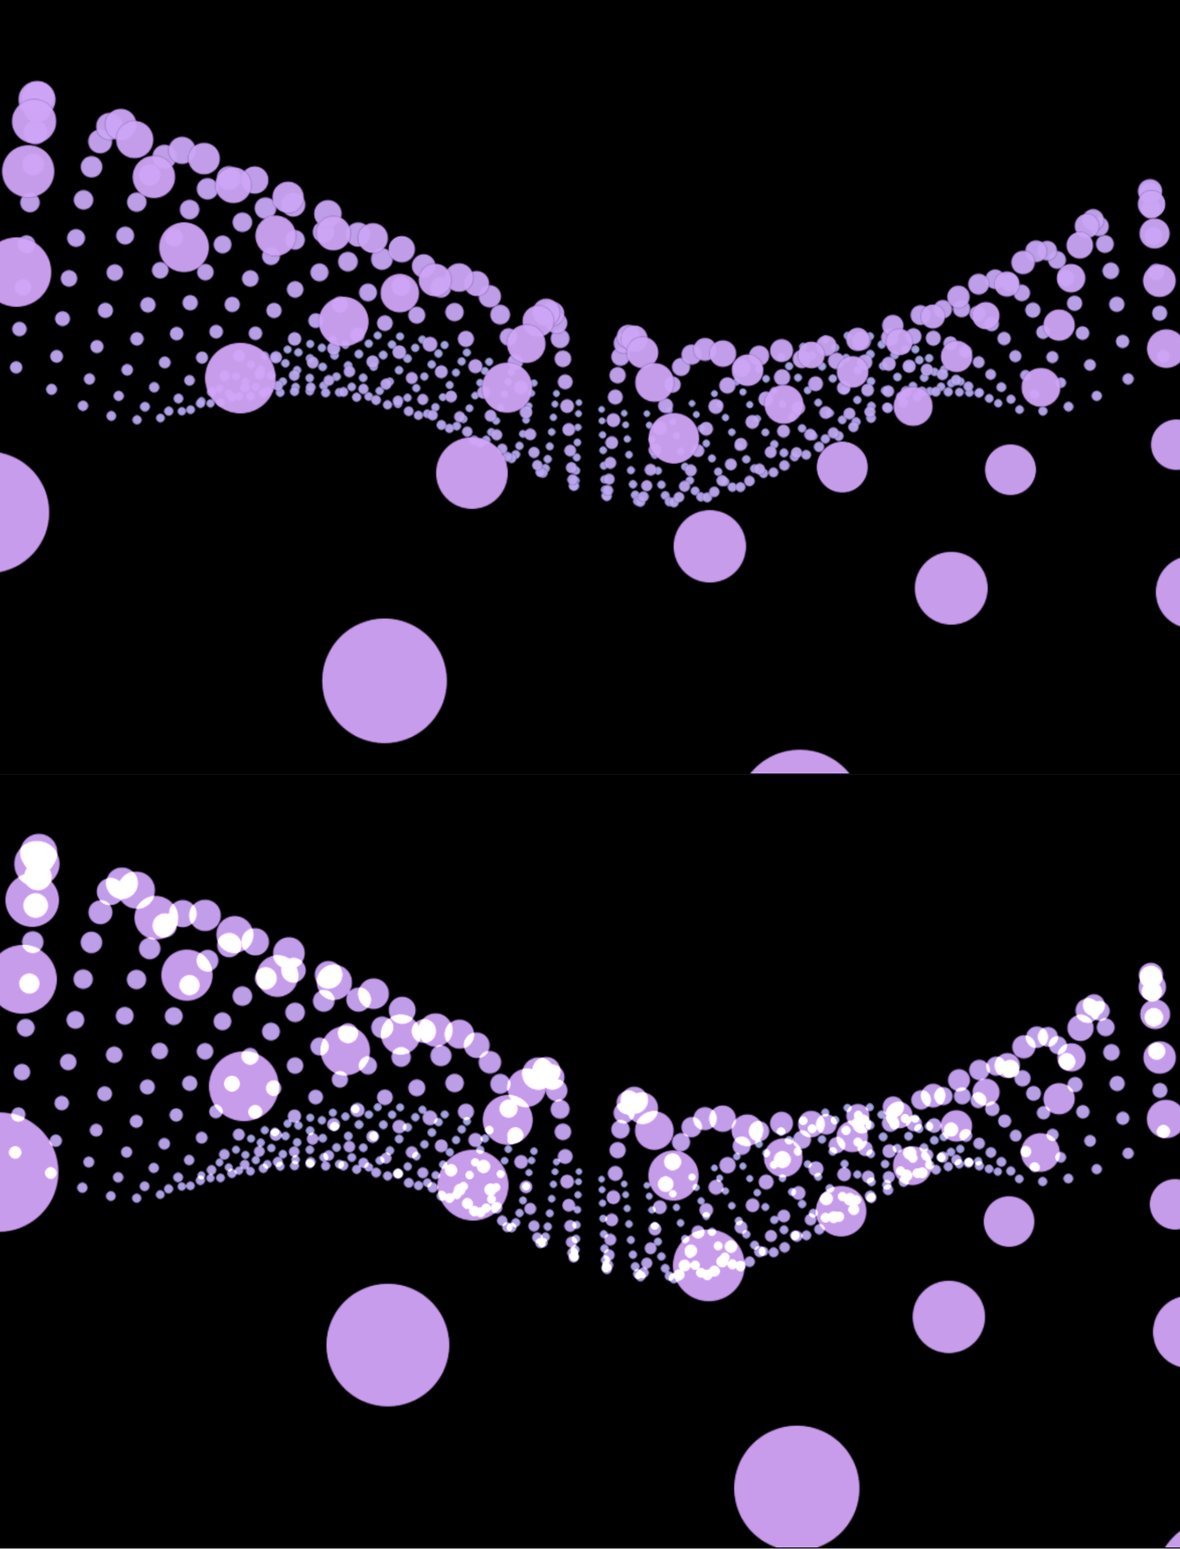
The Blending Mode option allows you to choose how particles should blend with one another when they overlap. There are three possible options:
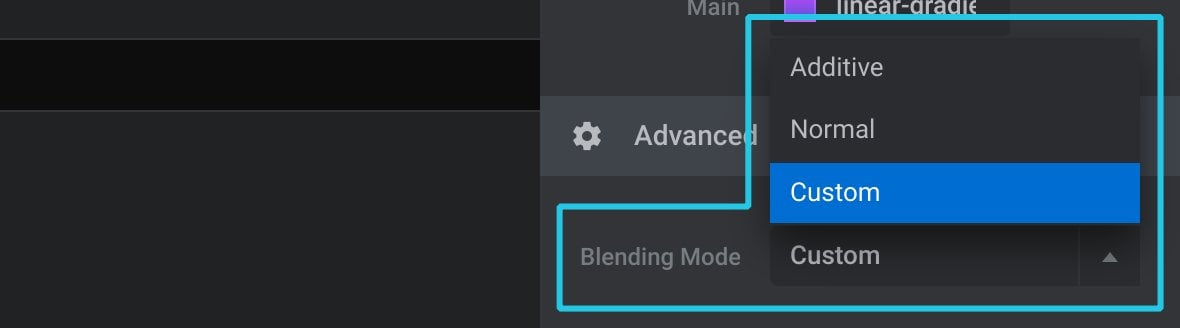
Selecting Normal or Custom will both leave your particle colors largely unchanged when they overlap, with only a very subtle difference between the two settings. However the Additive setting will substantially lighten the color of particles when they overlap:
Scene
The Scene category of options allows you to configure a particle wave’s scene:
Every particle wave has a scene, which is a kind of container in which the particle wave sits. You can think of it as a bubble of 3D space dedicated solely to displaying that particle wave.
Inside the Scene is the particle wave itself, and a virtual camera that views the wave. Both the scene and the camera can have their angles manipulated to alter what we see of the wave.
Some of the options in the Scene category may be shown or hidden depending on the setting of the Animation option, found under the Motion category, Animation Settings panel:
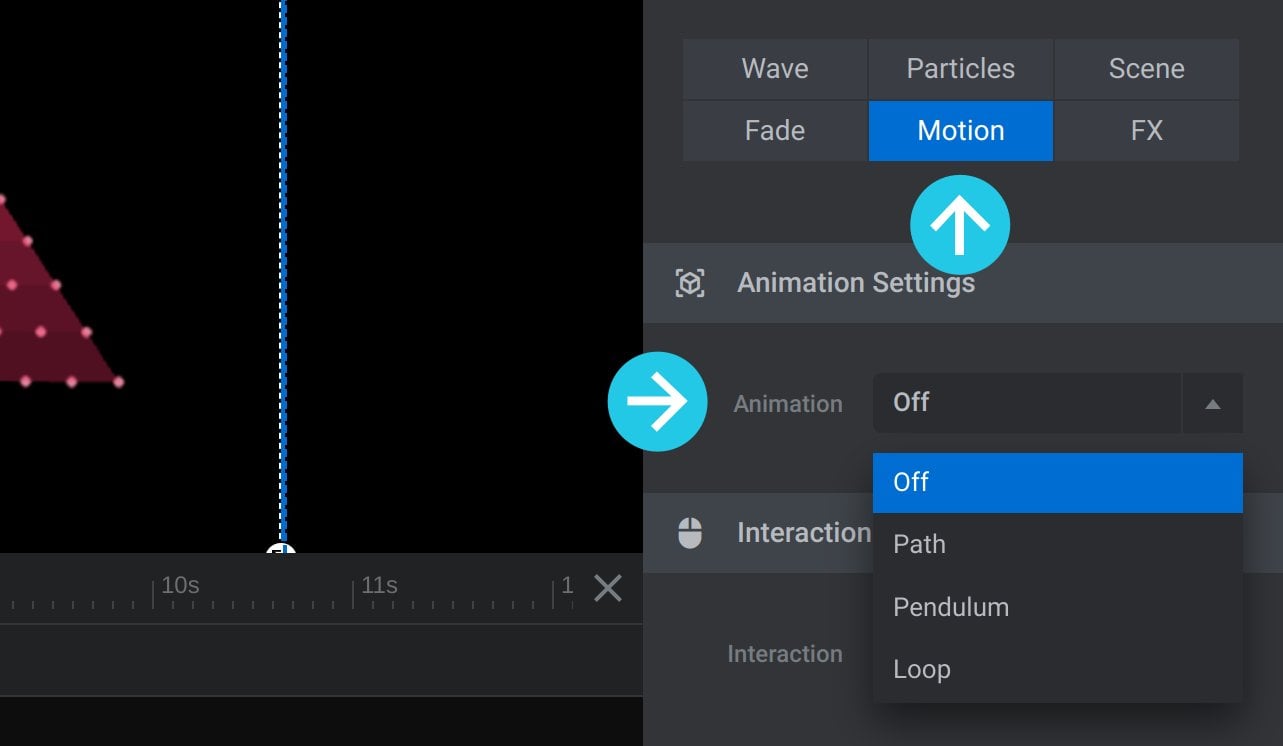
The effect of this setting on which Scene options are visible will be detailed in the sections below, wherever you see the heading “Visibility Note:”.
The panels that can be present in the Scene category are:
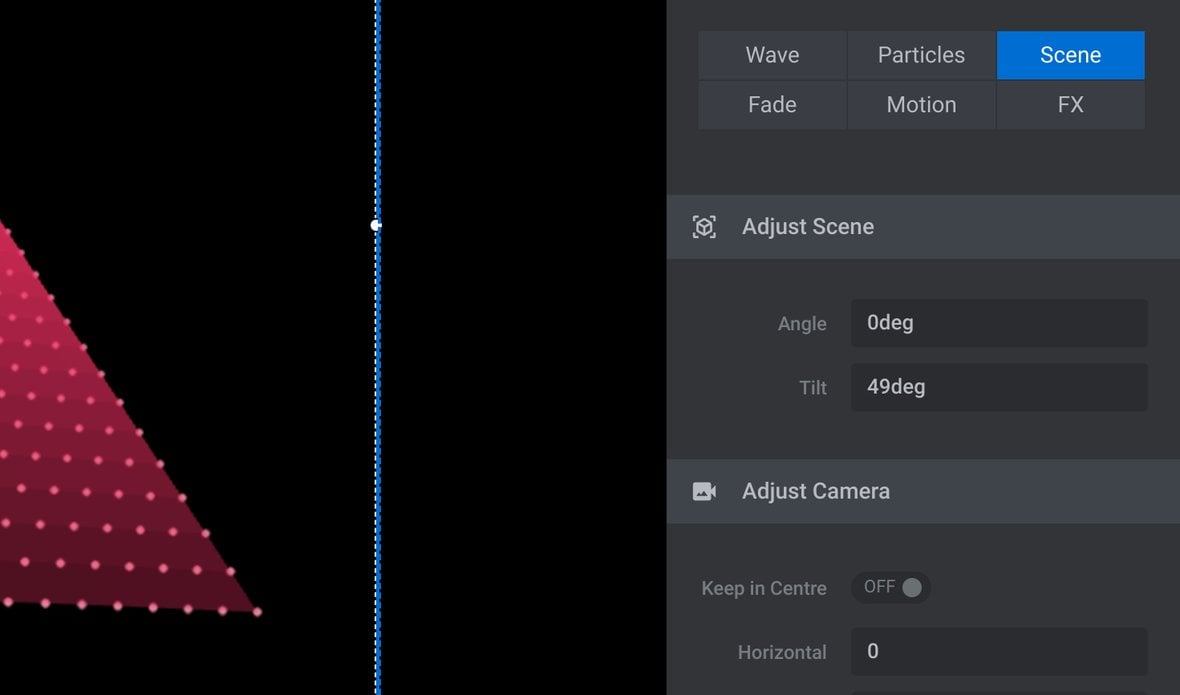
Adjust Scene Panel
In the Adjust Scene panel you can control the positioning of a particle wave’s scene:
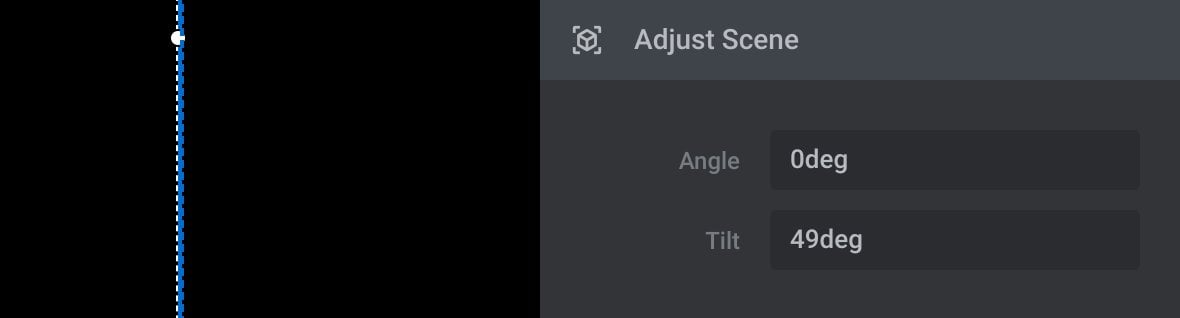
Visibility Note:
The Adjust Scene panel will be fully visible if Animation is set to Off, but hidden completely if Animation is set to Path or Loop.
If Animation is set to Pendulum you won’t see the Adjust Scene Panel heading, but the options it usually contains, Adjust and Tilt, will still be visible.
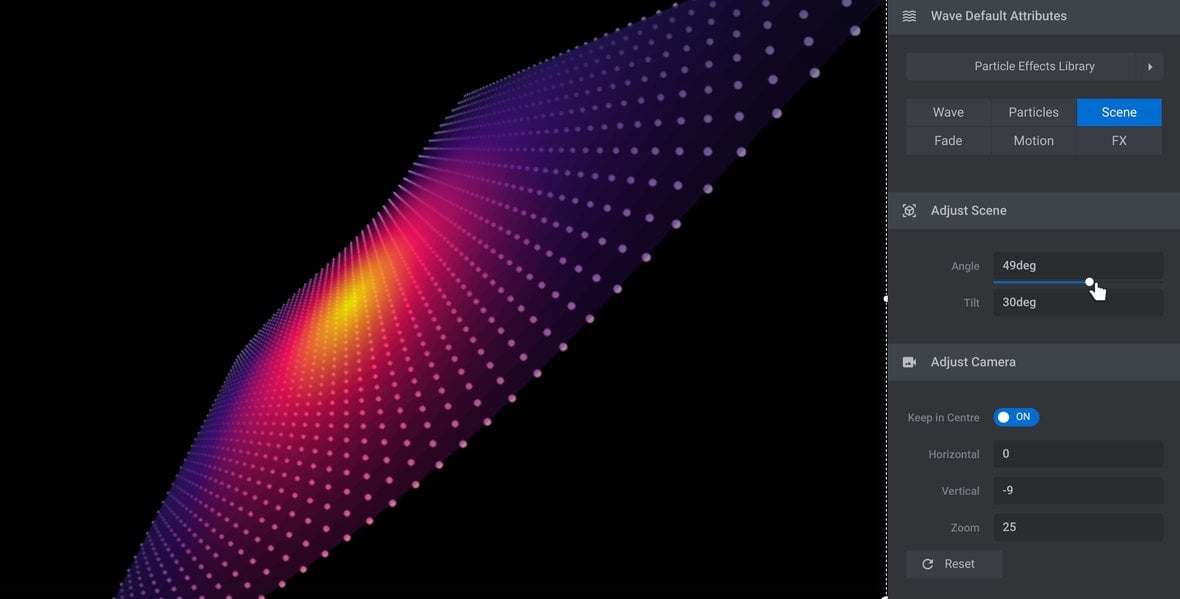
Angle
The Angle option allows you to rotate the wave’s angle from left to right or vice versa:

The value can be set in degrees, within a range between -360deg and 360deg.
Decrease the value to angle the wave to the right, i.e. rotate clockwise. Increase the value to angle the wave to the left, i.e. rotate counter clockwise.
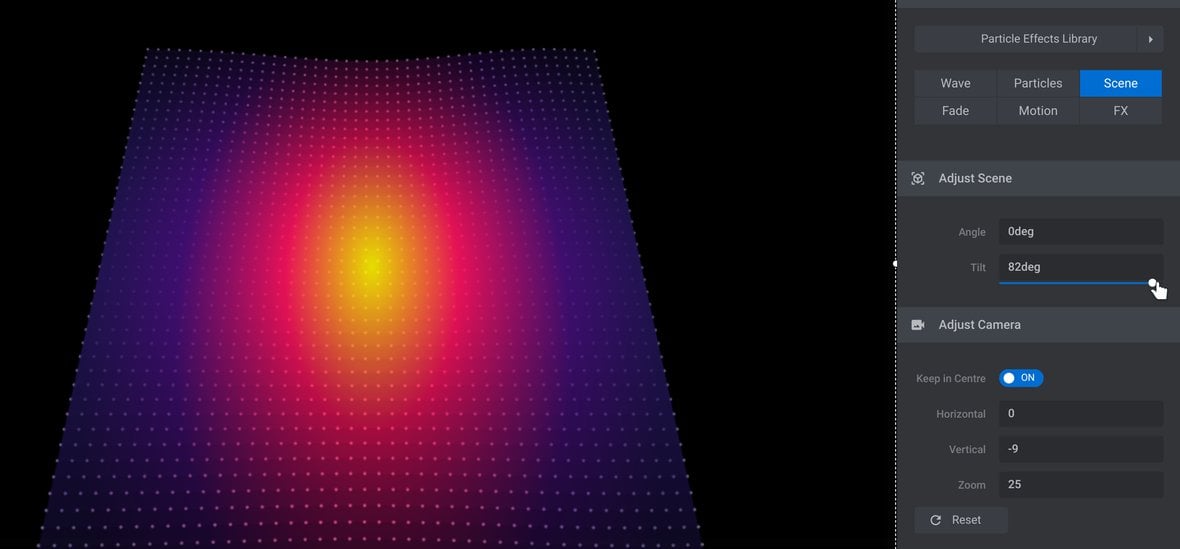
Tilt
The Tilt option allows you to tilt the wave forwards or backwards:

The value can be set in degrees, within a range between -90deg and 90deg.
Decrease the value to tip the wave forwards. Increase the value to tip the wave backwards.
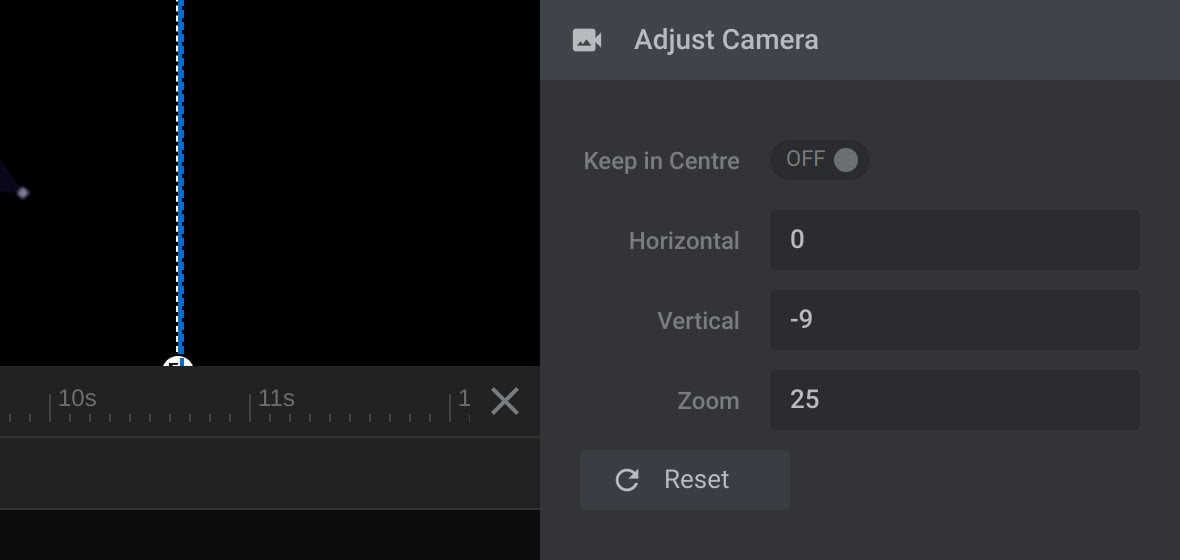
Adjust Camera Panel
The Adjust Camera panel allows you to position the camera capturing the particle wave:
Visibility Note:
The Adjust Camera panel will be fully visible if Animation is set to Off, but hidden completely if Animation is set to Path.
If Animation is set to Pendulum you won’t see the Adjust Scene Panel heading, but you will still see the options Horizontal, Vertical and Zoom.
If Animation is set to Loop you won’t see the Adjust Scene Panel heading, but you will still see the Zoom option.
Keep in Centre
Toggle the Keep in Centre option to ON and, regardless of what other camera adjustments you make, the camera will stay pointed at the centre of the scene:

Visibility Note:
Keep in Centre will only appear if Animation is set to Off.
Horizontal
The Horizontal option allows you to move the camera side to side:

The value can be set as a number, within a range between -20 and 20.
Decrease the value to move the camera left. If Keep in Centre is set to OFF, this will make the wave appear to slide [?]
A "slide" in Slider Revolution is a container into which multiple layers can be added, with layers in turn acting as containers for various forms of media such as images, text, video, audio, buttons, and special effects.
Slides are added to modules and edited via the module editor.
Within the module editor, each slide has its own animation timeline, background and collection of layers.
A single module can have one or many slides. A module with one slide is called a scene, and a module with multiple slides is called a slider or carousel. right. If Keep in Centre is set to ON, this will make the wave appear to rotate counter clockwise around its centre.
Increase the value to move the camera right. If Keep in Centre is set to OFF, this will make the wave appear to slide left. If Keep in Centre is set to ON, this will make the wave appear to rotate clockwise around its centre.
Vertical
The Vertical option allows you to move the camera up and down.

The value can be set as a number, within a range between -20 and 20.
Decrease the value to move the camera down. If Keep in Centre is set to OFF, this will make the wave appear to slide up. If Keep in Centre is set to ON, this will make the wave appear to tip forwards.
Increase the value and move the camera up. If Keep in Centre is set to OFF, this will make the wave appear to slide down. If Keep in Centre is set to ON, this will make the wave appear to tip backwards.
Zoom
The Zoom option allows you to move the camera forwards and backwards.

The value can be set as a number, within a range between -60 and 25.
Decrease the value to move the camera back. This will make the wave appear to move forward.
Increase the value to move the camera forward. This will make the wave appear to move back.
If Keep in Centre is set to ON, if the camera zooms in past the centre of the scene it will appear to quickly make a 180 degree turn and start zooming out again, looking at the centre from the opposite side of the wave.
Reset
Click the Reset button to set the scene back to its defaults:

This will set Angle to 0deg, Tilt to 10deg, Keep in Centre to ON, and Horizontal, Vertical and Zoom to 0.
Performance Settings Panel
The Performance Settings panel contains just the one option, Max DPR, as described below.
Max DPR
The Max DPR (maximum device pixel ratio) option allows you to set the quality of the particle wave:

It can be set with a value of either 1, 2 or 3. The default value is 1, but increasing to 2 or 3 will generate a higher quality wave. However, this may have performance impact.
Fade
In the Fade category of options you can control the opacity at the edges of the particle wave:
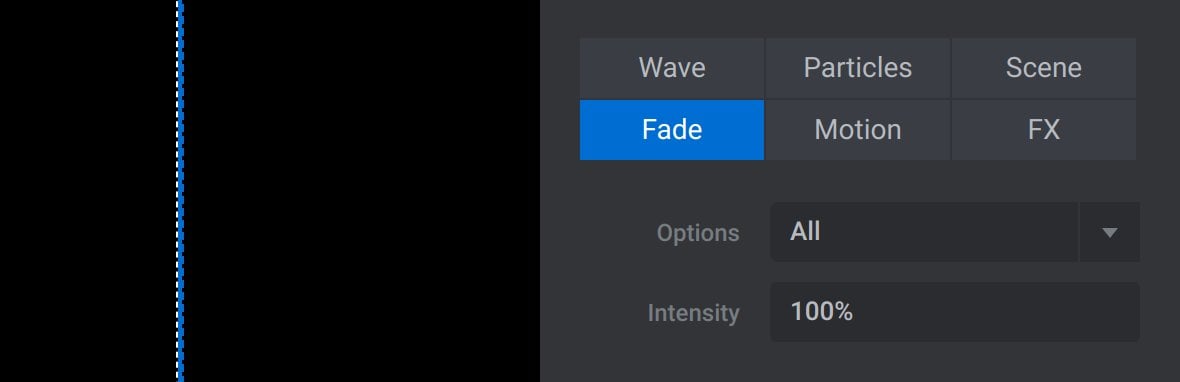
The Fade category contains these two options:
Options
The first option in the Fade category allows you to choose which edges of the wave will fade out:
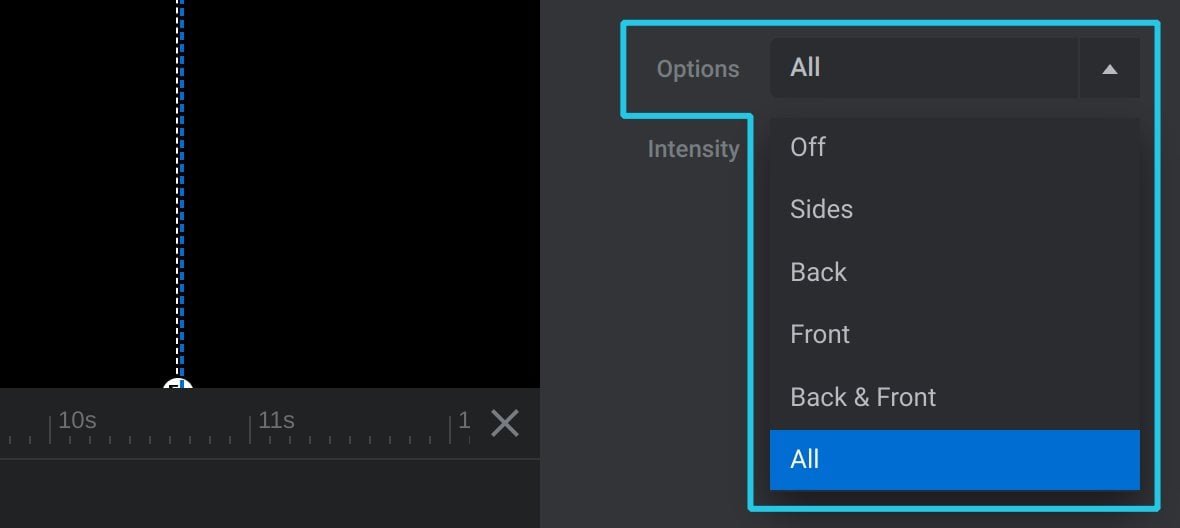
There are 6 possible settings: Off, Sides (meaning left and right sides), Back, Front, Back & Front, All.
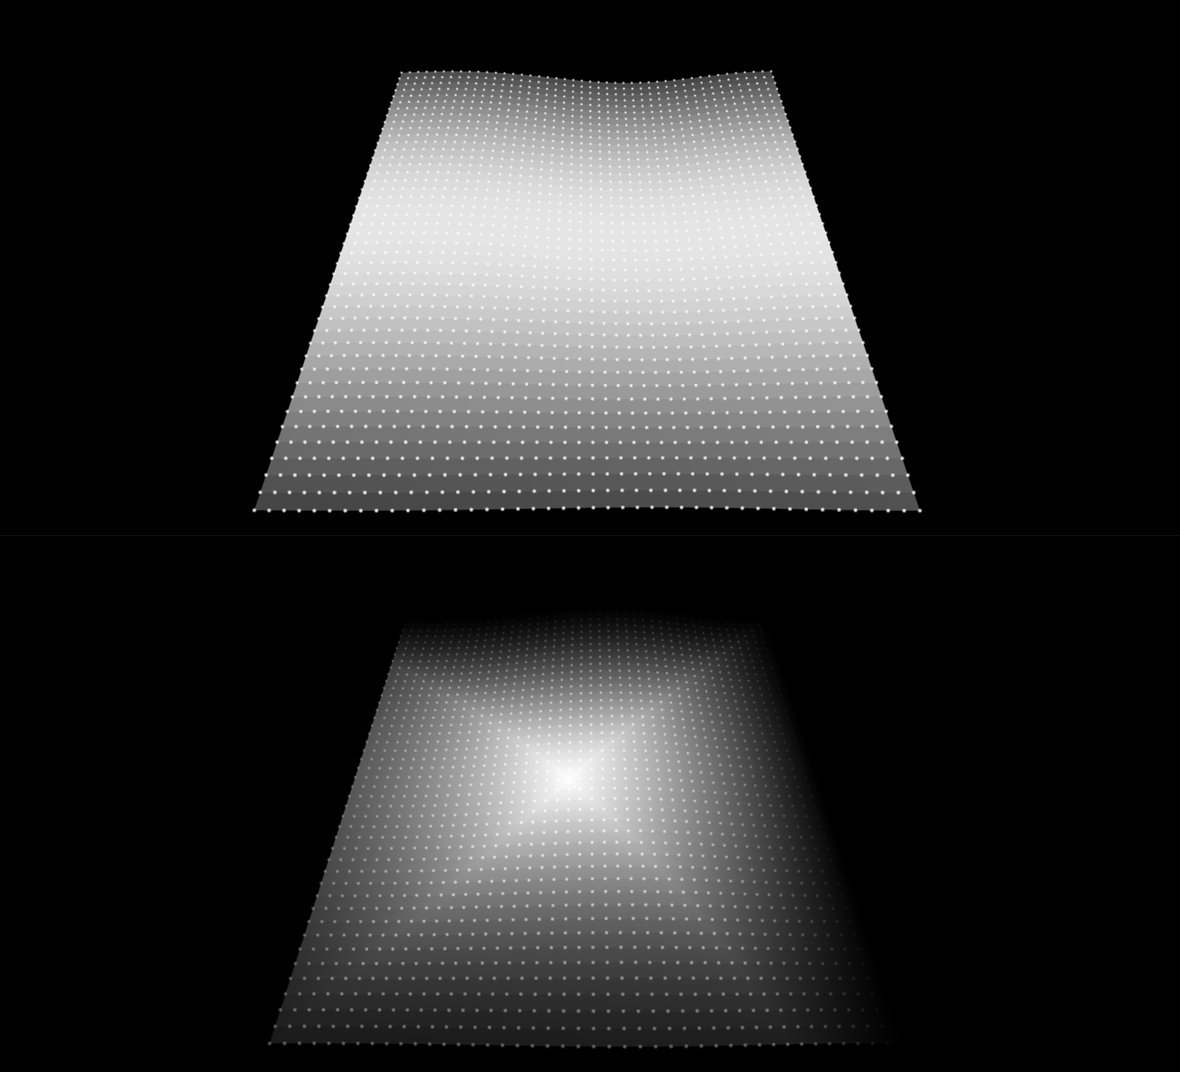
Intensity
The Intensity option controls the strength of color in the particle wave when Fade, Options is set to anything other than Off.
The value can be set as a percentage, between 1% and 100%. At 100% the particle wave color will be the most intense, but you will still see the fade out effect. At 1% the color will be so low you will typically no longer see the wave.
Motion
In the Motion panel you can configure animation and user interaction triggered movement of the overall scene:
The Motion category contains these two panels:
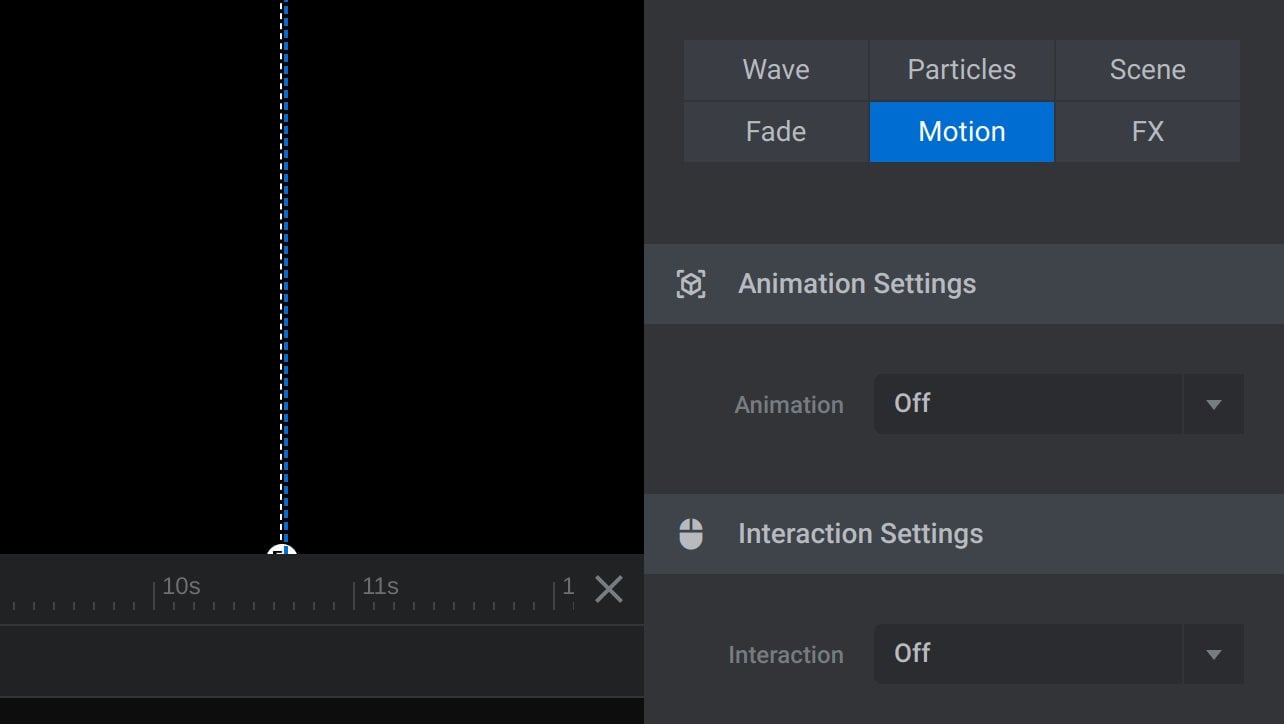
Animation Settings Panel
In the Animation Settings panel you can configure continuous motion of the scene, i.e. the entire particle wave:

Animation
The Animation option allows you to decide what type of motion to apply to the wave:
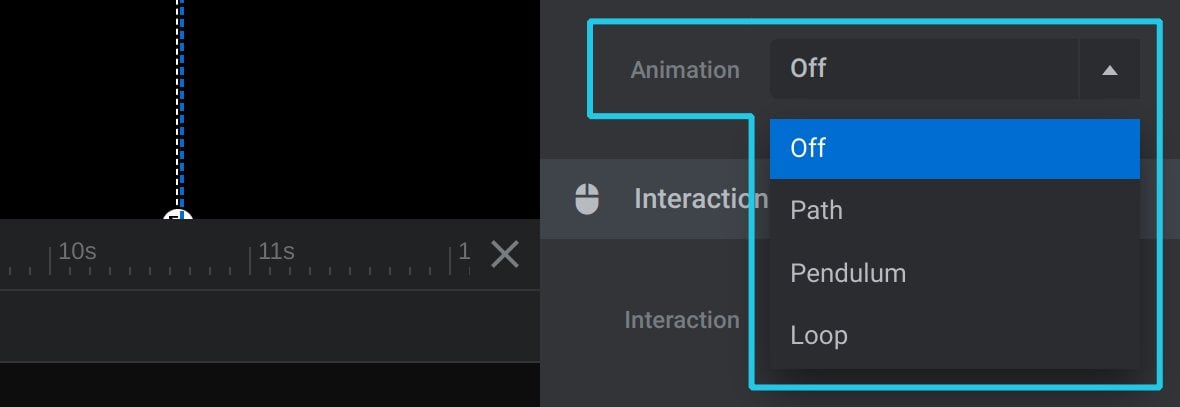
Set this option to Off to use no animation. If you want the wave to move choose either Path, Pendulum or Loop.
Path Animation
Setting Animation to Path will make the wave move along a predetermined path:
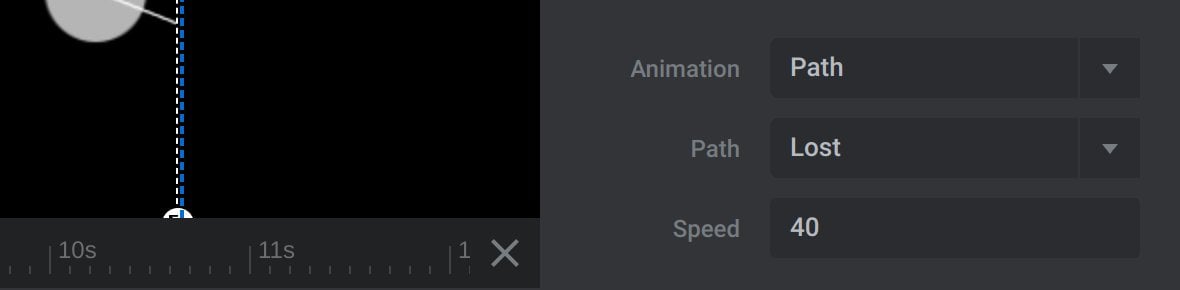
When you select this setting the additional options Path and Speed will appear.
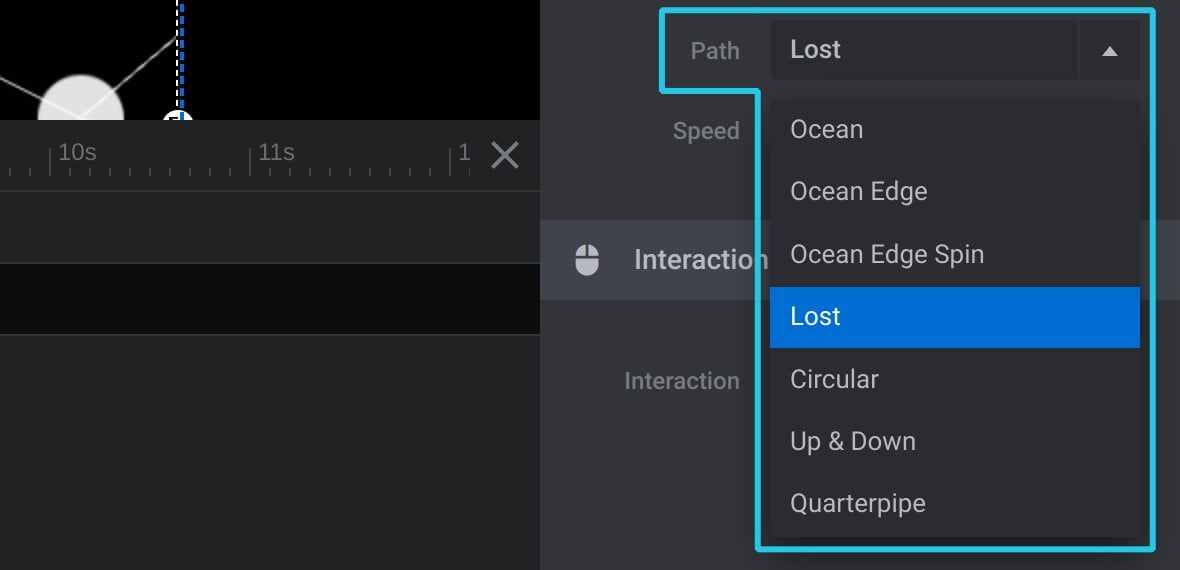
Path
The Path option allows you to select from a collection of predetermined paths for the wave to move along:
Speed
The Speed option allows you to set how fast the wave moves along the path:

It is set as a number between 1, the slowest, and 300, the fastest.
Pendulum Animation
Setting Animation to Pendulum will make the wave move back and forth between two positions.
The first position is the wave’s default position, as set under the Scene category of options. When you select the Pendulum setting, options will appear below that allow you to configure the second position:
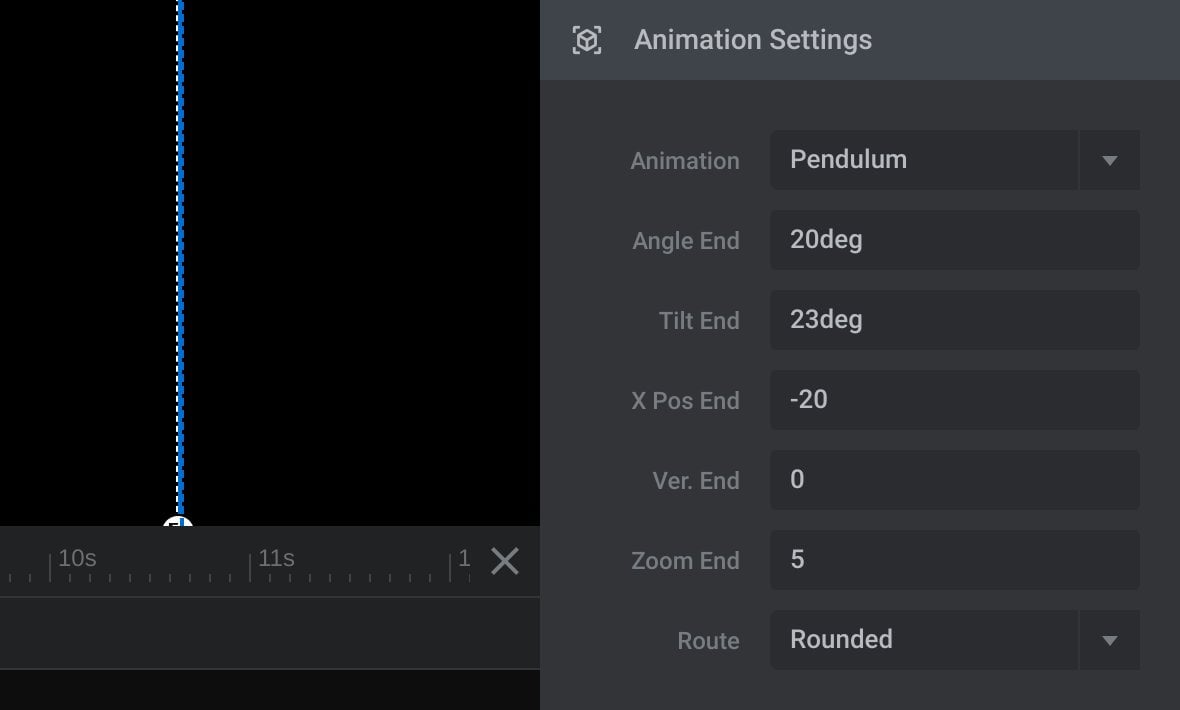
Angle End
The ending angle to animate to, set in the same way as the initial Angle option:

Tilt End
The ending tilt to animate to, set in the same way as the initial Tilt option:

X Pos End
The ending horizontal position to animate to, set in the same way as the initial Horizontal option:

However, while the Horizontal option has a range between -20 and 20, X Pos End can range between between -100 and 100.
Ver. End
The ending vertical position to animate to, set in the same way as the initial Vertical option:

However, while the Vertical option has a range between -20 and 20, Ver. End can range between between -100 and 100.
Zoom End
The ending zoom position to animate to, set in the same way as the initial Zoom option:

However, while the Zoom option has a range between -60 and 25, Ver. End can range between between -6 and 100.
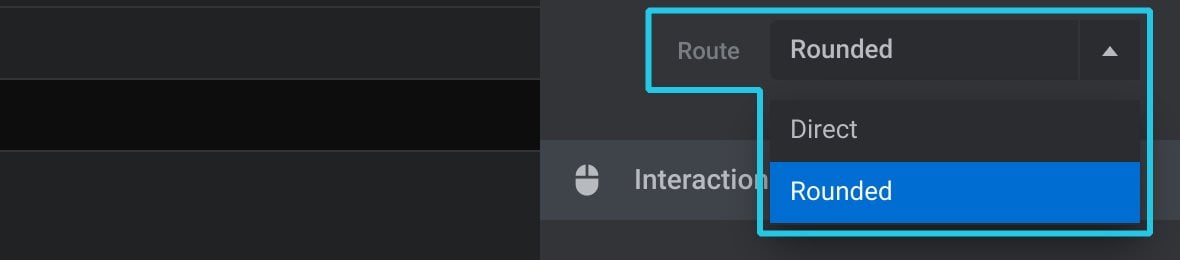
Route
If the Route option is set to Direct, the pendulum animation will animate in a straight line between the two points. If it’s instead set to Rounded, some curving will be added as the wave moves between the two points:
Loop Animation
Setting Animation to Loop will make the wave continuously spin with a specified angle, tilt and rotation.
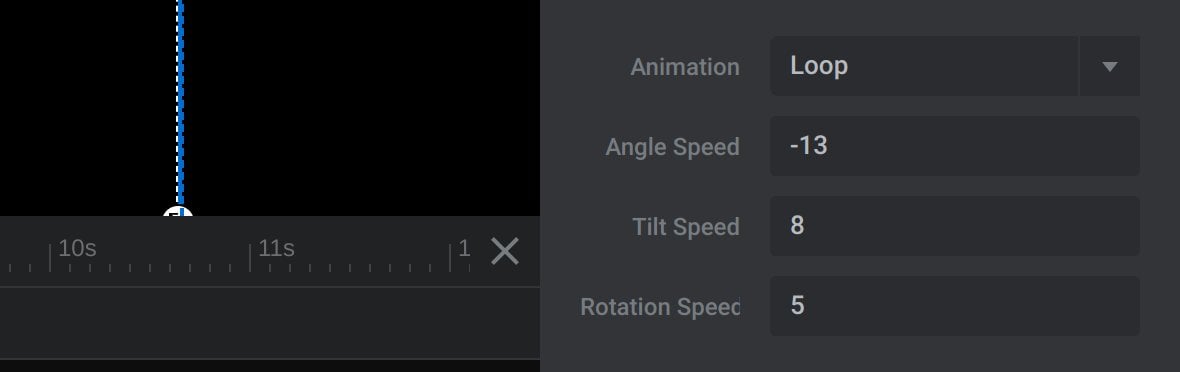
When you choose this setting, options will appear below you can use to configure the loop animation.
Angle Speed
The Angle Speed option allows you to continuously rotate the wave’s angle from left to right or vice versa, i.e. as though it’s rolling clockwise or counter clockwise:

The value is set as a number, within a range between -50 and 50.
Decrease the value to roll the wave angle to the right, i.e. clockwise. The lower the number the faster animation.
Increase the value to roll the wave angle to the left, i.e. counter clockwise. The higher the number the faster animation.
Tilt Speed
The Tilt Speed option allows you to continuously tilt the wave forwards or backwards:

The value is set as a number, within a range between -50 and 50.
Decrease the value to make the wave tilt forwards. Increase the value to make the wave tilt backwards.
Rotation Speed
The Rotation Speed option allows you to continuously rotate the wave around the vertical axis like a spinning plate:

The value is set as a number, within a range between -50 and 50.
Decrease the value to make the rotate clockwise around the vertical axis. Increase the value to make the wave rotate counter clockwise.
Interaction Settings Panel
Rather than having the wave animate continuously, you can instead configure the wave to animate in response to user interaction:

Interaction
Under the Interaction option you can select from three ways a user can trigger motion of the wave:
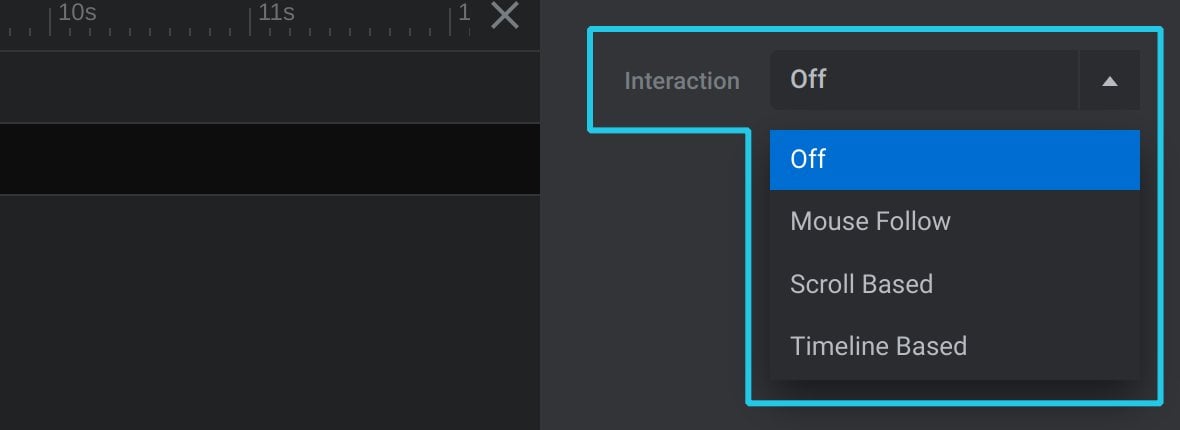
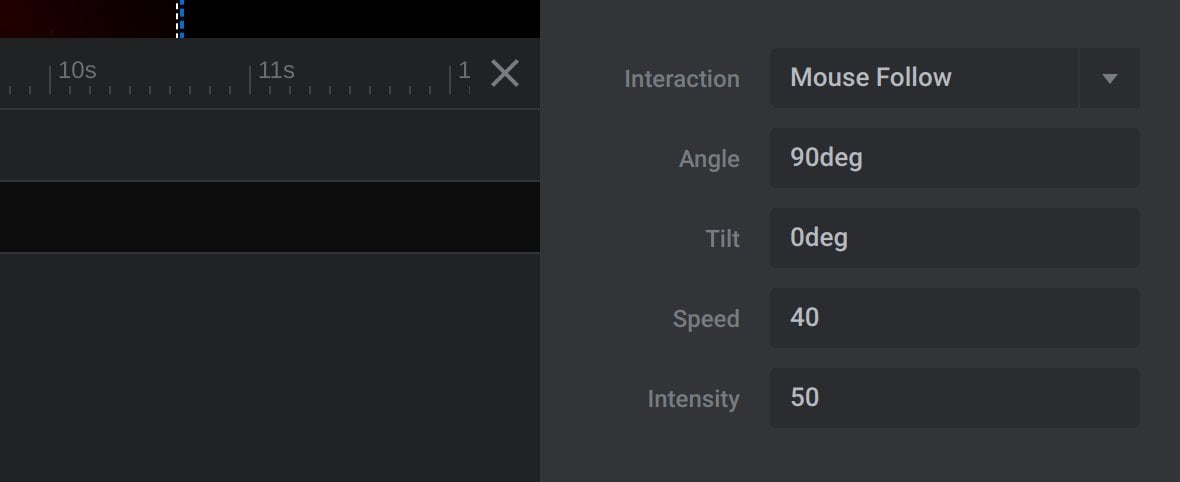
Mouse Follow triggers movement that corresponds with mouse position.
When Mouse Follow is selected the following options appear:
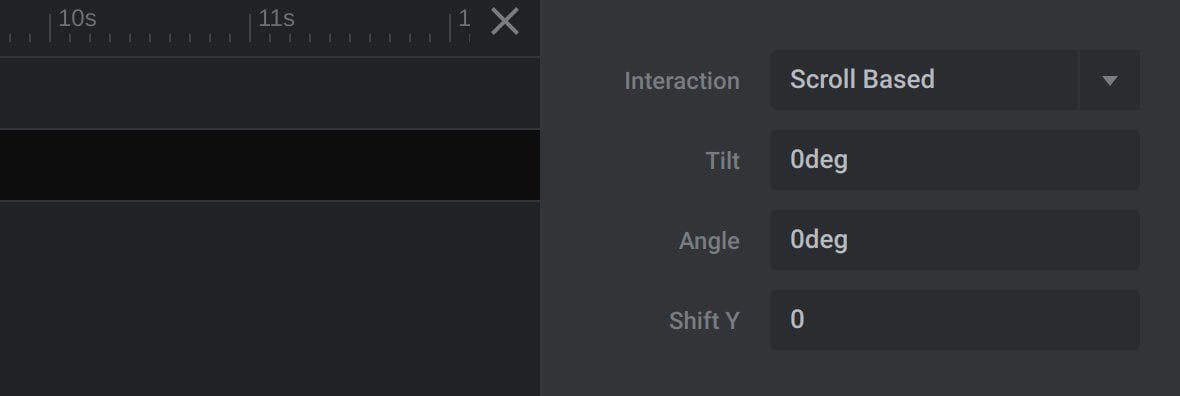
Scroll Based triggers movement according to page scroll position.
When Scroll Based is selected the following options appear:
Timeline Based triggers movement according to how far through the slide has played. No further configuration options will appear if this setting is selected.
Tilt
The Tilt option is available for Mouse Follow and Scroll Based interactions. It sets how much the wave should tilt forward or backward, and can be set in a range between -120deg and 120deg.
If using Mouse Follow interaction, when the mouse is moved vertically, a positive value will tilt the wave in the same direction as the mouse. For example, if the mouse moves up the wave tilts forward. A negative value will tilt the wave in the opposite direction to mouse movement. For example, if the mouse moves up the wave tilts backward.
If using Scroll Based interaction, a positive value will tilt the wave in the same direction as the scrolling. For example, if the mouse scrolls down the wave tilts backward. A negative value will tilt the wave in the opposite direction to mouse movement. For example, if the mouse scrolls down the wave tilts forward.
Angle
The Angle option is available for Mouse Follow and Scroll Based interactions. It sets how much the wave should angle left or right, and can be set in a range between -120deg and 120deg.
If using Mouse Follow interaction, when the mouse is moved horizontally, a positive value will angle the wave in the same direction as the mouse. For example, if the mouse moves left the wave angles left. A negative value will angle the wave in the opposite direction to mouse movement. For example, if the mouse moves left the wave angles right.
If using Scroll Based interaction, a positive value means scrolling down will angle the wave to the right, and scrolling up will angle it to the left. A positive value means scrolling down will angle the wave to the left, and scrolling up will angle it to the right.
Shift Y
The Shift Y option is only available for Scroll Based interactions. It sets how much the wave should move up or down during scrolling, and can be set in a range between -150 and 150.
A positive value will move the wave in the same direction as the mouse is scrolling. For example, if the mouse scrolls down the wave shifts down. A negative value will move the wave in the opposite direction to mouse scrolling. For example, if the mouse scrolls down the wave shifts up.
Speed
The Speed option is only available for Mouse Follow interactions, and controls how quickly the wave tilts or rotates in response to mouse movement.
It is set as a number between 0, the slowest speed, and 100, the fastest speed.
Intensity
The Intensity option is only available for Mouse Follow interactions. It controls how much mouse movement is required to generate the same amount of wave movement.
It can be set as a number between 0 and 100. The lower the number, the more the mouse will need to be moved, and the higher the number, the less the mouse will need to move.
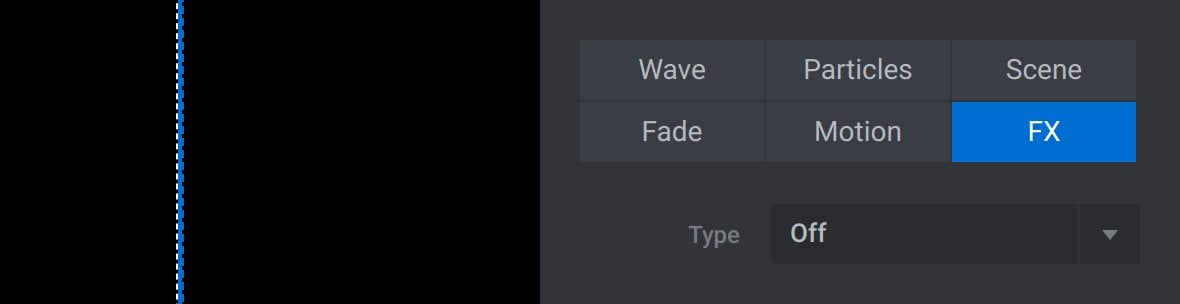
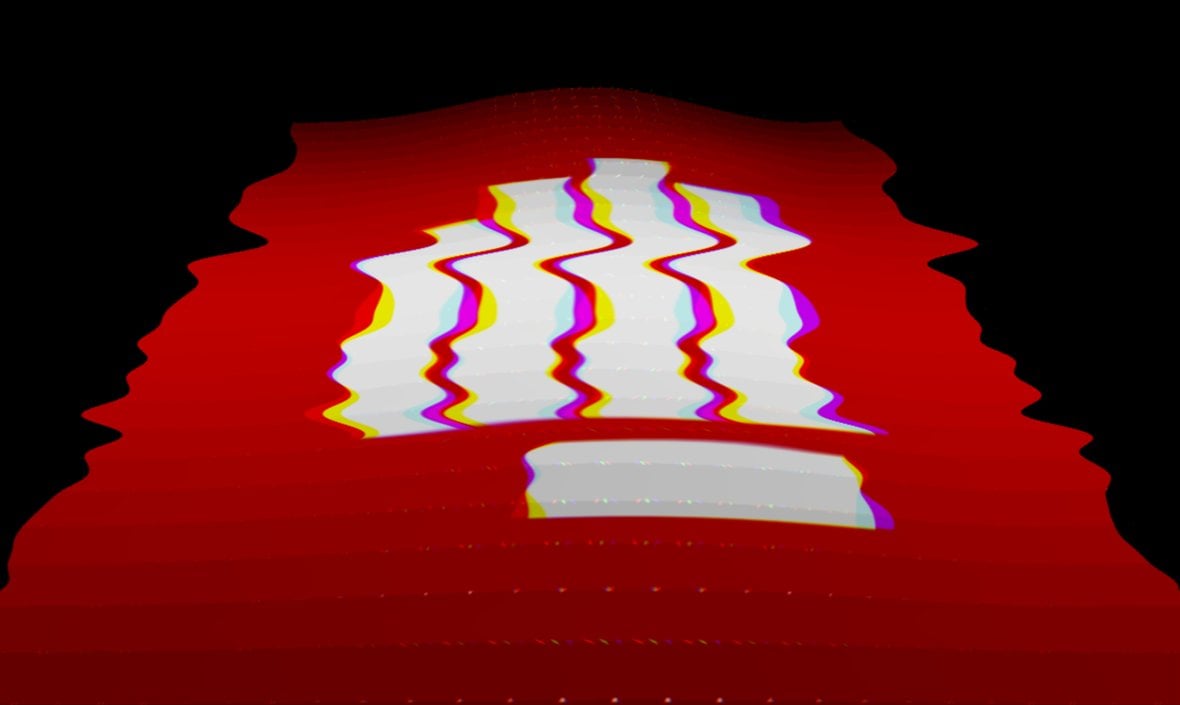
FX
In the FX category of options you can add either blur or glitch effects to a particle waves:
It can contain the options:
Type
From the Type field, you can select the Blur or Glitch effect, or set to Off to use no effect:
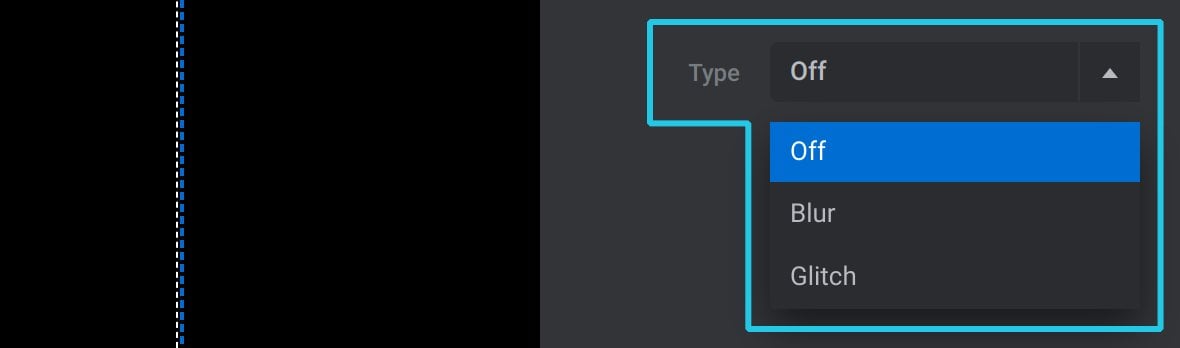
If you select Glitch a standard glitch effect will be applied, and there are no further options to configure:
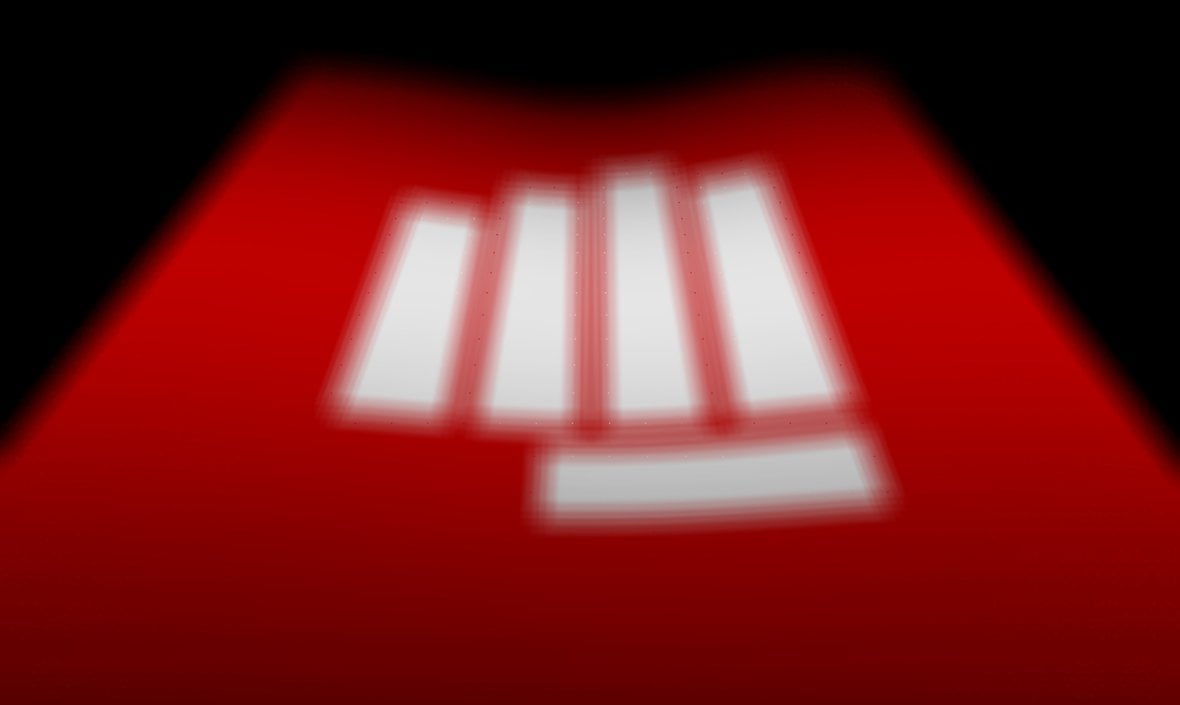
If you select Blur, the effect can be configured with the following options.
Max Blur
The Max Blur option sets the default amount of blur applied to the wave:

It can be set between a range of 1, a barely noticeable amount of blur, and 100, a very high amount of blur:
Breathing
If Breathing is toggled to ON, the amount of blur on the wave will slowly animate between that set in the Max Blur and Min Blur options:

Min Blur
The Min Blur option only appears if Breathing is toggled to ON, and determines the amount of blur that should be animated to from the default amount:
