
The Timeline: Animation and Layer Control
The timeline, filling the bottom left portion of the module editor, is a representation of the layers in your slide and what happens to them over time. i.e. their animation.
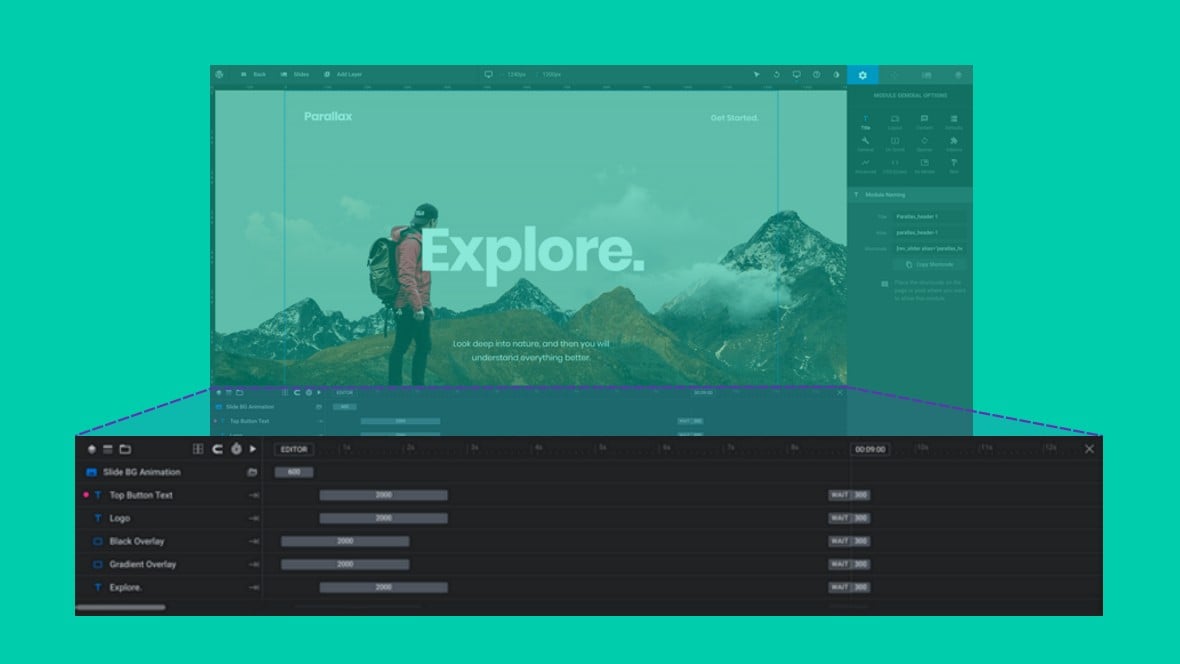
Table of Contents
- The Timeline (Video Tutorial)
- Slide Animation in the Timeline
- Left to Right Shows Animation Over Time
- Top to Bottom Shows the Layers In The Animation
- Selecting Layers
- Sorting Layers
- Animation Strips
The Timeline (Video Tutorial)
Everything covered in this section of the manual about the timeline can be learned by watching the “A Closer Look at Slider Revolution’s Module Editor, Slides & Layers” tutorial video from the 3:21 mark:
If you watched the above video in full you can skip the remainder of the A Closer Look section of the manual and proceed to Module Editing Basics.
Or, continue reading to learn more about the timeline:
Slide Animation in the Timeline
When you play a slide’s [?]
A "slide" in Slider Revolution is a container into which multiple layers can be added, with layers in turn acting as containers for various forms of media such as images, text, video, audio, buttons, and special effects.
Slides are added to modules and edited via the module editor.
Within the module editor, each slide has its own animation timeline, background and collection of layers.
A single module can have one or many slides. A module with one slide is called a scene, and a module with multiple slides is called a slider or carousel. animation you’ll see a purple playhead moving from left to right in the timeline, showing you the state of the slide’s layers [?]
Layers are containers for visual, audio or layout items and are added to slides. For example, text, button, image, audio, video, group and row are all types of layers.
Layers are added to slides via the module editor. at different time markers, e.g. the 1 second mark, 3 second mark and so on.
Left to Right Shows Animation Over Time
The actual “time” part of the layers being animated is shown horizontally from left to right.
In the example screenshot below you can see a “0” at the top left and “00:09:00” at the top right. The “0” informs you where the animation time begins; the “00:09:00” informs you where the animation ends. i.e. the animation lasts for 9 seconds.
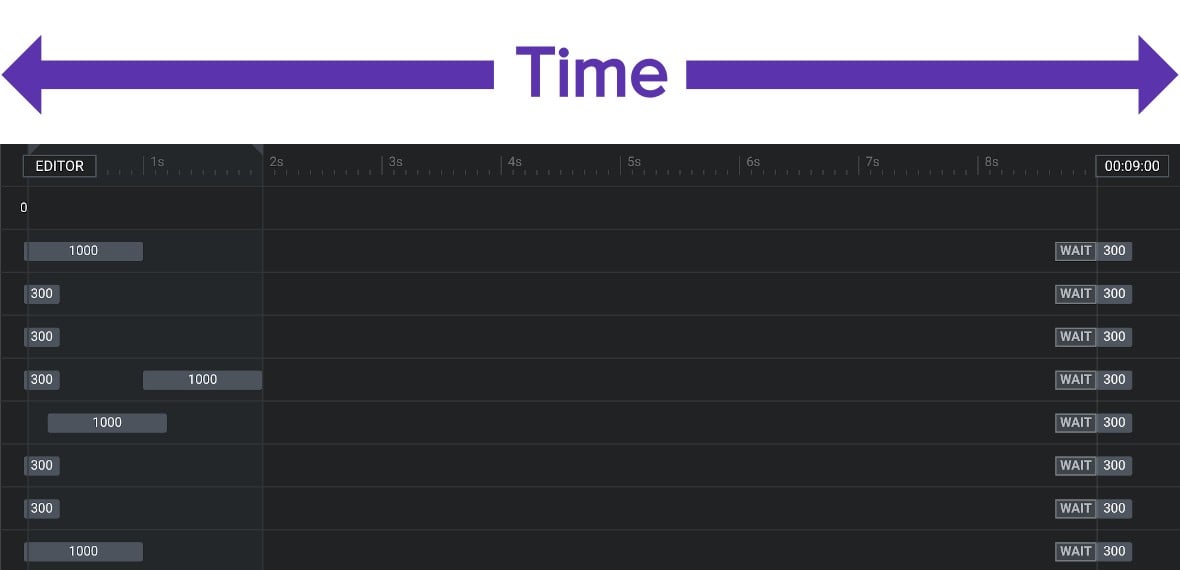
The grey bars with numbers on them are animation strips [?]
Animation strips look like little grey bars in the module editor's timeline:
A strip represents something about a layer changing over time, animating the change along the way. For exmple, a strip might animate a layer changing from being completely transparent to fully opaque.
The width of the strip determines how long the animation will run. The wider the strip, the longer the animation will take to complete. – we’ll talk about those in a moment.
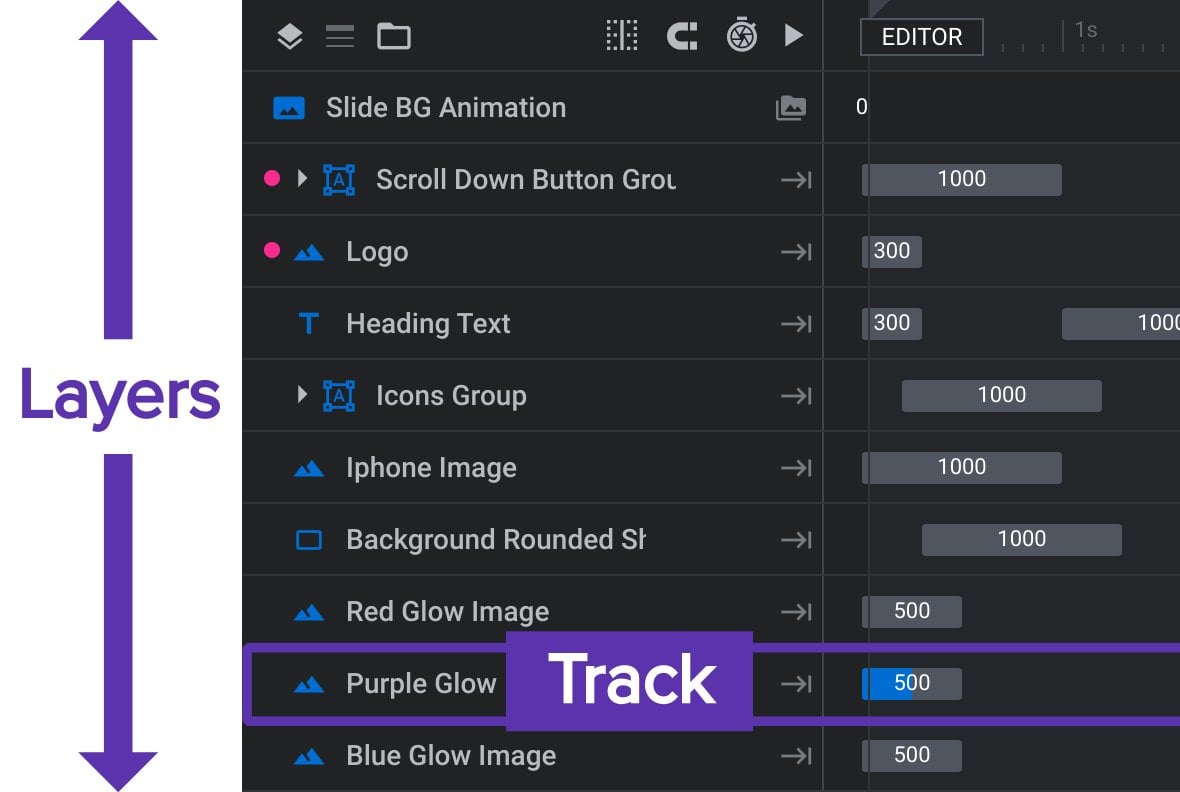
Top to Bottom Shows the Layers In The Animation
From top to bottom in the timeline is your stack of layers. Each track [?] A track is one of the horizontal spaces in the module editor's timeline. It is the representation of a layer within that timeline, used for controlling the animations and sorting order position of that layer., i.e. each horizontal line in the timeline corresponds with a layer.
Selecting Layers
We discussed earlier how you can select layers by clicking them on the canvas [?]
The canvas is the point and click design space in the module editor. It forms the largest area of the module editor.
In this area layers can be selected, moved and resized. Animations can also be previewed.. The layer stack in the timeline gives you an additional way to select layers: just click on the name area at the left end of the track for a given layer and it will be selected in both the timeline and on the canvas.
When you have a slide with several layers this can be the easiest way to select the specific layer you want to modify.
Sorting Layers
The order of layers from top to bottom in the timeline layer stack corresponds with their sorting order on the canvas. The higher a layer is in the timeline stack the further in front it will appear on the canvas; the lower it is in the stack the further behind it will appear on the canvas.
Sometimes you will need to modify this sorting order. To do so, click and drag the track for a layer and move it either up or down in the timeline’s layer stack. As you drag you’ll see a blue line indication where in the stack the layer will be inserted if you drop it.
Moving a layer up will make it appear further in front, and moving it down will make it appear further behind.
The only exception is the special background layer which, despite being locked in position at the very top of the layer stack, will always be displayed behind all other layers on the canvas.
Animation Strips
For each layer you will see at least two little grey animation strips [?]
Animation strips look like little grey bars in the module editor's timeline:
A strip represents something about a layer changing over time, animating the change along the way. For exmple, a strip might animate a layer changing from being completely transparent to fully opaque.
The width of the strip determines how long the animation will run. The wider the strip, the longer the animation will take to complete., one at the beginning and one at the end.
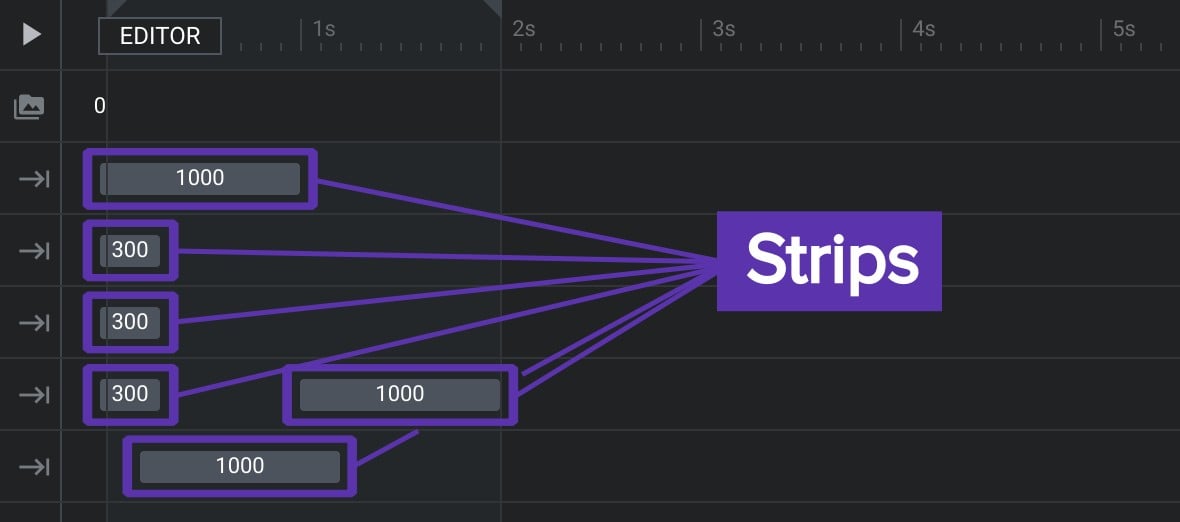
These strips represent something about the layer changing over time, for example, changing from being completely transparent to fully opaque.
The left end of a strip signifies when the change to the layer begins, and the right edge represents when the change ends. For this reason, the wider the strip is the longer the change will take.
Next: The Sidebar
That covers the main functions of the timeline. Next up we’ll look at the third section of the module editor, that being the sidebar, where we find settings & saving controls.