
Before & After Quick Start
Get started with the basics of creating before & after effects in your modules.
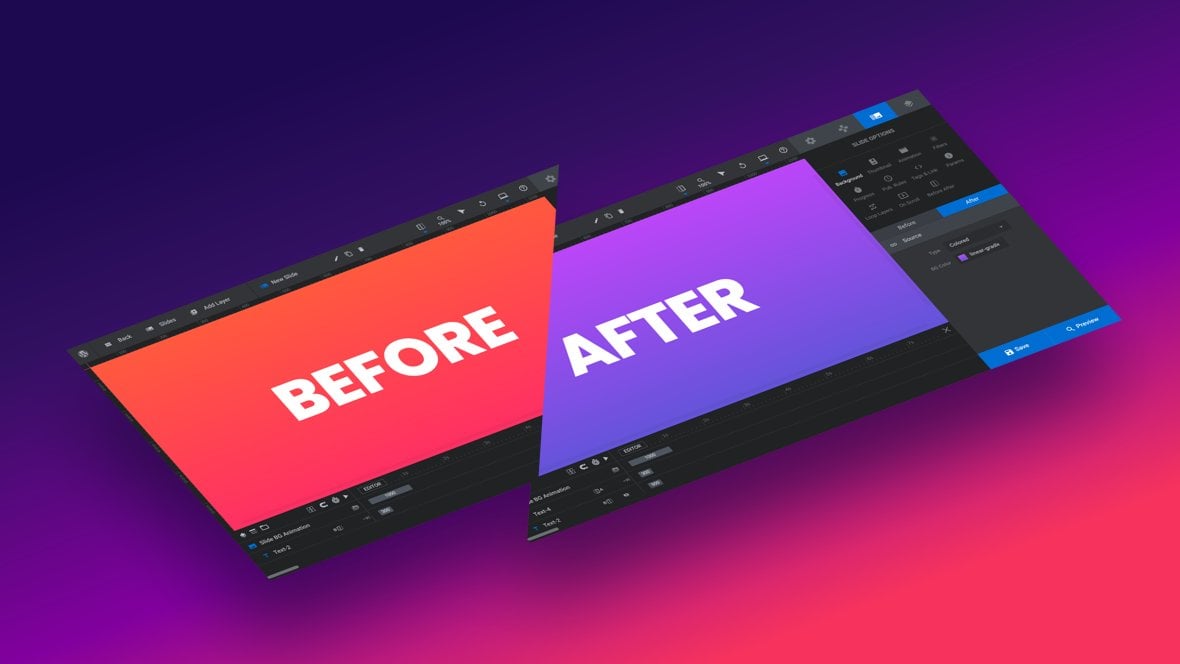
Table of Contents
What Does the Before & After Addon Do?
The Before & After addon [?]
Addons extend the functionality of Slider Revolution, adding new controls to the module editor and allowing you to do extra things with your design.
For example, using the particle addon you can create effects such as falling snow, and using the distortion addon you can create shimmering effects such as simulating being underwater.
There are dozens of addons available, all included with the full version of Slider Revolution. allows you to create two versions of any given slide [?]
A "slide" in Slider Revolution is a container into which multiple layers can be added, with layers in turn acting as containers for various forms of media such as images, text, video, audio, buttons, and special effects.
Slides are added to modules and edited via the module editor.
Within the module editor, each slide has its own animation timeline, background and collection of layers.
A single module can have one or many slides. A module with one slide is called a scene, and a module with multiple slides is called a slider or carousel.: a “before” version and an “after” version:
When the slide is viewed it will show a draggable divider that can be used to transition back and forth between the two versions:
In this guide we’ll step through how to get started with the most basic form of before & after effect.
Getting Started
To get started with the Before & After addon you’ll first need to install and enable it.
The process for doing this is the same as with all addons, so please begin by following the steps in our guide on how to Browse, Install and Enable Addons.
Activate Per Slide
After installing and enabling the Before & After addon, you’ll need to activate it within your module [?]
A module in Slider Revolution acts as a container for slides, which in turn act as containers for layers. Modules are created and edited with the module editor.
A "module" is a single, self contained piece of content. You can think of this as being similar to the way a post or page in regular WordPress is a self contained piece of content.
A module can represent any kind of content Slider Revolution is capable of creating, such as a slider, carousel, hero unit, navigation menu, posts display and so on.
Multiple modules can be combined to form rich content such as complete sites and landing pages..
The Before & After addon is activated on a per slide basis. This allows you to create modules where some slides can have a before & after effect while others don’t, giving you complete control.
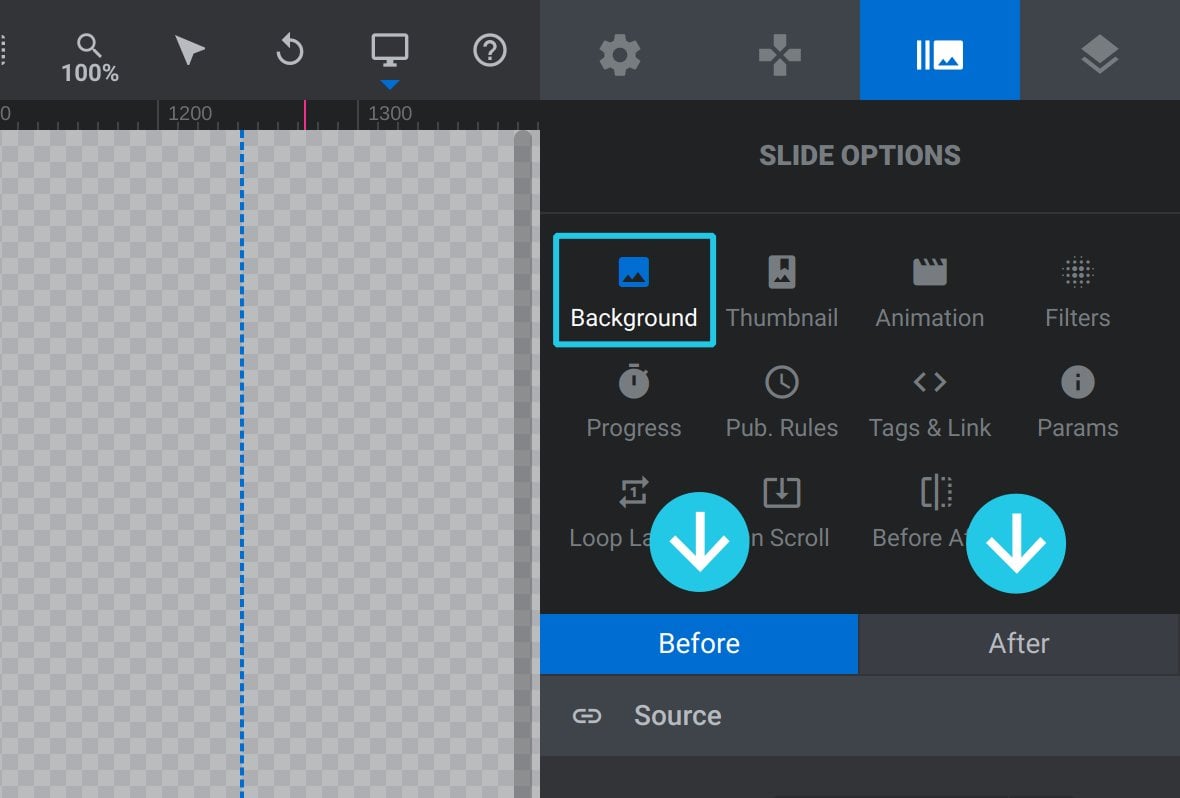
For each slide on which you want to create a before & after effect, go to the Slide Options tab, then the Before After sub-section, and in the General Settings panel toggle the Active option to ON:

Basic Before & After Effect
To create a before & after effect in the most simple way, all you need to do is add two backgrounds [?]
A "background" in Slider Revolution is a type of layer that is always present in every module, and is always visually behind all other layers.
A background can be transparent, a flat color, a gradient, an image, or a video. It can be animated in the same way as other layers can be, however it cannot be deleted. to your slide: one for the slide’s “before” environment and one for its “after” environment.
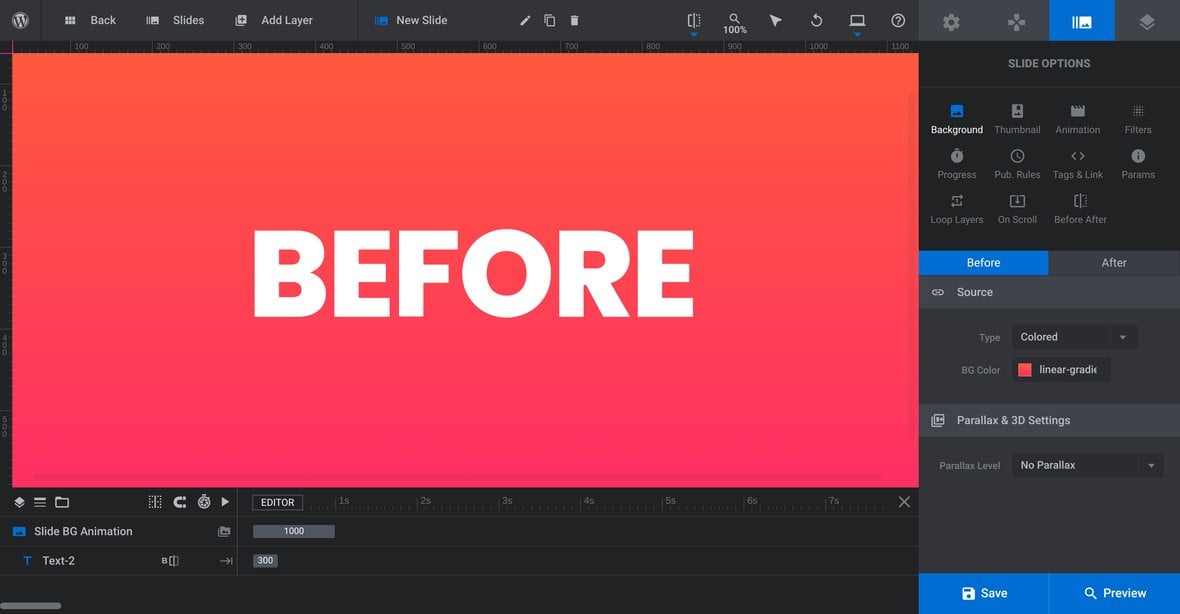
To do this go to the Slide Options tab, then the Background sub-section. You should see that there are now two tabs showing above the standard Background sub-section, one labeled Before and the other After:
Note: If you just enabled the Before & After addon and don’t see the above tabs, save your module and refresh the page.
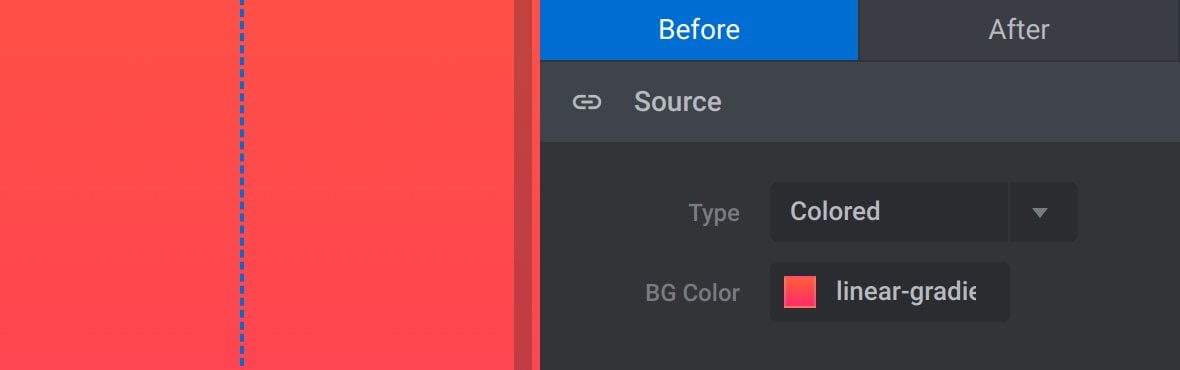
These two tabs give you independent areas in which you can separately configure how the background should look in the Before environment and the After environment.
For example, here the Before background is configured with a simple red/orange gradient:
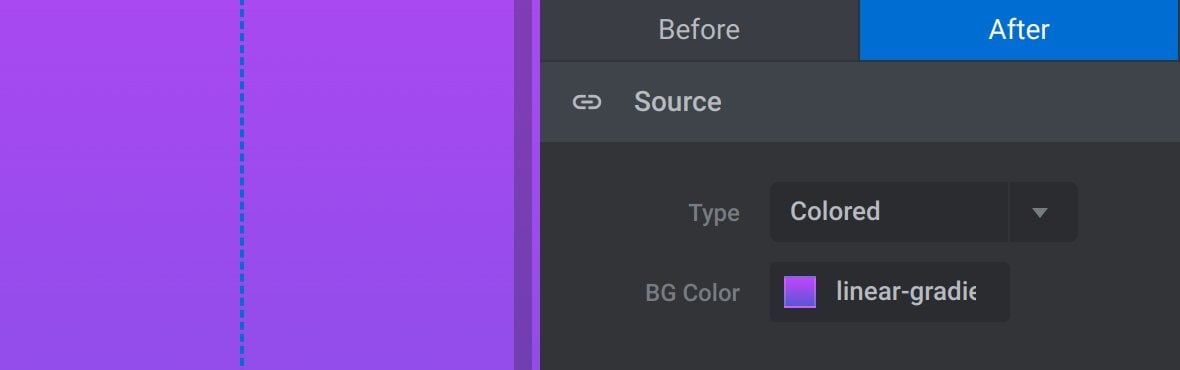
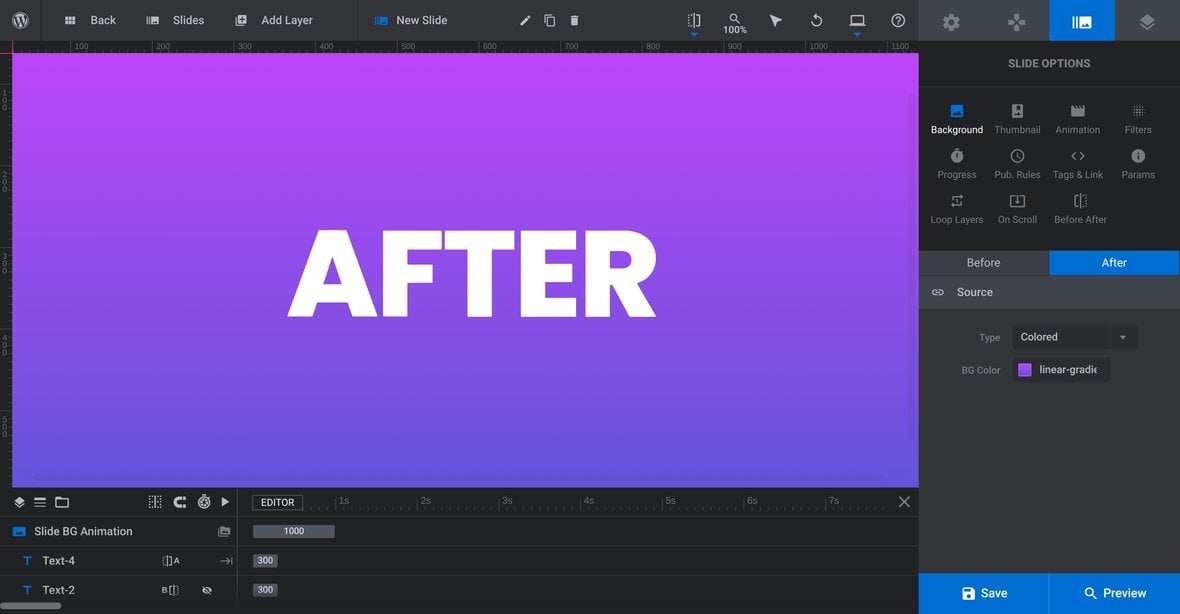
While the After background uses a simple purple gradient:
Saving and previewing the module at this time gives a simple before & after effect between these two backgrounds:
The next thing you’re likely to want to do is add extra layers [?]
Layers are containers for visual, audio or layout items and are added to slides. For example, text, button, image, audio, video, group and row are all types of layers.
Layers are added to slides via the module editor. to your slide. But before you can do that effectively you’ll need to know how to switch between viewing the Before and After environment.
Viewing the Before & After Environments
There are two ways to switch between viewing the slide’s Before and After environments, also referred to as “modes”.
You can either use the view switcher, which you will find on the right end of the top toolbar:
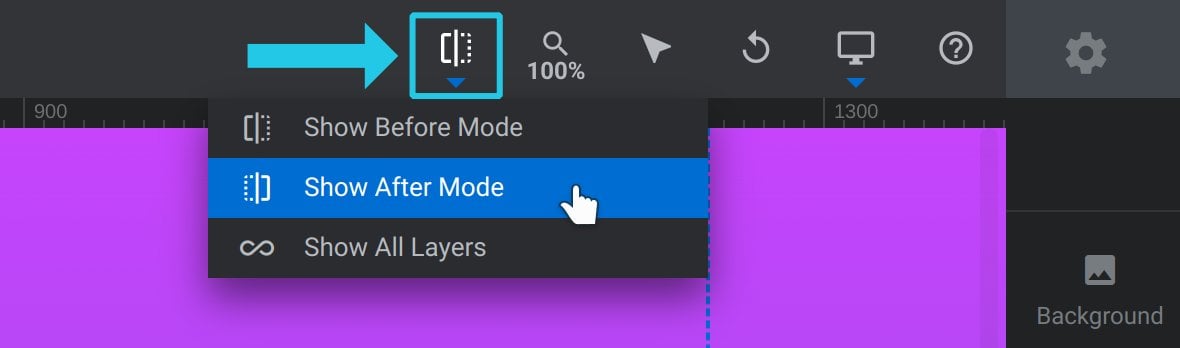
Or you can switch between the Before and After tabs we saw earlier in the Background sub-section, which effectively works in the same way as the view switcher.
Adding Layers
When you add a layer it will only appear in whichever environment you are viewing at the time.
So if you are viewing the Before environment and you add a layer, it will become part of that Before environment. For example, adding a text layer:
And conversely if you add a layer while viewing the After environment, it will become part of that After environment. For example, adding another text layer:
This will create an effect something like this:
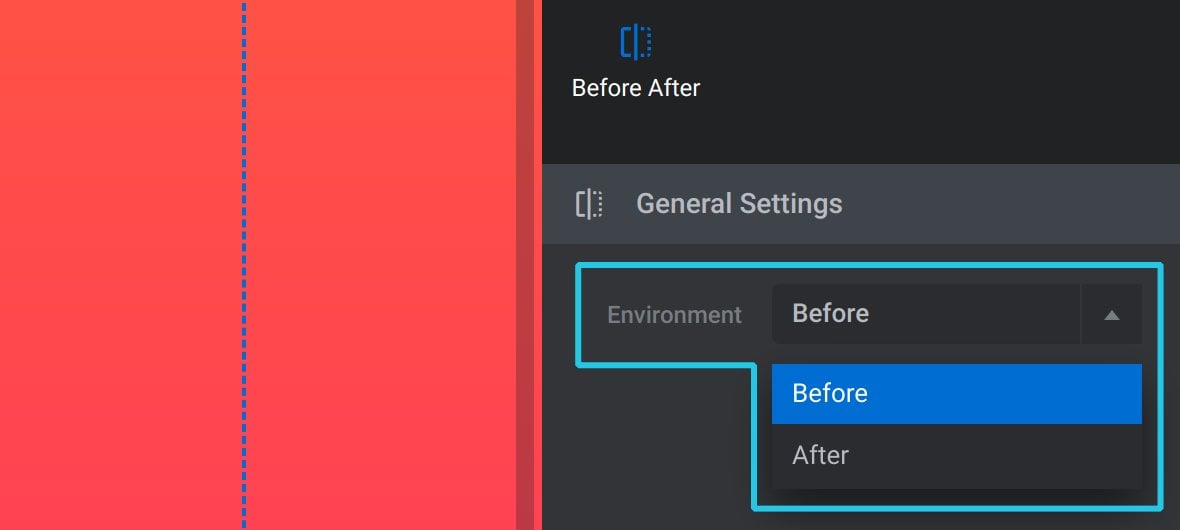
Switch Layer Between Environments
If, after adding a new layer, you want to move it from one environment into the other, select the layer and go to the Layer Options tab, Before After sub-section, and change the setting of the Environment option:
Up Next: More on Before & After Effects
That covers the basics of setting up a before & after effect and adding layers to it.
But as always with Slider Revolution [?]
Slider Revolution is a website content creation tool with a focus on captivating animation and stunning visual effects.
It began its life as a plugin for creating slideshows, but has evolved into a fully fledged piece of design software. there’s plenty more you can do, so up next we’ll dig further into the configuration options available in the Before & After addon.