
Customizing Cluster FX
Discover the full range of choices at your disposal to create custom clusters.
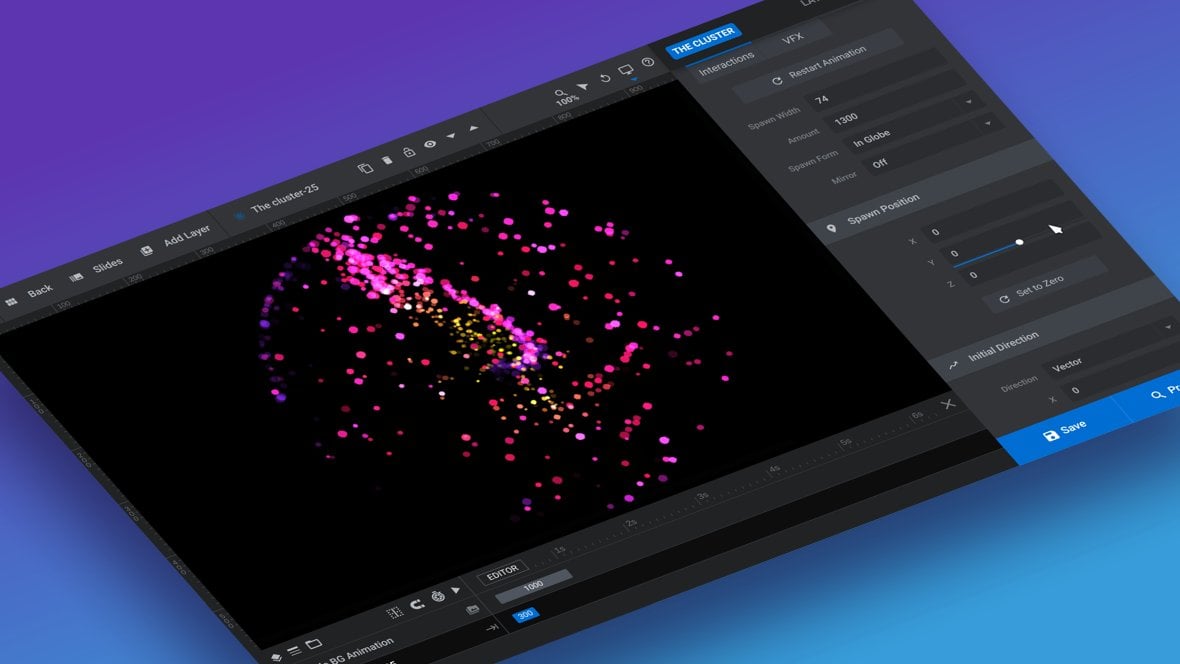
Table of Contents
Customizing or Making Your Own Cluster FX
In the previous section of the manual, we learned about the process of adding The Cluster layers [?]
Layers are containers for visual, audio or layout items and are added to slides. For example, text, button, image, audio, video, group and row are all types of layers.
Layers are added to slides via the module editor. to a slide.
Once you’ve added a cluster layer, there are numerous ways to personalize it according to your module’s [?]
A module in Slider Revolution acts as a container for slides, which in turn act as containers for layers. Modules are created and edited with the module editor.
A "module" is a single, self contained piece of content. You can think of this as being similar to the way a post or page in regular WordPress is a self contained piece of content.
A module can represent any kind of content Slider Revolution is capable of creating, such as a slider, carousel, hero unit, navigation menu, posts display and so on.
Multiple modules can be combined to form rich content such as complete sites and landing pages. requirements.
Furthermore, if you have created a cluster effect you want to reuse, you can save it as a custom preset and deploy it again anytime.
This guide encompasses all the available configuration options that you can use to tailor or create your unique cluster effects.
Before delving into the details, let’s briefly go over how you can manage your custom presets.
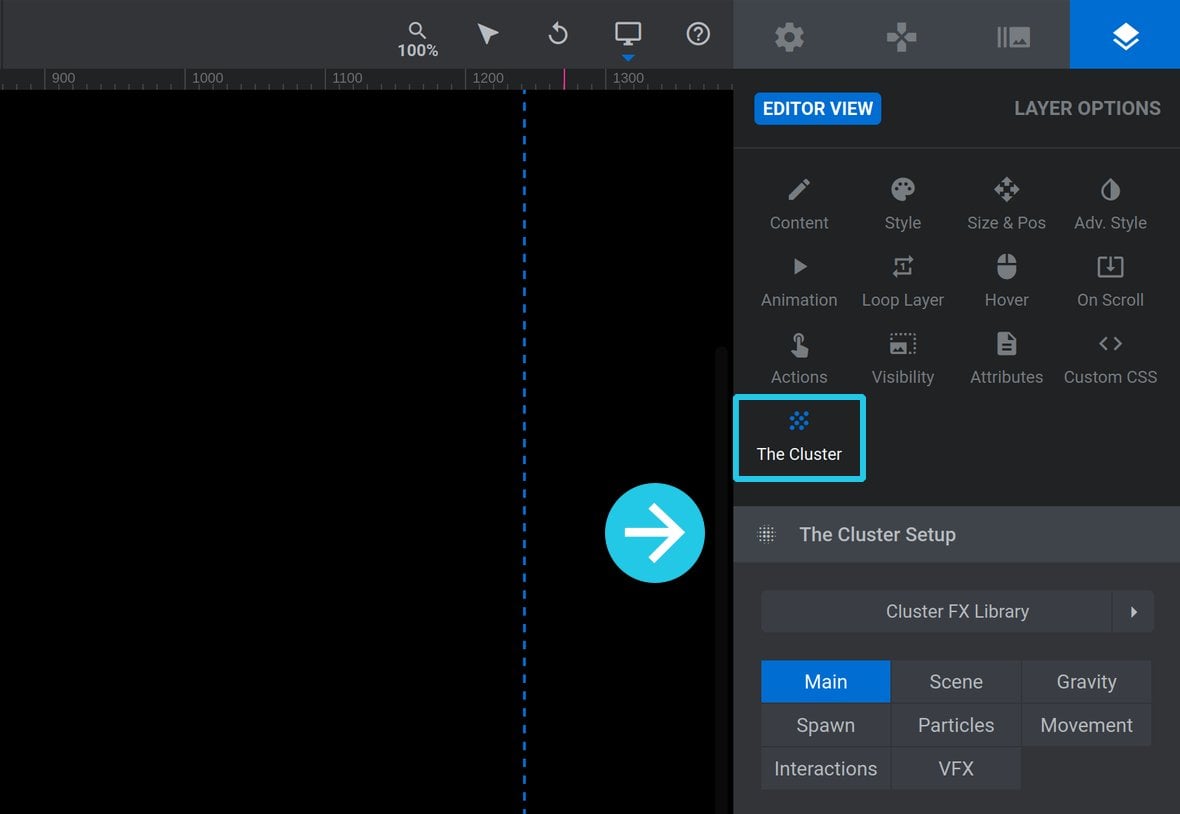
Note: To access every option mentioned in this guide, choose an existing The Cluster layer, go to the Layer Options tab, The Cluster sub-section, and finally the The Cluster Setup panel:
Managing Custom Presets
After customizing a cluster effect it can be saved as a custom preset in the Cluster FX Library for use later. Let’s see how.
Saving a Custom Preset
To save a custom preset, click to expand the Cluster FX Library and Custom Presets, then click the line labeled Custom Settings (Click to Save as Preset):

The line will turn blue and placeholder text such as “Give name” or “custom” will appear:
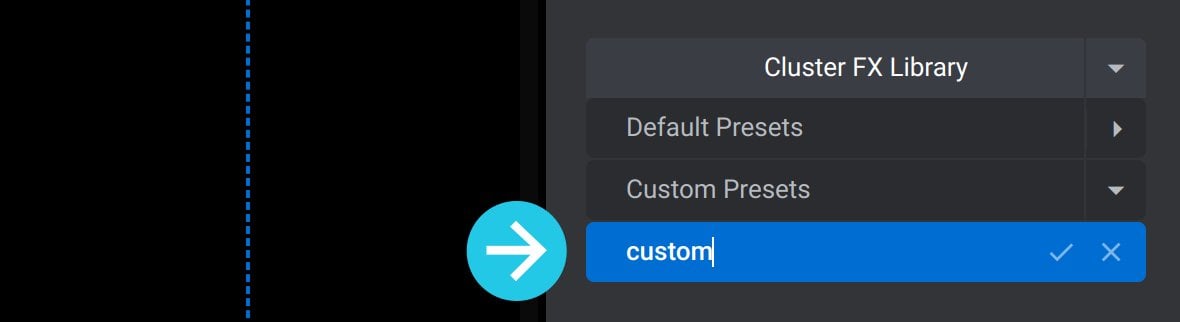
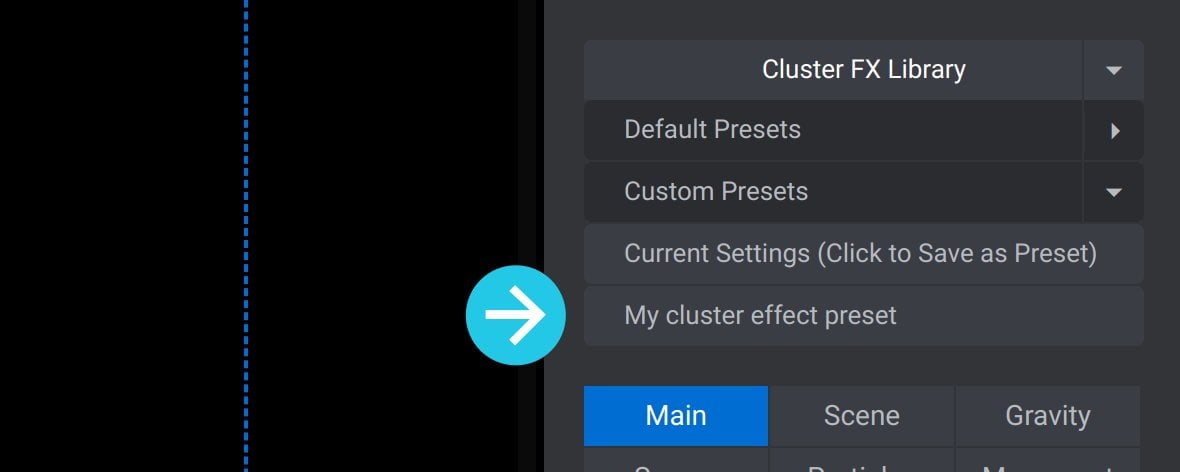
Replace that text with a name for your custom preset, then click the tick at the end of the line:

Your custom preset will be saved and you’ll now see it listed under Custom Presets:
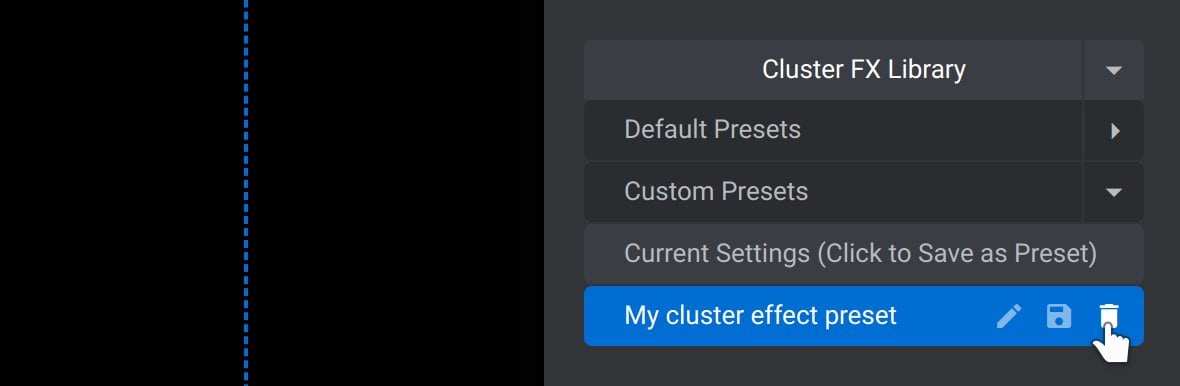
Deleting a Custom Preset
If you need to delete a custom preset, hover over it, then click the bin icon at the end of the line:
Customizing Cluster FX Attributes
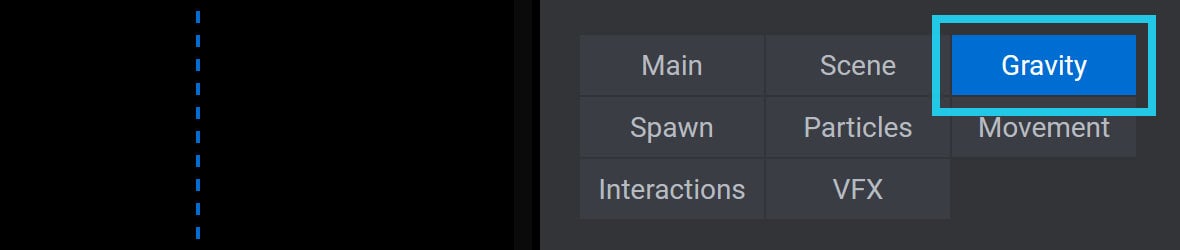
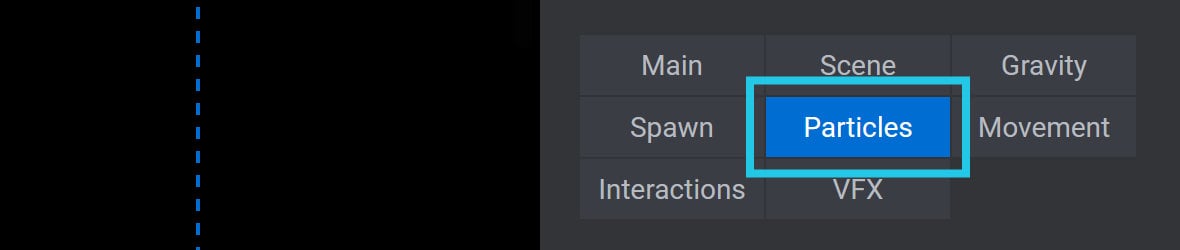
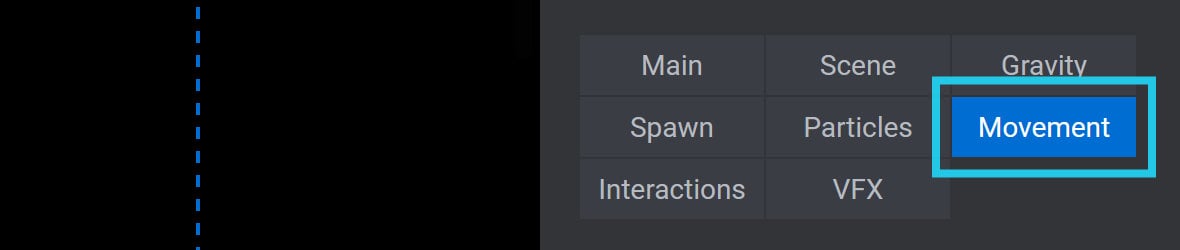
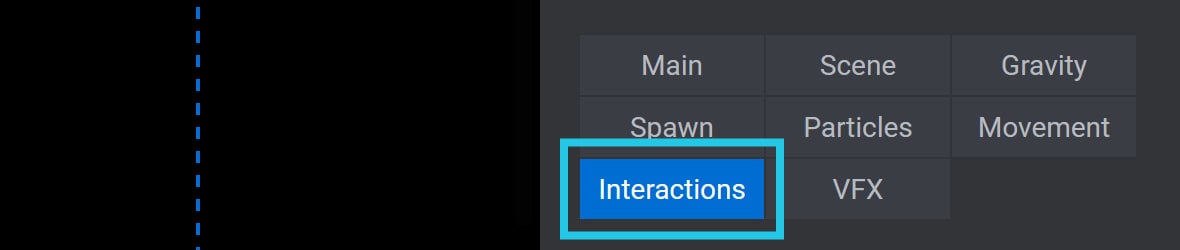
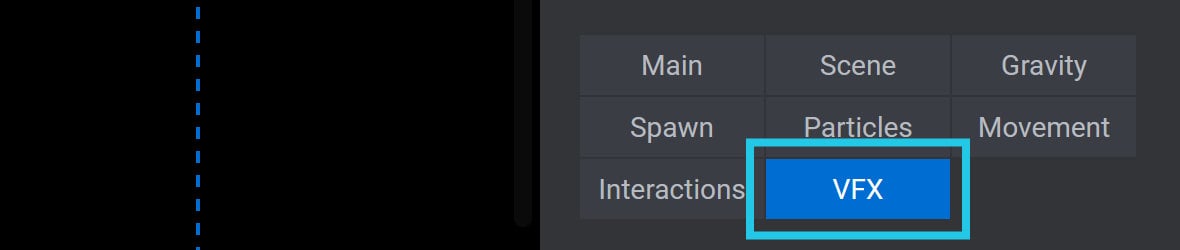
Below the Cluster FX Library you’ll see tabs for 8 categories of options you can modify in order to create a custom cluster effect:
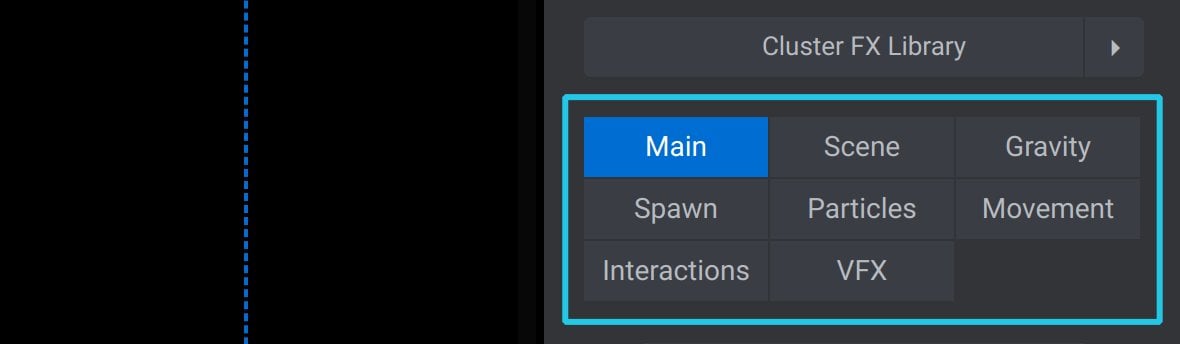
Those categories are:
- Main – sets the most broad options for the cluster effect.
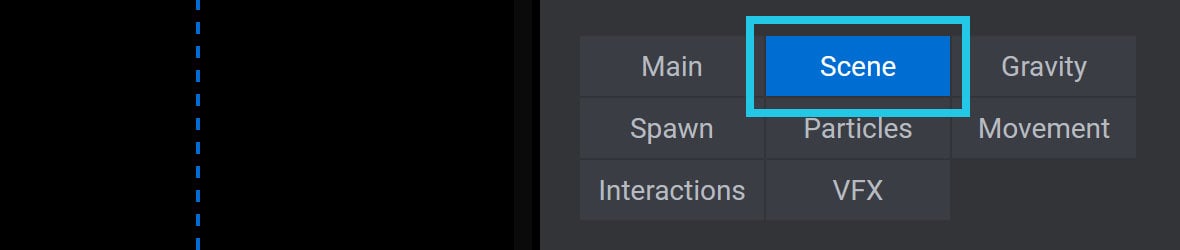
- Scene – allows you to configure a cluster layer’s scene.
- Gravity – enable and configure gravity points.
- Spawn – the number of particles, where the particles appear, and how they begin moving:
- Particles – the size range of particles.
- Movement – ongoing movement of the camera and particles.
- Interactions – make the cluster effect respond to mouse movement in various ways.
- VFX – apply additional visual effects to your cluster.
Let’s step through the options available under each category and learn how to use them.
Note: At any time you can click the Restart Animation button, (located below the category tabs), to play your cluster effect from the beginning:

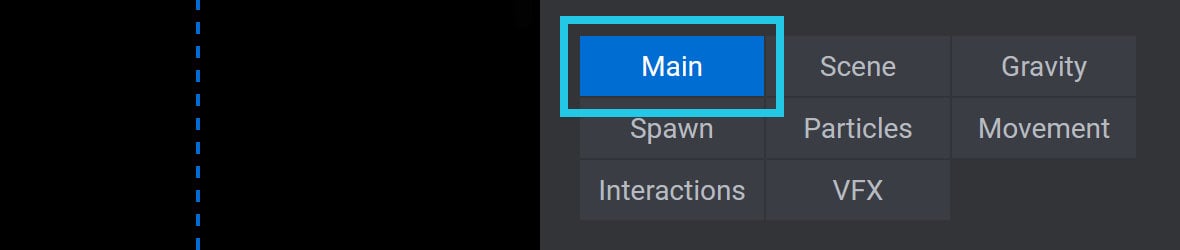
Main
The main category sets the most broad options for the cluster effect:
It contains the following options and panels:
Speed
The Speed option controls how fast the cluster particles move:

It is set as a percentage value between 1%, the slowest speed, and 100%, the fastest speed.
Limit Cluster
Toggle the Limit Cluster option to ON to restrict the movement range of the cluster to within a sphere:

Note: This limit sphere is positioned at the midpoint of the effect’s Gravity Points, which will be covered later.
Limit Amount
If the Limit Cluster option is set to ON, the Limit Amount option appears. It sets the size of the limit sphere, i.e. the maximum distance particles can move away from its center:

The option can be set from 1, which creates the smallest limit sphere, through to 15, the largest limit sphere.
Noise Setup Panel
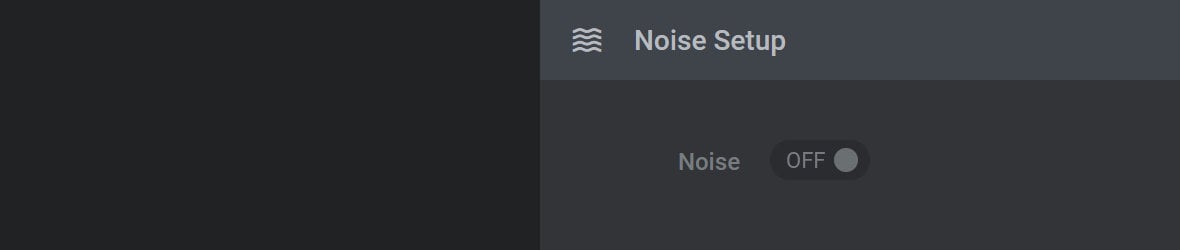
Noise
Toggle the Noise option to ON to introduce “noise”, i.e. randomness or turbulence, into the movement pattern of particles:

Influence
If the Noise option is set to ON, the Influence option appears. It is used to set how strongly particle movement is influenced by noise:

It can be set from 1, the weakest influence, through to 500, the strongest influence.
Scene
The Scene category of options allows you to configure a cluster layer’s scene:
It contains the following options and panels:
Adjust Scene Panel

Every cluster layer has a scene, which is a kind of container in which the cluster effect sits. You can think of it as a portion of 3D space dedicated just to the cluster effect.
Inside the Scene is the cluster effect and a virtual camera that views the cluster. Both the scene and the camera can have their angles manipulated to alter what you see of the cluster.
Show Helper
Toggle the Show Helper option to ON:

And a visual representation of the scene’s 3D positioning will appear on the canvas:
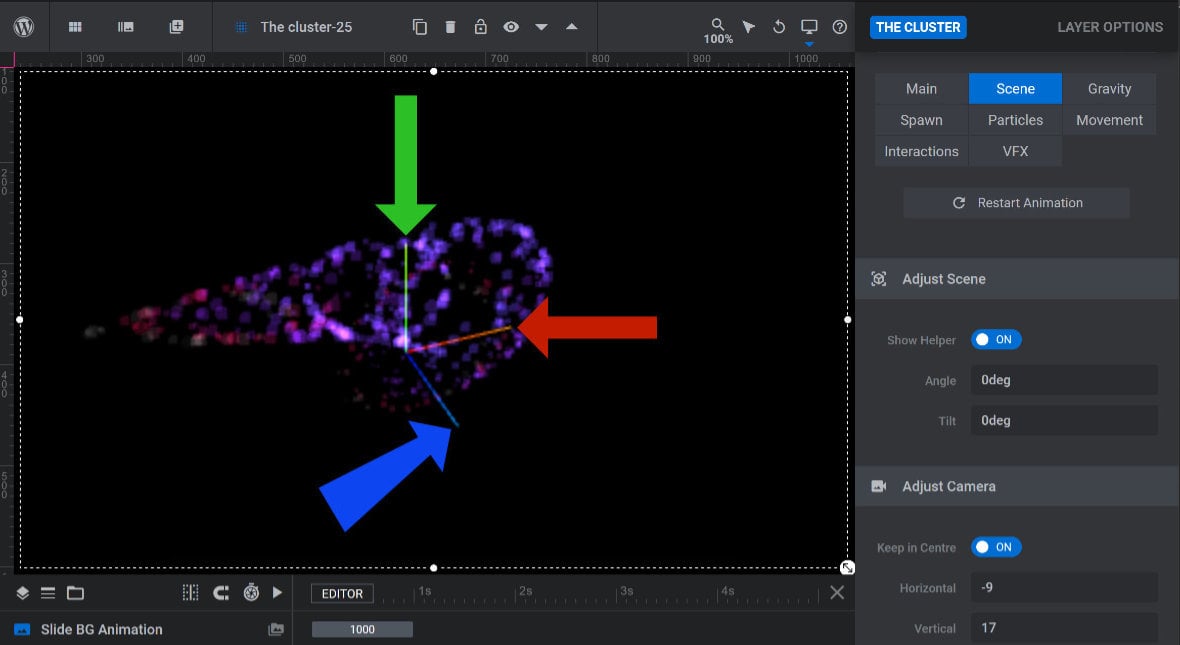
The helper consists of three lines, each representing an axis. Green is the vertical, or Y, axis. Red is the horizontal, or X, axis. Blue is the depth, or Z, axis.
Angle
The Angle option allows you to roll the cluster’s angle from left to right or vice versa:

The value can be set in degrees, within a range between -360deg and 360deg.
Decrease the value to angle the cluster to the right, i.e. roll clockwise. Increase the value to angle the cluster to the left, i.e. roll counter clockwise.
Tilt
The Tilt option allows you to tilt the cluster forwards or backwards:

The value can be set in degrees, within a range between -90deg and 90deg.
Decrease the value to tip the cluster forwards. Increase the value to tip the cluster backwards.
Adjust Camera Panel
The Adjust Camera panel allows you to position the camera capturing the cluster:
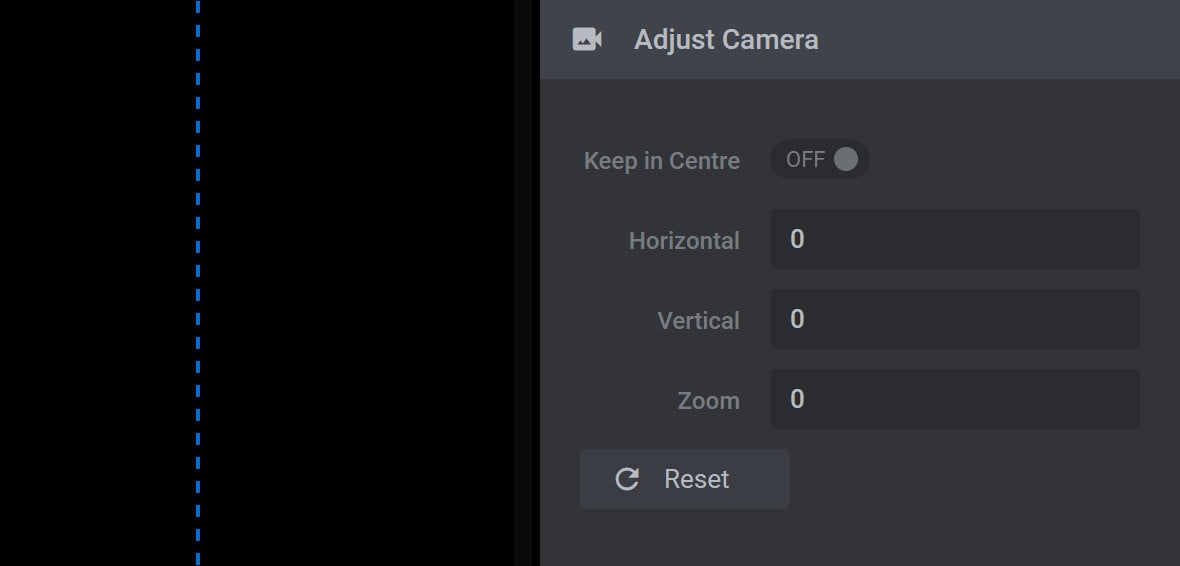
Keep in Centre
Toggle the Keep in Centre option to ON and, regardless of what other camera adjustments you make, the camera will stay pointed at the center of the scene:

Horizontal
The Horizontal option allows you to move the camera side to side:

The value can be set as a number, within a range between -20 and 20.
Decrease the value to move the camera left. If Keep in Centre is set to OFF, this will make the cluster appear to slide right. If Keep in Centre is set to ON, this will make the cluster appear to rotate counter clockwise around its center.
Increase the value to move the camera right. If Keep in Centre is set to OFF, this will make the cluster appear to slide left. If Keep in Centre is set to ON, this will make the cluster appear to rotate clockwise around its center.
Vertical
The Vertical option allows you to move the camera up and down:

The value can be set as a number, within a range between -20 and 20.
Decrease the value to move the camera down. If Keep in Centre is set to OFF, this will make the cluster appear to slide up. If Keep in Centre is set to ON, this will make the cluster appear to tip forwards.
Increase the value and move the camera up. If Keep in Centre is set to OFF, this will make the cluster appear to slide down. If Keep in Centre is set to ON, this will make the cluster appear to tip backwards.
Zoom
The Zoom option allows you to move the camera forwards and backwards:

The value can be set as a number, within a range between -60 and 25.
Decrease the value to move the camera back. This will make the cluster appear to move forward.
Increase the value to move the camera forward. This will make the cluster appear to move back.
If Keep in Centre is set to ON, if the camera zooms in past the center of the scene it will appear to quickly make a 180 degree turn and start zooming out again, looking at the center from the opposite side of the cluster.
Reset
Click the Reset button to set the scene back to its defaults:

This will set Angle to 0deg, Tilt to 10deg, Keep in Centre to ON, and Horizontal, Vertical and Zoom to 0.
Performance Settings Panel
The Performance Settings panel contains just the one option, Max DPR, as described below.
Max DPR
The Max DPR (maximum device pixel ratio) option allows you to set the quality of the cluster effect:
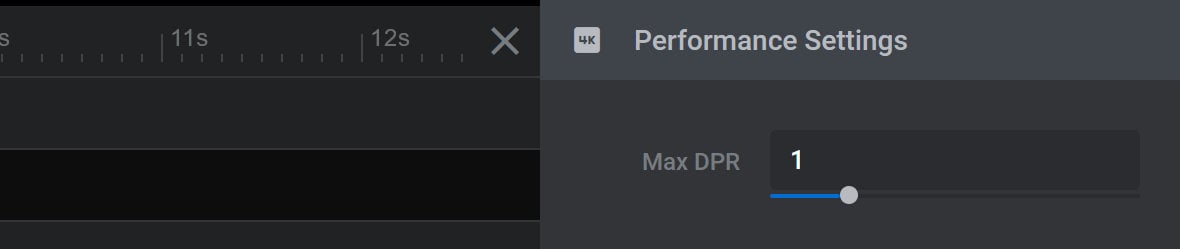
It can be set with a value of either 1, 2 or 3. The default value is 1, but increasing to 2 or 3 will generate a higher quality cluster. However, this may have performance impact.
Gravity
The Gravity category of options allows you to enable and configure gravity points:
Gravity points are positions in 3D space that act as attractors or repellors for particles in the cluster.
A gravity point will pull particles towards itself, or push them away, with a strength that depends on its Mass setting, as detailed below.
Edit Gravity Points
Click the Edit Gravity Points button:

And the Gravity Point Editor window will open:
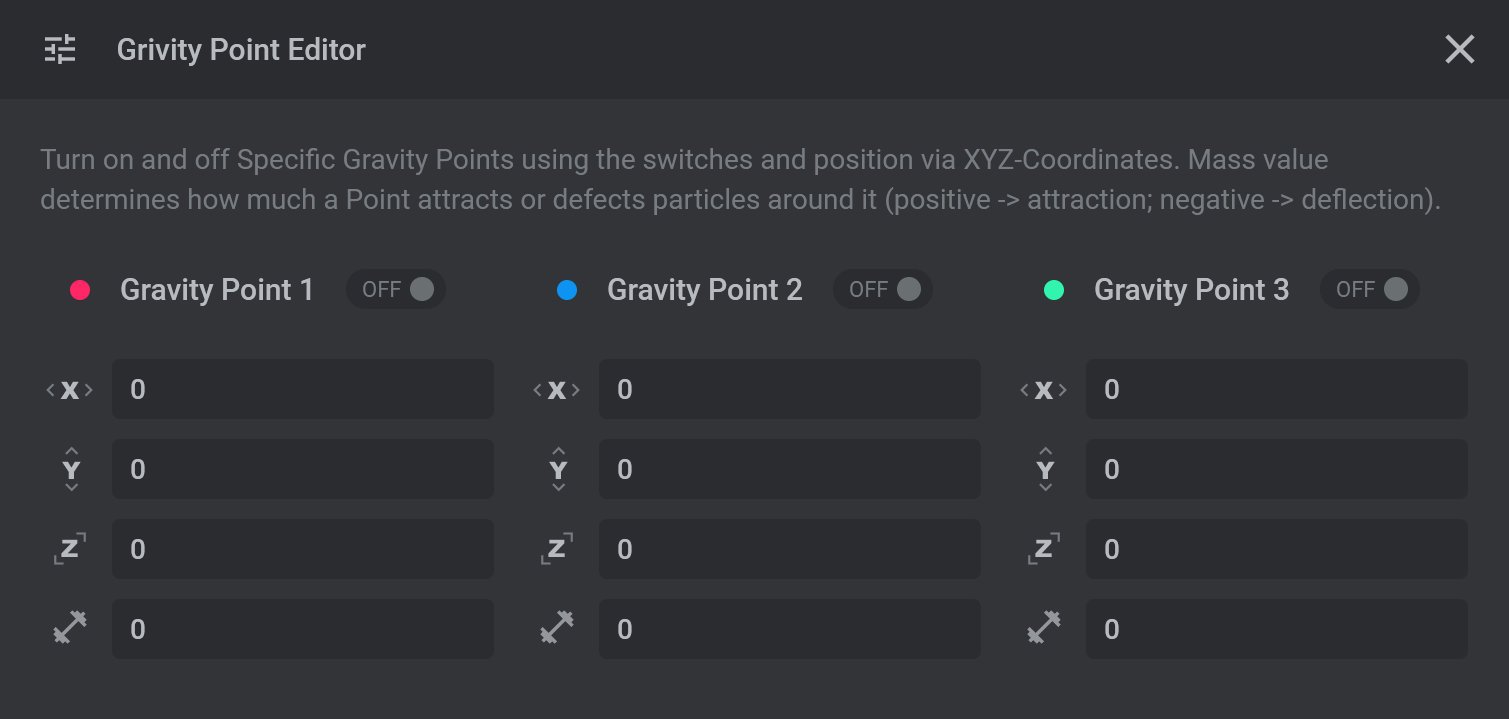
Gravity Point 1, 2, 3
There are up to three Gravity Points available, each of which can be activated in the scene by toggling its switch to ON:

Position & Mass
After activating a gravity point, use the four fields below its switch to set its position and mass.
The first three options set the point’s X (horizontal), Y (vertical), and Z (depth) positions:
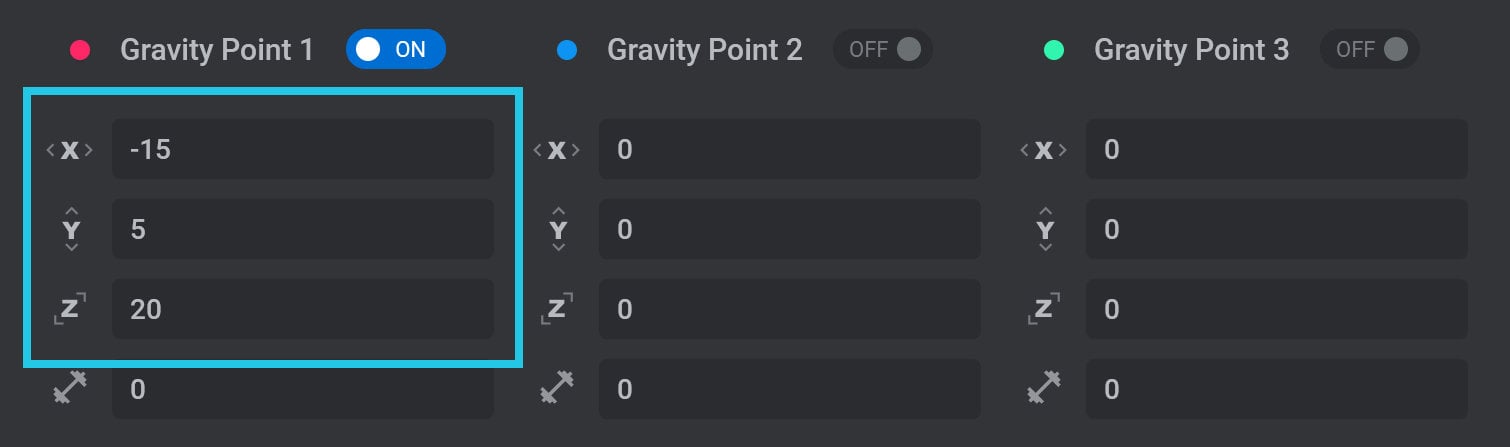
And the fourth option sets the point’s Mass, i.e. the strength with which it attracts particles towards its position, or repels them:
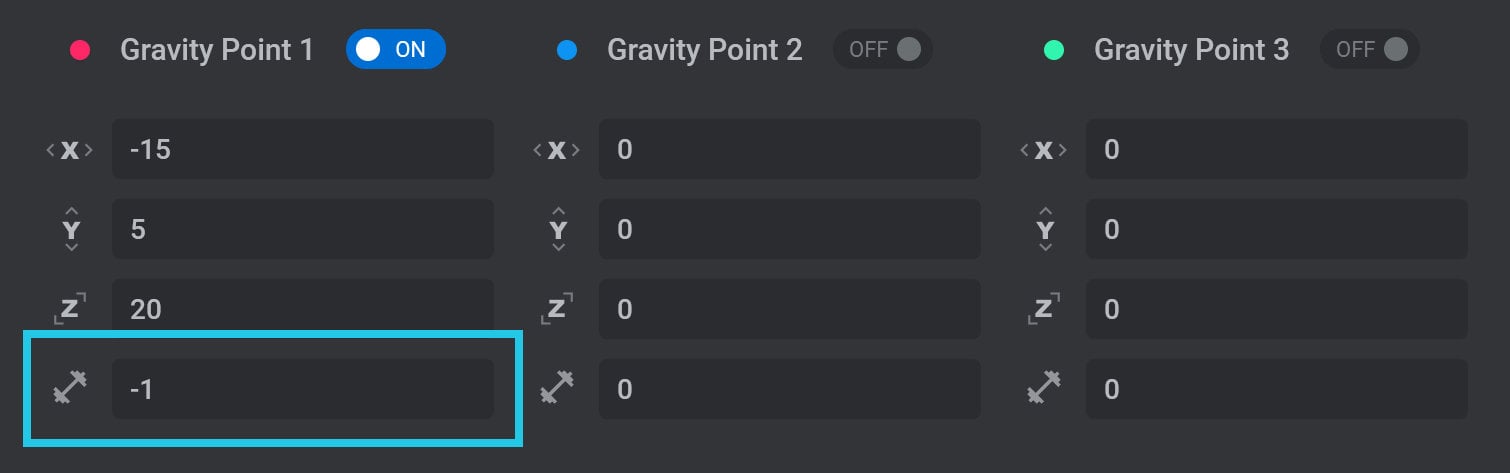
Enter a positive number to attract particles, and a negative number to repel them.
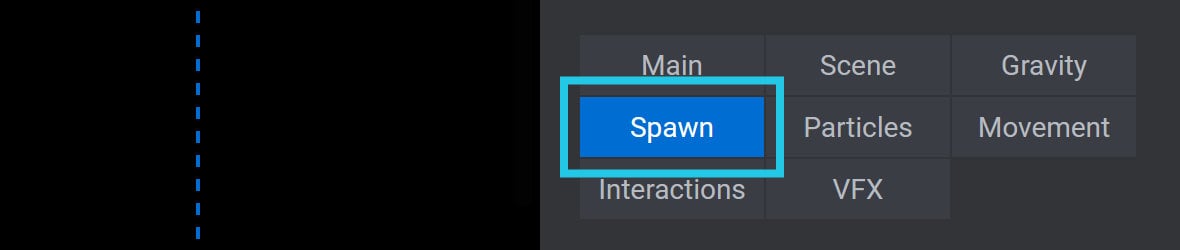
Spawn
The Spawn category of options allows you to configure the number of particles added to a cluster layer, where the particles appear, and how they begin moving:
It contains the following options and panels:
Spawn Width
The Spawn Width option sets the amount of space in which particles are allowed to spawn:

It can be set between 1, the narrowest space, and 100, the widest space.
Note: This option only appears if Spawn Form is set to On Globe, In Globe, or In Circle.
Amount
The Amount option sets the number of particles that will be added to the cluster:

It can be set between 5, the minimum particle count, and 3000, the maximum particle count.
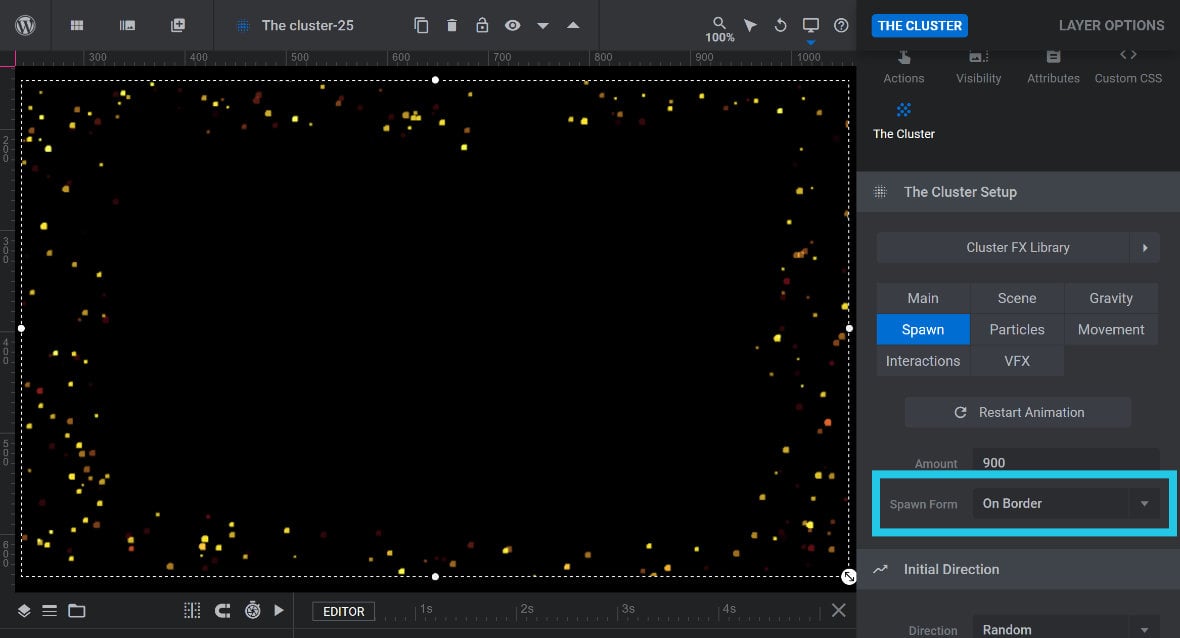
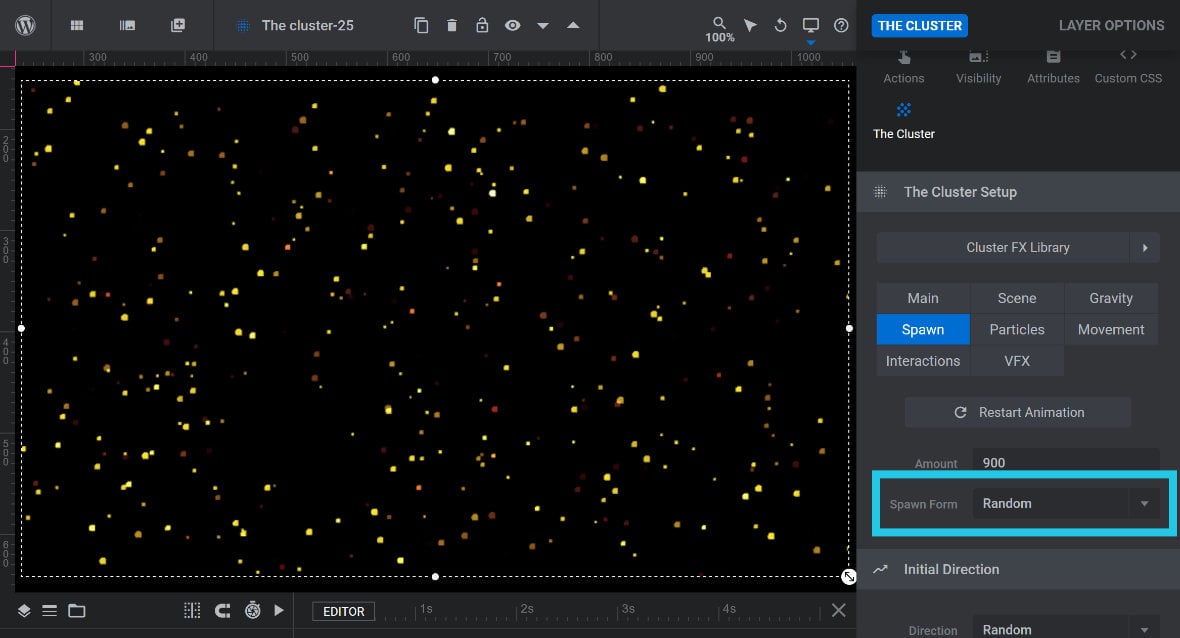
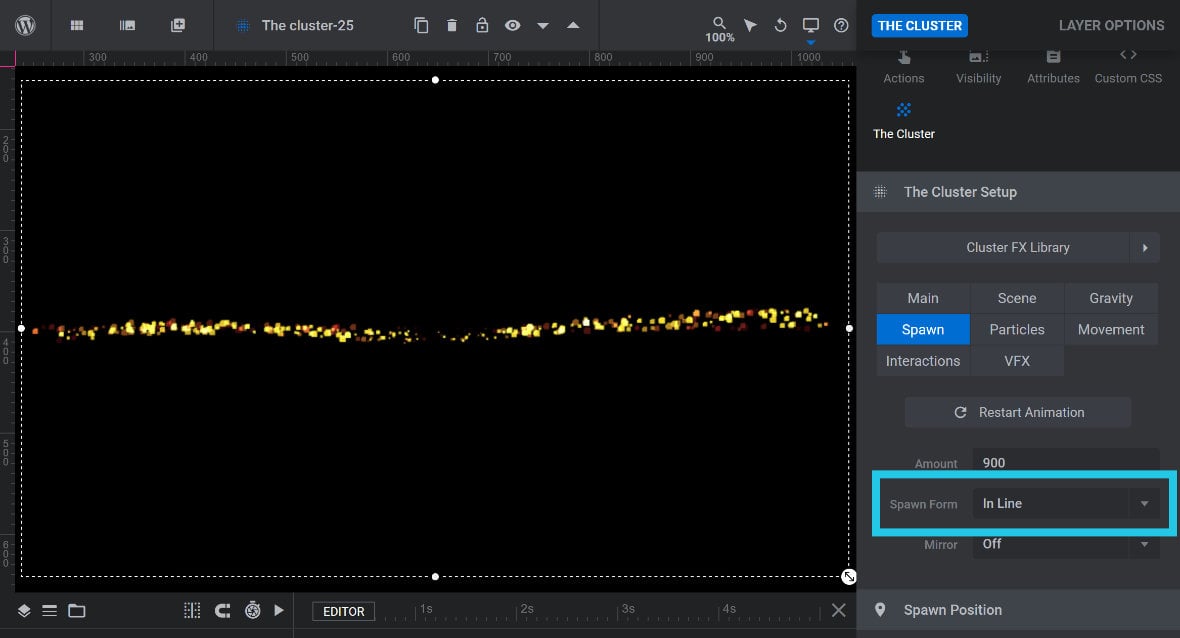
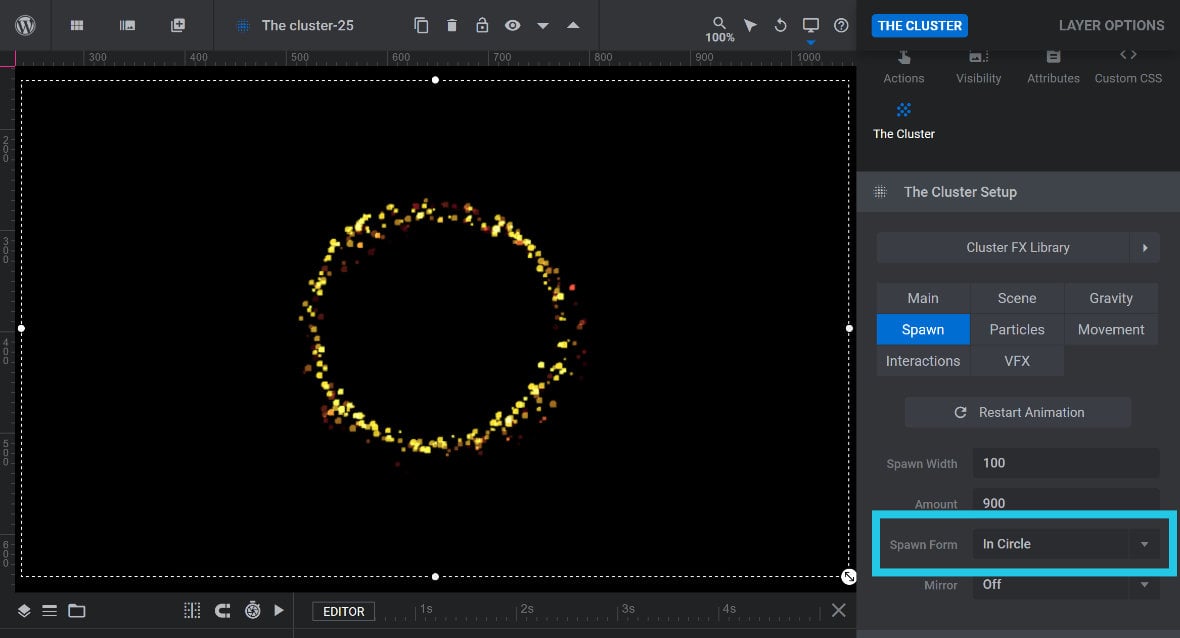
Spawn Form
Particles are initially formed in the shape of a 3D object, after which they will begin moving. The Spawn Form option determines what that initial shape will be:
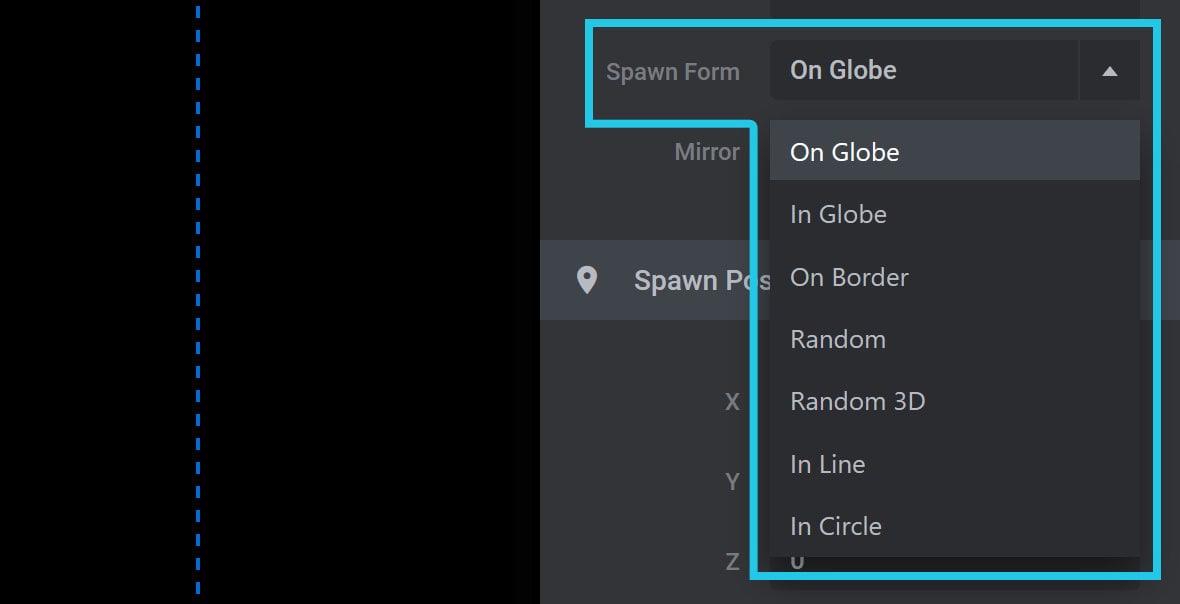
It has seven possible settings: On Globe, In Globe, On Border, Random, Random 3D, In Line and In Circle.
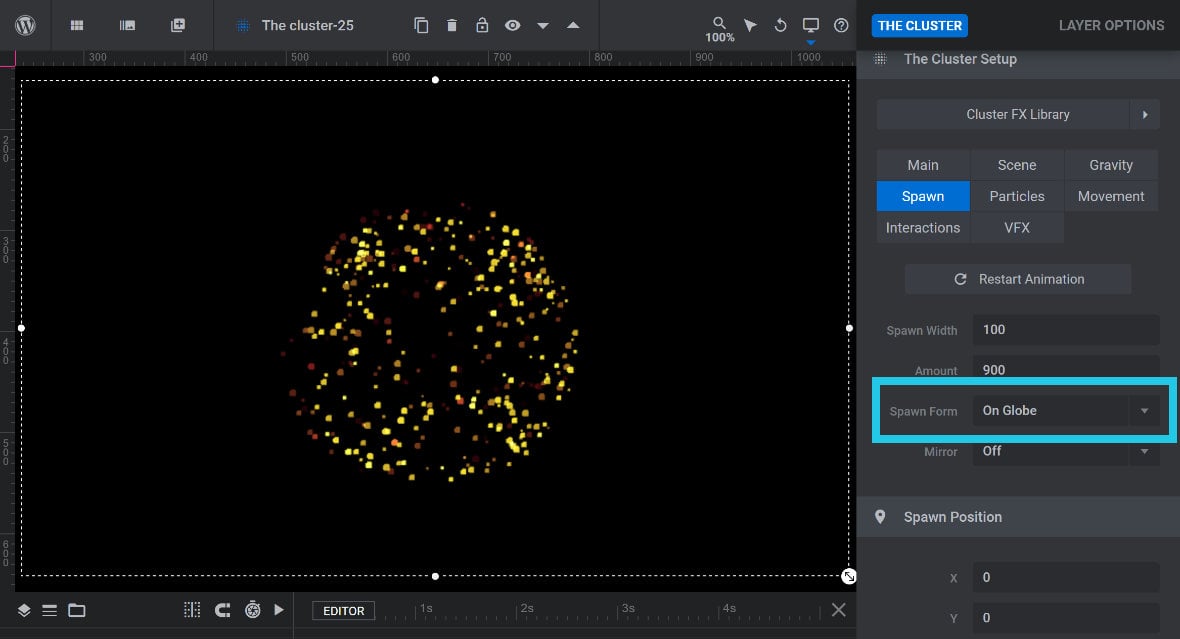
On Globe spawns particles on the outside of a sphere:
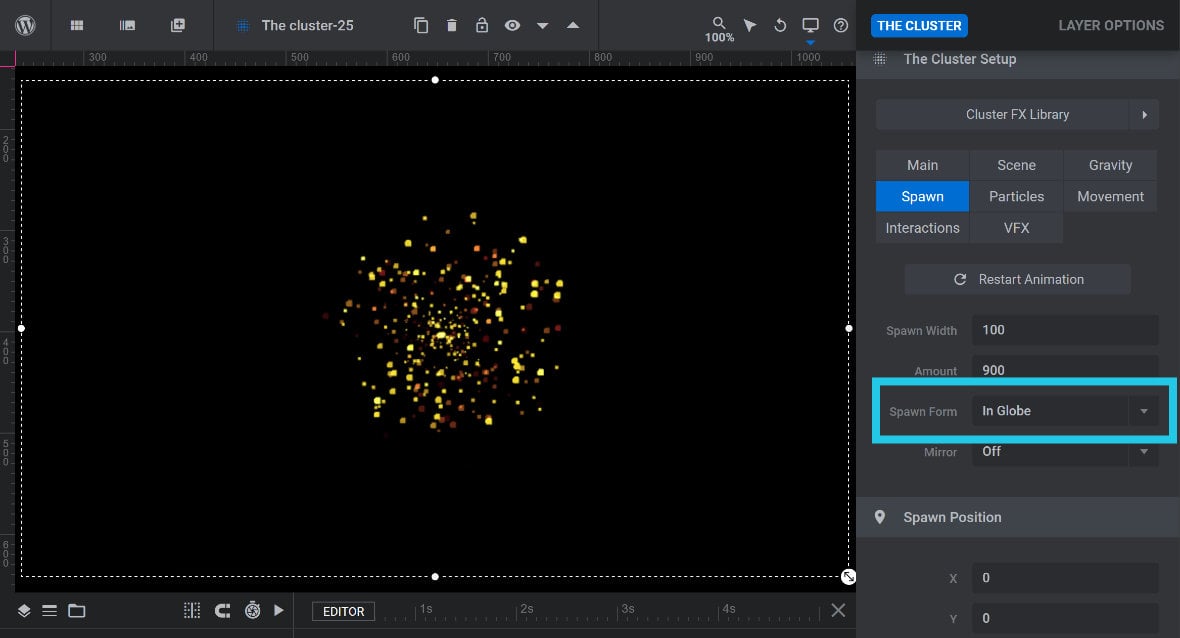
In Globe spawns particles inside of a sphere:
On Border spawns particles along the border of the layer boundary:
Random sets random X and Y positions for the particles:
Random 3D sets random X, Y and Z positions for the particles:

In Line spawns particles along a 2D line:
In Circle spawns particles along a 2D circle:
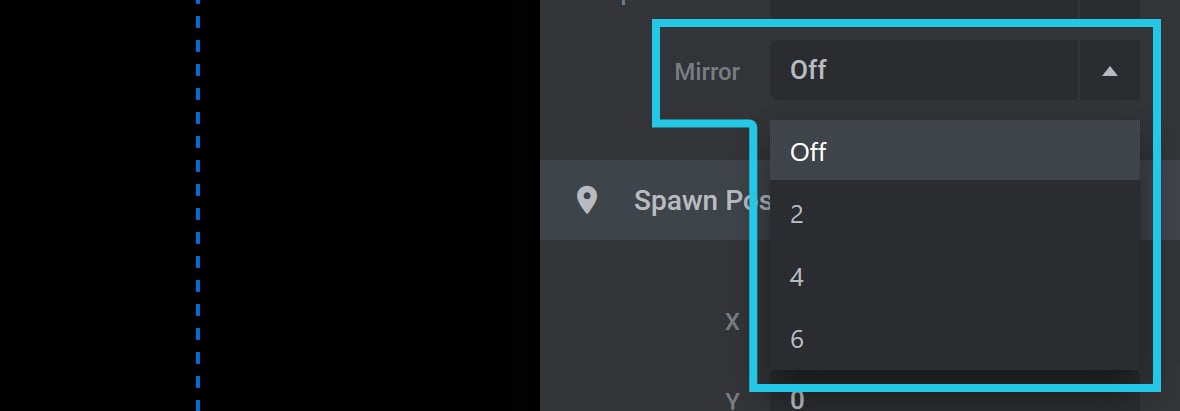
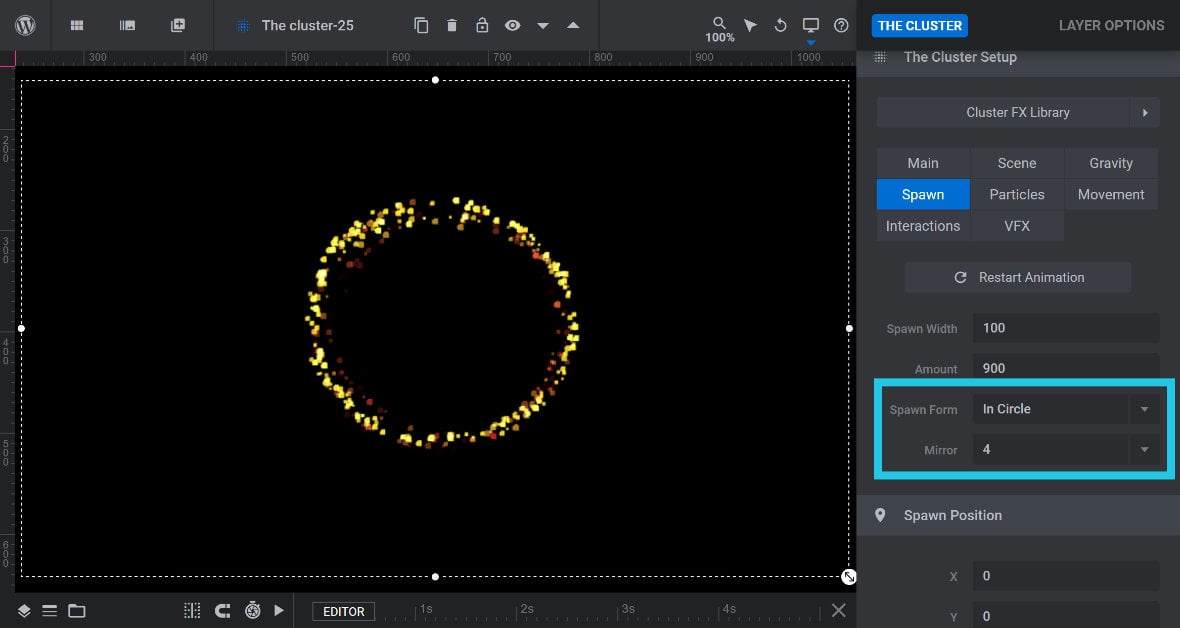
Mirror
The Mirror option allows you to mirror, or duplicate, the Spawn Form you have selected. If set to 2, 4 or 6, that number will be the number of spawn forms seen:
For example, if using the In Circle spawn form, setting Mirror to 4 will create 4 lines of particles:
Note: This option only appears if Spawn Form is set to On Globe, In Globe, In Line, or In Circle.
Spawn Position Panel
The Spawn Position panel allows you to set where the initial spawn form should be positioned in the scene.
X, Y, Z
Use the X option to set the spawn form’s horizontal position, the Y option to set the vertical position, and the Z option to set the depth:
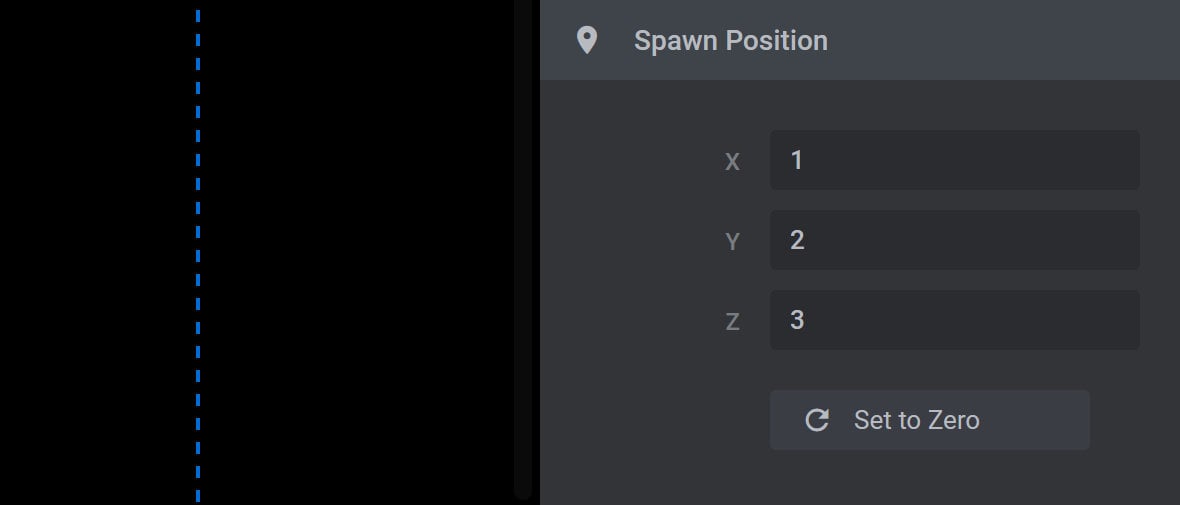
Set to Zero
Click the Set to Zero button to set the X, Y and Z options to zero:

Initial Direction Panel
In the Initial Direction panel you can configure the initiating movement of the cluster:
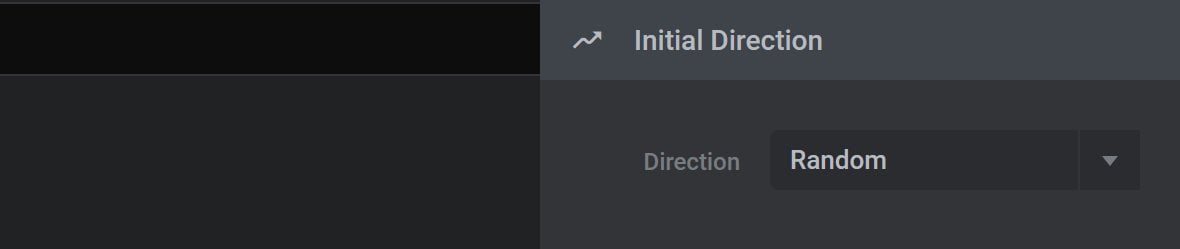
Direction
The Direction option allows you to set the initial direction to either Random, Towards Centre, Vector, Spin CW or Spin CCW:
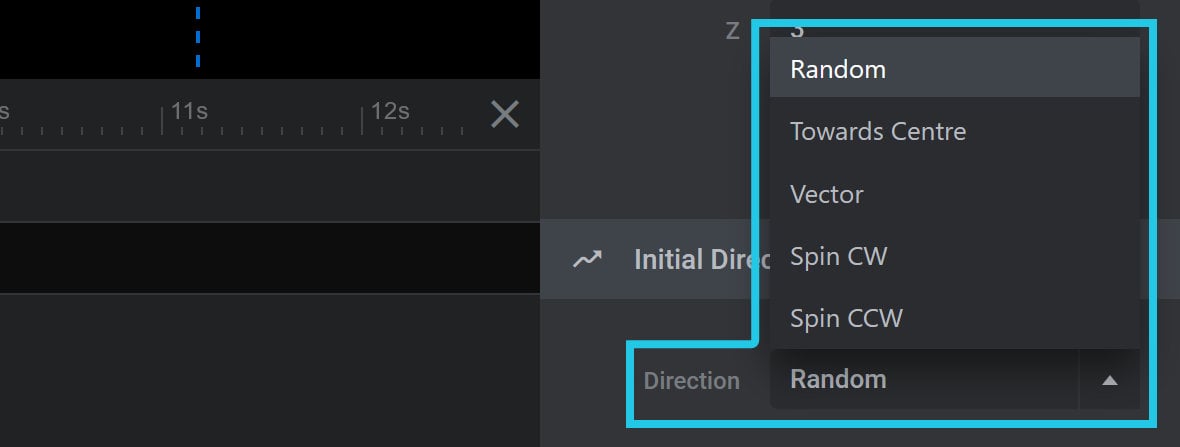
If you select the Vector setting, X, Y and Z options will appear:
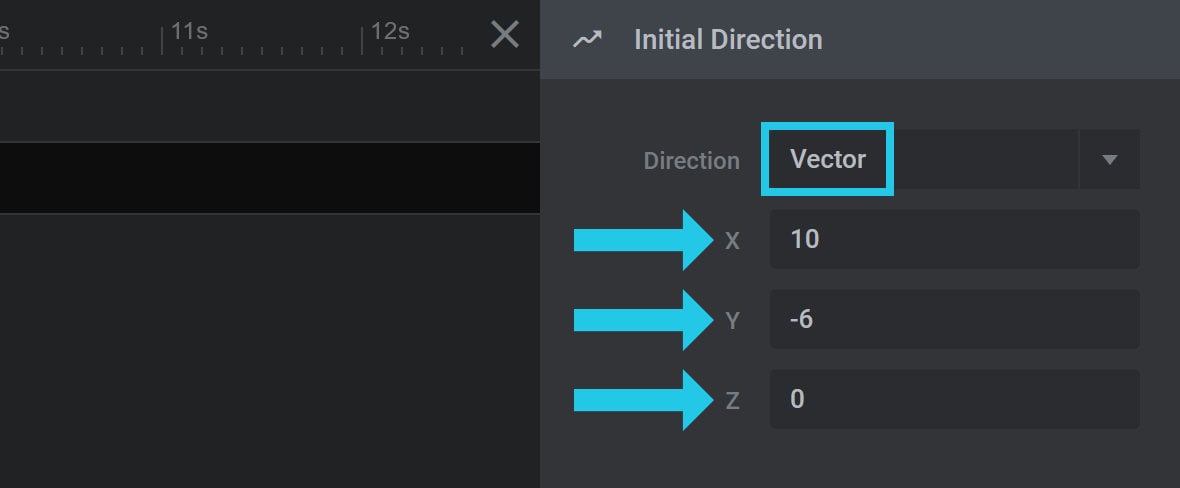
These allow you to specify a point in space for the particles to begin moving towards.
Particles
The Particles category of options allows you to configure the size range of particles:
It contains the following options and panels:
Size
The Size option controls how large particles are in 3D space:

The value is set as a number between 1, representing the smallest size, and 100, representing the largest size:
Random Size
Toggle the Random Size option to ON to randomize the initial particle spawn size:

The Min and Max options will appear below to set limits on the randomization.
Min, Max
The Min and Max options determine the smallest and largest sizes a particle can be. They are both set as percentages, which will be multiplied against the Size setting:

Design Panel
Particle
At the top of the Design panel you’ll see the currently active particle graphic, which is a circle by default:
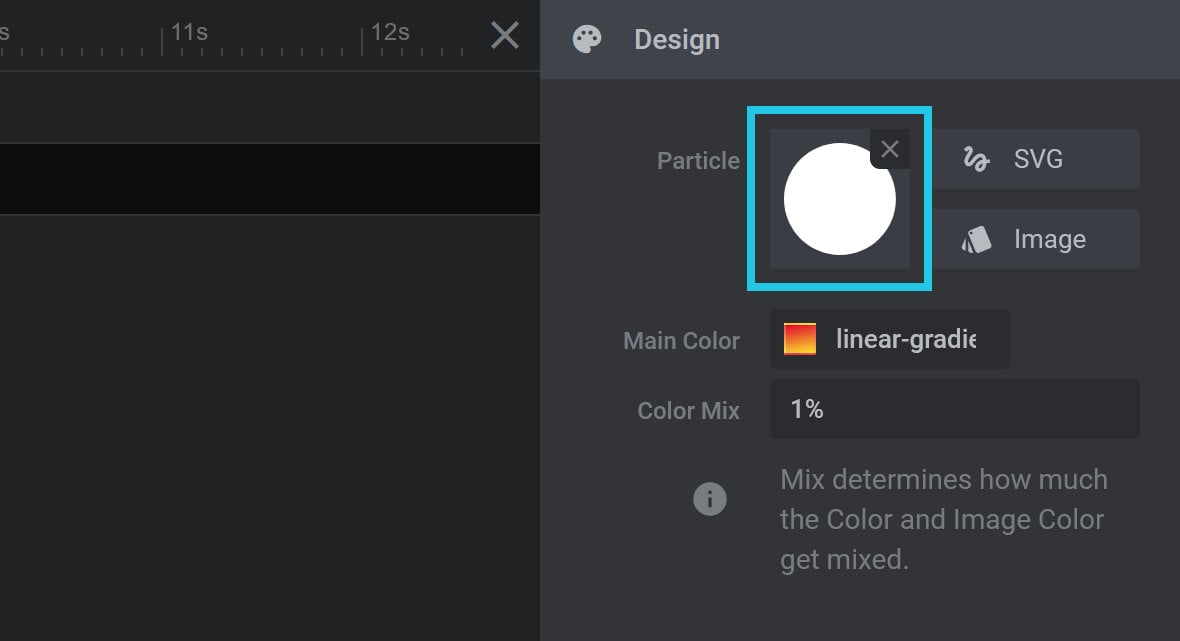
If you wish, here you can select a different graphic to display in the effect. There are two ways to do so.
The first is to click the button labeled SVG:

This will open up a window with an additional 900+ SVG shapes to choose from for your particles:
The second way is to click the button labeled Image:

This will open the WordPress media library, which you can use to add your own custom graphic.
You’ll see a thumbnail of your selected graphic appear:

To remove a custom graphic and go back to the default circle, click the small X at the top right corner of the graphic.
Main Color
The Main Color option allows you to set a gradient or flat color to apply to the cluster:

If you use a gradient, each particle will be given a color from somewhere along that gradient.
Color Mix
Use the Color Mix option to control how much of the default image color to use vs the Main Color:

It can be set as a percentage value, with lower percentages using more Main Color, and higher percentages using more default image color.
Movement
The Movement category of options allows you to configure ongoing movement of the camera and particles:
It contains the following options and panels:
Camera/Scene Animation Panel
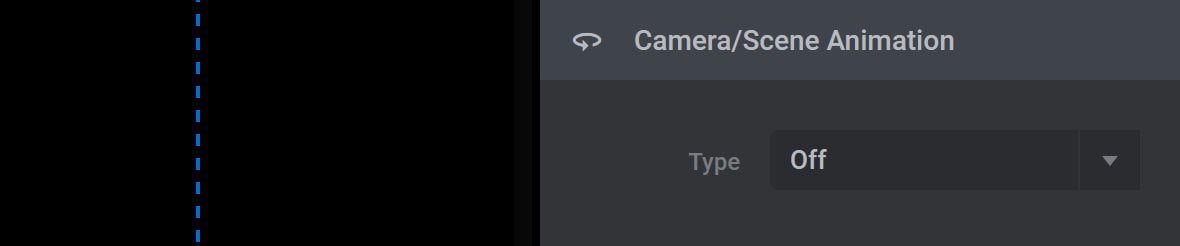
Type
Set the Type option to Loop if you would like the camera to rotate on its axis repeatedly:

The Setup panel will then appear below.
Setup Panel
In the Setup panel you can set how fast the camera should rotate around each axis:
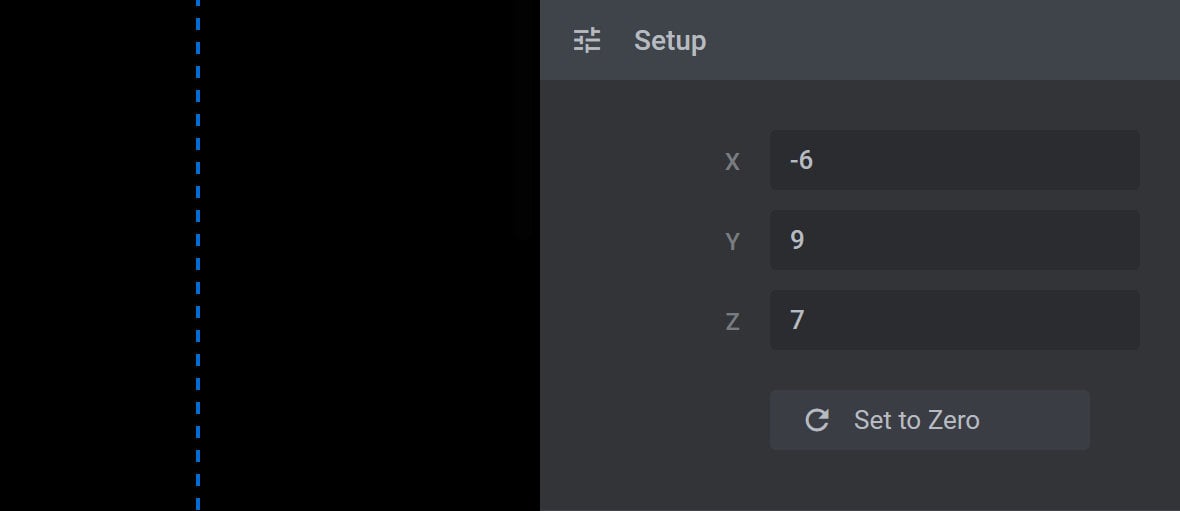
Use the X option to set rotation around the horizontal axis. Set a positive number to tip the camera backwards, or a negative number to tip it forwards.
Use the Y option to set rotation around the vertical axis. Set a positive number to rotate the camera counter clockwise, or a negative number to rotate it clockwise.
Use the Z option to set rotation around the depth axis. Set a positive number to roll the camera counter clockwise, or a negative number to roll it clockwise.
Particle Behavior Panel
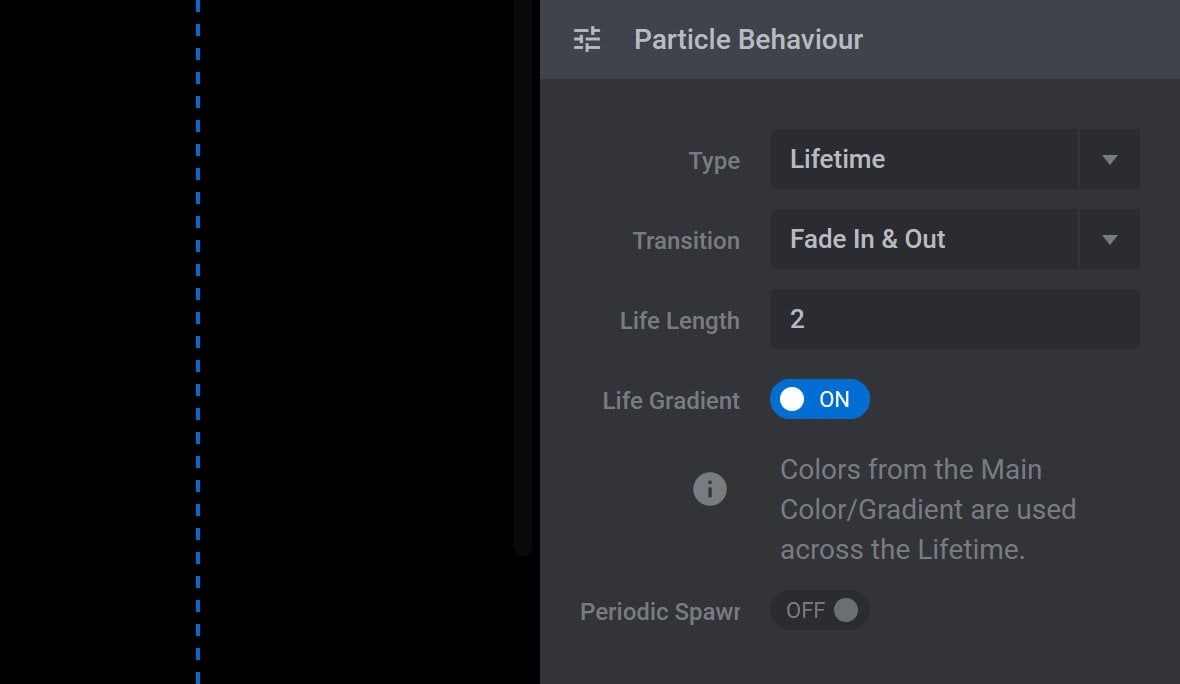
Type
The Type option controls how particles move across their lifetime. It can be set to either Continuous, Sinus or Lifetime:
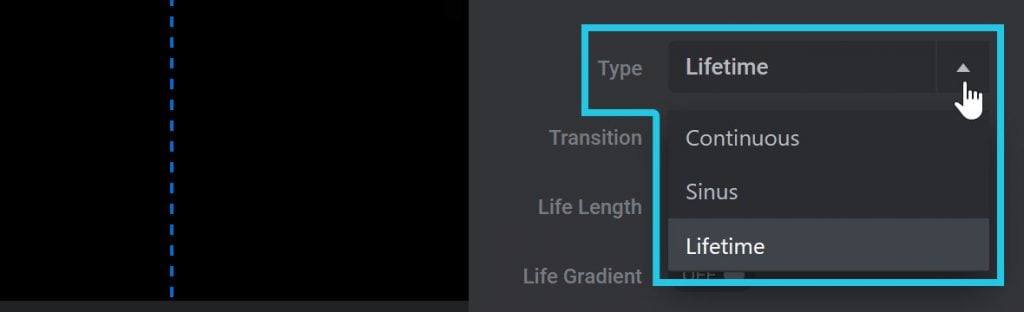
Continuous spawns particles once only then keeps them moving at a continuous flat rate.
Sinus also spawns particles once only, but then moves them at an undulating rate according to a sinus wave.
Lifetime spawns particles that live for a limited time, then respawns more particles.
If you choose this setting, four to five additional options will appear below, with which you can configure the lifetime particle behavior:
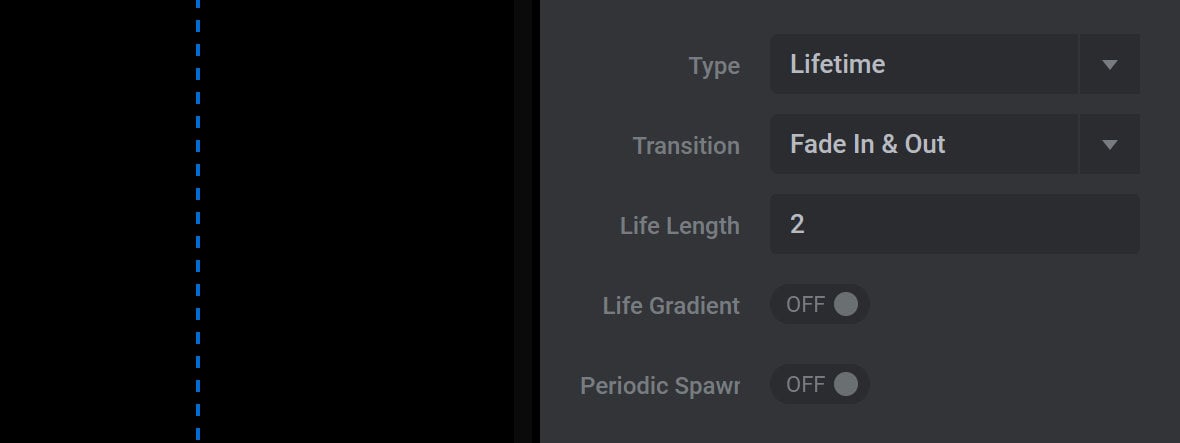
Transition
The Transition option controls particle opacity over their lifetime:
Fade In will make particles slowly fade in, but quickly fade out when they die.
Fade Out will make particles slowly fade out as they die, but quickly fade in when they spawn.
Fade In & Out makes particles slowly fade in when they spawn, and slowly fade out as they die.
Life Length
The Life Length option controls how long a particle lives after spawning:

It can be set between 1, the shortest life, and 20, the longest life.
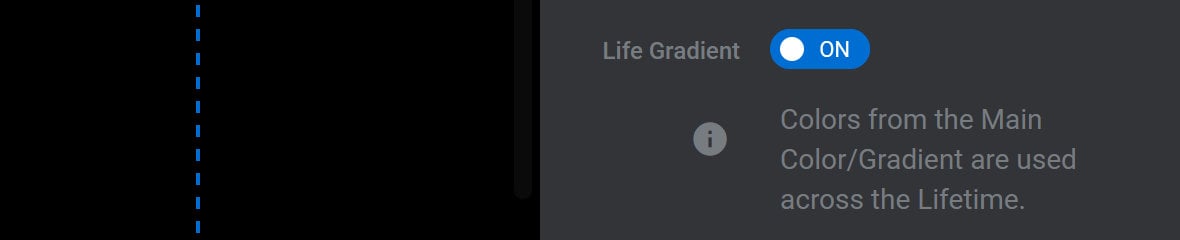
Life Gradient
If Life Gradient is toggled to ON, each particle will gradually change its color through the range set in the Main Color/Gradient option (found under the Design Panel in the Particles category):
Periodic Spawn
If Periodic Spawn is toggled to ON, particles will spawn in bursts rather than steadily over time:

Respawn Intensity
Use the Respawn Intensity option to set the strength of Periodic Spawn bursts of particles:

It can be set between 2, the least intense, and 10, the most intense.
Gravity Point Animation Panel
The Gravity Point Animation panel allows you to make gravity points continuously move in a circle on a specified plane:
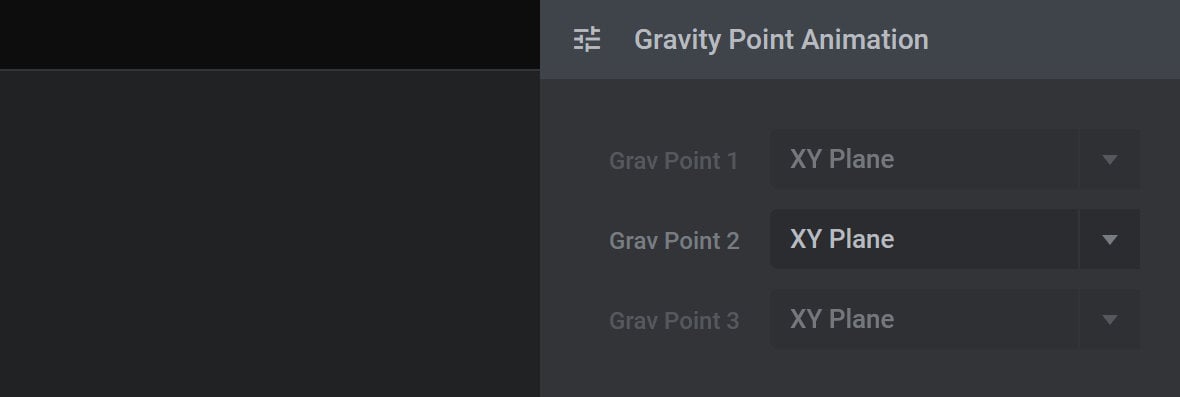
Grav Point 1, 2, 3
For each gravity point, set its circular movement to either the XY (horizontal & vertical), YZ (vertical & depth) or XZ (horizontal & depth) plane:
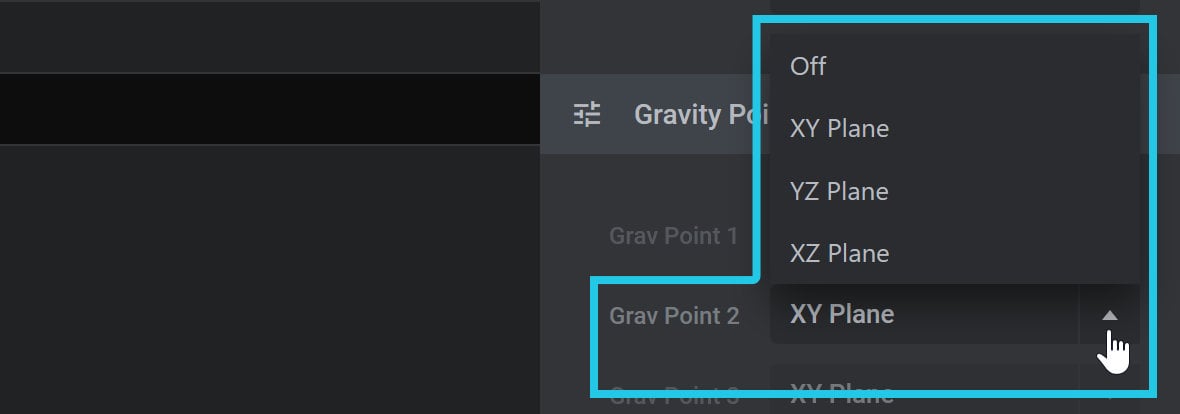
To apply no movement, instead choose Off.
Interactions
The Interactions category of options allows you to make the cluster effect respond to mouse movement in various ways:
Type
The Type option sets the type of interactivity to use:

To enable interactivity, set the option to Individual Gravity, Individual Rotation, or Indiv Rotation & Return:
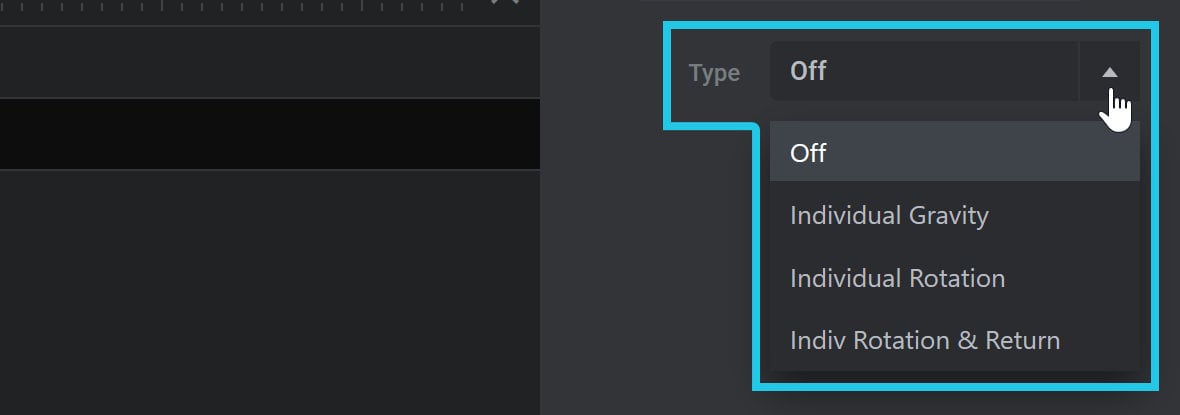
Individual Gravity adds a new gravity point that follows the mouse. Selecting this setting will reveal the related Intensity option:

Intensity
When using Individual Gravity interaction, the Intensity option controls how strongly mouse movement attracts particles.
Individual Rotation rotates the scene along with mouse movement. Selecting this setting will reveal the related Angle option:

Angle
The Angle option controls how the maximum amount of mouse movement can affect rotation.
Indiv Rotation & Return also rotates the scene with mouse movement, then returns it to its original rotation. Selecting this setting will reveal the related Angle option (as detailed above) as well as the Return Speed option:

Return Speed
The Return Speed option controls how quickly the scene will return to its original rotation.
VFX
The VFX category of options allows you to apply additional visual effects to your cluster:
At present there is one visual effect available: bokeh blur.
Type
Set the Type option to Bokeh to apply a bokeh blur effect to the cluster:

Breathing
Toggle the Breathing option to ON to shift the bokeh effect’s focus point back and forth:

This will make the Min and Max options appear below.
Min, Max
Use the Min and Max options to set the minimum and maximum amounts of blur the Breathing effect will transition between:
