
One of the more difficult things to do when marketing your business is to explain how it all works without overwhelming the prospective customer or user. On the flipside of that, you also don’t want to put them to sleep with a description of what you do.
Imagery can be useful in this regard — be they photos, GIFs, or explainer videos — as they enable prospective users to actually visualize what you’re talking about.
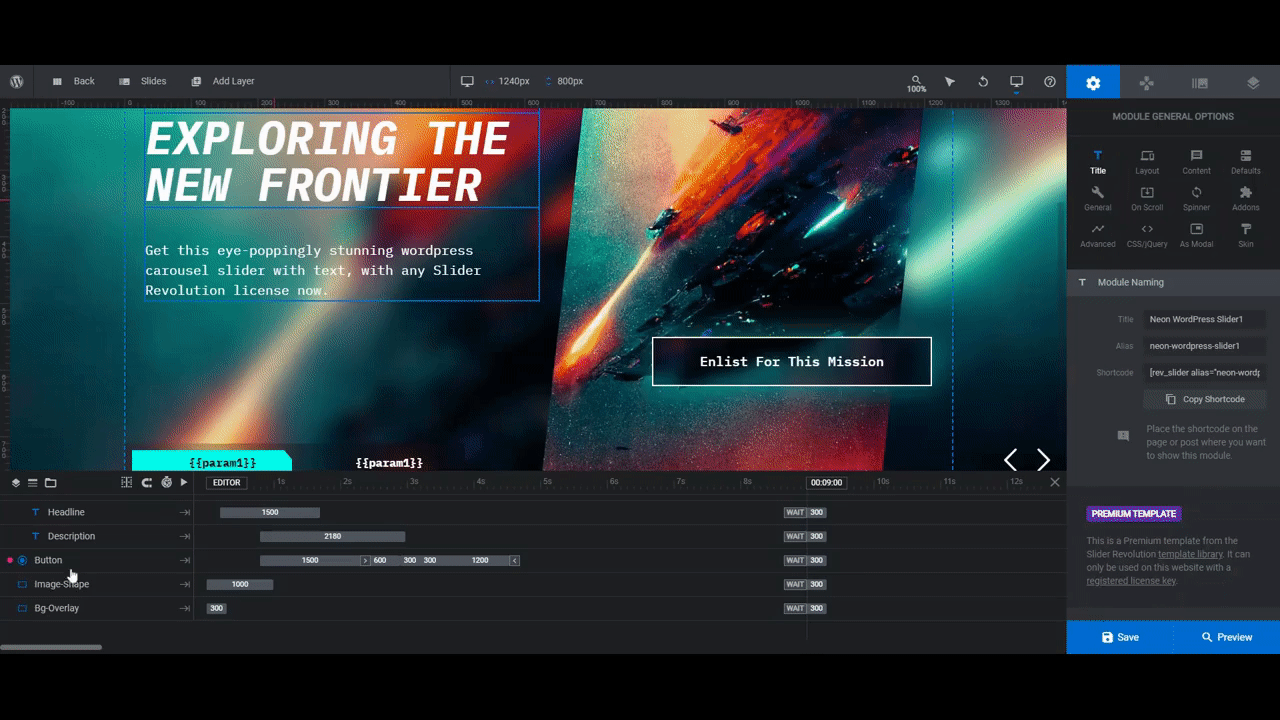
In this tutorial, we’re going to demonstrate how to create a colorful image slider with the Neon WordPress Slider template. We’ll use it to break down each step of our process visually and with minimal text.
Table of Contents:
- Step 1: Delete all of the slides except the first
- Step 2: Change out the main slide photo
- Step 3: Change out the background photo
- Step 4: Update the slide animation
- Step 5: Edit the text
- Step 6: Duplicate the slide and customize the graphics and text
- Step 7: Update the slider buttons
- Step 8: Customize the navigation
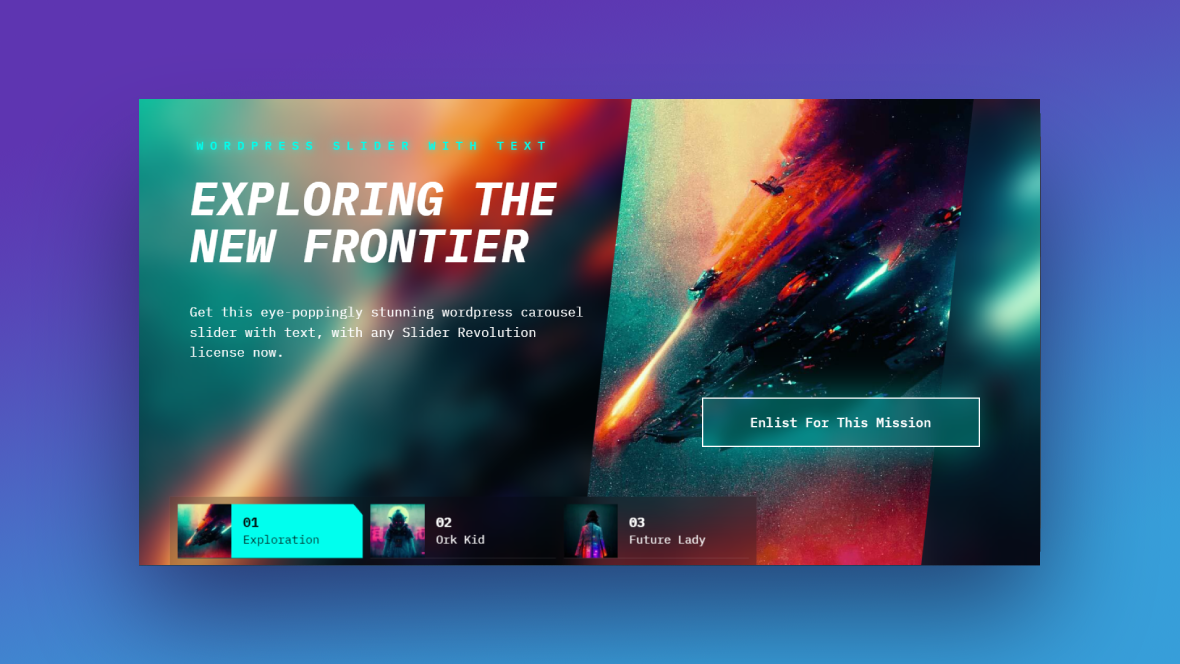
How to create a colorful image slider that explains what your business does
Take a look at the Neon WordPress Slider template and you’ll see that it has nothing to do with processes.
That’s okay. This color image slider has all the building blocks we need. Below, we’ll show you how to easily repurpose this template and break down any process step by step.
If this is the first time you’re using Slider Revolution, review these quick-start guides before you begin:
Step 1: Delete all of the slides except the first
Because we need to do extensive customization to the styles, it’s going to be easier and much faster if we customize just one slide. We’ll then duplicate that slide once the design is perfected.
To delete all of the slides but the first, go to “Slides” in the top toolbar. Hover over each slide and click the trash can icon that appears to the right.
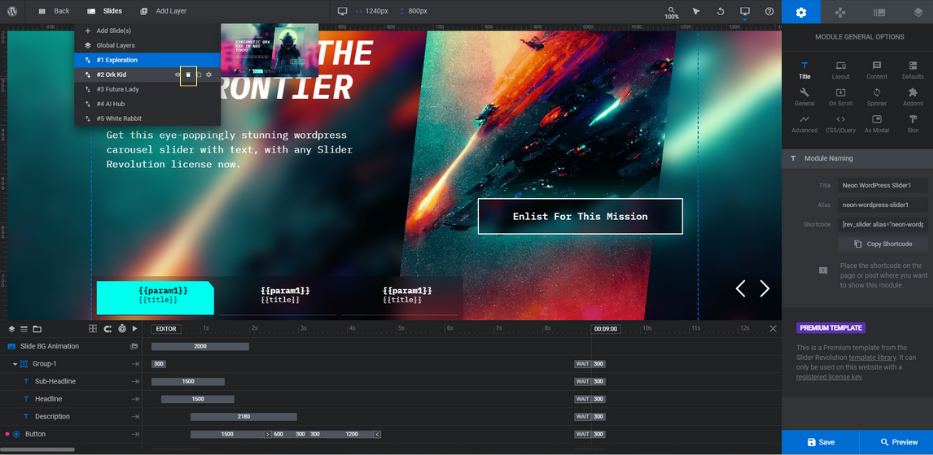
When you’re done, you should have just one slide remaining.
Learn more:
Step 2: Change out the main slide photo
To create this colorful image slider background, we’re going to place our process image in two spots — as the main slide photo in the foreground and as the background image.
To update the foreground photo, select the image in the canvas or select the layer called Image-Shape in the timeline editor.
Note: For the best results, save your image to the same size as the template image: 1000 px by 1000 px. Also, avoid using photos with lots of light colors. You want the white font to stand out well against the background.
Go to “Layer Options” and “Content”. Upload your new image to the Media Library.
Right now, the image has a spike mask applied to it. That’s what creates the angular slices along the edges.
To modify the spike mask, go to “Adv Style” and “Spike Masks”. To remove the effect entirely, switch the toggle off.
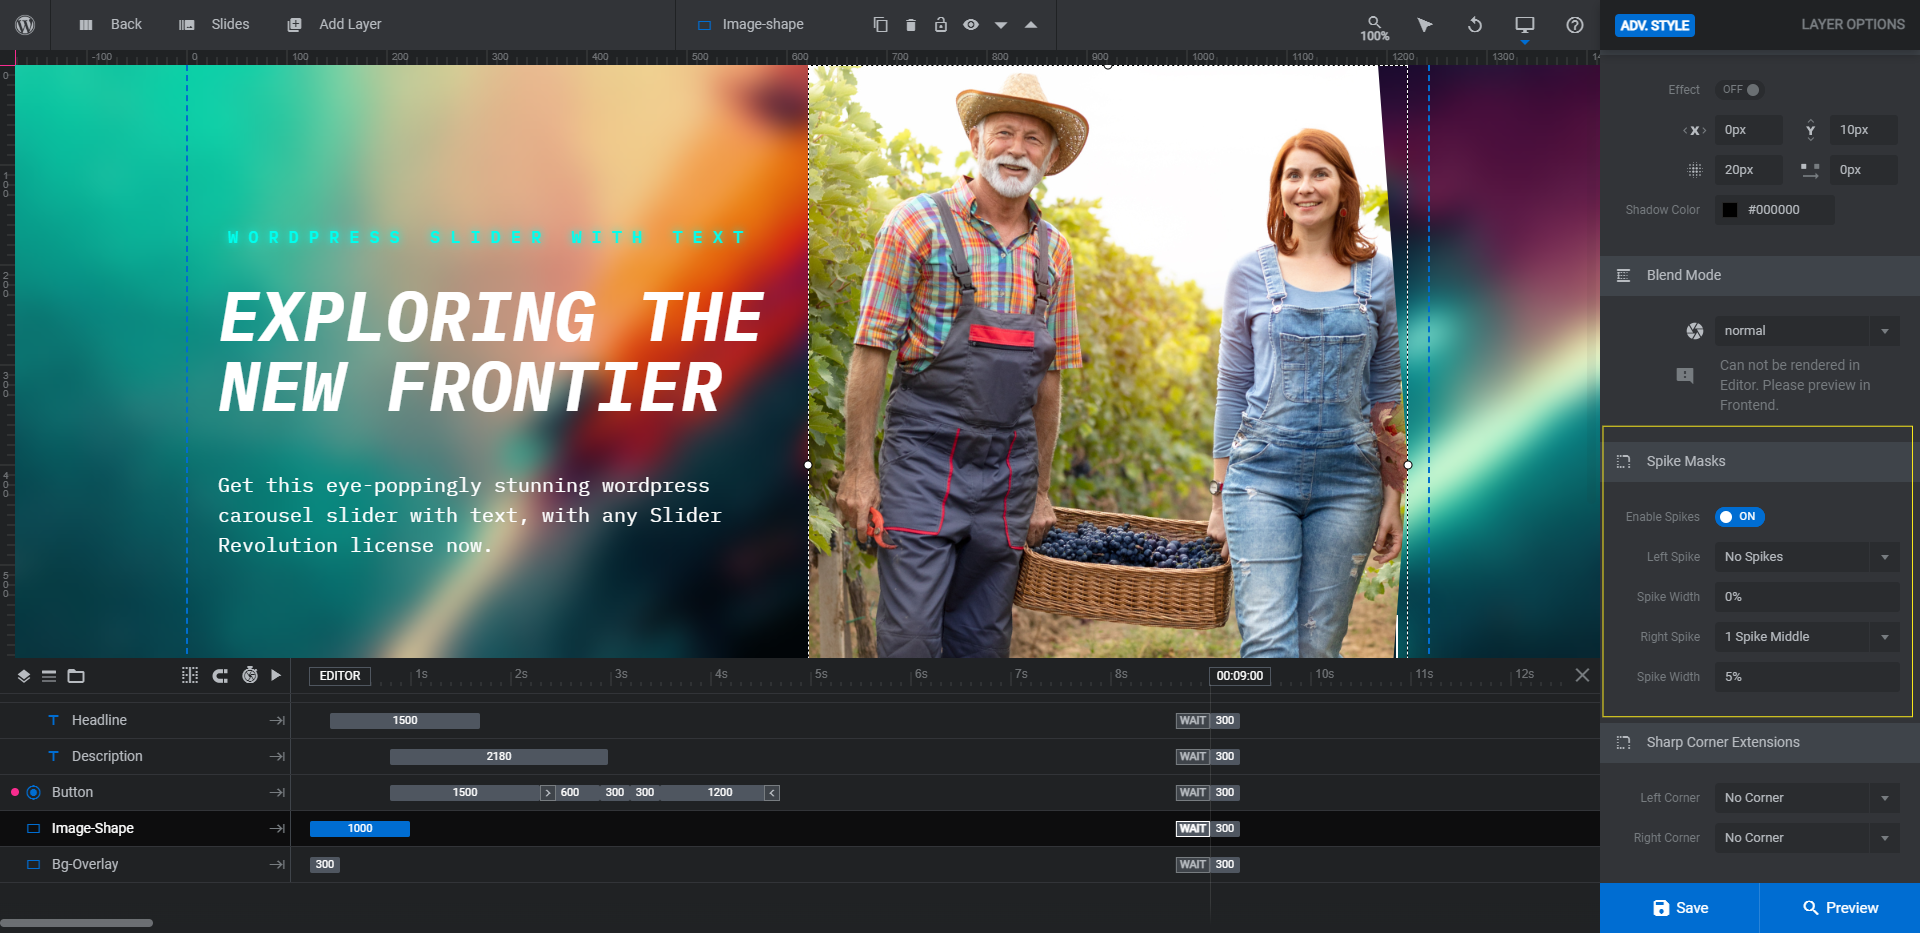
You can also change the spikes. You can add more of them to the left and/or right side of the image. You can also change the width/angle of them.
For our image, we’re going to disable the spike masks and go to “Style” to apply a rounded border instead. It’s more in line with our vineyard’s vibe.
To do the same, leave the border transparent. Just add equally sized borders all around it.
Save your changes when you’re done.
Learn more:
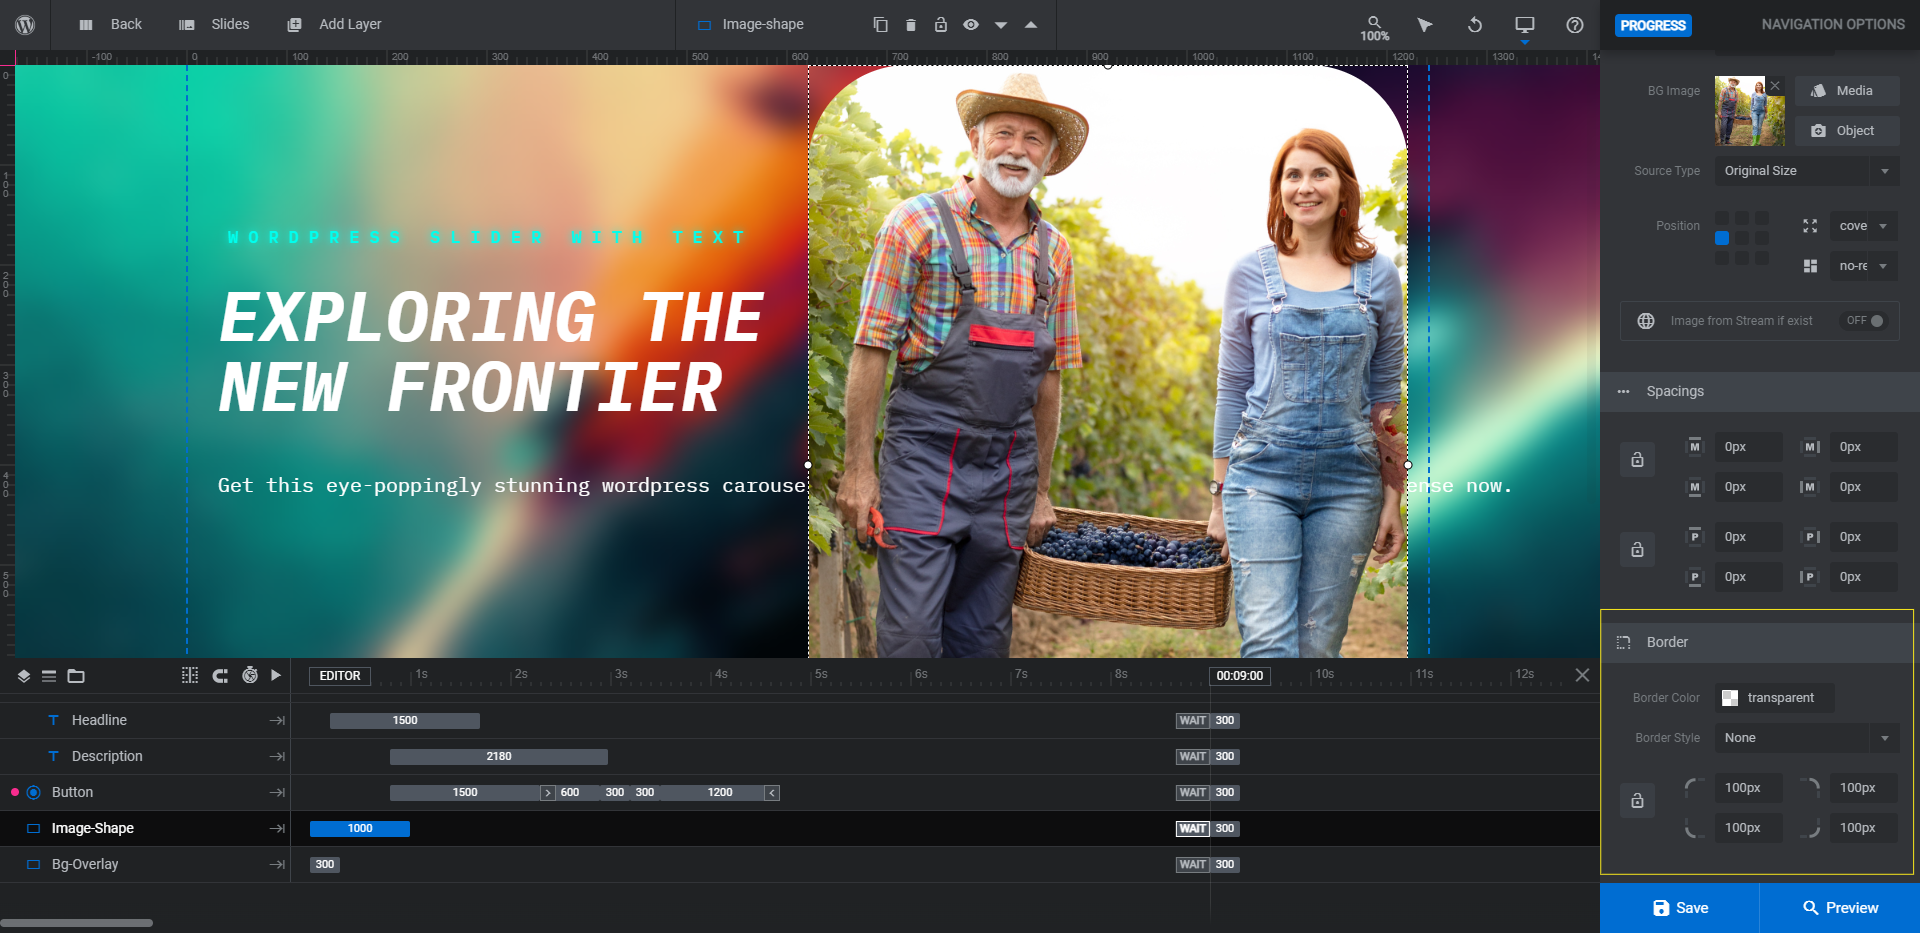
Step 3: Change out the background photo
You’re going to add that same image file to the background. To do this, go to “Slide Options” and “Background”. Select the image from your Media Library.
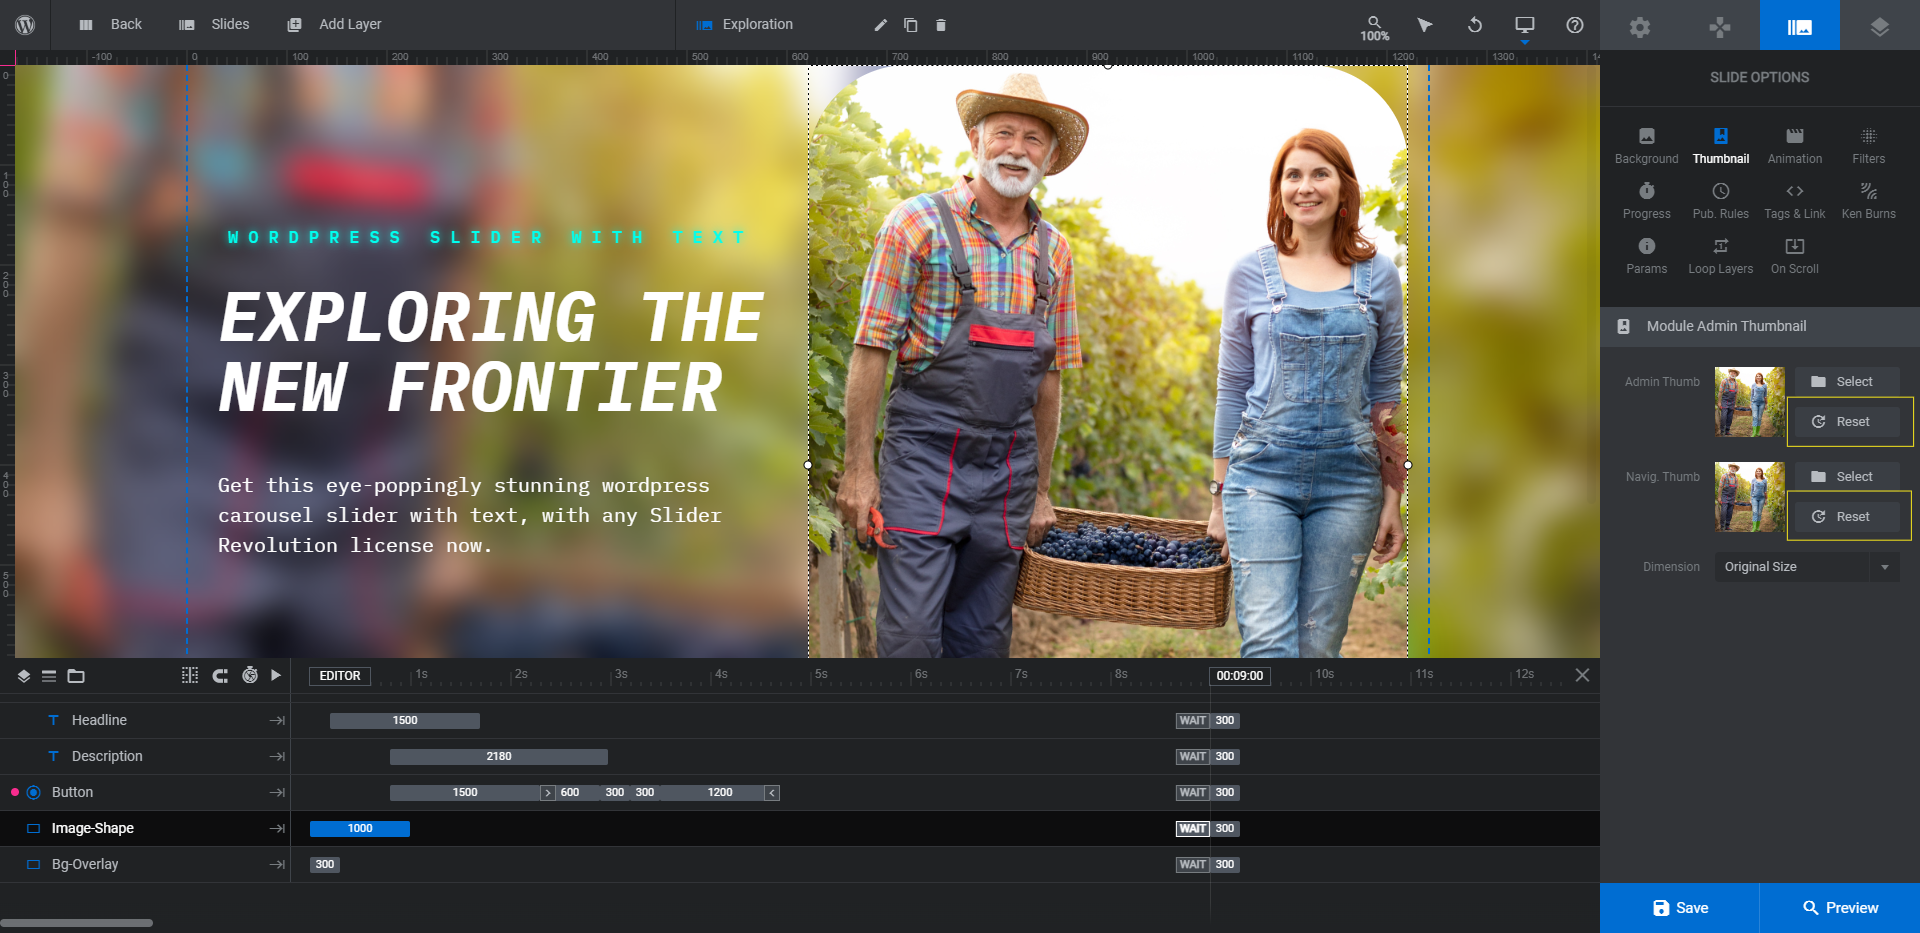
Before you wrap up here, go to the “Thumbnail” tab and add the same image as both the Admin Thumb and Navig. Thumb. The fastest way to do this is to click the Reset button next to each.
While you’re here, update the slide name. Go to the center of the top toolbar, select the current file name (i.e. “Exploration”), and then type over it to add a new one.

Save your changes.
Learn more:
Step 4: Update the slide animation
The template was set up with different transition animations between each slide. While this is useful for when slides transition between different themes or topics, we want to establish a consistent transition effect for our process slider. So we’ll choose just one effect and then use it for the rest of the slider.
To customize the slide transition effect, go to “Slide Options” and “Animation”.
Spend some time going through the different Transition Presets as well as categories (e.g. Advanced, Base, Columns, etc.) to find one that fits your concept best. All you have to do is hover over the name of the effect and you’ll see how it looks in the canvas on the left.
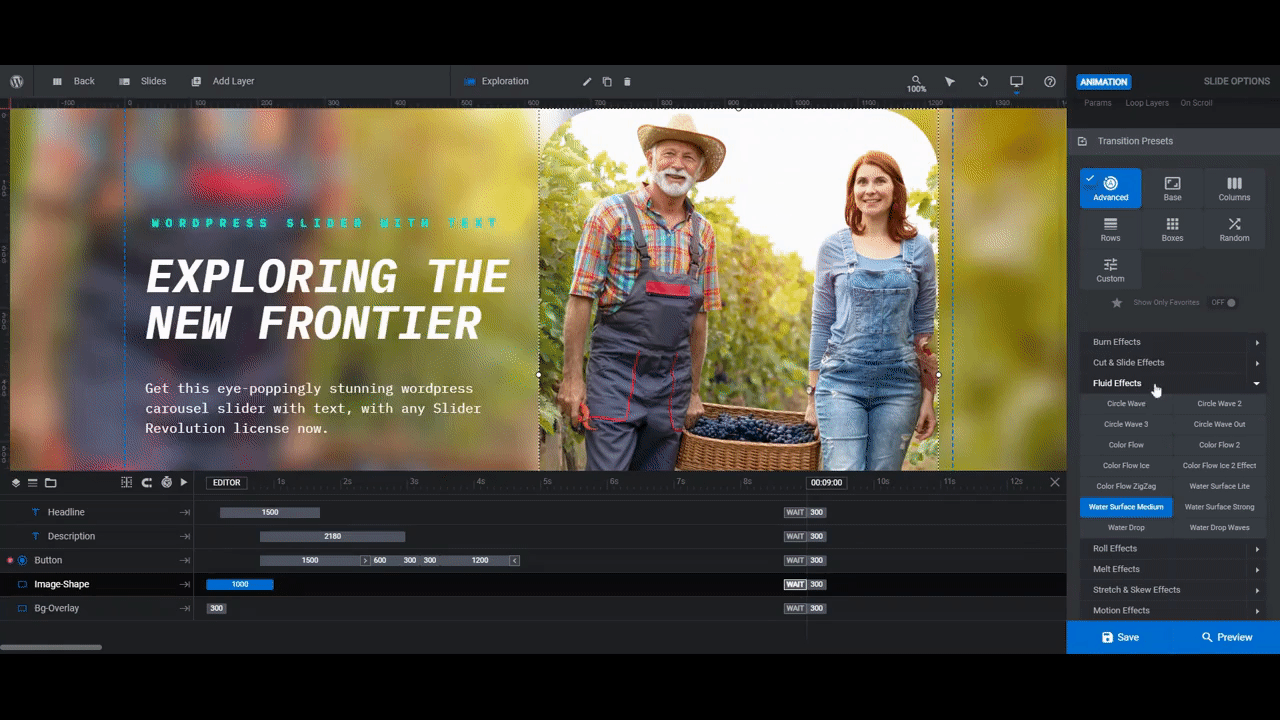
Click on the one you want in order to apply the effect. If you want to make further adjustments, scroll down below the presets to adjust the timing, filters, or 3D effects.
Learn more:
Step 5: Edit the text
There are three text layers to edit in each slide:
- Sub-Headline is the blue-glowing text at the top of the block.
- Headline is the big white title in the middle.
- Description is the plain text paragraph at the bottom.
To edit each layer, go to “Layer Options” and use the various settings to modify what they say and how they look. Use “Content” to edit the text. Then use “Style” to change the font, color, size, and other stylistic choices.
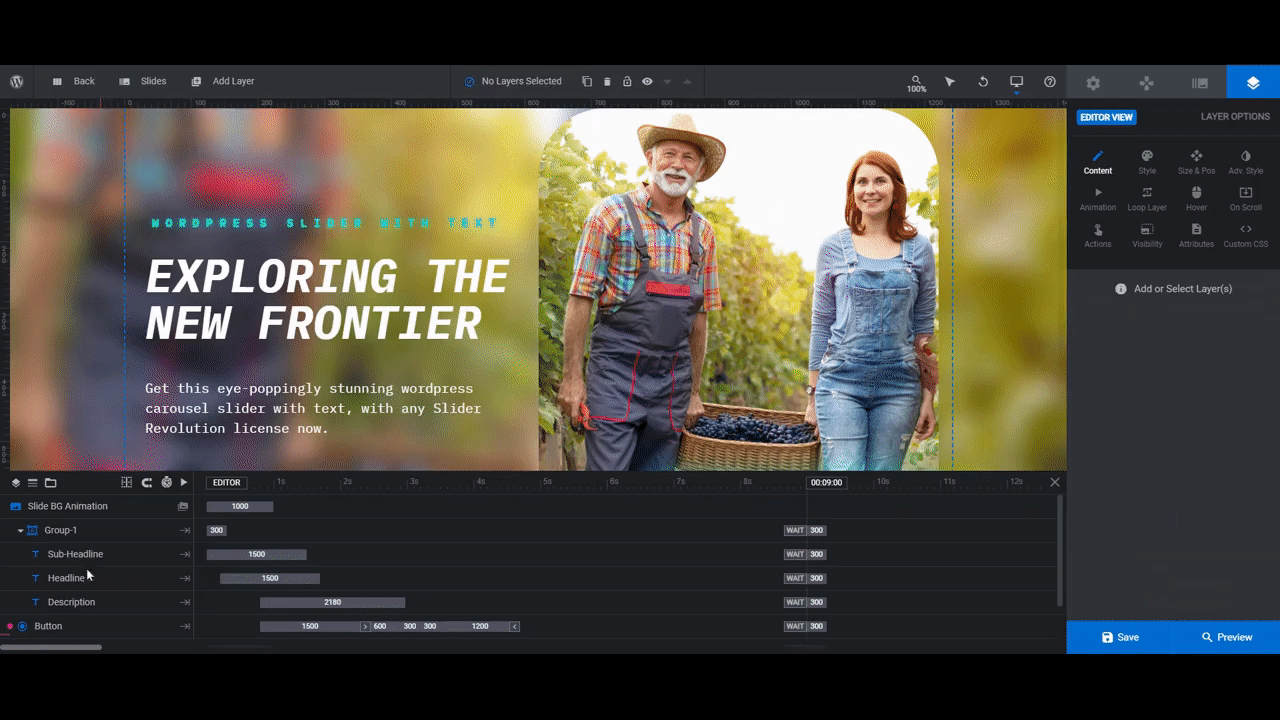
Note: If you’re moving away from the tech/futuristic theme of the template, then you might not want to preserve the glowing Sub-Headline style. To remove it, go to “Adv Style” and switch off the Text Shadow effect.
Learn more:
Step 6: Duplicate the slide and customize the graphics and text
Every piece of the slide design has been finalized except for the button design and navigation. We’re going to put them on hold until after we’ve built out the rest of the slider.
To create your other slides, go up to “Slides” in the toolbar and click on the duplicate button next to the one slide that’s in there.

The original slider had five slides in it. Feel free to add as many as you need (within reason) to depict your process.
When you’re done adding your slides, go back through this tutorial’s steps to customize the content in each slide. Here are the ones to focus on:
- Step 2: Update the Image-Shape photo layer.
- Step 3: Update the slide background photo, thumbnail images, and slide name.
- Step 5: Edit what the text says. Keep the styles the same.
When you’re done with each slide, save your changes and then move onto the next one.
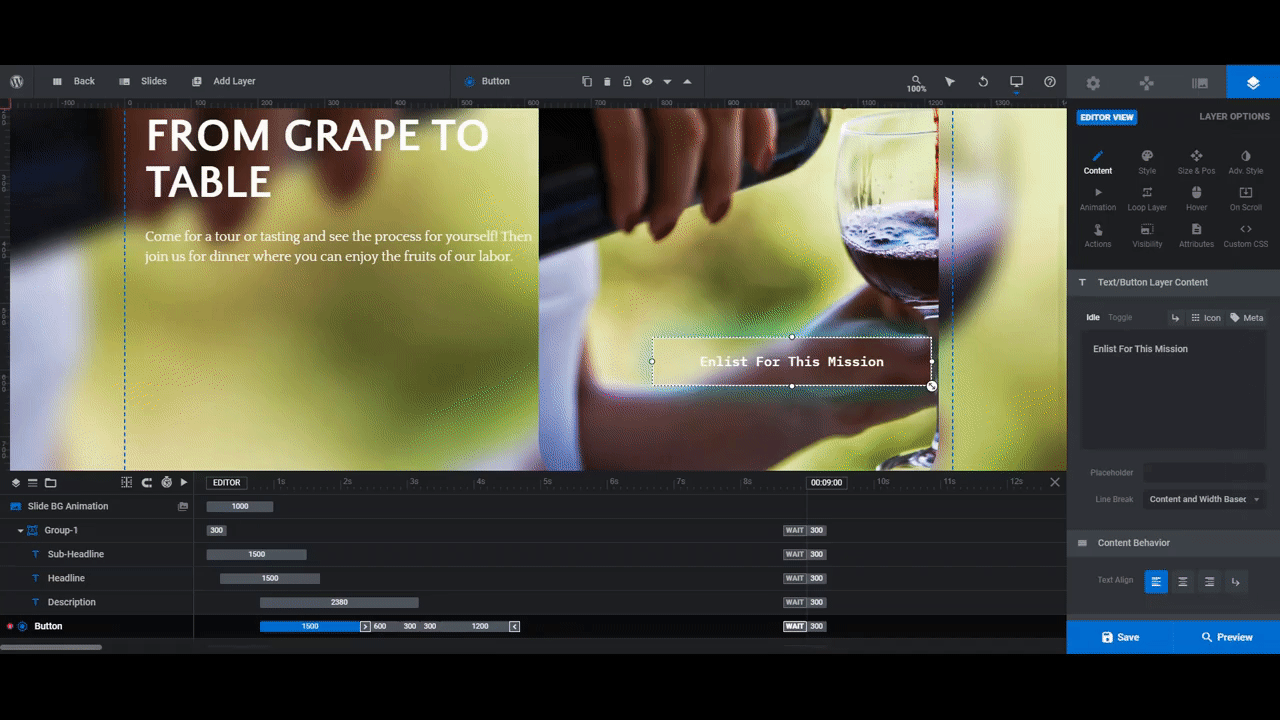
Step 7: Update the slider buttons
The template included a button on each slide. You could do the same if there’s a corresponding page that explains each part of the process in depth.
However, if that’s not the case for your site, you can remove the buttons from all of the slides except for the last one. That way, visitors can focus on each step of your process and only consider a call-to-action once they’ve gotten through all of it. That’s what we’re going to do.
To delete the button layer from the slides, either click on it in the canvas or look for Button in the timeline editor. Then hit the Backspace or delete key.
Next, go to your last slide. Rather than add a new button, modify the existing button’s text and styles to align with your new design and theme.
Use “Content” to edit the text.
Use “Style” to:
- Change the font.
- Edit the text and background colors.
- Update the button border color and shape.
Use “Size & Pos” to reposition the button if it’s not centered over your photo.
Use “Adv Style” to remove the glowing border (if you did the same to the Sub-Headline).
You may also want to remove the blinking effect that appears on the frontend of the site. To do this, go to “Animation”.
You’re going to see a number of TO keyframes. To disable the blinking effect, select in, in2, in3, and out and click the trash can that appears below them down and to the right.
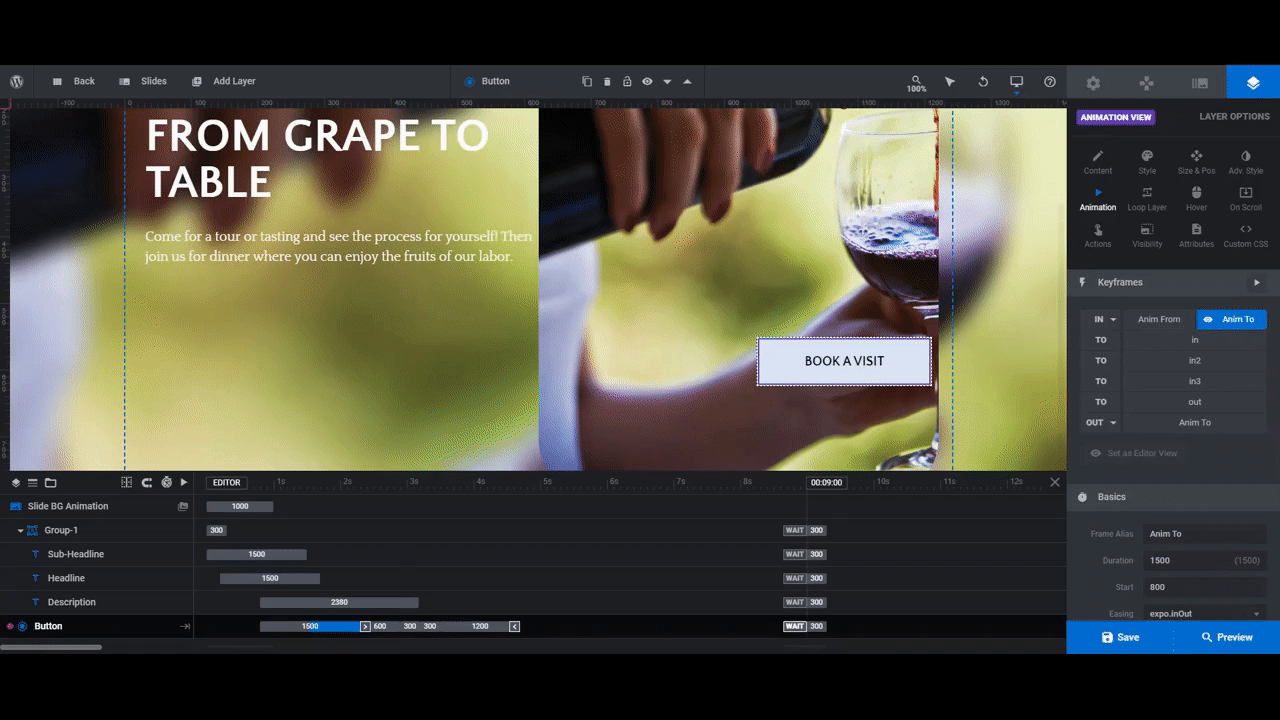
The last thing to do is update the button’s link. Go to “Actions” and update the Link URL.
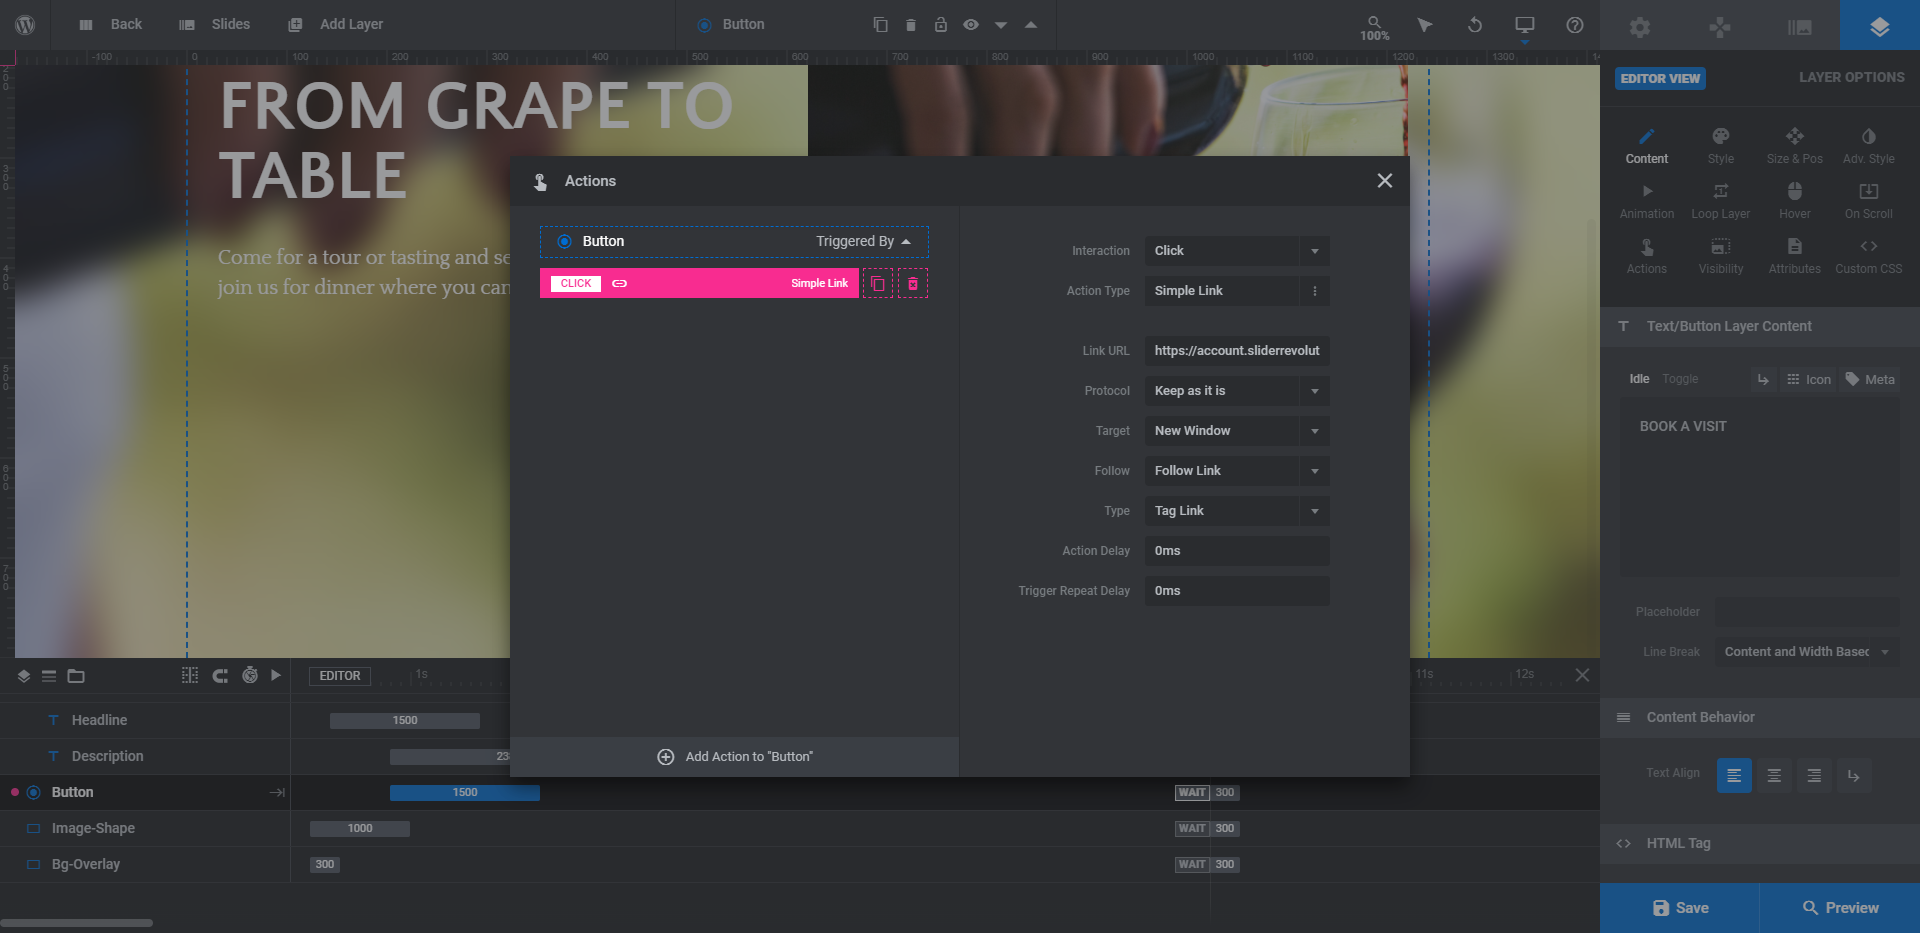
If you’d rather direct visitors to another section on the same page, you can do that as well. Delete the Simple Link and then create a new one for Scroll Below Slider or Scroll to ID.
Learn more:
- Adding and Configuring Button Layers
- Inserting “TO” Animations Between the “IN” and “OUT” Animations
- Editing Links in Template Modules
Step 8: Customize the navigation
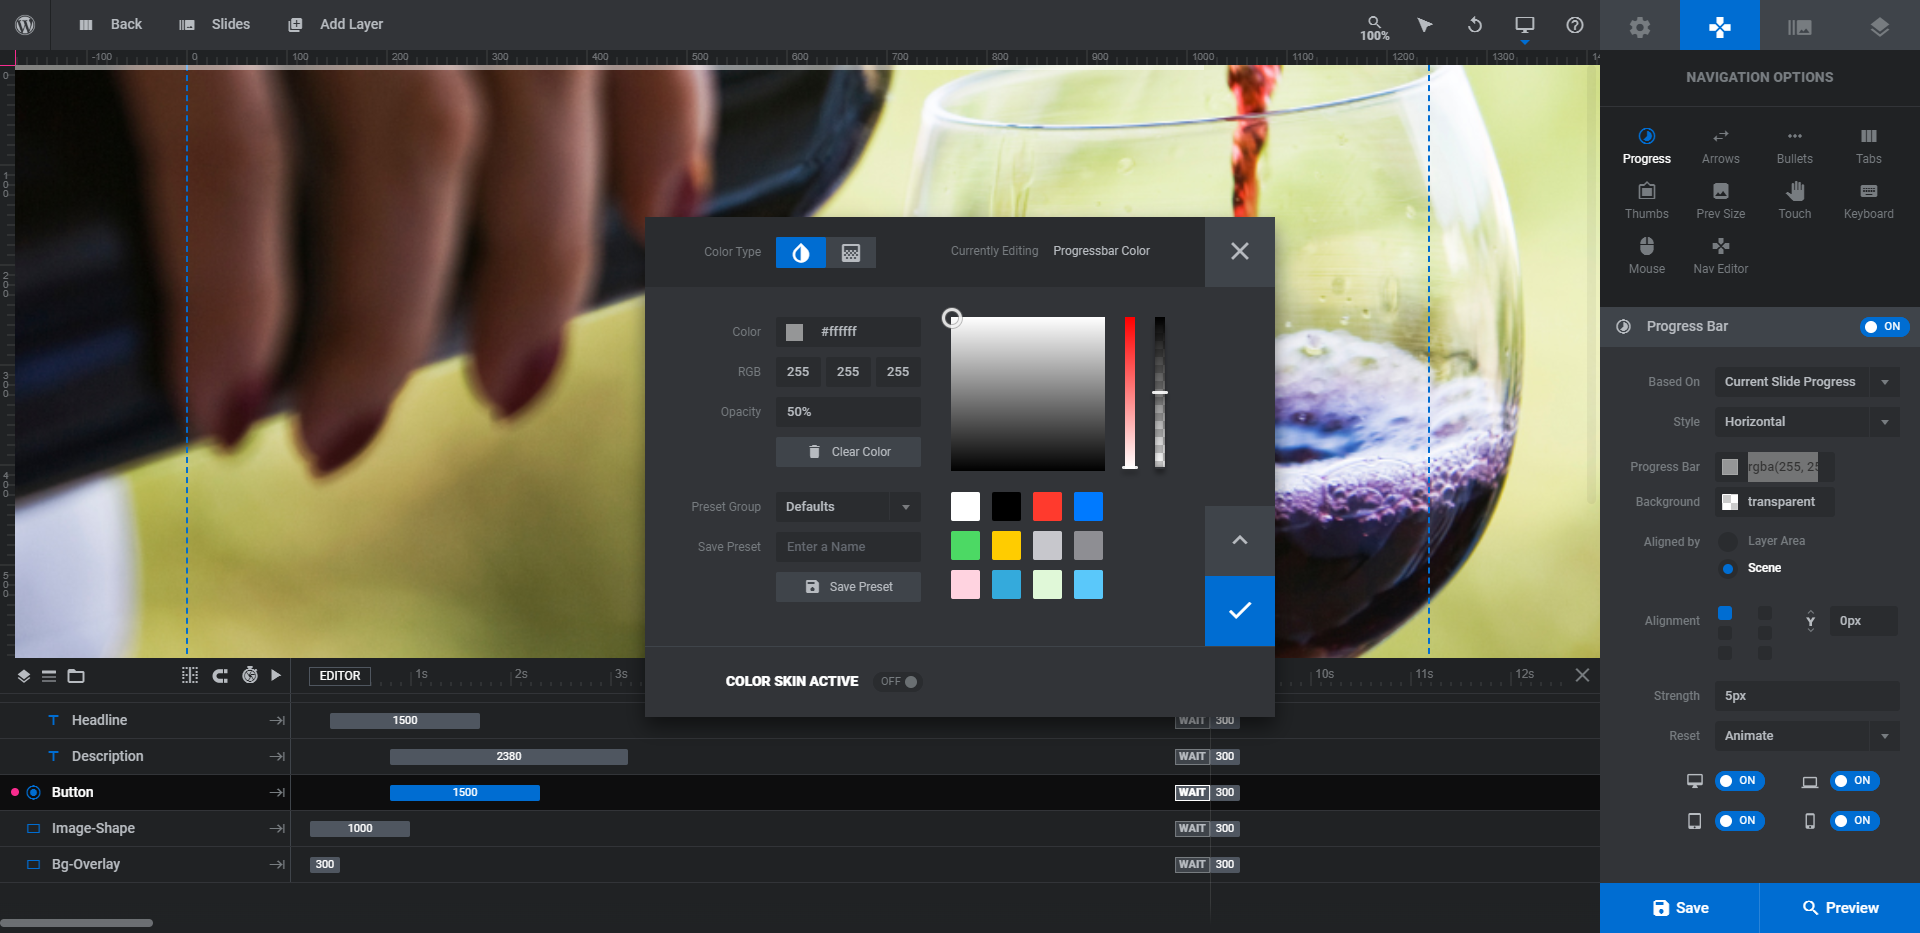
The final thing we’re going to do is to customize “Navigation Options”. Right now, there are three types activated:
- Progress: A semi-transparent bar appears at the top, letting visitors know how much time remains before the next slide appears.
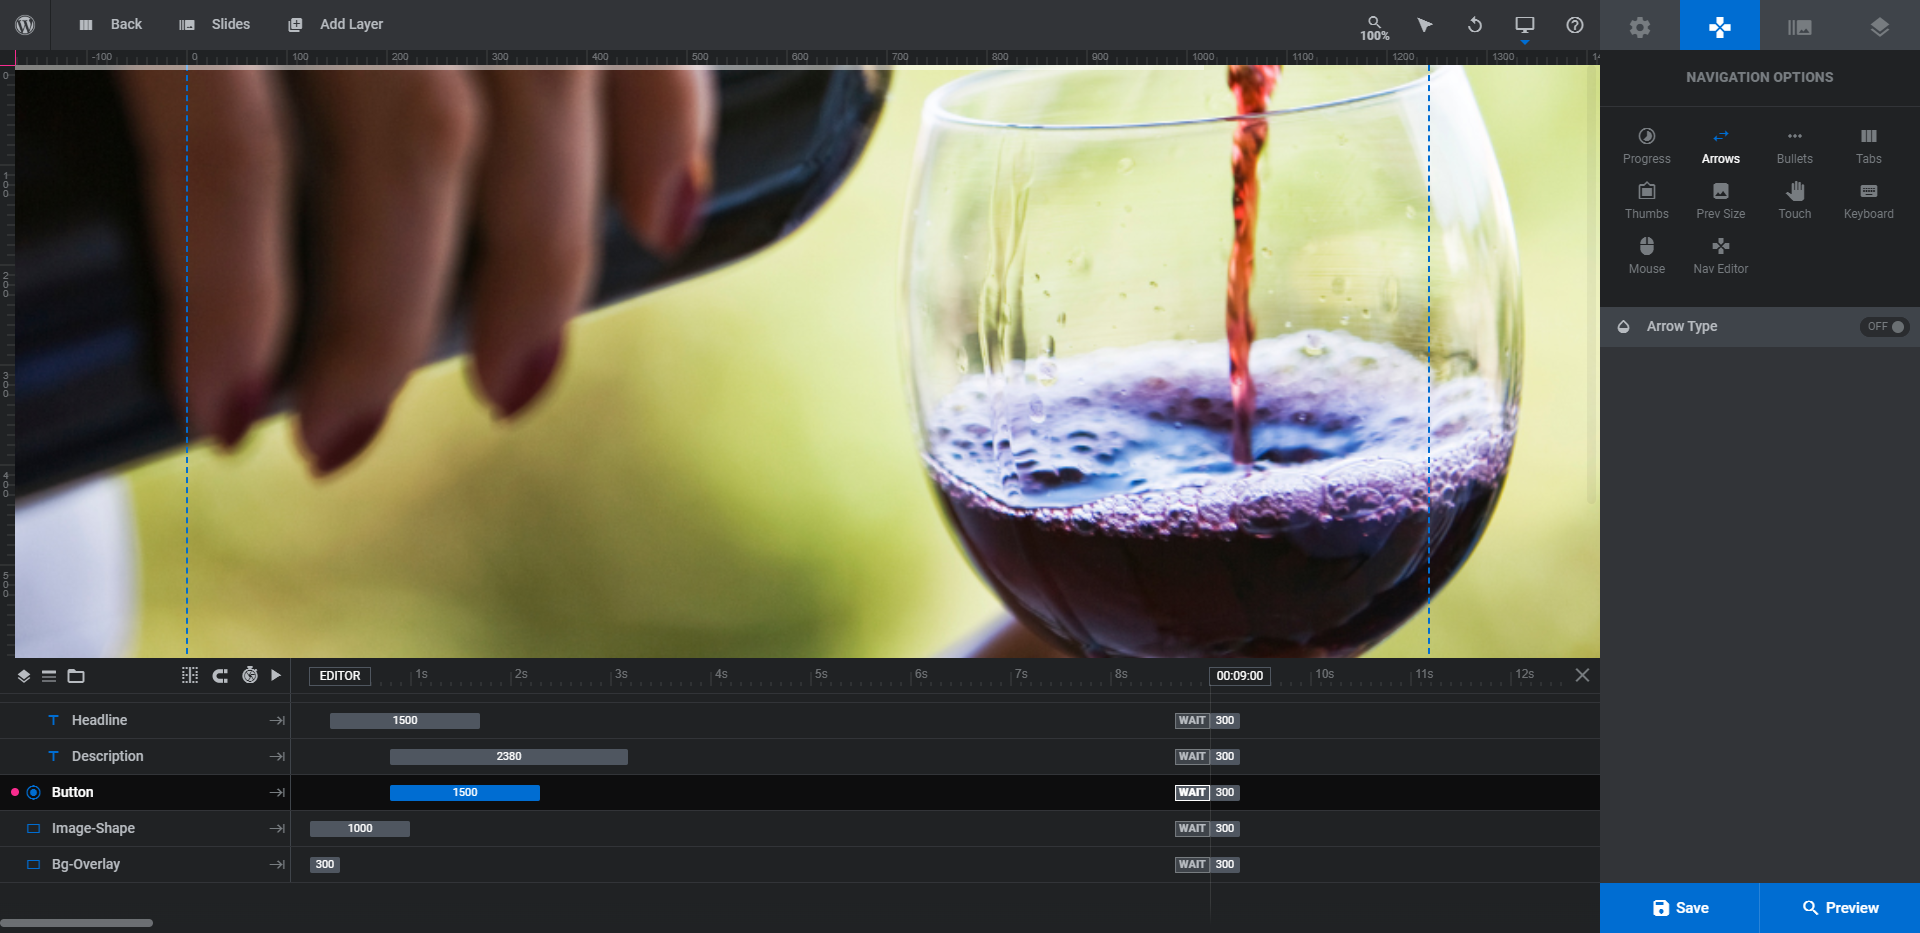
- Arrows: Small arrows in the bottom-right corner give visitors control over the pace of the slider.
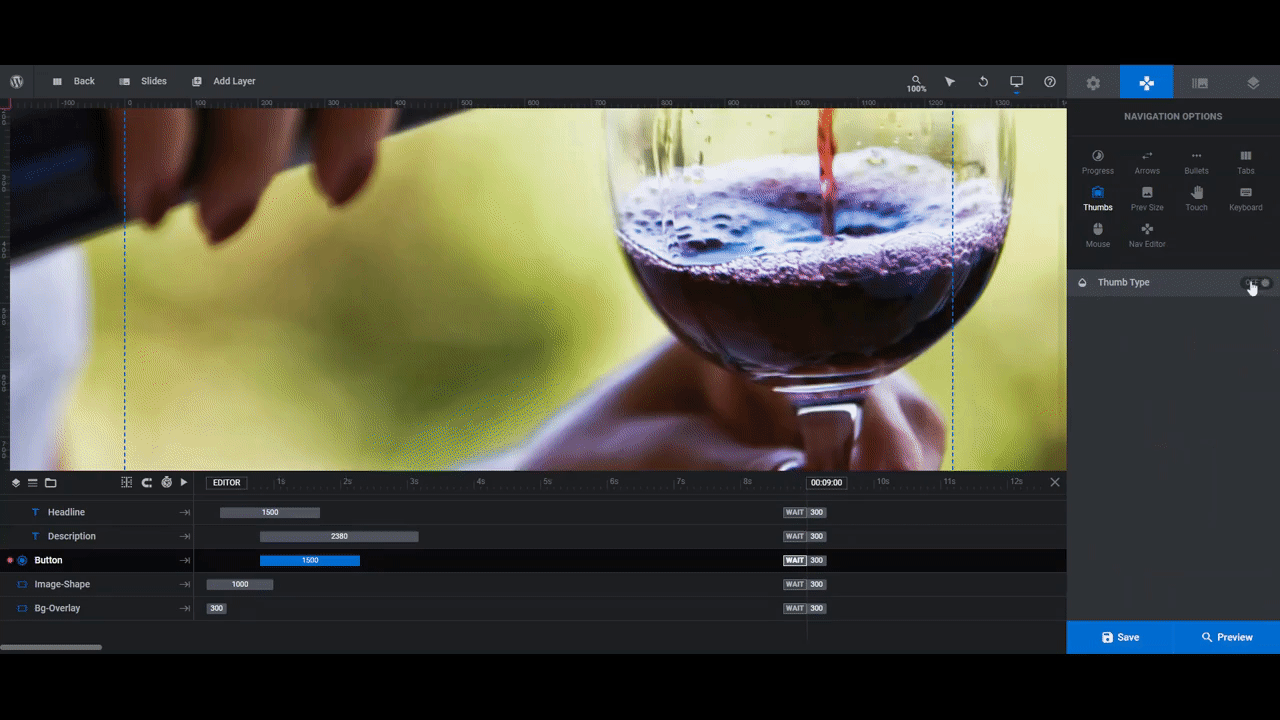
- Tabs: Slide thumbnails and tabs at the bottom let visitors preview upcoming slides. They can also use them to quicken the pace of the slider.
To start, we’re going to make the bar at the top a little bit brighter so visitors notice it (without making it too distracting). To do this, select the color block next to Progress Bar and then increase the Opacity level.
Next, we’re going to disable the arrows. To do this, go to Arrows and switch the toggle off.
Lastly, we’re going to adjust the clickable tabs at the bottom. There are a number of ways to do this.
For example, you can replace the current Tabs with a different style if the “cyber” look doesn’t work well with your slider. Another option is to switch off the Tabs and switch on Thumbs. Then choose the style of thumbnail you prefer. Ideally, it will have a title overlay so people can see the name of the slide and step in addition to the thumbnail — similar to how the Tabs work.
There are also some Bullets that work this way, so play around with the settings to find one that works best for you.
You can then make modifications to the positioning of the navigation, the size of the thumbs, the styling, animation, and more.
When you’re done, preview the navigation on the frontend to make sure it looks and works exactly as you want it to.
Learn more:
Visually depict your process using a colorful image slider
While you could fill an entire web page with your step-by-step process, a slider offers you the opportunity to present the entire process in a consolidated space. If you’ve been looking for a way to break down a process on the home page (or a different page) in a more space-conscious yet eye-catching manner, a colorful image slider will do the trick!
Start with the Neon WordPress Slider, follow the steps above, and then customize the rest as needed.


