
You want to create a website that’s so impressive that visitors can’t help but think:
“If this is what the site is like, I can’t wait to see how amazing the products/services are.”
But in order to design a website with that kind of wow factor, doesn’t it need to be painstakingly custom-coded? Nope.
That’s the great thing about the Slider Revolution plugin and its templates. You don’t have to spend tons of time or money on a heavily coded bespoke website in order to get amazing results. A lot of the work is already done for you.
All you need is a good working knowledge of how to modify the templates with your own content. And the best way to do that is to deconstruct the Slider Revolution template layer by layer.
Table of Contents
- The Slider Revolution WordPress plugin
- Modules: The containers for your designs
- Templates: Completely customizable cutting-edge designs
- Slides: Background designs and animations
- Layers: Eye-catching content to pair with your designs
- AddOns: Level up your special effects
Tutorial: Deconstructing the Slider Revolution template
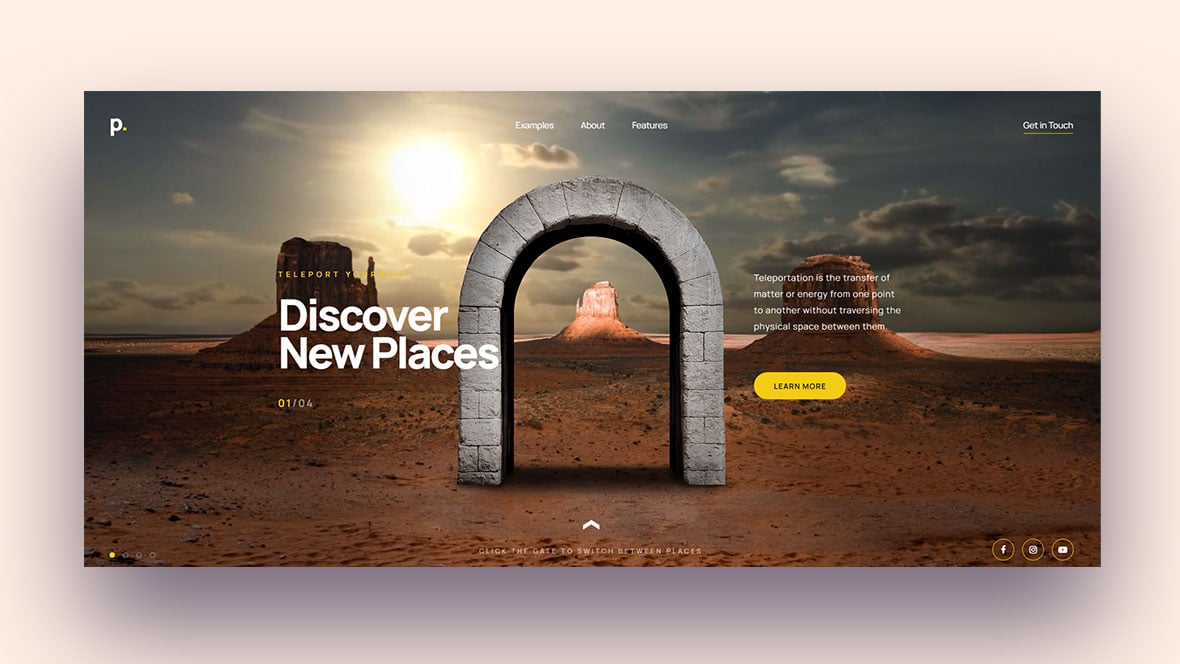
In this tutorial, we’re going to use the Portal Effect Hero Slider template to demonstrate how you go from this:
To this:

Let’s start with a bird’s-eye view of the Slider Revolution plugin and then make our way through the various levels of the template.
1. The Slider Revolution WordPress plugin
Before you can insert a Slider Revolution design into your website, you have to first create it.
To do this, find the Slider Revolution link in WordPress:
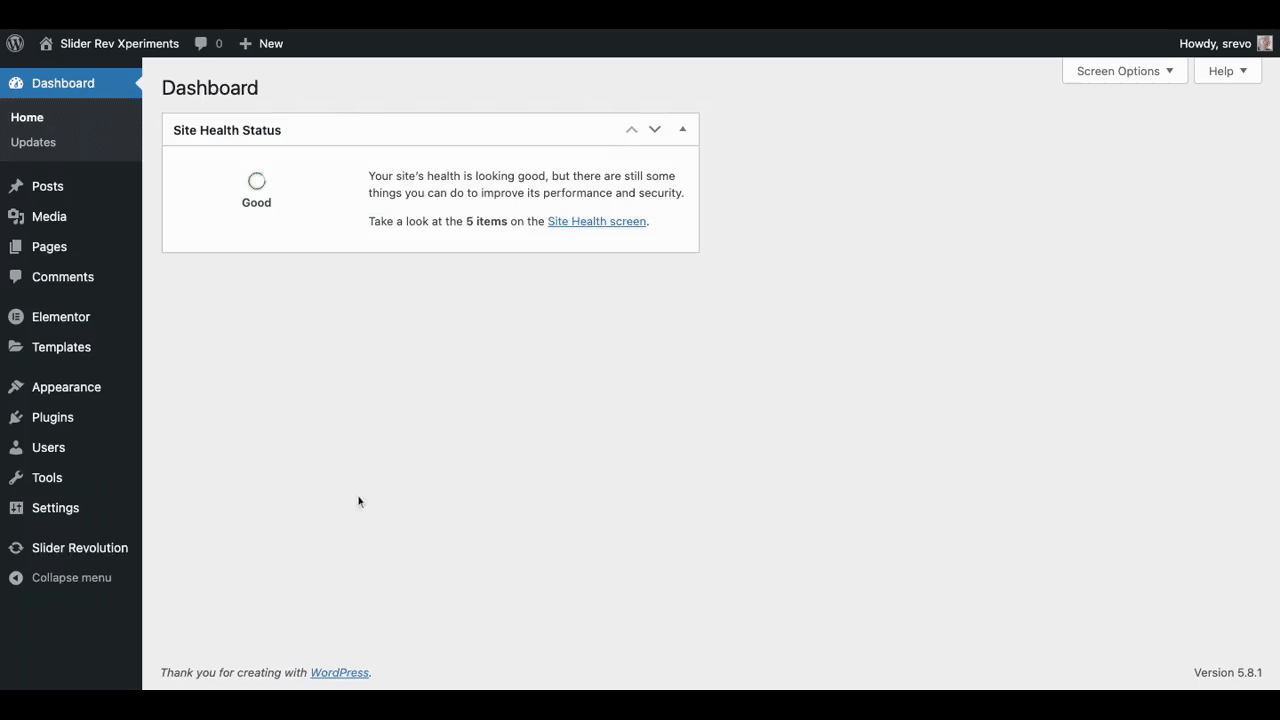
Click on the link to open up the plugin.
Learn more about this topic:
2. Modules: The containers for your designs
Slider Revolution modules work just like other contained sections within WordPress. You’ll need to create a new module for every Slider Revolution design you create.
From the Slider Revolution plugin page, select “New Module from Template”:
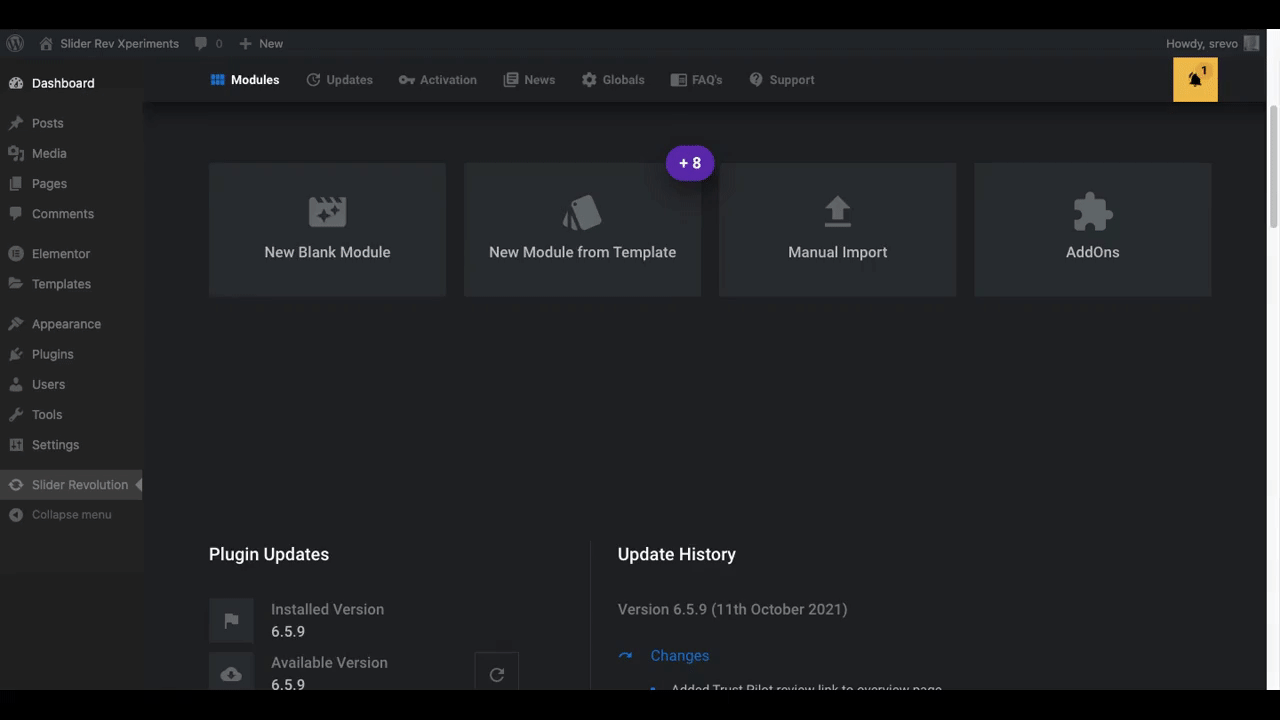
There are two other options available.
“New Blank Module” enables you to design a slider, carousel, or other Slider Revolution container from scratch. Use “Manual Import” if you have an external template or design to import.
Learn more about this topic:
3. Templates: Completely customizable cutting-edge designs
When you purchase a Slider Revolution license, you get access to over 200 professionally-designed and fully customizable templates.
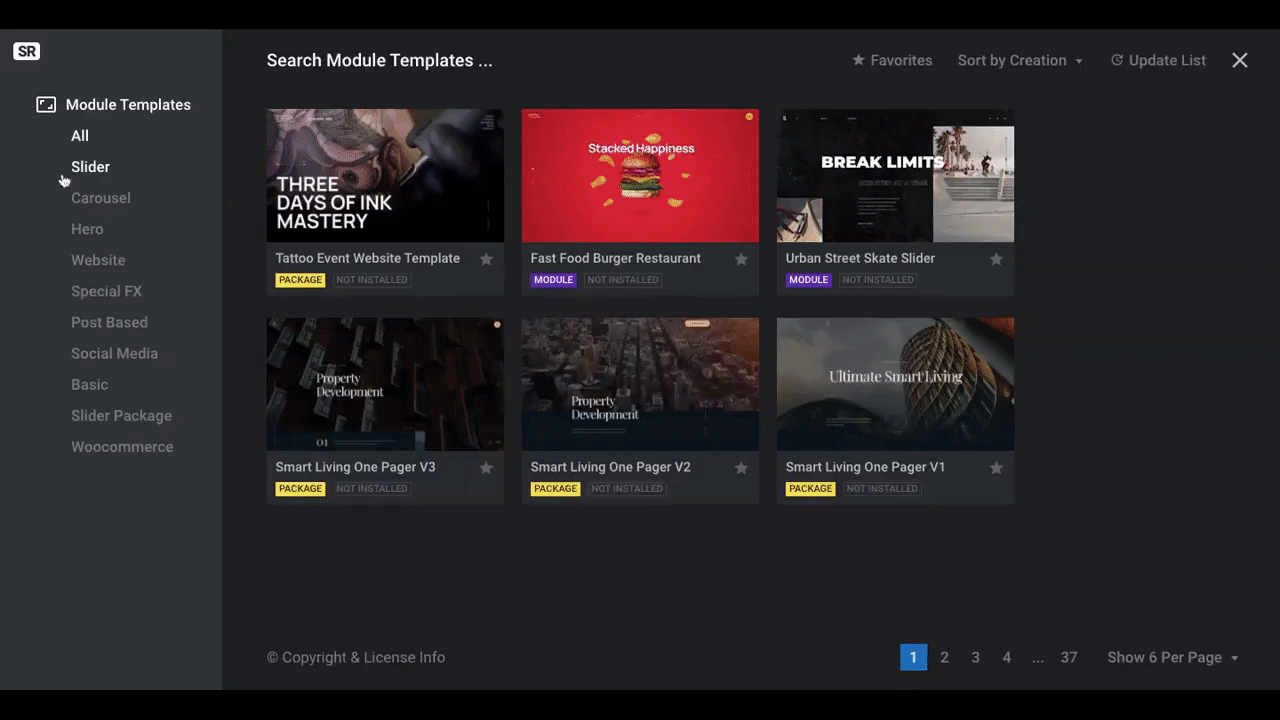
Despite the name Slider Revolution, there are templates for all kinds of content:
- Sliders
- Carousels
- Hero images
- Websites
You’ll also find modules with different types of content:
- Blog posts
- Social media
- eCommerce
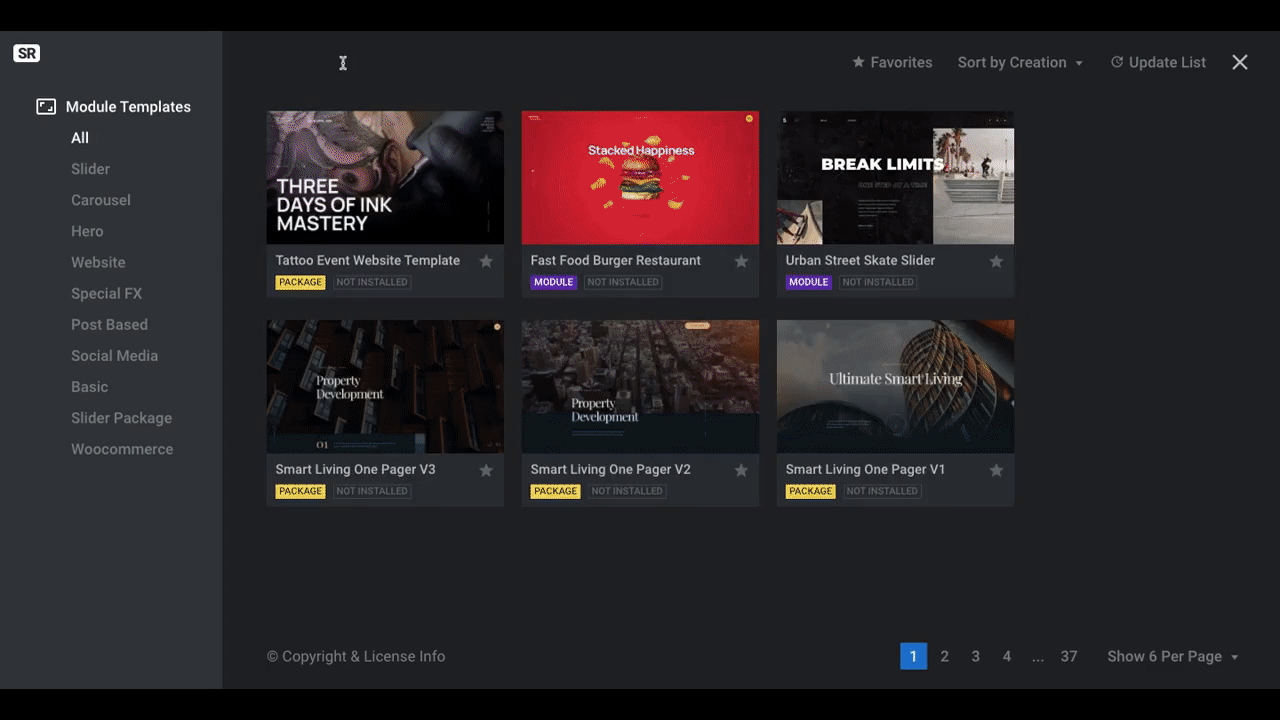
When you find one that’s closest to the layout, style, and effects you are looking for — or that simply inspires you — hover over it and click the plus sign (“+”):
Make sure your WordPress installation and setup meets the list of Requirements. Then click “Install template” to add the template to your module.
By the way, if the template you want to use requires a certain addon, it will be installed along with the template automatically.
Use the right side of the editor’s toolbar to adjust the template module’s settings. Here are some tips to help you get acquainted with the editing features:
Zoom
The magnifying glass with the percentage underneath it allows you to control the zoom.
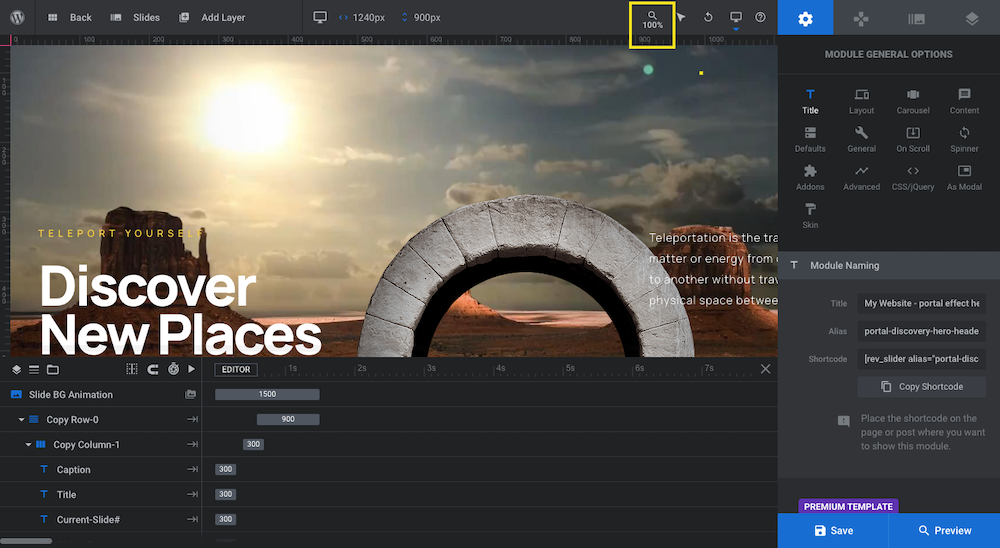
So if you want to hone in on more specific details when editing or zoom out to view the module in full, use this tool.
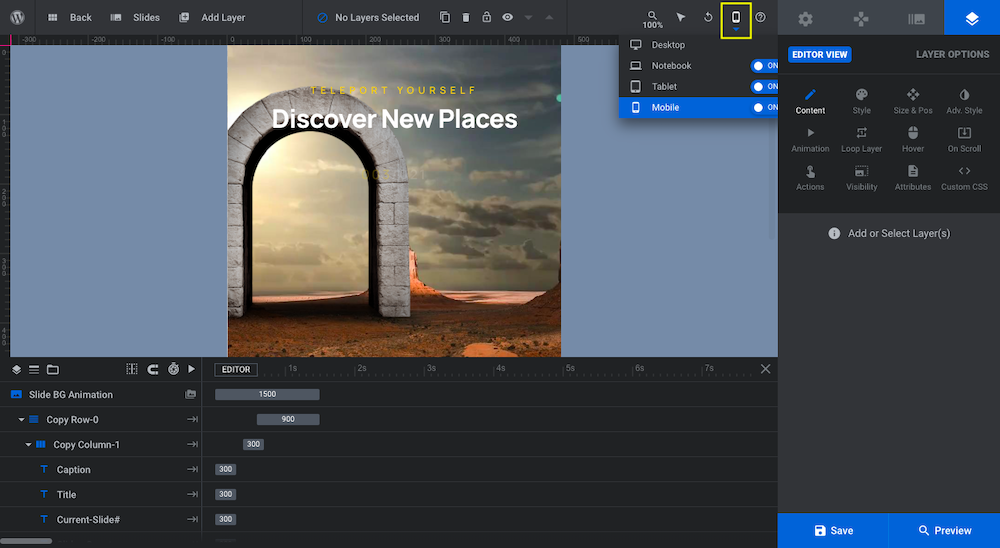
Responsive view
All of Slider Revolution’s module templates are responsive in design. In order to ensure that the edits you make continue to be responsive — or to customize the design from device to device — click the desktop icon to change the view:
Module settings
The general settings for the module live under the gear widget:
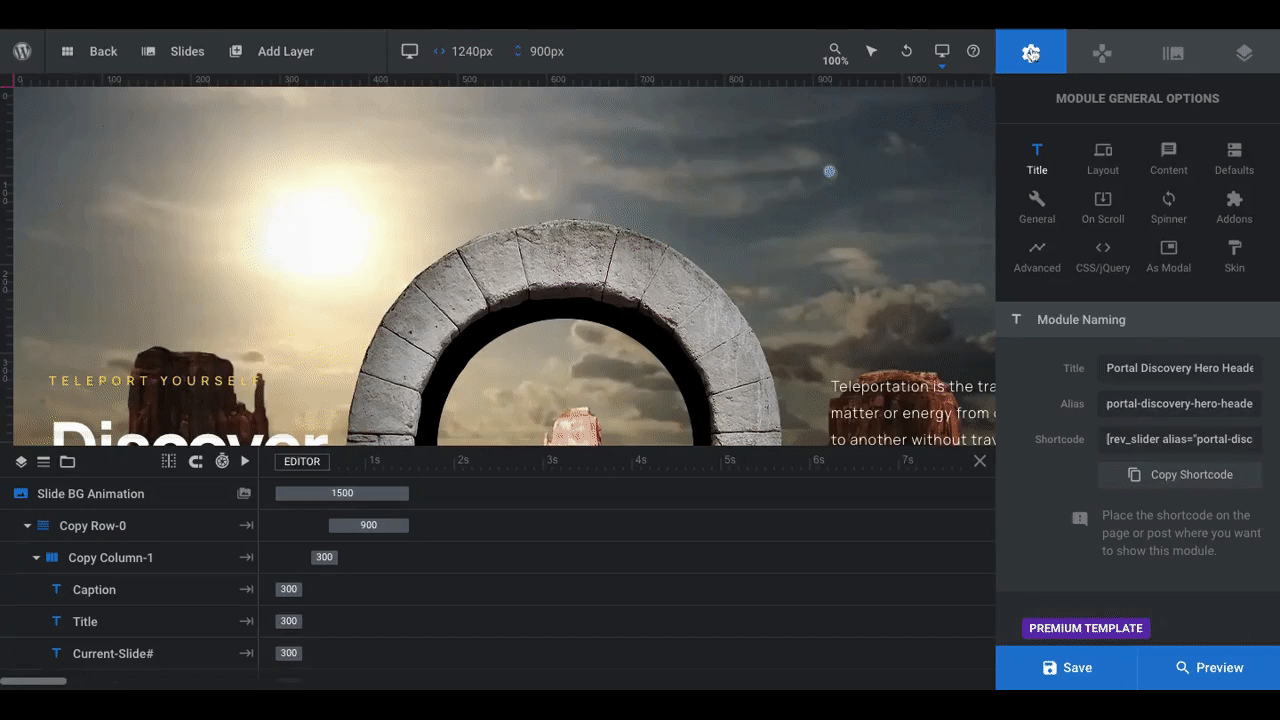
This section allows you to edit:
- Module name
- Layout type: Slider, scene, carousel
- Responsive breakpoints and sizing rules
- Overlay
- Background
- Content source
- Slide animation style and rules
- Scroll triggers
- Mouse interactions
And if you feel inclined to do some custom coding, there’s an area for you to add custom CSS or jQuery.
Navigation settings
If you’re using a template with navigation — i.e. arrows, progress bar, bullets, or tabs — the settings to the right of general settings is where you’ll edit it.
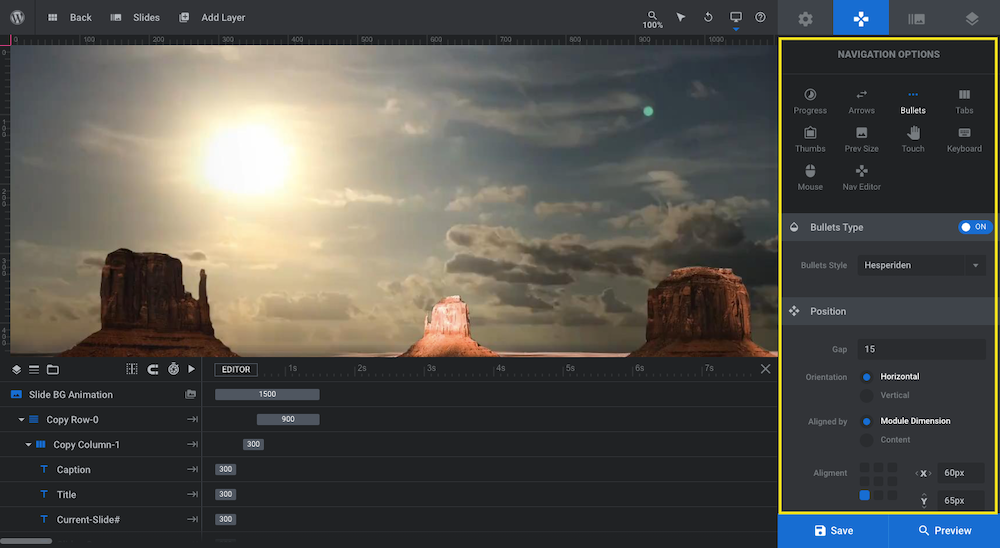
From this toolbar, you can edit the style, design, positioning, interaction rules, and more for your navigational icons.
Learn more about this topic:
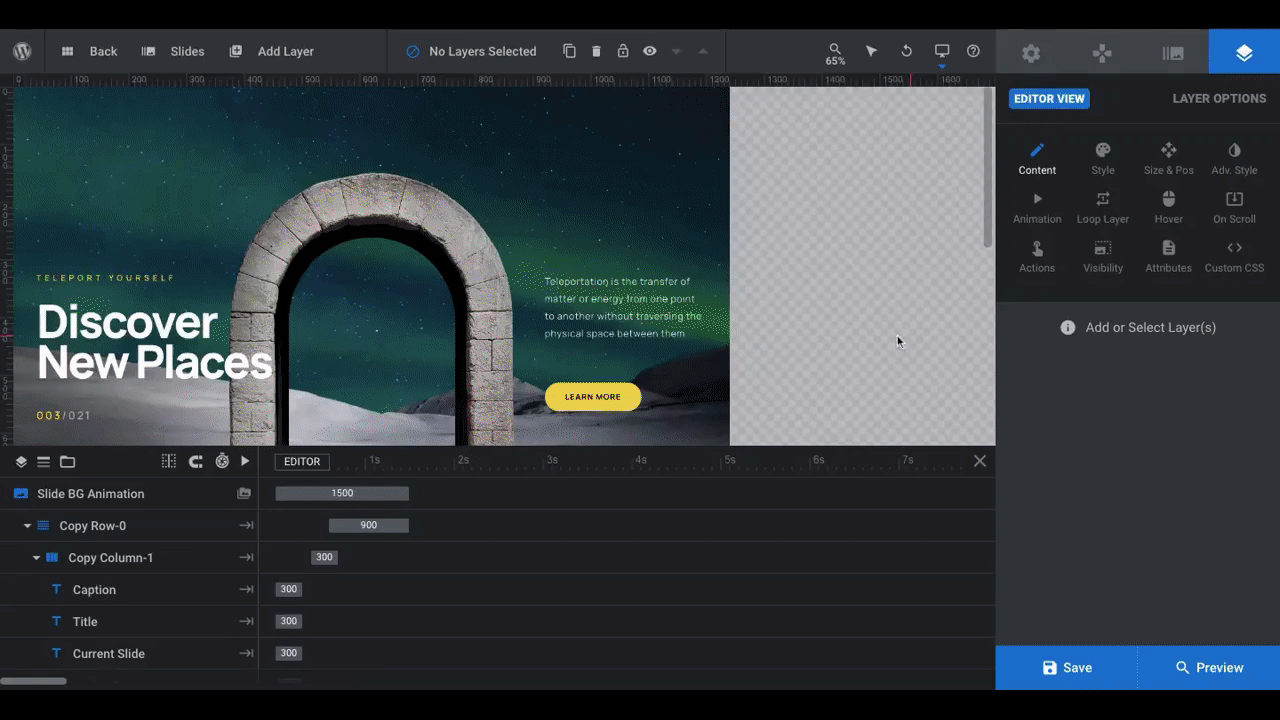
4. Slides: Background designs and animations
A slide is the background element that fills the module.
In order to create sliders, carousels, and other animated graphics in Slider Revolution, you have to use numerous slide images or videos to create the effect. That’s not always needed, but for something like a portal effect, it is.
Click on the Slides button in the top-left part of the toolbar to locate your slide manager:
If you’re using a template, then the slides have already been set up for you. Click through each one and you’ll see how each of the “portals” that appear on the site are just individual slides.
To edit each of the slides, click on the icon to the right of the navigational settings.
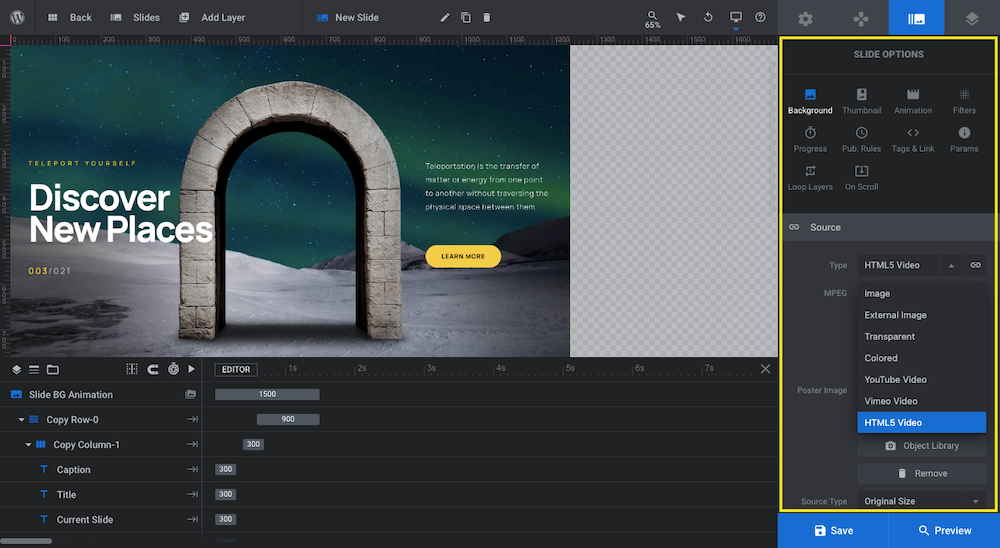
From here, you can edit anything having to do with the background design. For instance:
- Content: Image, video, or color
- Transition effect, timing, and settings
- Color filter
- Slide length
- Looping
- Parallax
- Scroll effects
To get a better idea of the difference between a Slider Revolution slide and the other content in your module, play around with the slide animations:
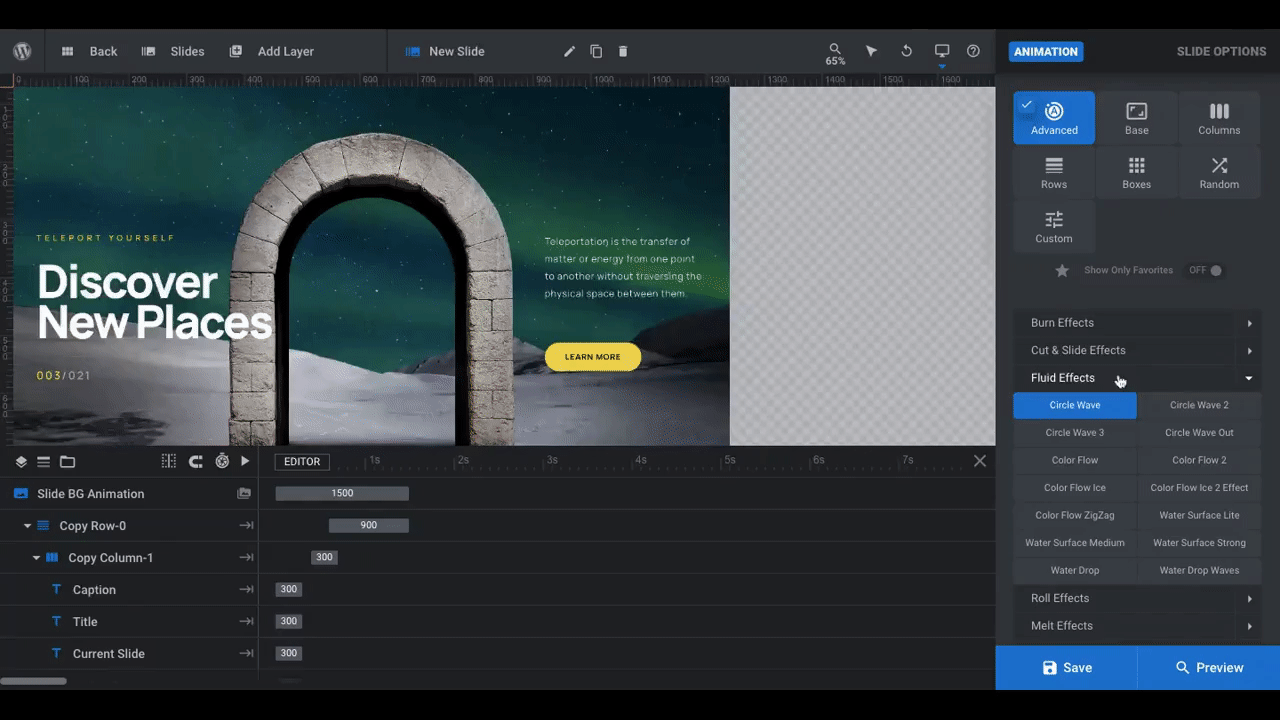
As you hover over the various transition effects, notice how the text, portal image, and button never change. That’s because they exist on a different layer.
There’s one other feature under the Slide Manager you should take note of: Global Layers. Think of this as a master overlay for all of your slides.
When you edit the slides within your Slider Revolution template, you won’t see the global layers in the visual editor. It’s only when you open up the Global Layers “Slide” that you will see these elements:

You can edit the content of your Global Layers just as you do the layers on your individual slides (which we’ll look at next). The Global Layers tool is useful if you want to apply the same content and media to every slide — like a logo, navigation links, or CTA button.
Learn more about this topic:
5. Layers: Eye-catching content to pair with your designs
To edit the content within your template, you’ll work with layers.
Layers are not much different from the content blocks you use in WordPress and its page builder plugins. With Slider Revolution, though, you have more control over where those elements go, how they look, and how they behave.
Open the slide you want to edit. To add a completely new layer, go to the toolbar and open up the layer options:
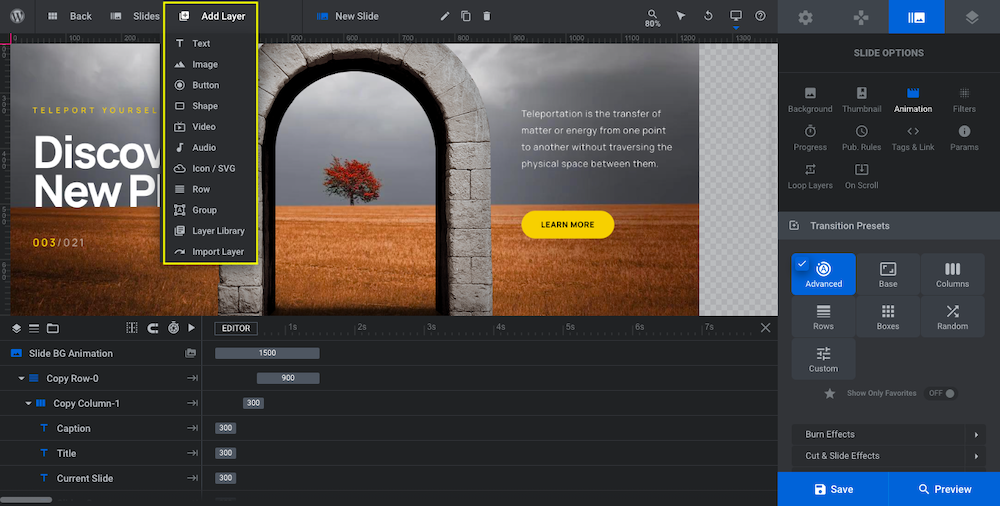
From here, you can add elements like:
- Text
- Image
- Button
- Shape
- Video
- Audio
- Icon
You can also add a row as well as group content together.
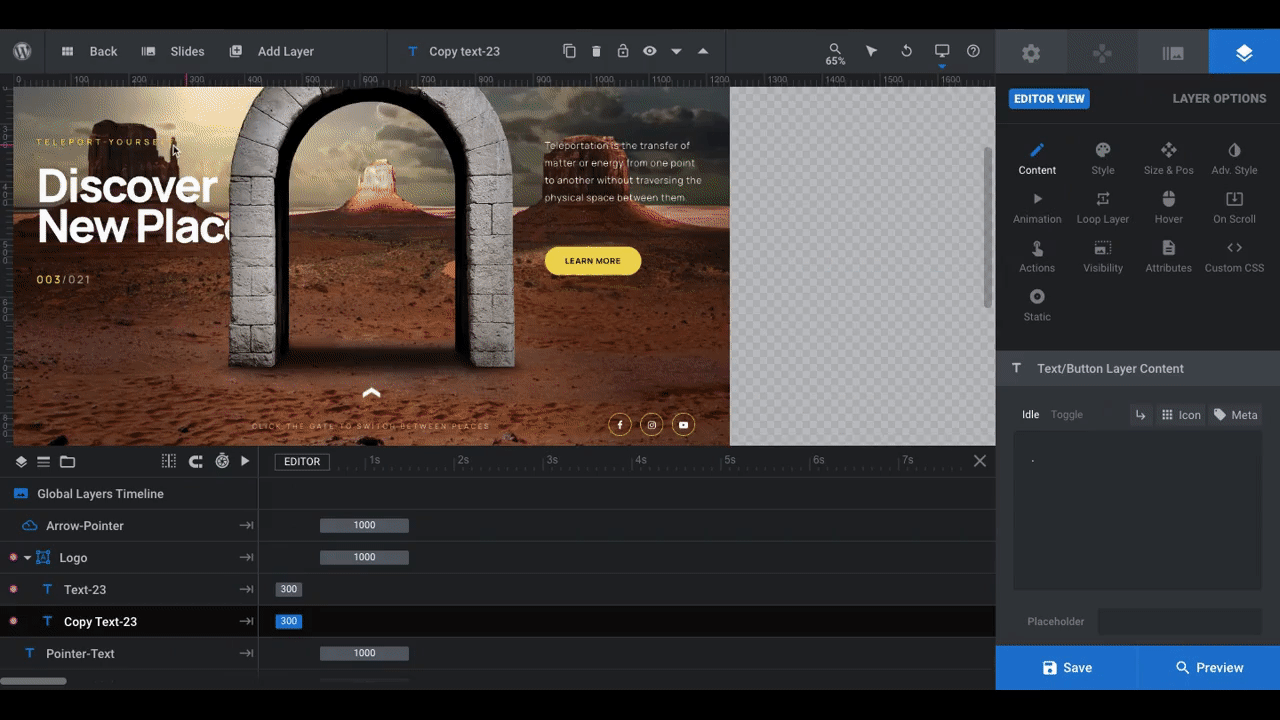
To edit existing layers and elements within your template, hover over the graphic and select the one you want. You can also select it from the controller beneath the graphic:
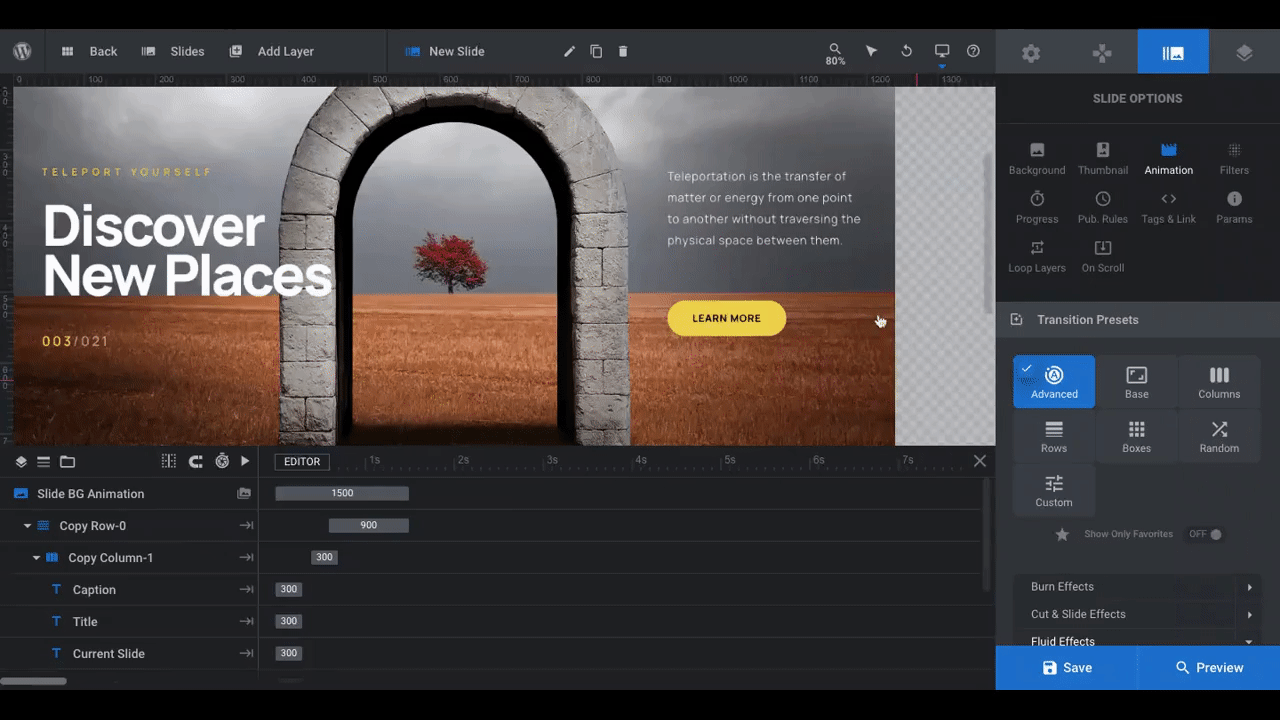
With your layer selected, there are a number of ways to edit it.
The first is to adjust the timing. That’s what the bottom area is for — so you can visualize each layer, how it relates to the rest, and to adjust its timing.
You have the ability to change when the layer appears on the screen as well as for how long. You can do this by manipulating the corresponding box in the editor or you can use the settings on the right sidebar.
To see your changes reflected in the slider, click the “Play” arrow icon button or hit the spacebar on your keyboard.
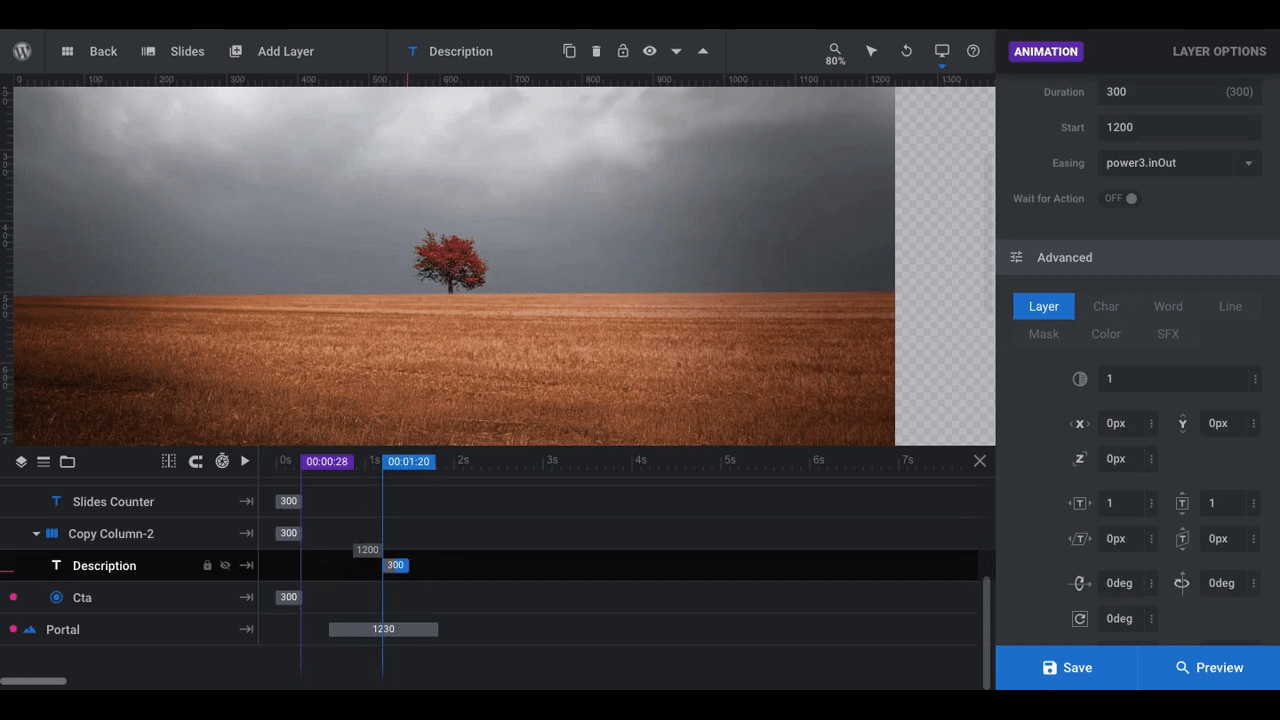
The other settings for your layers are under the icon at the right end of the toolbar. Just make sure you have the correct layer selected before making any edits.
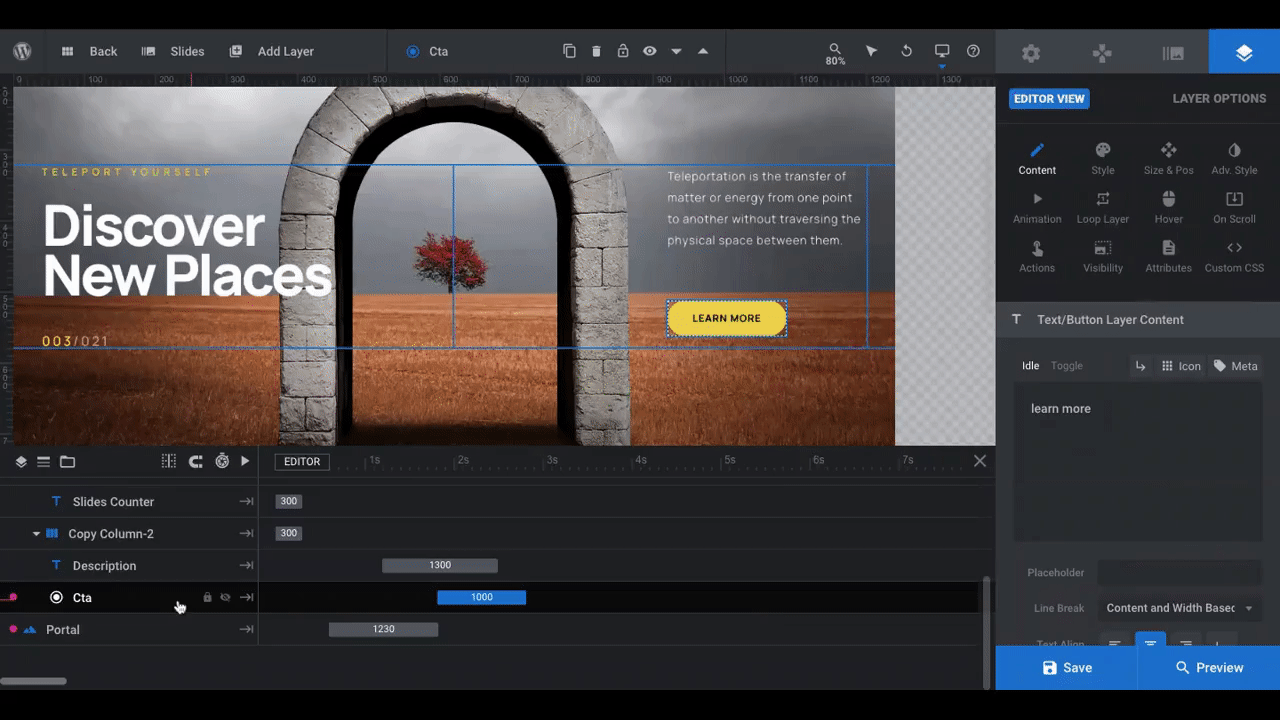
These settings allow you to edit:
- Content within the layer — like text, image, video, etc.
- Colors
- Fonts
- Icons
- Backgrounds
- Borders
- Spacing
- Size and positioning
- Shadows, blends, and filters
- Animations
- Hover and scroll transformations
- Actions
Unlike the other parts of your module, you can set your layers to be visible on some devices and not others. This way, if you want different content displayed to mobile visitors than desktop — or perhaps in a different format or order — you can do that through these settings.
You can also custom-code your layers, if you prefer.
Learn more about this topic:
6. AddOns: Level up your special effects
Many Slider Revolution templates come with built-in special effects. For instance, each of the slides in the Portal Effect Hero Slider uses an advanced “fluid” transition animation.
If you want to experiment with other special effects for your slides or layers, all you have to do is activate them.
Go back to the main Slider Revolution page in WordPress. To the right of the module creation buttons is one called “AddOns”:
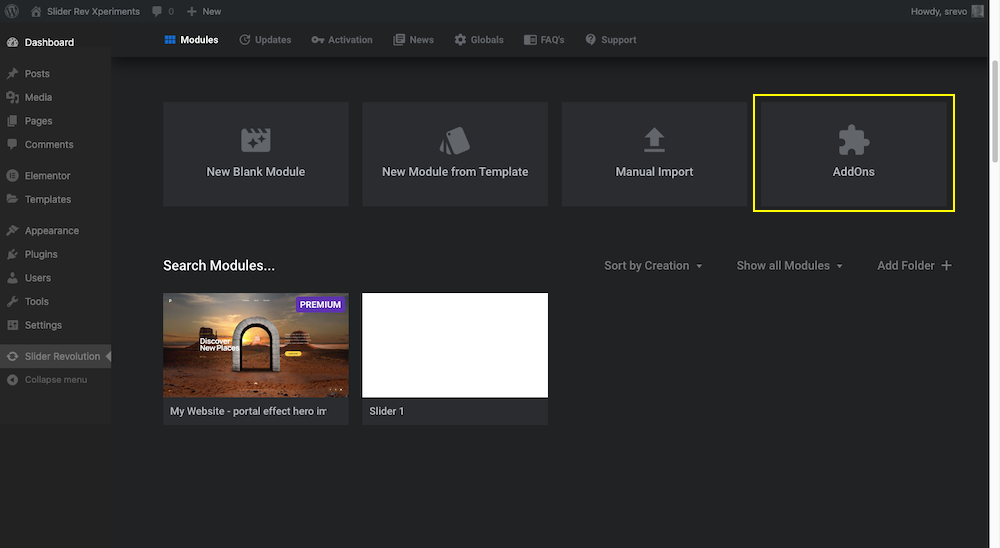
You can explore and activate any of the AddOn special effects you want to use there. Once activated, you’ll be able to find your new special effects under the relevant settings in the Slider Revolution editor.
For instance, you’ll find the “Advanced Transitions” addon under Slide Options > Animations because it’s a slide-specific animation. “Bubble Morph”, on the other hand, appears under Layer Options as a new layer type.
If you haven’t fully enabled the AddOn yet, the blue button on the right will let you know to do so. You can then apply the effect to the relevant module, slide, or layer.
Learn more about this topic:
Unlock the power of Slider Revolution
Want to build the kind of website that brings you the recognition you deserve? With Slider Revolution’s beautiful and customizable templates, you can. Now that you know how to edit them, what will you create with Slider Revolution?


