
As your business and body of work grows, it becomes important to maintain a highlight reel of your best and most recent work. There are many different ways to show this off on the home page of your site — as a photo gallery or grid, as an image slider, or via a carousel.
If you really want to wow visitors and prospective clients with your portfolio highlight reel, this tutorial will show you how to create an interactive 3D space for your work. We’ll be using the Claymorphism Carousel as our base, so make sure you have that template installed in Slider Revolution before you begin.
Table of Contents:
- Step 1: Add your portfolio imagery
- Step 2: Edit the supporting text
- Step 3: Adjust the slide background color
- Step 4: Customize the 3D space
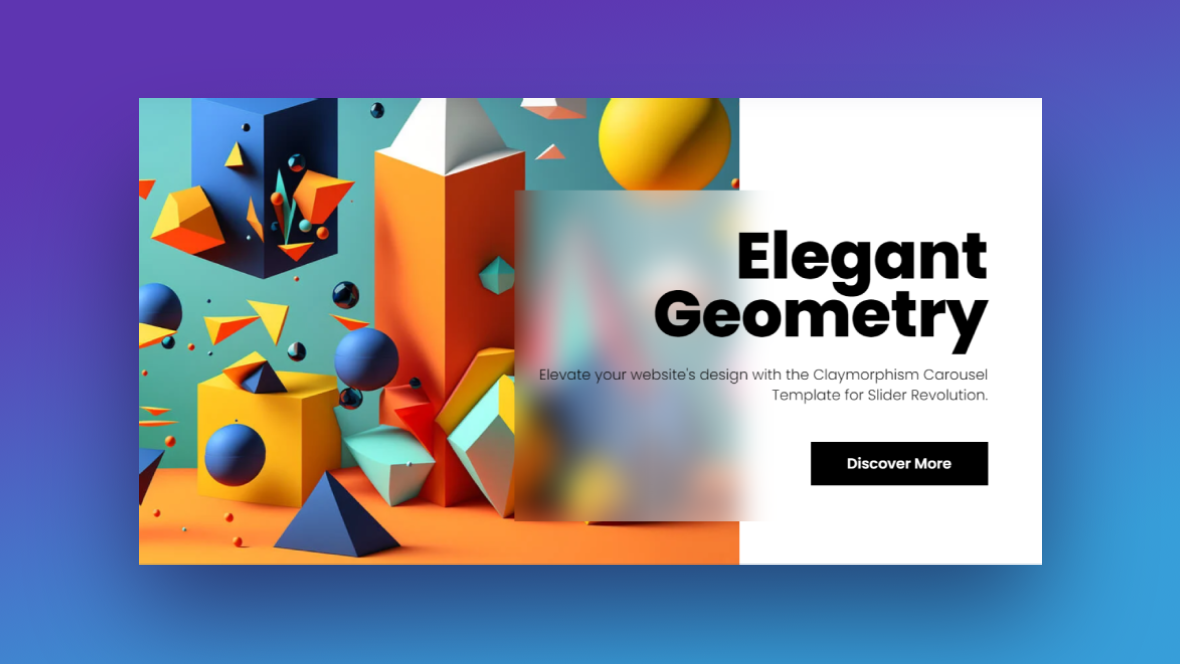
How to create a 3D space for your portfolio highlight reel
With this template, you’ll be able to make website visitors feel like they’ve stepped inside of a gallery to view your work:

Whatever it is you create or do, this carousel offers an exciting, new way to digitally present your portfolio highlight reel. In the tutorial below, we’ll show you how to repurpose this for an interior designer’s portfolio website:
New to Slider Revolution? Start here:
Step 1: Add your portfolio imagery
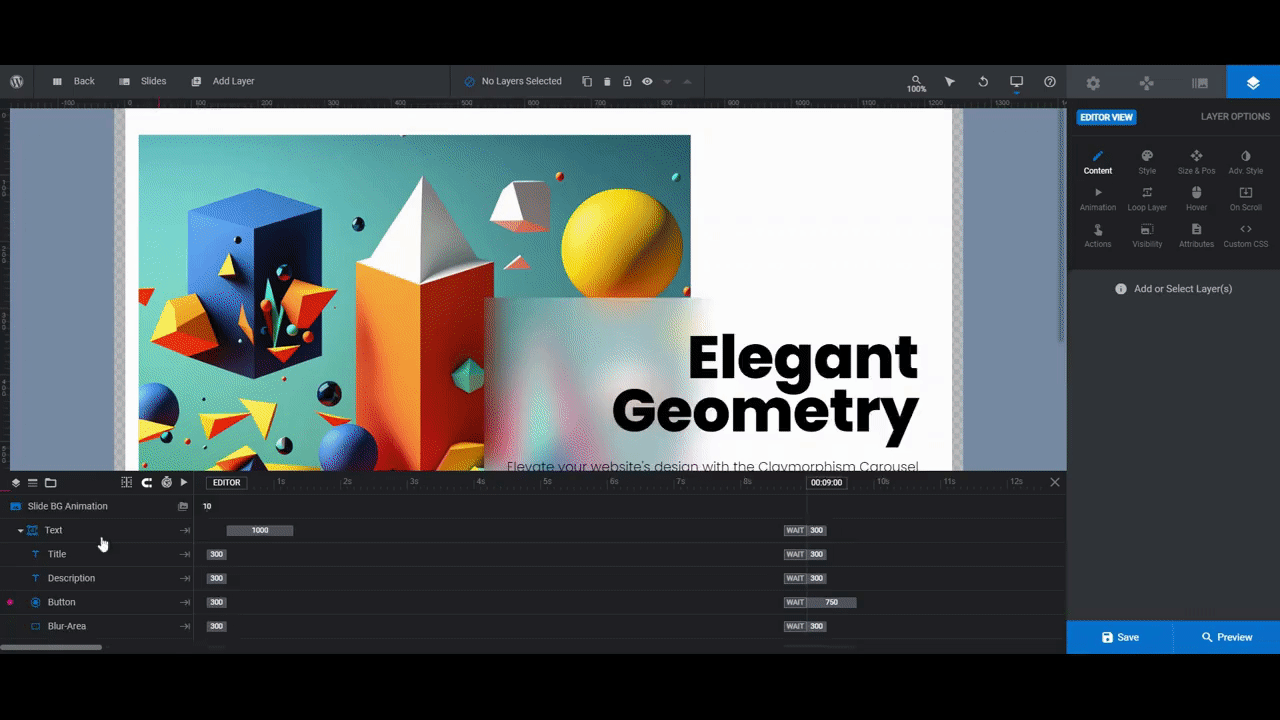
There are four slides in this carousel template. To edit them, go to “Slides” in the toolbar and open them up one at a time.
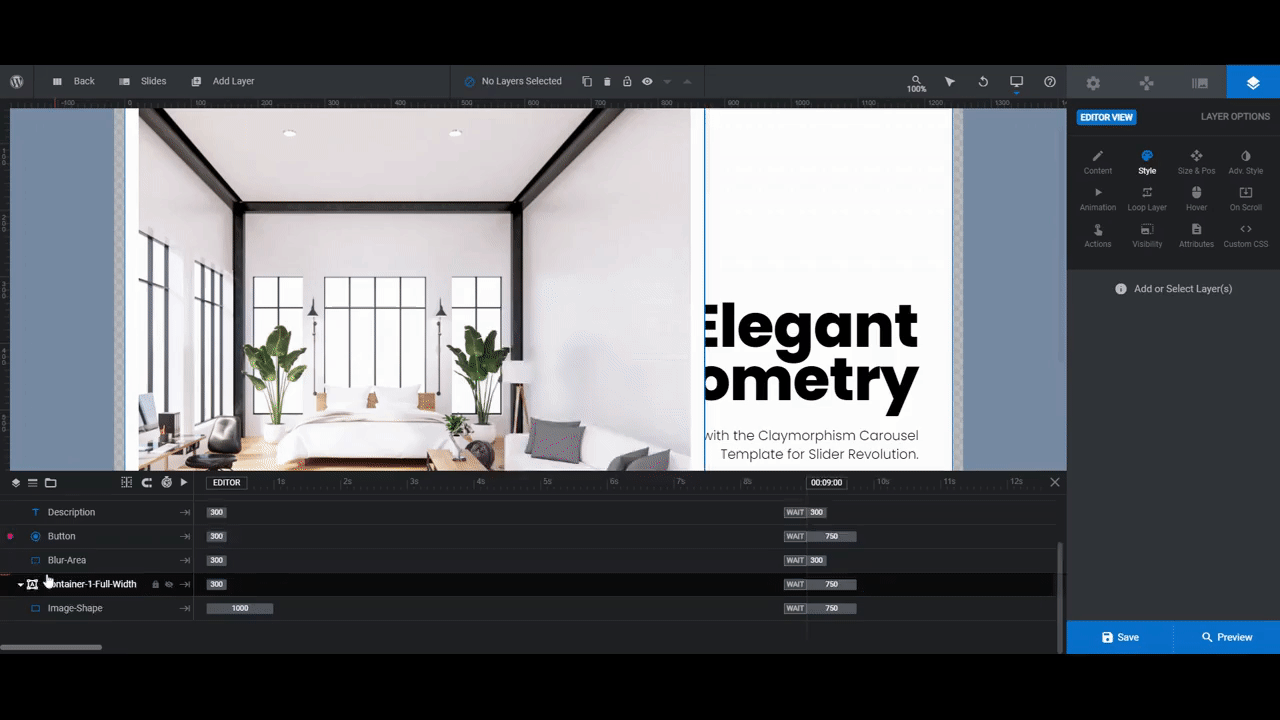
The portfolio image in each slide is a layer called Image-Shape. You can select it from the timeline editor at the bottom or by clicking on it in the canvas.
Note: While the images appear to be different shapes based on the way they’re cropped in each slide, the source images are all sized the same way: 1240px by 827px. We’d advise doing the same thing as the sliding-reveal effect in the template will reveal more of each graphic as visitors scroll through the carousel.
To add new images, go to “Layer Options” and “Style”. Click the Media button next to the image thumbnail and upload your new one to the library.
If you don’t like how the image settles into the frame, use the Position settings below the uploader to adjust its placement. This will allow you to recenter the image without having to do any resizing or cropping outside of WordPress.
When you’re done, save your changes and then do the same thing in the other slides.
Learn more:
Step 2: Edit the supporting text
Each portfolio image has a Title, Description, and Button that goes along with it. You can use these content fields to provide a little bit of information about the project or relevant service you offer.
To edit the Title and Description text fields, select them one at a time. Then go to “Layer Options” to make edits. You can change what the text says under “Content” and which font you use as well as how the text looks under “Style”.
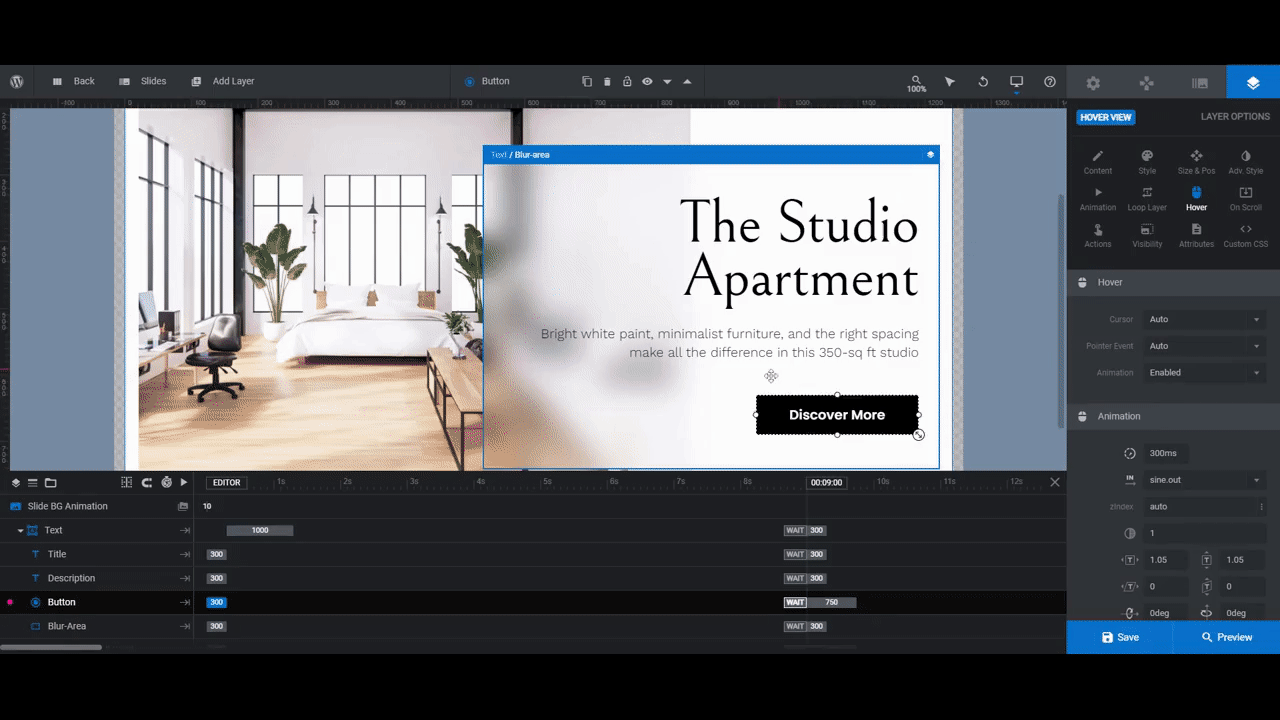
You’ll use the same “Content” and “Style” settings to edit the Button layer. You can also make adjustments to how the button looks in its hover state under the “Hover” settings. Currently, the colors don’t change, but the text hover effect does.
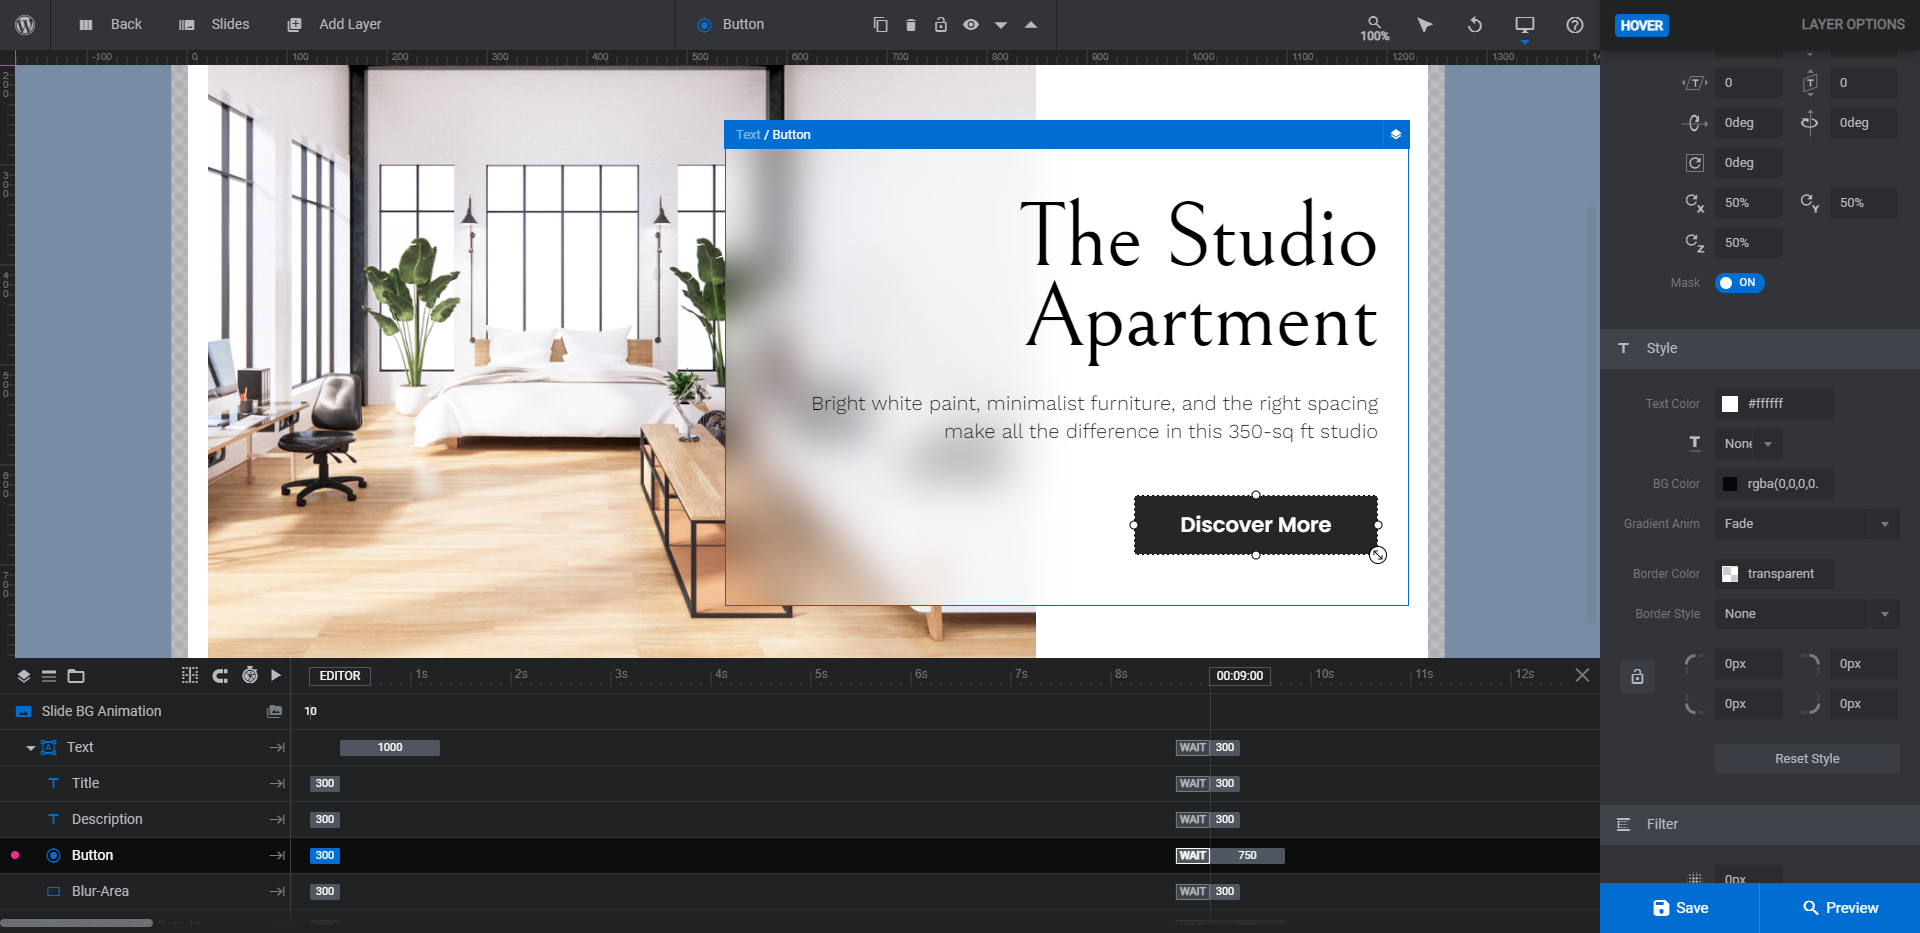
One other thing that will need editing is the button’s “Actions”.
Currently, the button is programmed to move visitors to the next slide in the carousel. However, if you’d like to set each button to go to the portfolio or case study page for the project, you can do that here.
First, click the trash can icon that appears to the right of the existing “Click” action. Then, create a “Simple Link” action and add your URL and settings.
Close the “Actions” pop-up to save your changes.
Repeat this editing process for the other slides.
Learn more:
- Editing Text from Template Modules
- Adding and Configuring Button Layers
- Editing Links in Template Modules
Step 3: Adjust the slide background color
For our purposes, we’ll leave the white slide background as is. It provides a sharp contrast to our interior design imagery.
However, if your portfolio imagery has lots of vibrant colors, has a tech-oriented style, or consists of all black-and-white photography, you may want to change the background to a color that better contrasts it (like black).
To do this, go to “Slide Options” and “Background”. Click on the color block next to BG Color and set your new color there.

Do this for all of your slides and save your changes when you’re done.
Learn more:
Step 4: Customize the 3D space
The last thing to do is give our 3D space a tighter feel. We don’t want visitors to feel claustrophobic or trapped, but we do want to make it feel more like they’re turning to look at our photos on the walls of a room.
To make modifications to the 3D carousel, go to “Module Options” and “Carousel”.
The Carousel Layout section will allow you to configure basic settings about the carousel — like alignment, how many slides can be visible at once, the amount of padding around them, etc.
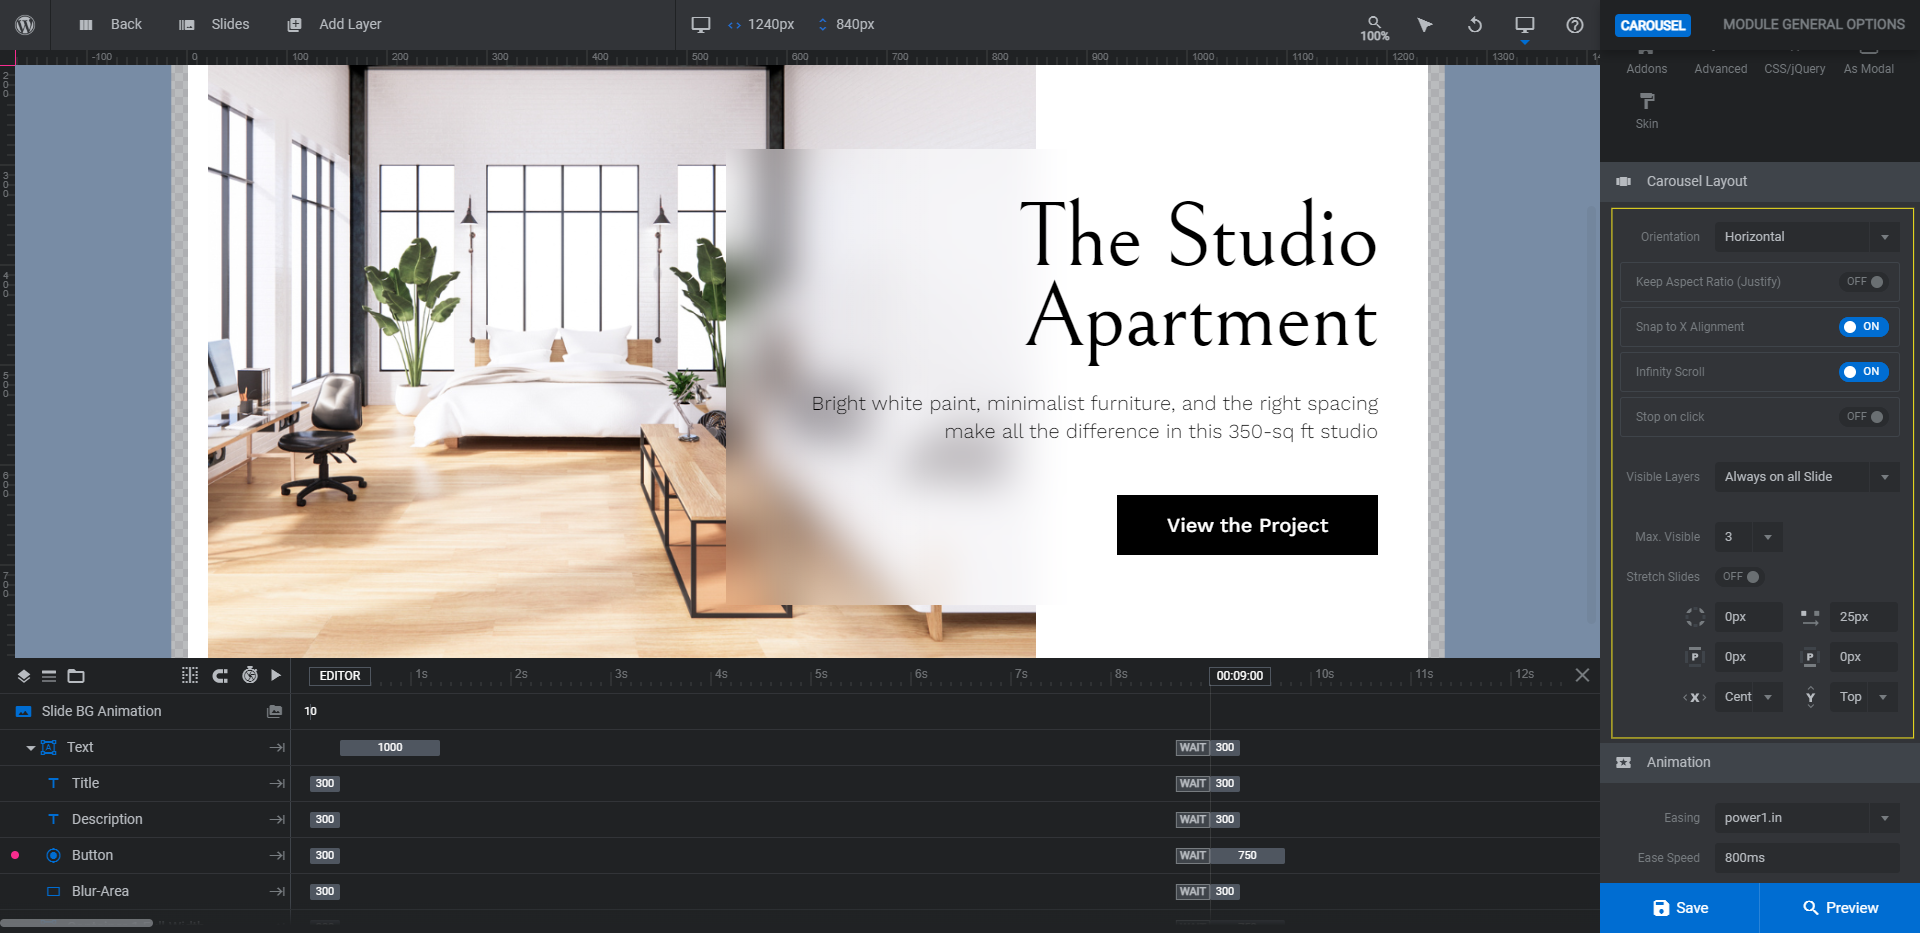
The Animation settings will allow you to control what style of easing is applied as well as the ease speed.

Note: If you decide to change the type of easing, stick with the powerX.in settings. This will maintain the smooth slide-in effect and won’t cause the slides to bounce around.
The last set of settings — Effects — relates to the special effects that create the 3D space.
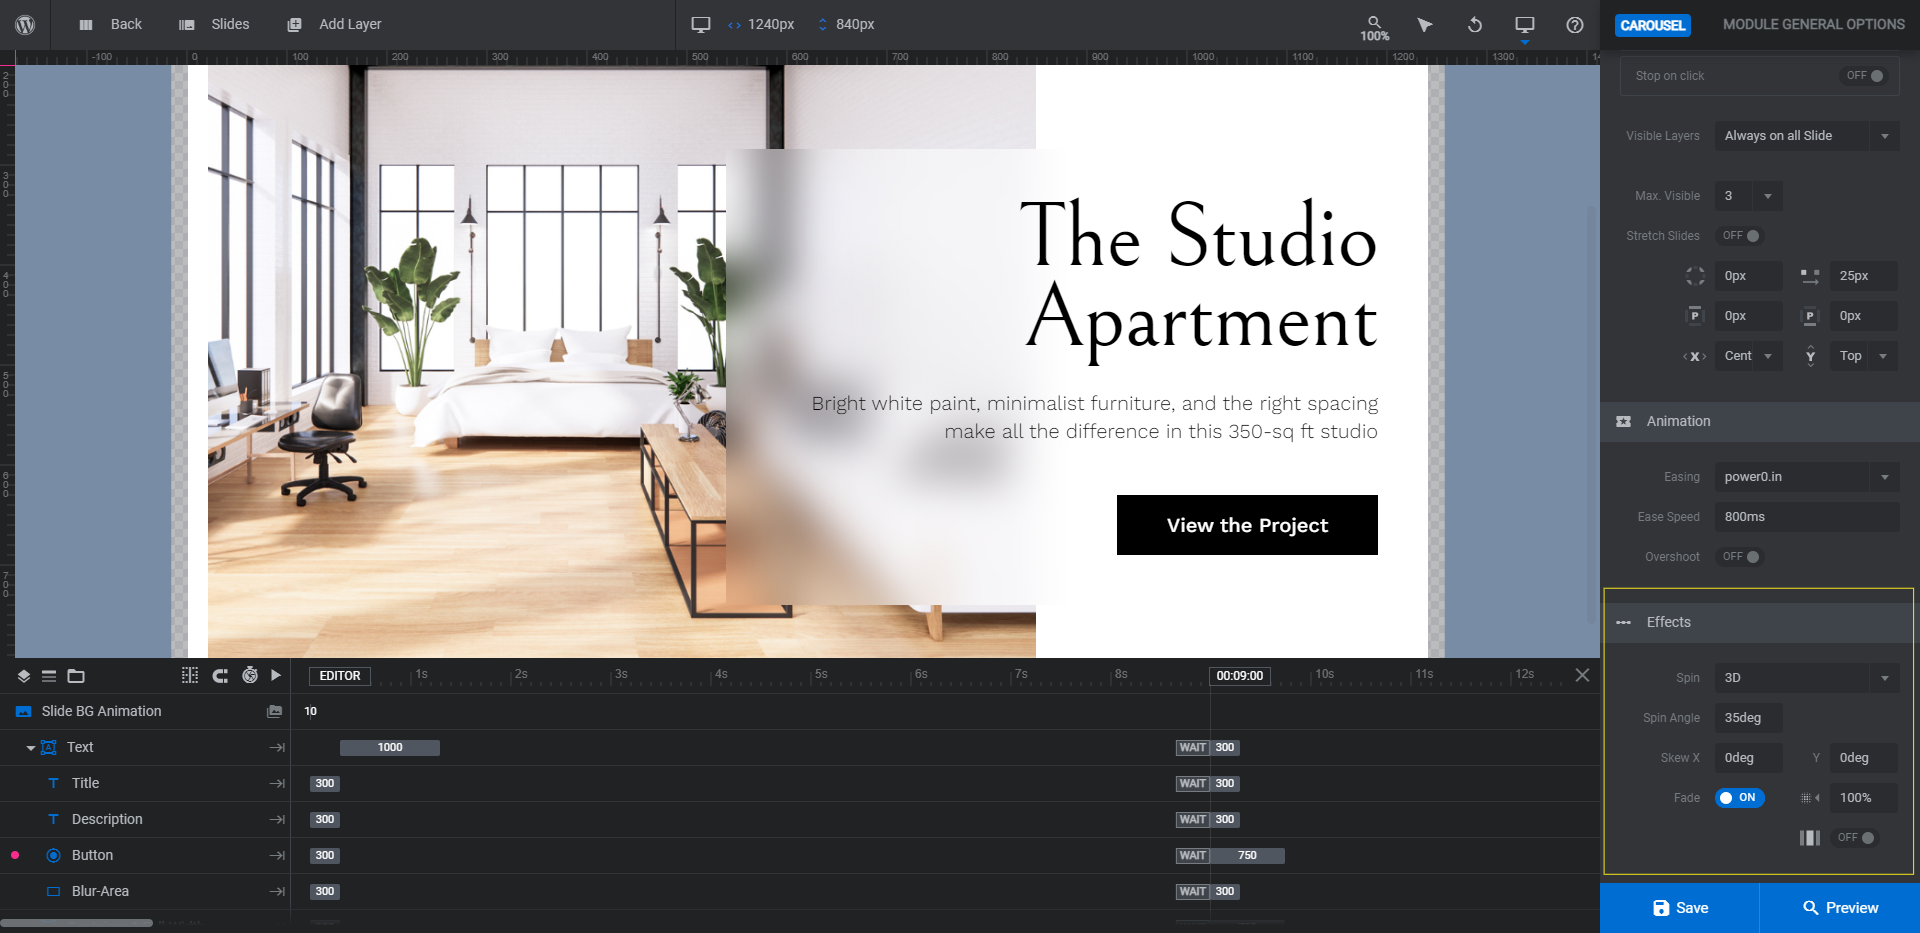
This is where we’ll adjust the Spin Angle to 60deg to make the portfolio look like it’s being displayed on the walls of a gallery or office.
When you’re done, preview your work on the frontend to make sure you’re happy with all your changes. Then save your work.
Learn more:
Bring your work to life with an interactive highlight reel
Whatever type of work you do or stuff you create, a portfolio highlight reel ensures that prospective buyers and clients are seeing the best of your best work. With the Claymorphism Carousel template, however, you won’t be presenting it to them in the typical flat and auto-rotating formas. You’ll have created an interactive 3D space that makes prospects feel like they’re viewing your work from a real world space they can move around in.


