
When selling a service-based solution, part of the website’s job is to educate prospects on your offering. In addition, the website should make a compelling argument that you’re the service provider to handle this particular task for them.
If your website can’t do this, you’ll be stuck with the time-consuming back-and-forth emails and calls it takes to first connect with leads and then turn them into clients. When time is money, you can’t afford to let this happen.
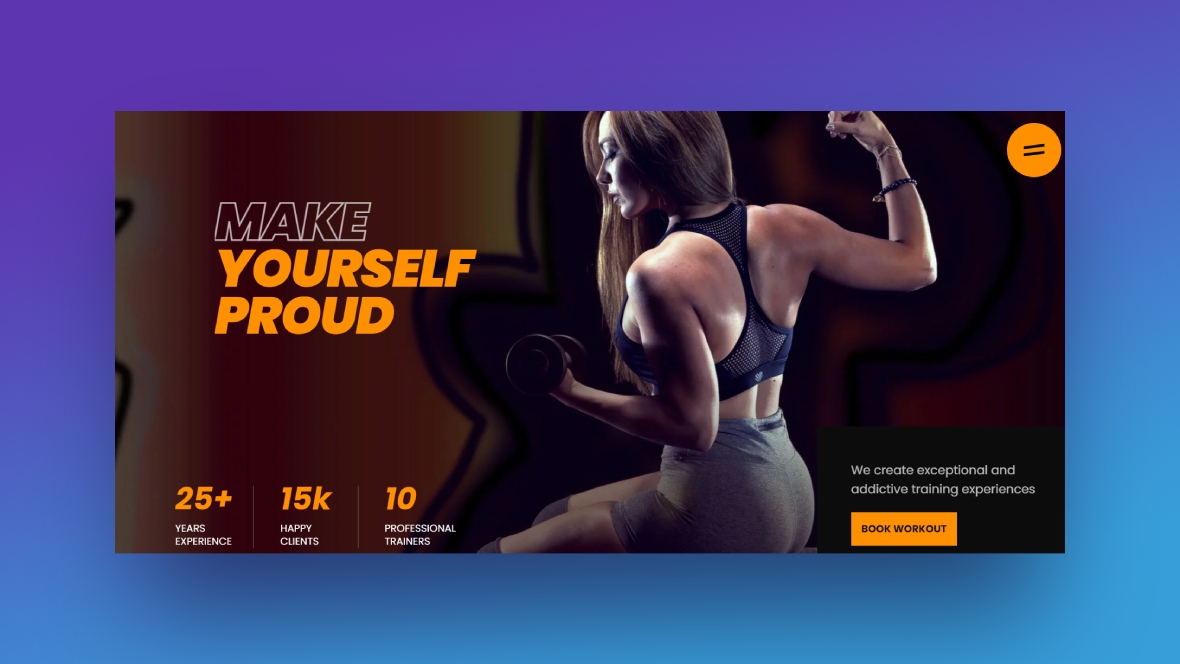
In this tutorial, we’re going to show you how to create a multimedia slider for your website that will get prospective clients excited about signing up for their first consultation or appointment. The process will be fast and easy, thanks to the Fitness Gym Website Slider template you’ll use as your base.
Table of Contents:
- Step 1: Update the global skin colors
- Step 2: Customize each slide’s background
- Step 3: Edit the headline layers in each slide
- Step 4: Edit the fact layers in each slide
- Step 5: Edit the call-to-action layers in each slide
- Step 6: Refine the Global Layers
How to create a beautiful multimedia slider for your website
When you provide a service, prospective clients want to see some sort of a guarantee of results. Whether you sell landscaping services and want to show off your transformative work or you sell gym packages and want to show prospects how fit your clients are, an aspirational multimedia slider is a great way to do it:
The template above has been designed specifically for a gym or personal trainer. However, we can easily repurpose this for other kinds of service-based businesses. In the tutorial below, we’ll show you how to create a multimedia slider for a tutoring agency:
Just a quick reminder that if you’re new to Slider Revolution, you should read through these startup guides first:
Step 1: Update the global skin colors
When you step inside the newly installed template, the first thing you’ll see is the Global Color Skin pop-up:
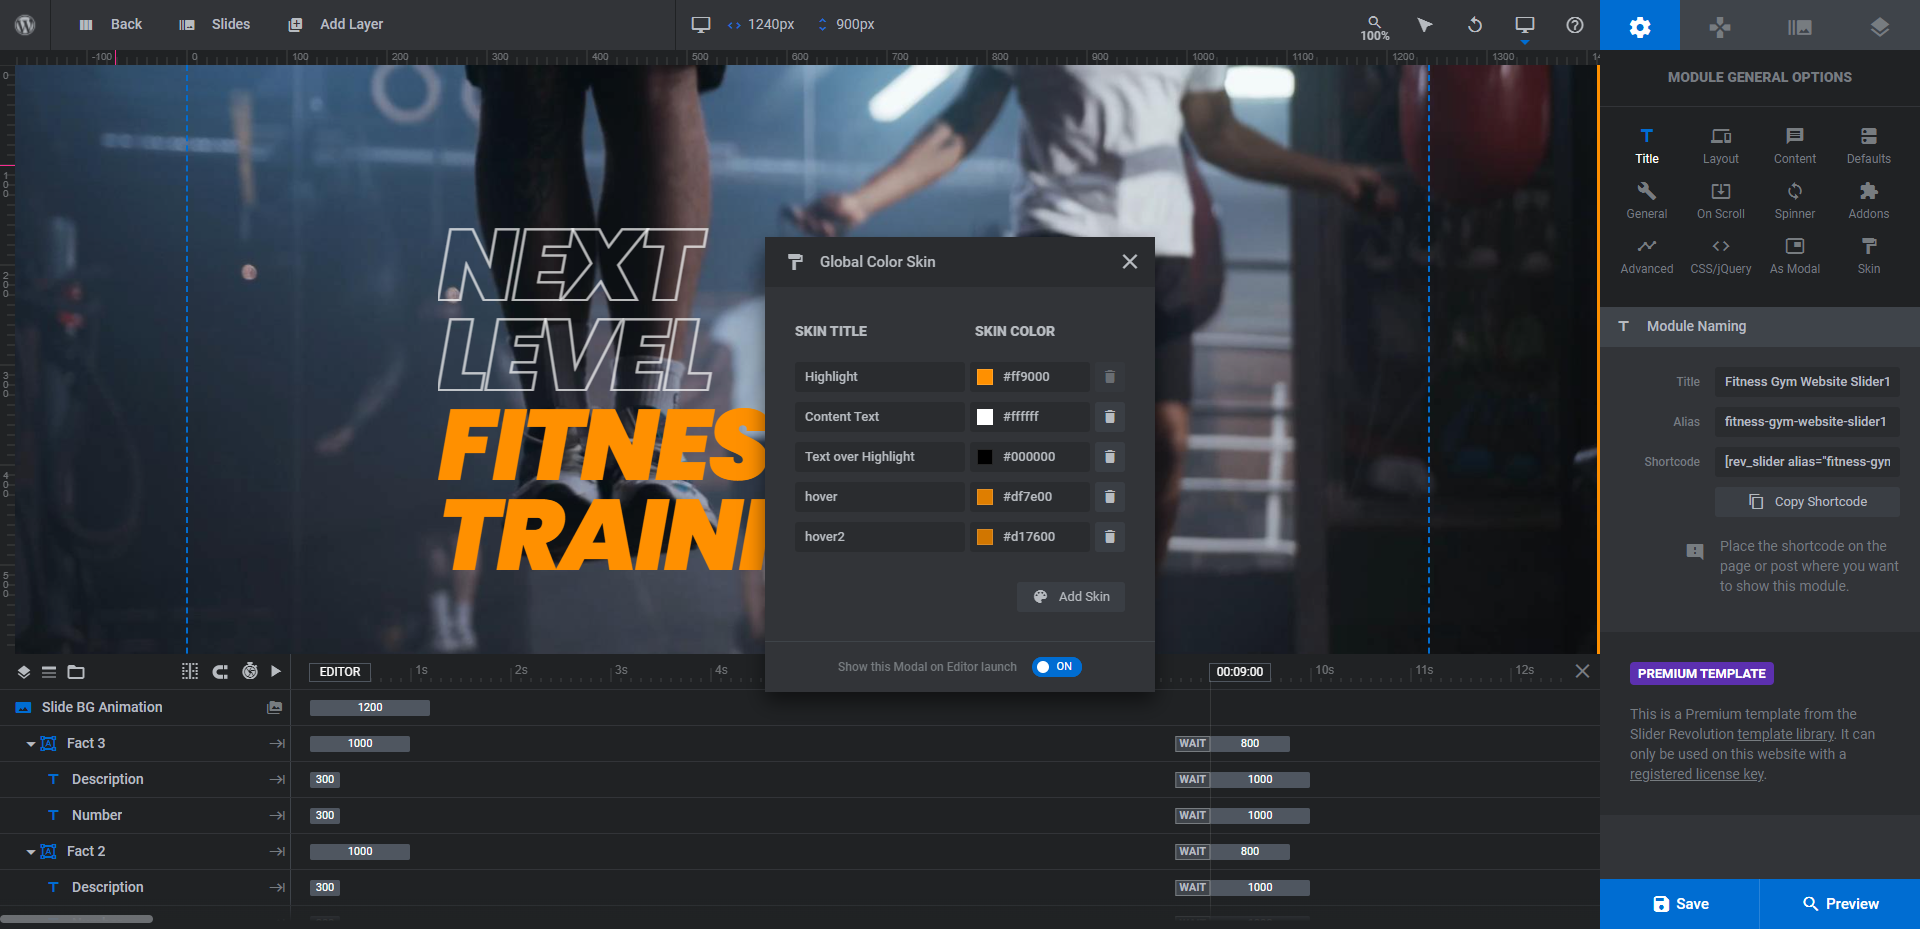
With this tool, you can instantly define colors to be used throughout the slider. This will decrease the amount of time you have to spend editing the template.
Leave the Content Text and Text over Highlight colors as they are. White and black are always the best choices for readable text.
Editing the Highlight color will affect:
- Headlines 2 and 3
- CTA-button’s background
- Fact numbers
- Progress bar navigation
The hover color will change the background color of the button in its hover state.
To edit these colors now, select the color under the Skin Color column. The color selection dialogue box will appear. Replace the existing color with your new one and click the blue “Save” checkmark button before moving onto the next one:
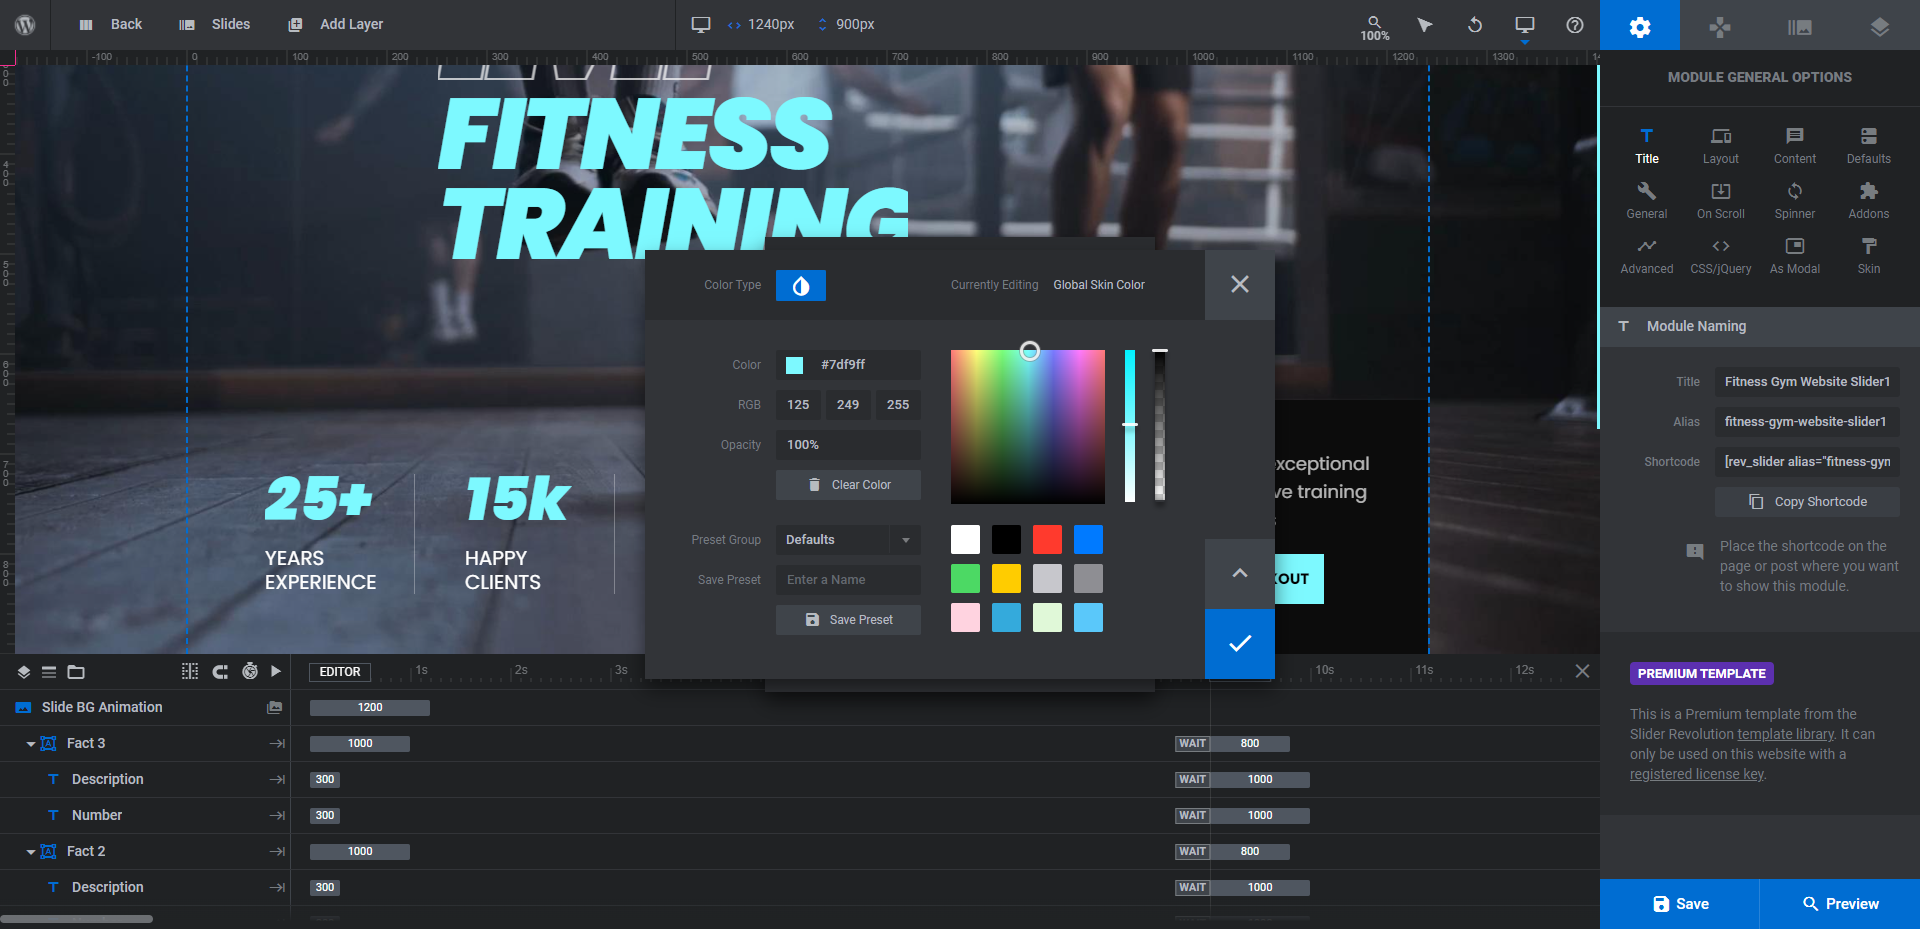
Pro tip: A vibrant highlight and button color will be most effective as they’ll stand out more clearly against the multimedia background content.
By the way, you can adjust your global skin colors at any time by going to Module Options and Skin.
Learn more:
Step 2: Customize each slide’s background
The template has five slides in it — 3 video slides and 2 image slides. We’re going to keep all of the slides. However, we want to change their order so that they alternate between video and image backgrounds.
To modify the order of the slides, go to the toolbar at the top and hover over the Slides dropdown. Click on the one you want to move and drag it so it appears in the right order:
We’ve swapped Slides 2 and 3 and Slides 4 and 5. By doing this, we won’t have to worry about reconfiguring the image or video settings since the media type will remain the same.
To update the background content in each slide, start with the first one and go to “Slide Options”. Under “Background” settings, upload the new file to your Media Library.
For video files, you should create a Poster Image. If you have a screenshot from your video ready to go, upload it. If not, click Get Start Frame and Slider Revolution will generate one for you.
Pro tip: While you’re updating your “Slide Options”, it’s a good idea to update the thumbnail image which you’ll find under “Thumbnail” settings:
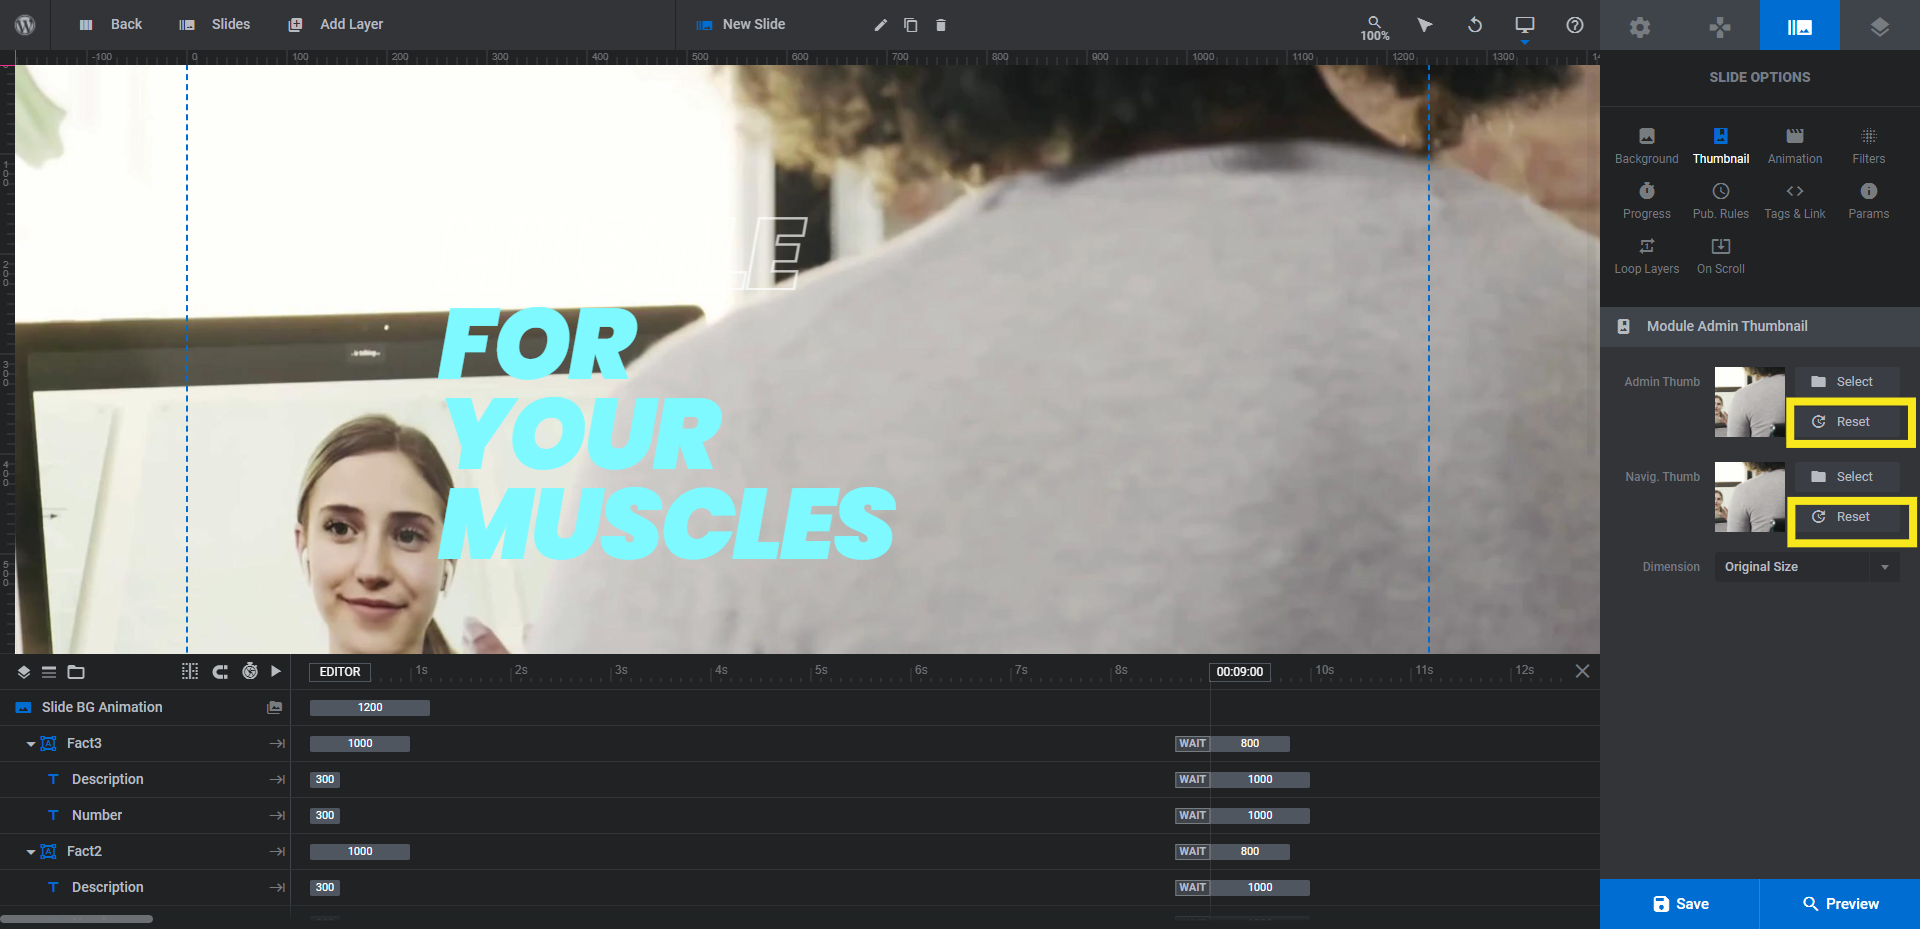
There’s no need to upload or create a new image. Simply click the Reset button next to each and it’ll pull in the source or poster image for you. This will make managing slides from the toolbar easier as the correct visual will appear when you hover over each slide.
Repeat this process for all of your slides and save your changes when you finish each update.
Learn more:
Step 3: Edit the headline layers in each slide
Look at the timeline editor in this template and you’ll see three Headline layers under Row-0 and Column-1:
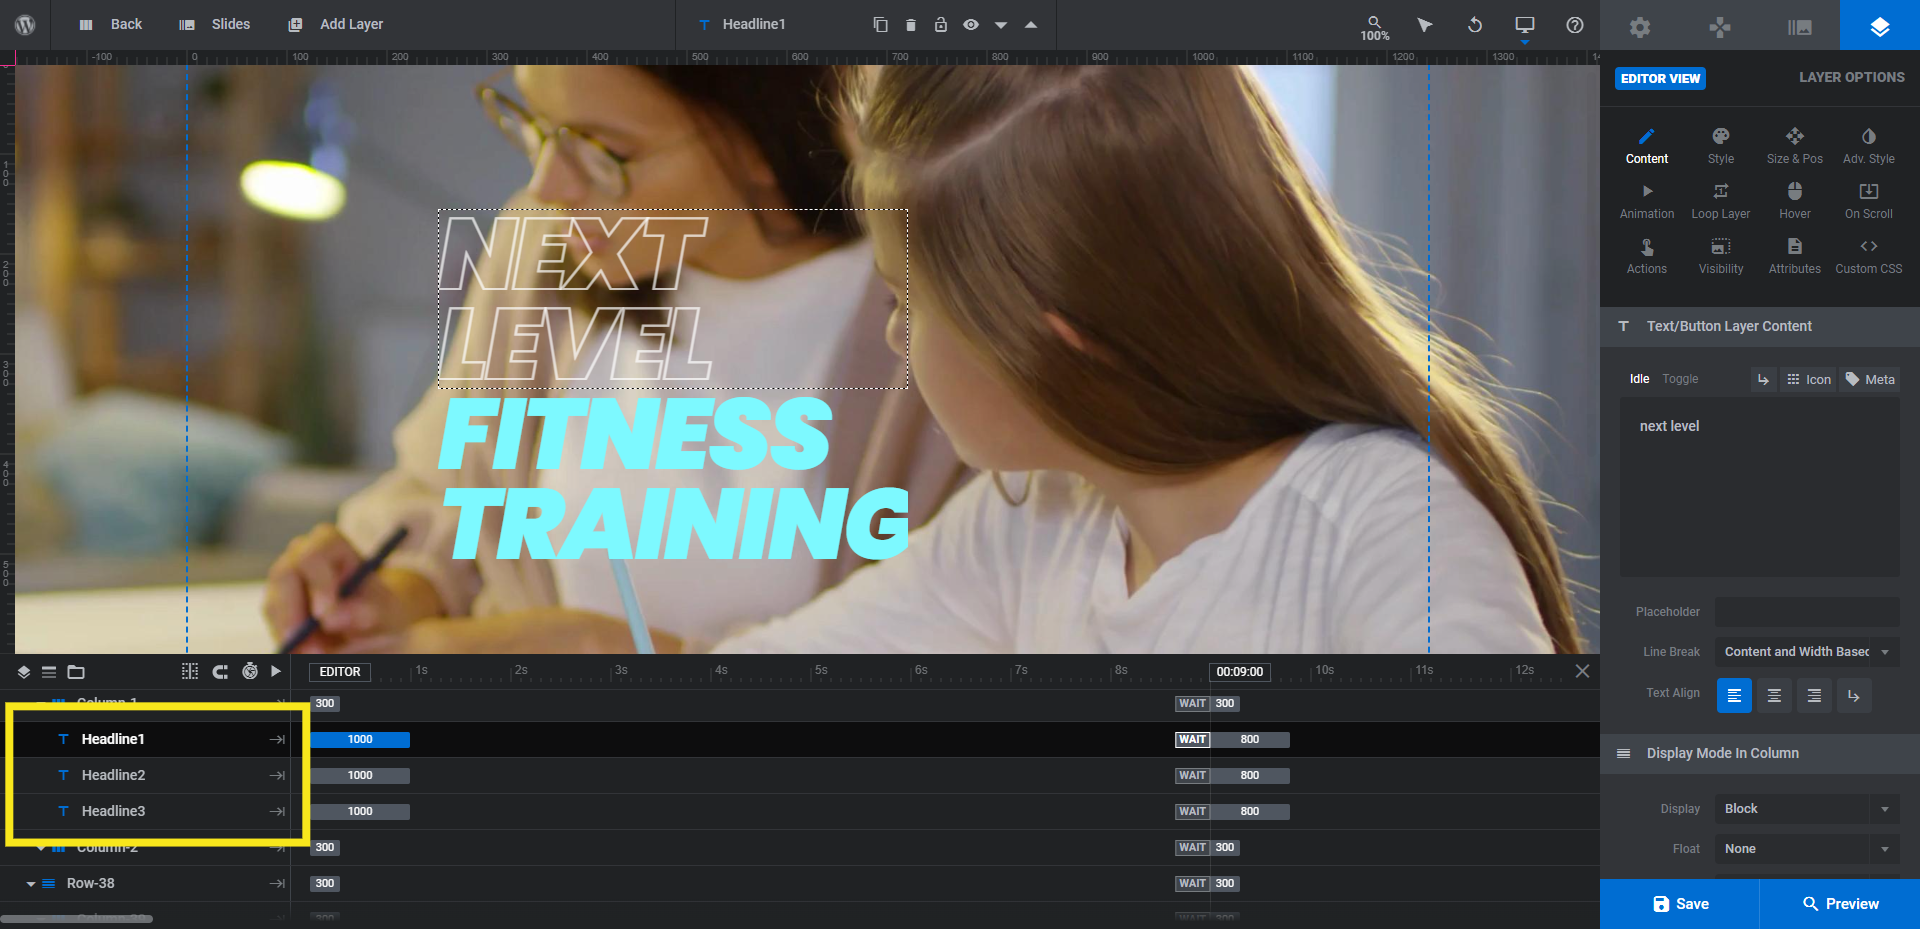
Headline1 is the outlined text that reads “Next Level”. Headline2 is the colored text that reads “Fitness”. Headline3 is the colored text that reads “Training”.
We don’t need the third headline layer, so we’re going to select it in the timeline and then hit the delete/backspace button on our keyboard.
To edit the remaining text, select the layer you want to work on and go over to “Layer Options”:
- Edit what the copy says under “Content”.
- Edit the font and styling of the text under “Style”.
- Edit the text stroke effect applied to Headline1 under “Adv Style”.
While you can adjust the size and position of text layers under “Size & Pos”, there’s no reason to mess with this setting unless you’re adding much more text than there already is.
Make the same changes to all your other slides.
Pro tip: Save and preview your work before moving on. If there isn’t a strong enough contrast between the headline text layers or your new backgrounds, then return to “Module Options” and “Skin” to revise your global skin colors. Likewise, you could change the background image or video to one with a darker overlay to fix a low-contrast issue.
Learn more:
Step 4: Edit the fact layers in each slide
In the bottom-left corner of each slide is a set of three facts about the company.
If you have impressive numbers about your business, you can showcase them here. They could be related to things like number of projects, clients, money earned, awards won, things of that nature. You can do as the template does and show off the same facts from slide to slide or present a bunch of different ones based on the content of the slide.
Regardless of what you decide to put here, you’ll update these text layers the same way you did the headlines.
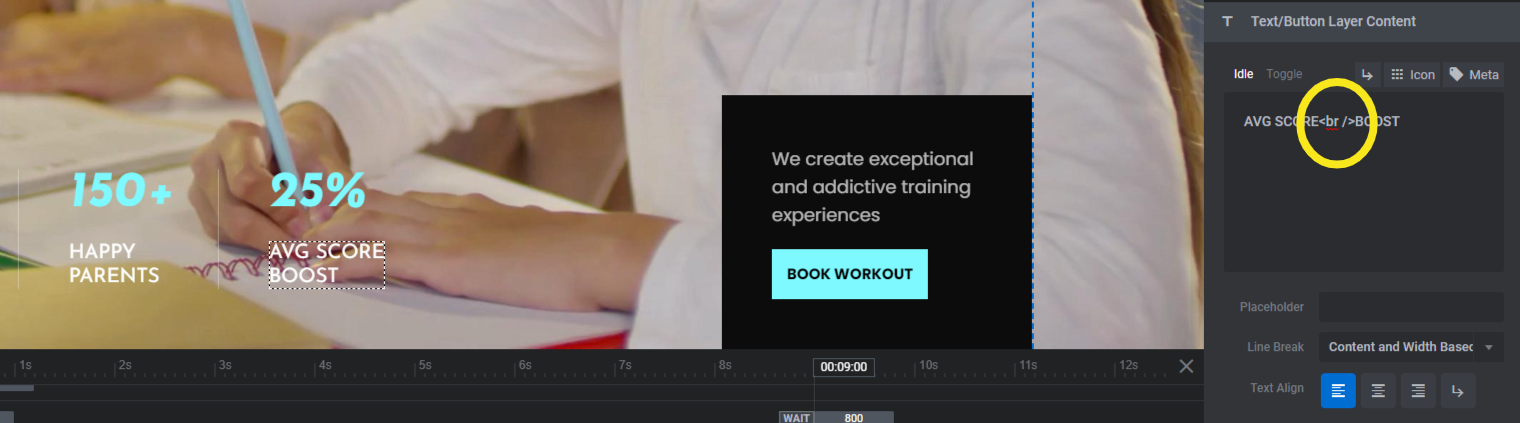
Each Fact has two parts: Description and Number. Use the “Layer Options” settings to edit the copy and change the font and style:
Pro tip: If you don’t add a break <br /> to the Description field, the text won’t wrap and will get cut off at the right boundary of the block. Make sure to add the forced break into the text field to ensure that all the text can be seen:
Repeat this process in each of the slides and save your changes.
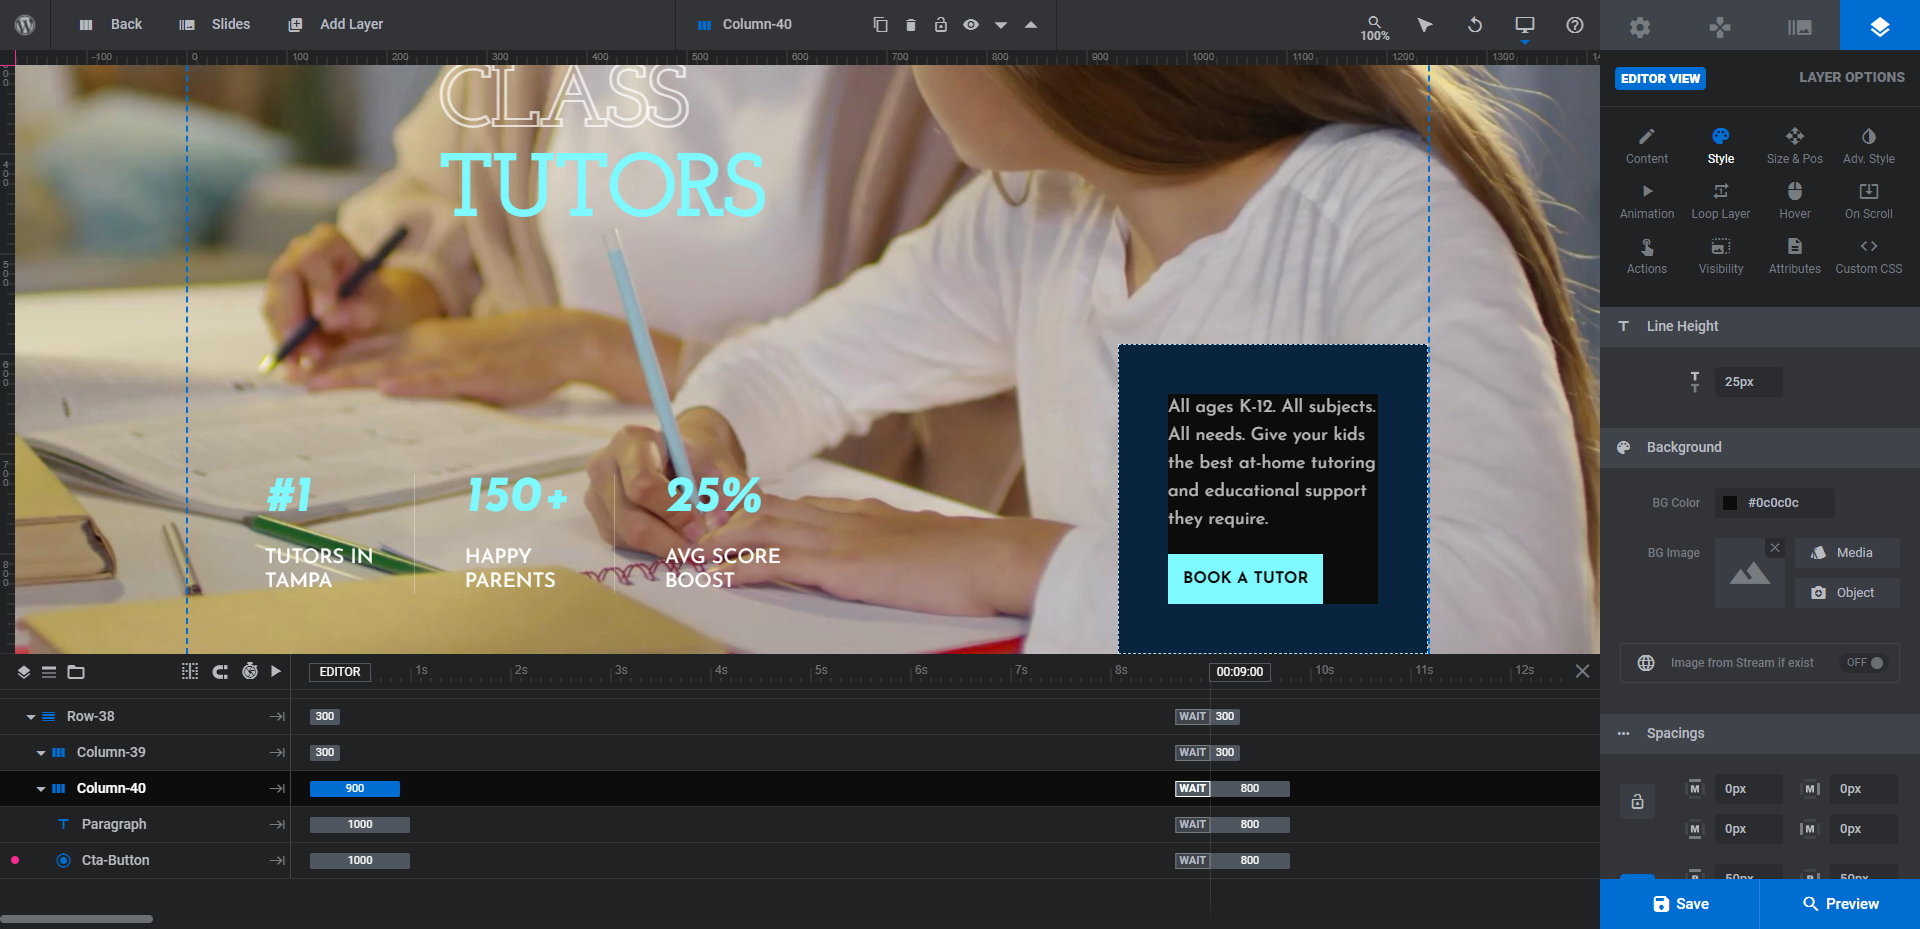
Step 5: Edit the call-to-action layers in each slide
There is a call-to-action block in the bottom-right corner of each slide. In the timeline editor, you’ll find the Paragraph and Cta-Button elements that make it up under Row-38 and Column-40.
Edit the Paragraph and Cta-Button layers the same way you did the text layers in the previous two steps. The button will require some additional editing.
Under “Style” settings, you can change the background color of the button under the “Background” section. Click on BG Color to open the color selection dialogue:
If you edited the button’s background color, you’ll also want to edit the background color in its hover state. You’ll find this under “Hover” and “Style”:
Pro tip: In the template, the button’s background color has the “Color Skin Active” setting toggled ON. The regular background is programmed to pull in the Highlight color. The hover background is programmed to pull in the hover color. You can change these colors to another default skin color or you can toggle off the setting and add a custom color instead.
The other thing to think about editing is the background block color. You’ll find this setting when you click on Column-40 in the timeline and go to “Style” settings and “Background”:
You can adjust the color by clicking on BG Color.
When you’re done implementing these edits in the first slide, go through and make the same ones in the others.
Learn more:
Step 6: Refine the Global Layers
Global Layers are the ones that appear in the multimedia slider at all times. To edit them, go to the toolbar at the top, hover over “Slides”, and select Global Layers.
There are a number of sections we can see in our slider now that we couldn’t see before:
- Menu-Button
- Menu
- Menu-Overlay
- Navigation
- Side-Bar
If you plan on using Slider Revolution to create all the content on your site, you can leave the Menu-related layers in there and customize them as needed. For our purposes, we’re going to delete them. The top navigation menu will be handled by our WordPress theme.
To delete these layers, hold down the CTRL button on your keyboard and simultaneously select the top-level layers (i.e. Menu-Button, Menu, and Menu-Overlay) in the timeline editor. To select the Menu-Overlay layer, you’ll need to click the lock and eyeball icons first:

When you hit the delete or Backspace button on your keyboard, these layers and all the layers attached to them will disappear.
Let’s edit the remaining layers:
The Navigation group contains the Arrow Up and Arrow Down layers that appear in the bottom-left part of the slider. There’s not much to edit here aside from the background color of these blocks.
To do this, select the Arrow Up layer first. Go to “Layer Options”, “Style” settings, and scroll down to “Background”. Click on BG Color to open the color selection dialogue.
In the template, this section of the sidebar is a couple shades darker then the Highlight color found in the rest of the slides. To make a similar change, either replace the custom color here or select it from the global skin colors (if you configured it earlier):
Do this for both arrow layers.
The Side-Bar group of layers is the last thing to customize. There are three elements to edit:
The Side-Bar background needs to be edited to match the Highlight color in the slider. Select the group in the timeline editor. Then, go to “Layer Options”, “Style”, and “Background”. All you have to do is toggle on the “Color Skin Active” setting and it’ll automatically set it to the Highlight.
Next, select the Logo layer. This is the dumbbell icon at the top of the sidebar. There are a couple of ways to customize this:
- Replace it with a similarly styled icon by adding an Icon / SVG layer.
- Replace it with your custom brand logo by adding it in as an Image or Icon / SVG layer (depends on the file type).
Either way, this will require you to delete the Logo layer and then go to the toolbar, hover over “Add Layer”, and select the corresponding layer type. Here’s what you’ll do next:
- Drag-and-drop the layer in the timeline editor so that it sticks to the Side-Bar group (you’ll know when a line appears under it).
- Go to “Layer Options” and “Style” settings to change the Text Color to black.
- Go to “Size & Pos” settings to center the layer horizontally.
The last element to edit is the Slide-Counter layer that appears in the center of the sidebar. There’s no need to edit the numbers since this layer is programmed to pull in the following data:
{{current_slide_index}}/{{total_slide_count}}
All you need to do is update the font under “Style” settings so it matches the font used in the rest of the slides. Or at least one that complements it well.
Learn more:
Dazzle prospective clients with an awesome multimedia slider
Client management in and of itself is a tough task. So is everything that comes before it — lead generation, qualifying those leads, and converting them into clients.
By creating a video and image slider that successfully conveys what you do and what the client stands to get from it, your website might be able to take some of that weight off of your shoulders. If you’d like to start luring in high-quality clients more easily, repurpose the Fitness Gym Website Slider template and create your own aspirational multimedia slider today.


