
What is it that people say — that their work speaks for itself? That may very well be true, but it’s also true that the work isn’t always the first thing that people notice on a website.
The first thing you can do to avoid this problem is to put a preview of your portfolio front and center on the home page. That way, there’s no missing it. Then, present it in a way that commands attention. Include the best of your best. Give it a dramatic flair. And turn it into an interactive portfolio slideshow.
In the following template, we’re going to show you how to repurpose the Portfolio Showreel Slider template and turn your portfolio into a truly impressive representation of your work.
Table of Contents:
- Step 1: Remove slides you don’t need
- Step 2: Update the slide background graphics
- Step 3: Edit the slide copy
- Step 4: Style your text layers
- Step 5: Update the Global Layers
- Step 6: Create a new button
How to create an interactive portfolio slideshow
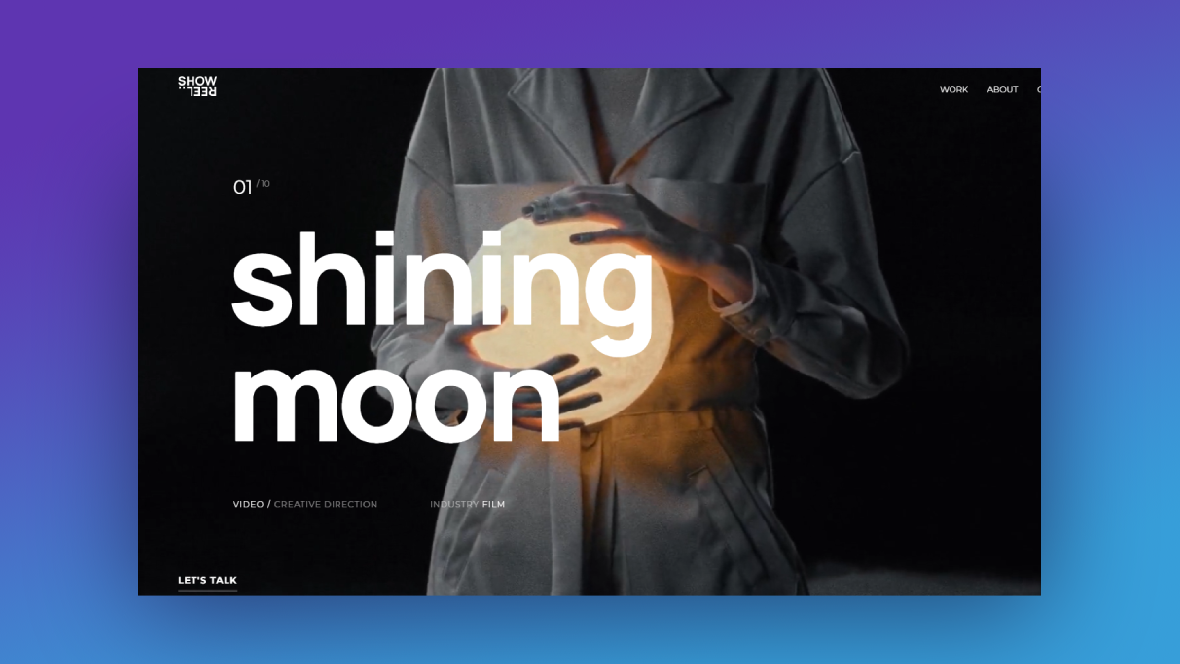
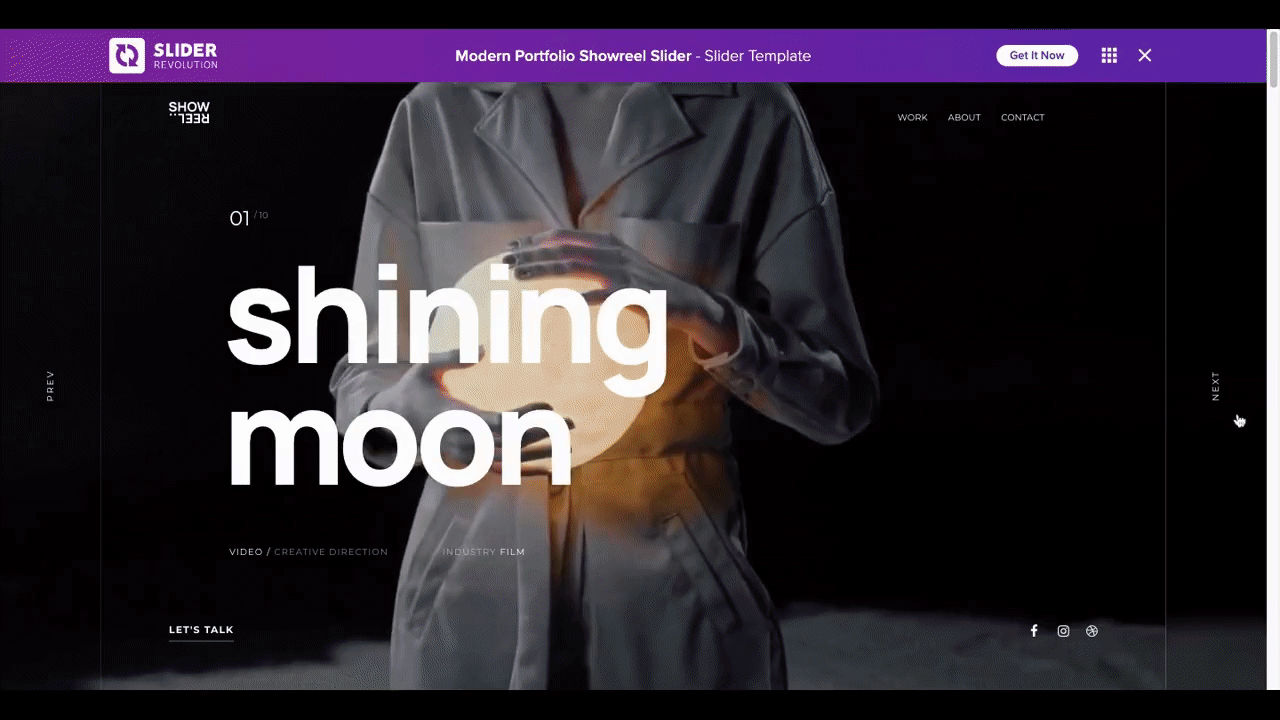
Our Portfolio Showreel Slider template demonstrates how a digital content agency might show off their work in an interactive slideshow format:
You don’t have to be a digital creator in order to use this portfolio template. As long as you have high-quality photos or videos of your work or services, you can easily use this Slider Revolution template to lay out your portfolio slideshow.
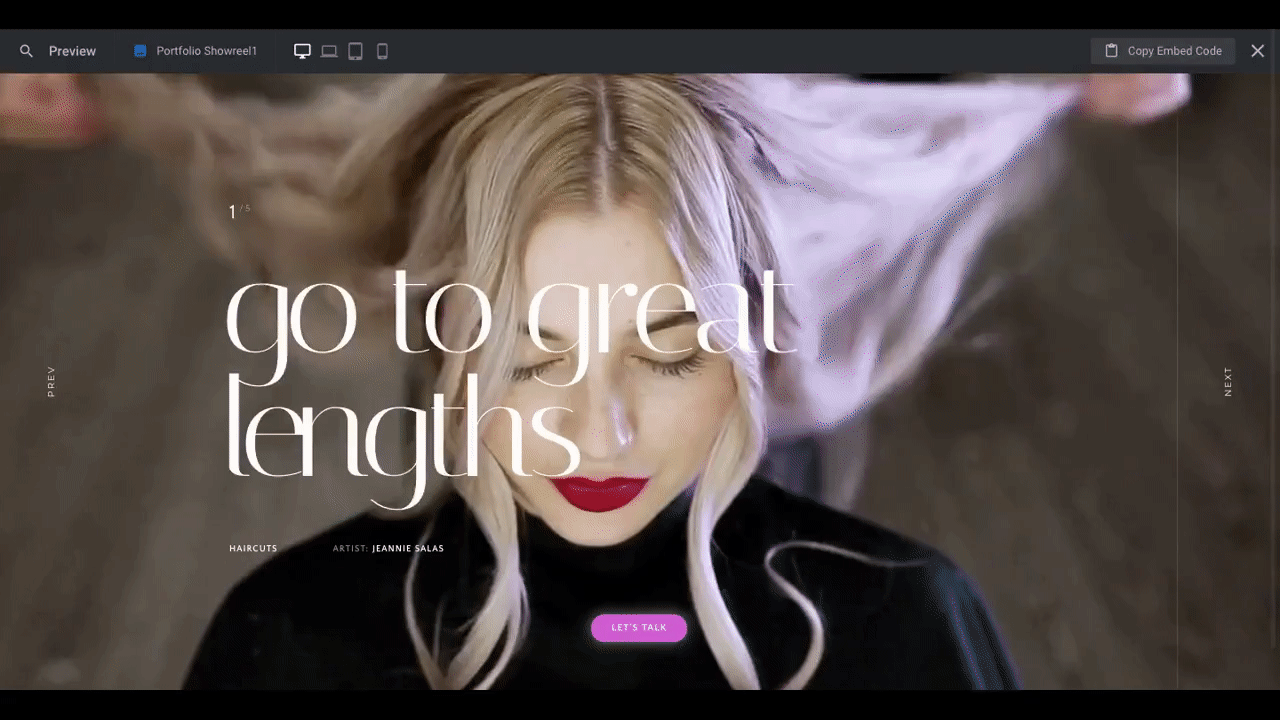
In the tutorial below, we’ll show you how a hair stylist or salon could repurpose this template and turn it into something like this:
Need a Slider Revolution introduction or refresh? Start here:
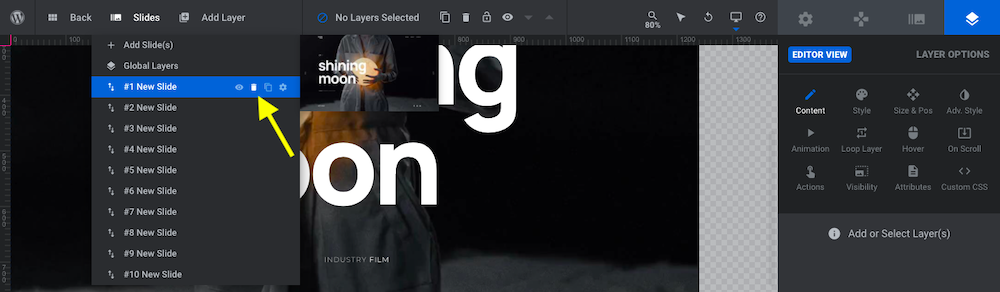
Step 1: Remove slides you don’t need
There are 10 slides in this slideshow template. If you plan on turning this into a preview of your full portfolio, then you may decide you don’t need that many slides. You might also come to that conclusion if you’re just starting out and only have a few examples to share. Either way, that’s fine.
Deleting slides is a simple process. Go to the “Slides” dropdown in the top toolbar. Hover over the slide you want to delete and click the trash icon to remove it:
Note: There are two types of slides in the template:
- Video background slides
- Image background slides that use a pan zoom “Ken Burns” effect
Before you delete any slides, figure out which types of slide backgrounds you want to use. You can mix them up as this template does or you can stick to all one style (i.e. images vs. videos).
By deciding which kinds of graphics you’ll be using, you can delete the slides with the backgrounds that are irrelevant. You won’t have to do much else to the remaining slides other than replace the background graphics and copy. The styles and animations will already be configured for you.
Learn more:
Step 2: Update the slide background graphics
There are a number of things we want to do in this step:
- Replace the existing background images with your own.
- Rename the slides.
- Change out the thumbnails.
The last two points will make managing your portfolio now and in the future much easier. Let’s start with changing out the graphics.
Starting with the first slide, go to “Slide Options” and “Background”. Open up the Media Library and upload your replacement graphic:
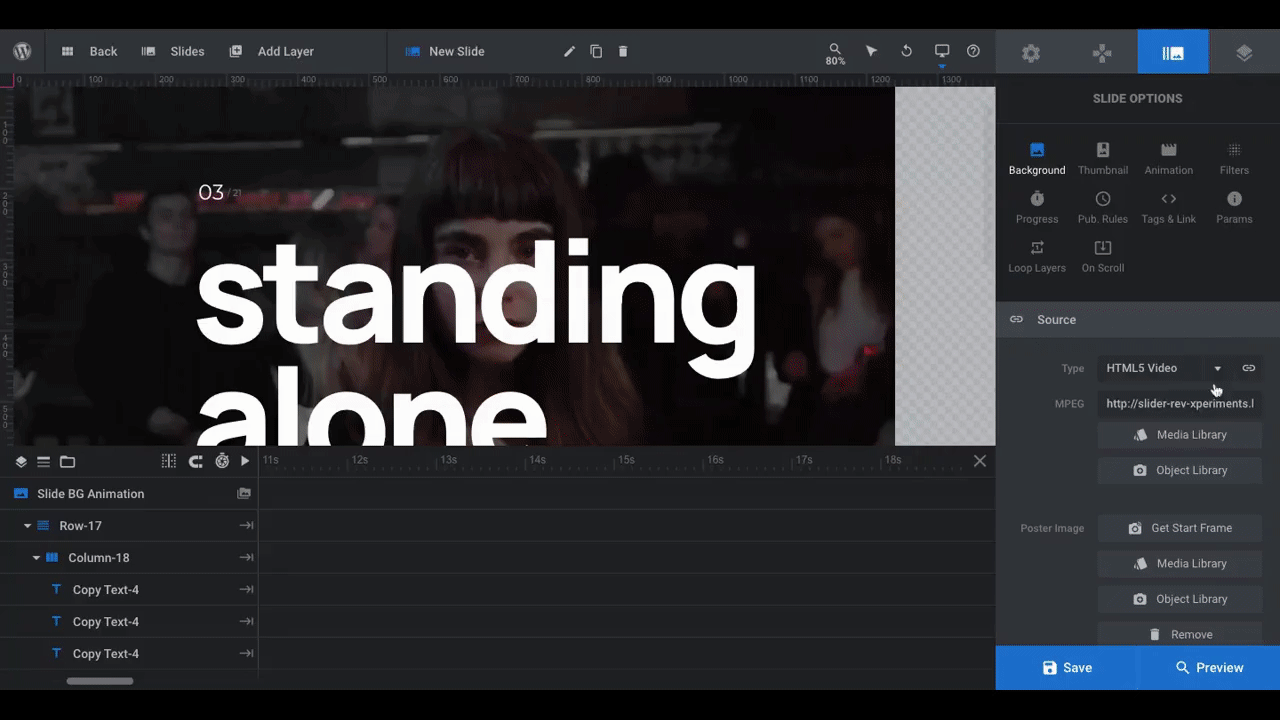
If you want to make adjustments to how the video fits to the space, if/how it loops, as well as what portion of the video plays, scroll down to the settings section below to make adjustments. You’ll also be able to adjust image sizes, if needed.
Note: Some of the slides have an overlay layer applied to them. All this does is add a dark transparency to the background:

To remove the overlays, select them in the timeline and hit “delete” on your keyboard.
If you want to keep the overlays, then just leave them be. You can always add overlays to the slides that don’t have them if you want to give each slide a consistent level of darkness. To do this:
- Add a new Shape layer to the slide from “Add Layer” in the toolbar.
- Go to “Content” and set the “Layer Align” to “Scene”. Otherwise, the shape will only cover the layer area size and not the fullscreen.
- Go to “Style”. Set the BG color to black (#000000) and set the transparency to 15%.
- Go to “Size & Pos”. Set the width and height to 100%.
Alternatively, you can use the “Filters” setting under “Slide Options” to add the same colored overlay to every slide.
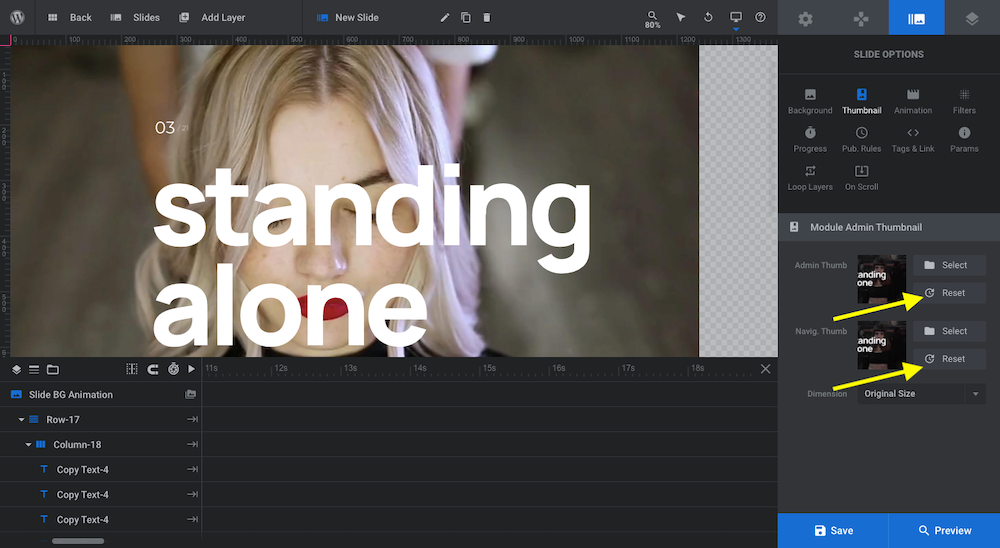
Next, go to “Thumbnail” settings. Click the Reset button next to both thumbnail images to import the cover image from your video background or the image from your photo background:
Lastly, give the slide a unique name. In the toolbar where it says “New Slide”, select the text and replace it with your own:

Repeat this process for all of your slides.
Learn more:
Step 3: Edit the slide copy
There are eight text layers on each slide. The first two you won’t have to edit because they’re dynamic:
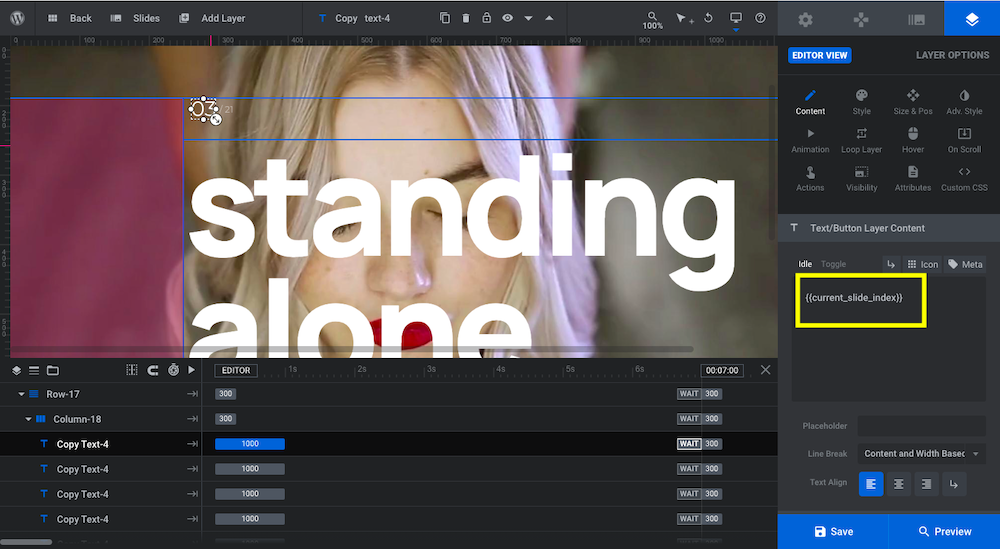
What you see in the canvas does not reflect what you’ll see on the frontend of your website. The first Copy Text-4 layer is programmed to pull in the current slide index and the second displays a forward slash (/) plus the total number of slides. So you can leave these be.
Pro tip: To save yourself the trouble of having to click through each layer the next time you edit your portfolio slideshow, give each text layer a more descriptive name. The process is similar to editing slides. Click on the layer in the timeline. Then, go to the toolbar at the top and overwrite the Copy text-4 name with your own.
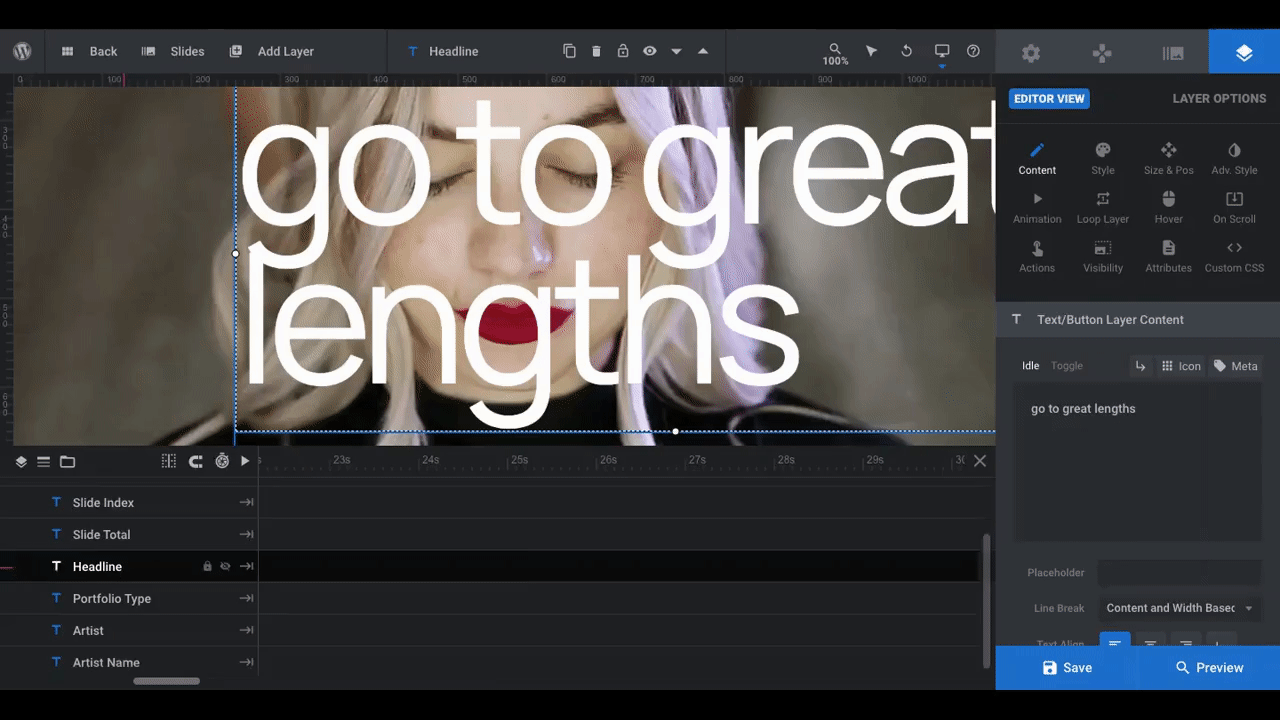
To edit the copy inside the other text layers, click on them in the timeline. Then, go to “Layer Options” and “Content”. Replace the existing copy in the text box with your own:

If there are any text layers you don’t need, feel free to delete them. Select them in the timeline and hit “delete” on your keyboard.
Learn more:
Step 4: Style your text layers
To apply your brand’s typography settings to the text layers, select them one by one from the timeline and then go to “Layer Settings” and “Style”. From here, you can:
- Edit the font.
- Change the color.
- Update the size and weight.
To add a text shadow, stroke, or spike mask, use the settings under “Adv Style”.
For our purposes, we’re going to update the fonts and add a little more weight to the smaller text on the slide:
We don’t want the small text to overshadow the headline or the background graphics. However, we want it to act more like supporting text instead of categories or tags. Just by making the text bolder, we can enhance its visibility on the page.
Repeat this step for all slides, making sure to use the same fonts and styles across them.
Learn more:
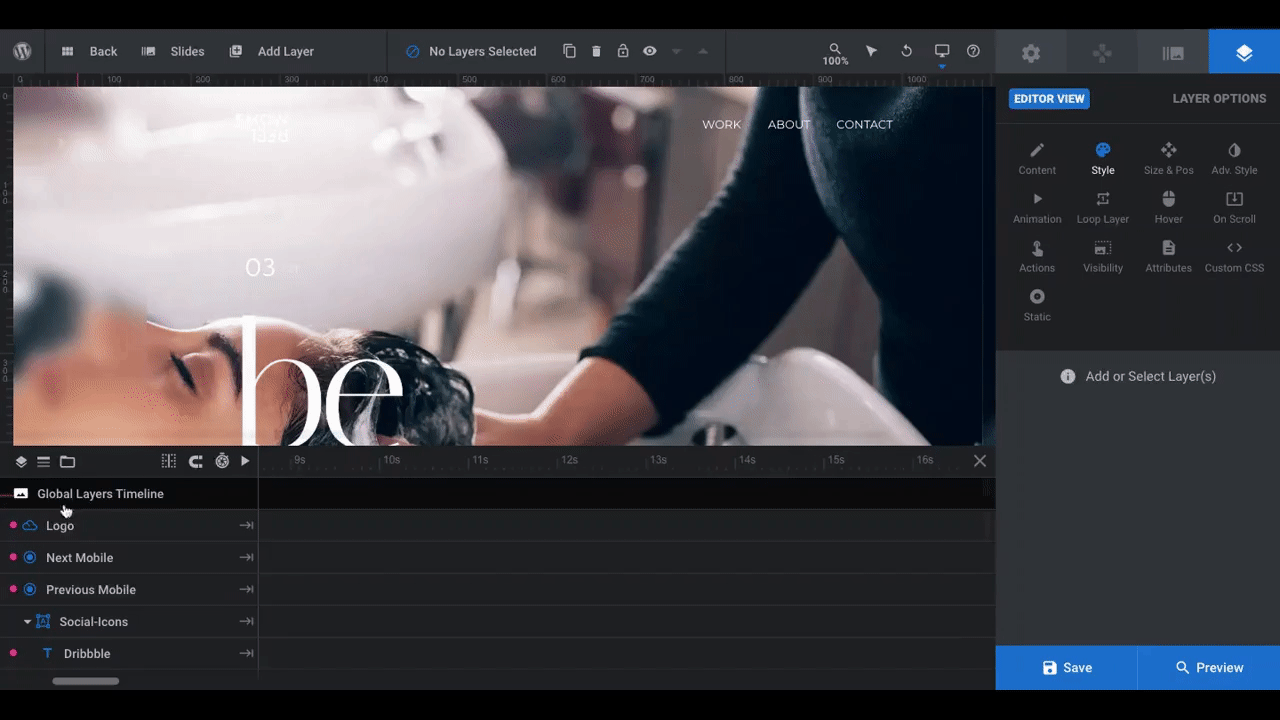
Step 5: Update the Global Layers
You’ll find the last components to edit under Global Layers. Go to “Slides” to access them:

Some of the layers you can leave be as they’re part of the built-in navigational controls:
- Next Mobile
- Previous Mobile
- Previous
- Next
- Blur-Right
- Blur-Left
Depending on how you plan on using this portfolio slideshow, you may not need some of the other layers. For instance, if you want to make this be your home page and use Slider Revolution to create the other pages on your site (like Work, About, and Contact), then you can keep all of the layers that run along the top of the page:
- Logo
- Everything under Row-7
If instead you want to embed this slideshow into one of the pages as a hero section or a section below the fold, go ahead and delete those layers:
Note: You don’t need to delete all the layers under Row-7. Just deleting the row will remove anything contained within it.
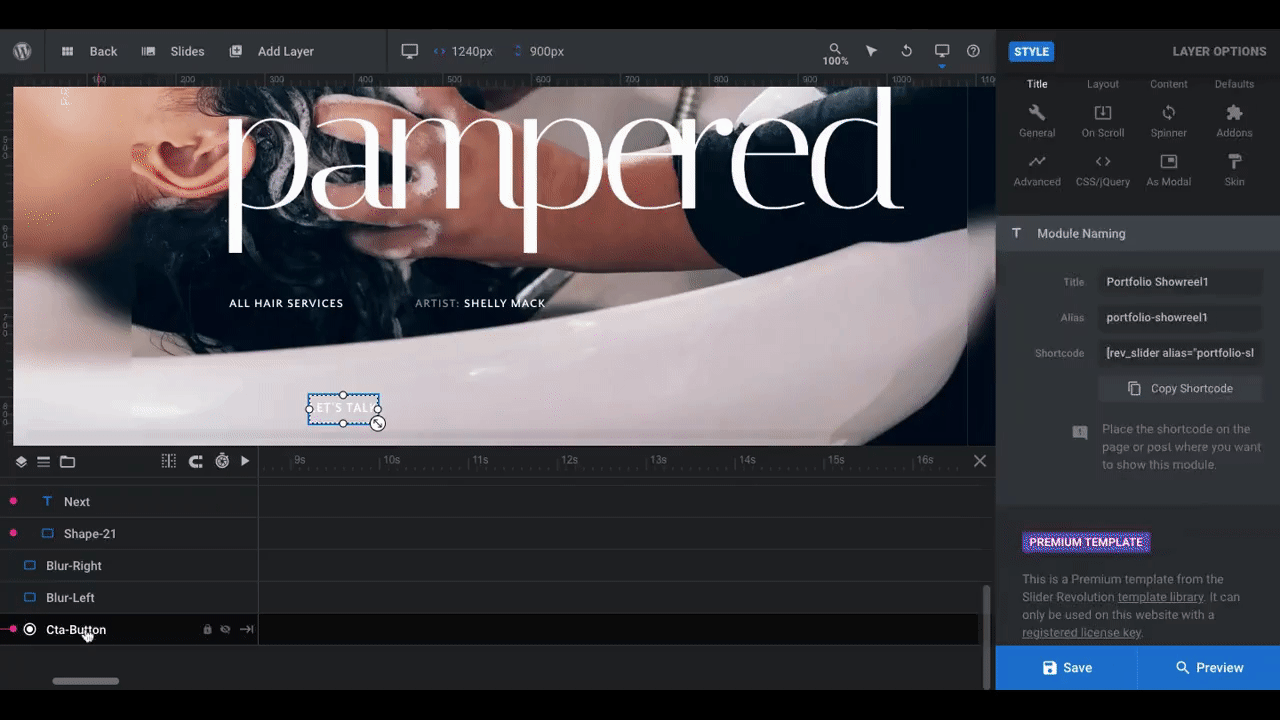
There are two remaining layers to address. The first is the “LET’S TALK” Cta-button. The other is the row of Social-Icons:
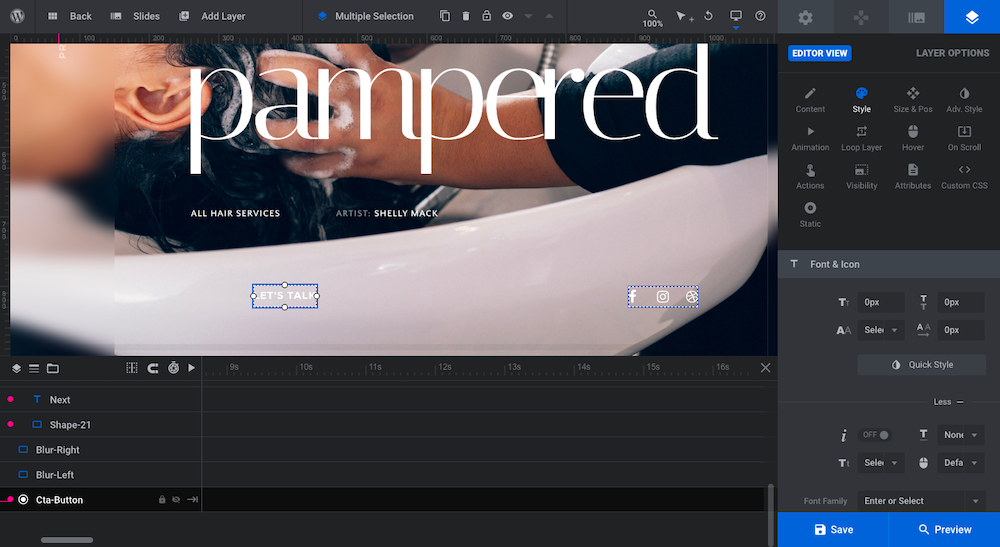
The social media icons make sense if you’re designing this slideshow to be a freestanding portfolio landing page. If it’s going to be embedded within a page, though, you can remove them.
As far as updating them, select the individual social media icon layers from the timeline. Then, go to “Layer Options” and “Content”. You’ll need to find the corresponding icon for the social media platform you want to replace it with:
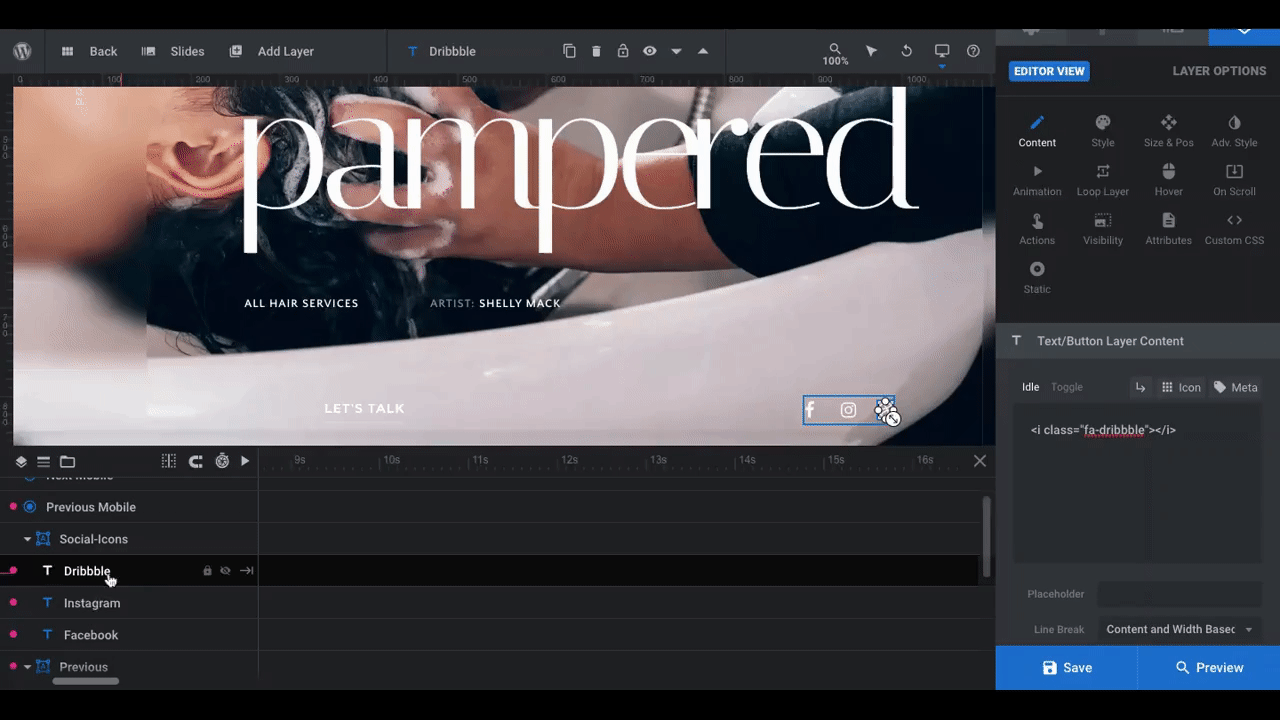
If you don’t delete the existing icon code, it’ll just add your new one next to it. You can always edit the code after the fact (like in the example above).
Note: Remember to link your active social media pages to each of these links under “Actions” settings.
In the final step, we’ll address what you can do with the Cta-button layer.
Learn more:
Step 6: Create a new button
It’s always a good idea to have a call-to-action at the bottom of critical sections and web pages — like your portfolio. Because we stripped out all the top and bottom layers from this design, though, we want to make our button more prominent.
To do this, we could delete the existing layer and create a new button under “Add Layer”. That’s not really necessary though. We’re going to use the button layer’s “Style” and “Adv Style” settings to transform how it looks:
Note: To change what the button says, go to “Content” and enter in your new text.
If you changed your button’s design, you’ll also need to change its hover state. To do this, go to “Hover” settings and make your style settings adjustments there:
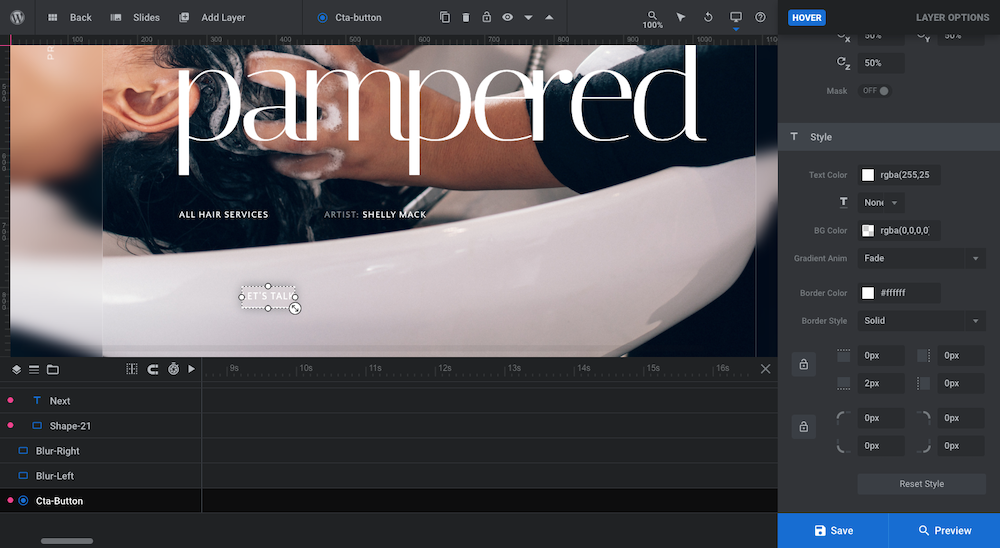
You may find that your redesigned button needs to be repositioned now. You’ll have to check this using the blue “Preview” button in the bottom-right corner.
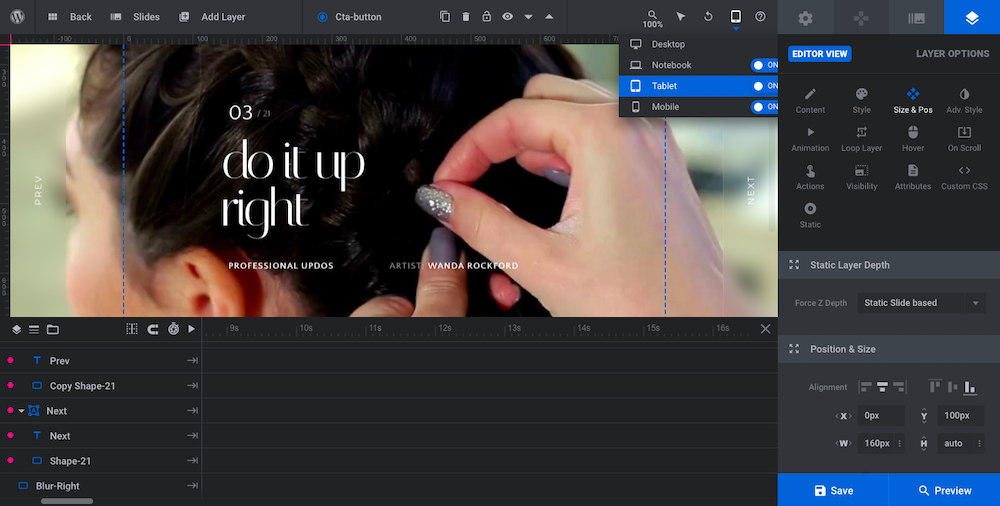
Don’t forget to check it from responsive mode either — the button may look okay on desktop, but need to be repositioned or resized on smaller screens:
If you need to fix the button’s position, go to “Size & Pos”. You can make all the necessary adjustments from there. Use the responsive editing mode switcher in the toolbar to set custom sizing for different devices:
When you’re done, save your changes.
Learn more:
Shine a light on your work with a beautiful portfolio slider
Every artist and creative would benefit greatly from putting their high-quality portfolio online. There are lots of ways to do this.
However, if you want to create a website portfolio that people will take notice of and engage with, an interactive portfolio slider is the perfect solution — and easy to implement, too, with the help of the Portfolio Showreel Slider template.


