
Residential real estate is booming. So, how do you take advantage of the vast amounts of people looking to rent?
You could create listings on apartment and home rental sites. Write a summary, add a slew of high-quality photos, and promote your top amenities. But the problem with those sites is you have to compete side-by-side with all the other properties in the area.
The best thing to do is create an amazing looking website that appeals to renters looking for a property just like yours. In this tutorial, we’ll show you how to use the Real Estate Showcase Slider template to create a hero slider that promotes your most popular features.
Table of Contents:
- Step 1: Add your videos and images
- Step 2: Pick a slide transition style
- Step 3: Edit the text
- Step 4: Style your font
- Step 5: Program the button
- Step 6: Customize the slider navigation
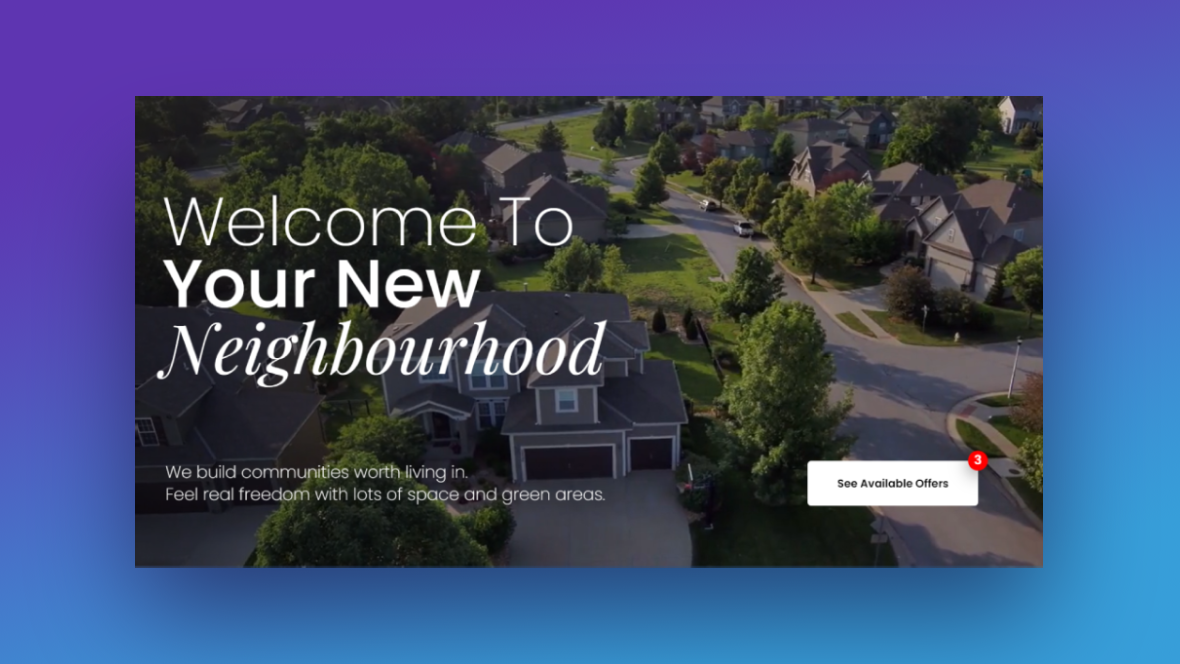
How to create a hero slider that shows off your top features
You can use the Real Estate Showcase Slider template to promote all types of real estate ventures. In this template, we see how it can be used to promote a commercial real estate business:
However, this visually stunning hero slider can be just as impactful on a website for a smaller real estate property. Instead of promoting different properties, we’ll demonstrate in this tutorial how to create a hero slider that shows off your property’s top-of-the-line features and amenities.
If you’ve never used the Slider Revolution editor before, review these documents before you start the tutorial:
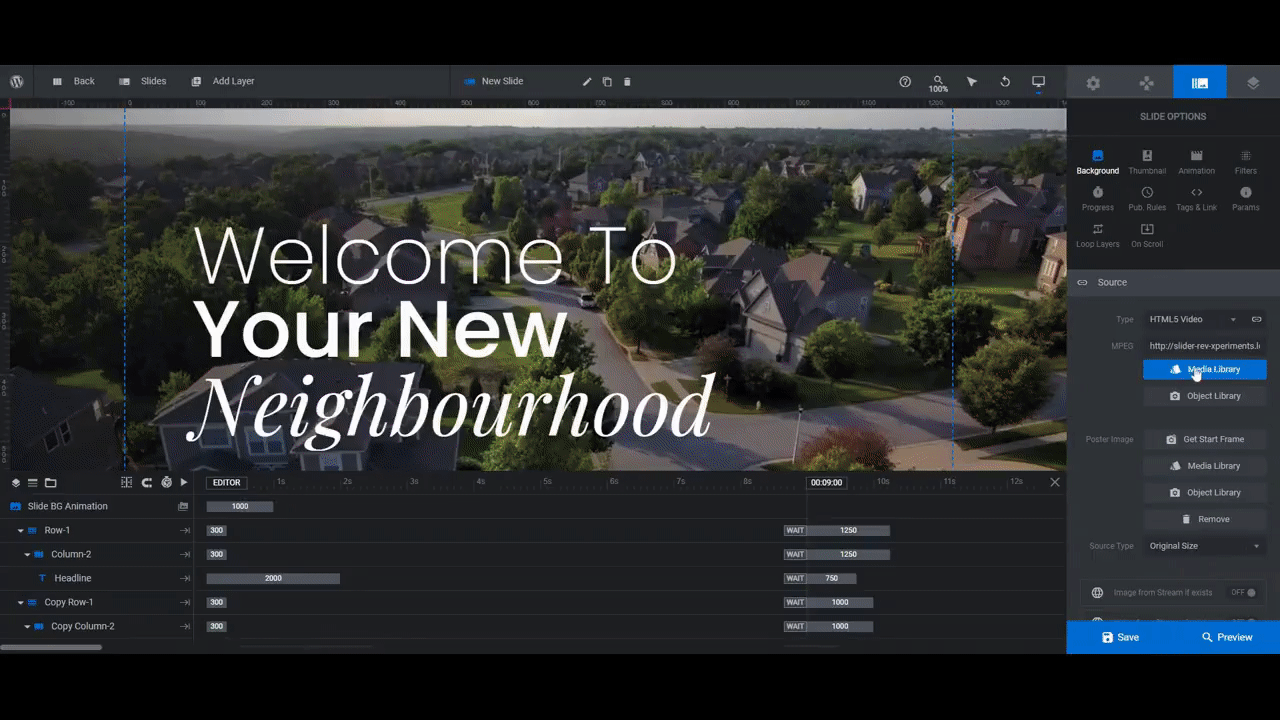
Step 1: Add your videos and images
There are four slides in this template. The first and third slides have video backgrounds; the second and fourth have photo backgrounds. You can use either type of image content in your slides.
To swap out the current imagery for your own, go to “Slide Options” and “Background”. Under “Source”, choose one of the following types:
- Image — a JPG or PNG file you upload to the Media Library
- External Image — a link to an image on another site
- YouTube Video — a link to a YouTube-hosted video
- Vimeo Video — a link to a Vimeo-hosted video
- HTML5 Video — an MP4 video file you upload to the Media Library
Note: If you choose the External Image, YouTube Video, or Vimeo Video options, make sure you have the rights to use the content on your website.
Click the Media Library button to upload your replacement imagery. (Or enter the URL if it’s coming from an external source.)
Don’t worry if the white text looks difficult to read over your images. There is a large Gradient shape over the left side of the slider. It should provide sufficient contrast for your text to show up over whatever photos or videos you choose. You can confirm this by opening the preview.
If it isn’t dark enough, select the Gradient layer from the timeline. Then go to “Content” and click on the block next to BG Color.
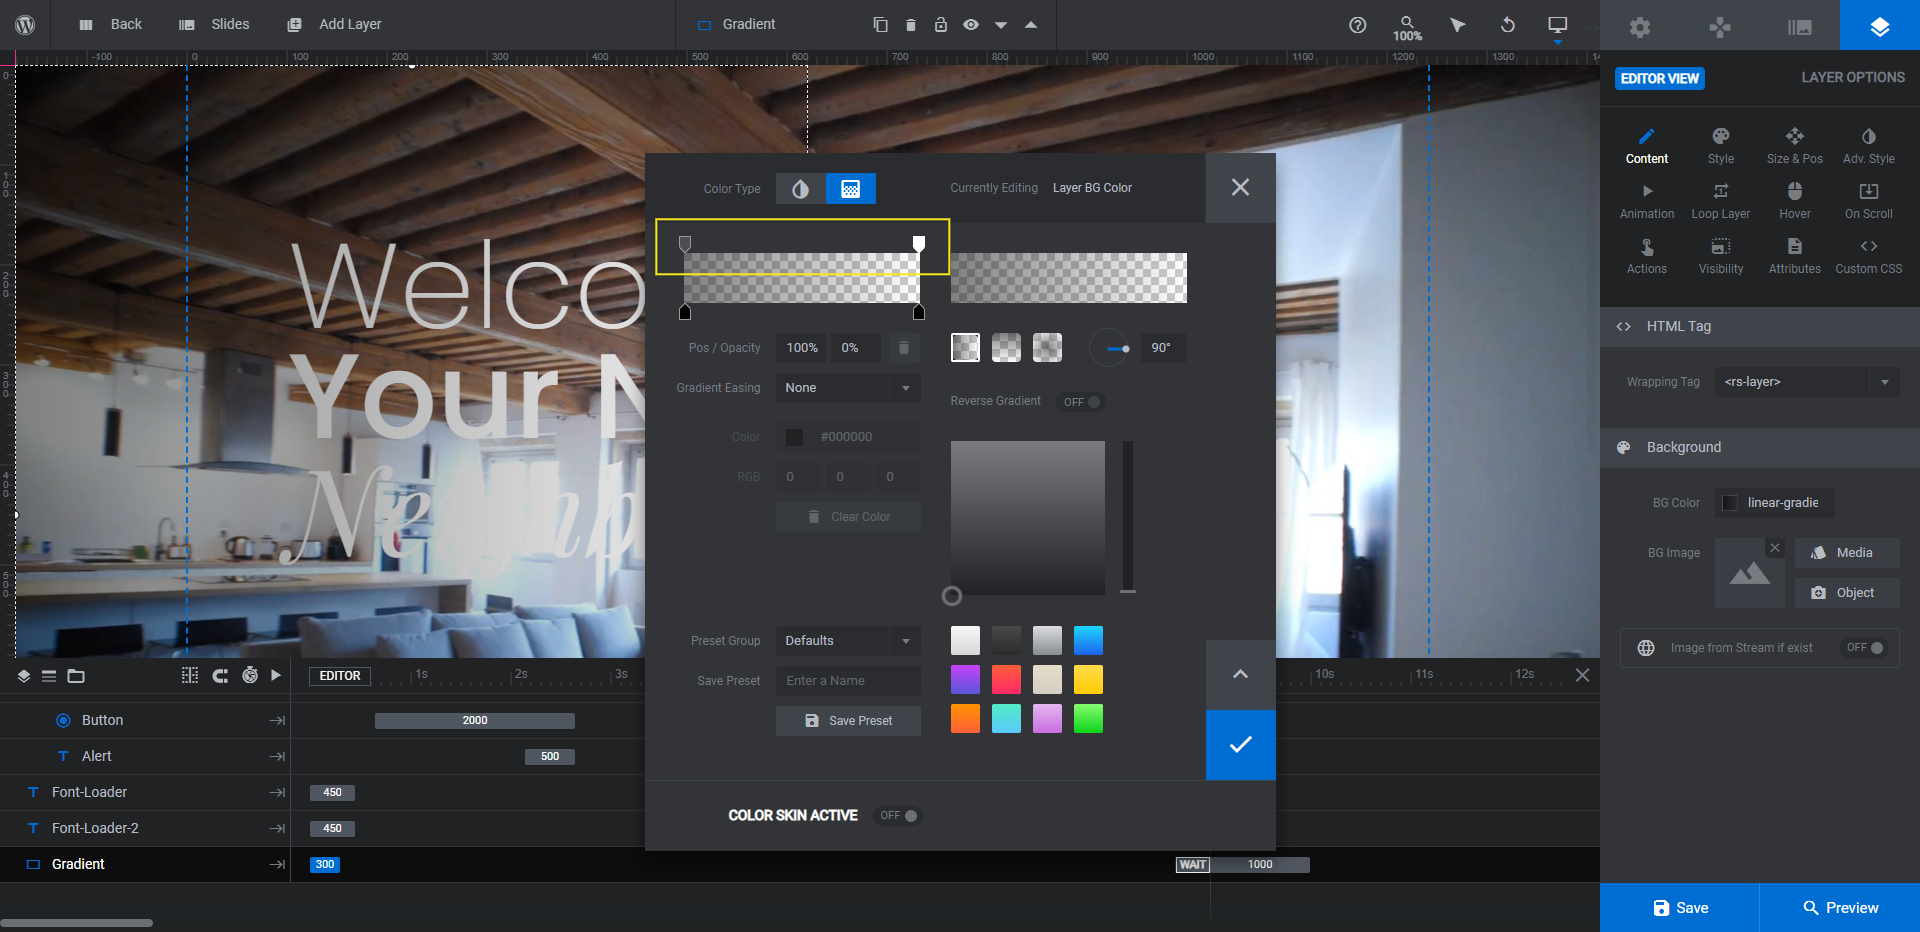
Both ends of the gradient are already set to black. To darken it, increase the opacity in the gradient settings (at the top of the color bar).
If you make this change for one slide, do the same for the others so there’s a consistent darkening effect throughout the slider.
Learn more:
- Changing Template Background Colors and Images
- Adding and Configuring Shape Layers
- The Tools of the Color Selection Dialogue
Step 2: Pick a slide transition style
There’s a different transition effect between the slides. This gives you a good idea of the things you can do with Slider Revolution’s animation effects. However, you’ll want to select just one style to create a consistent feel for your slider.
To set your transition style, go to “Slide Options” and “Animation”. Take your time looking through the transition presets. Hover over any of the styles and you’ll be able to see what it looks like in the canvas on the left.
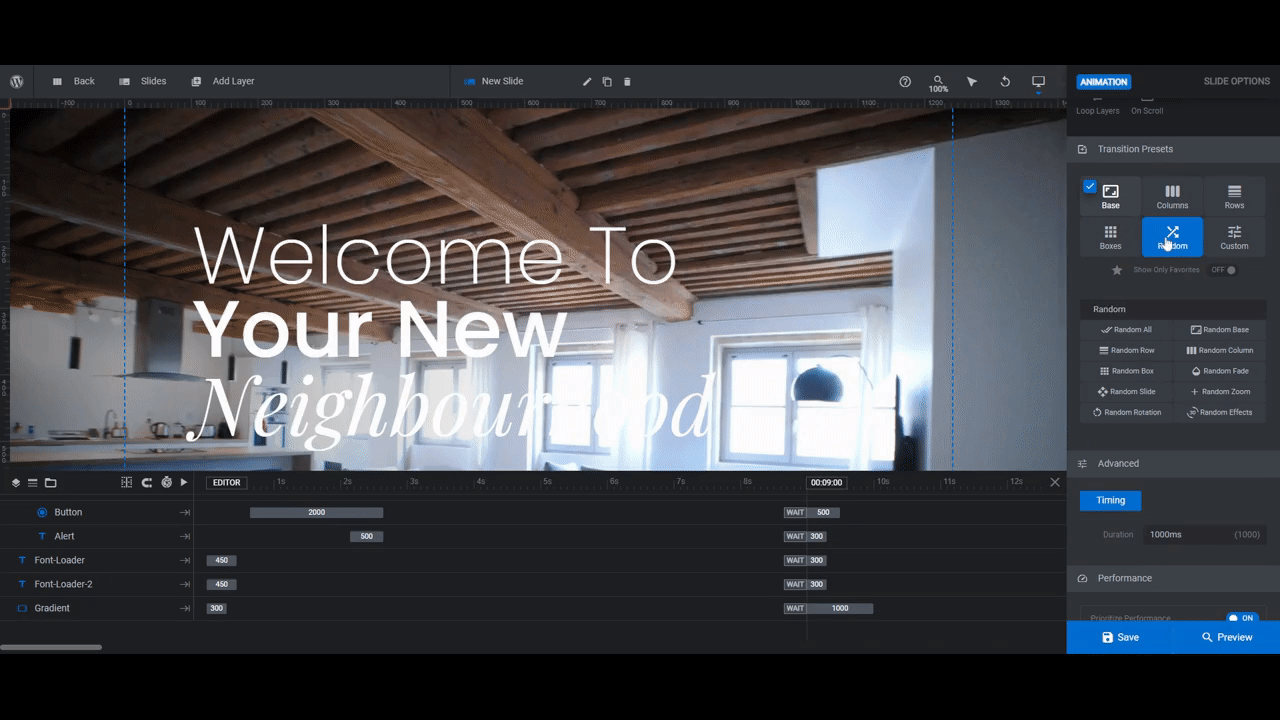
Find one that works well with the overall vibe of your residential community. You can use it as is or make tweaks to it using the “Advanced” settings down below.
Then go through each slide and set the same transition effect for each.
Learn more:
Step 3: Edit the text
The stylized headlines in this hero slider make editing the text a bit precarious. So we’re going to break this up into two steps.
We’re going to start by editing what the text says in the Headline and Text layers.
Select the Headline area first. Then go to “Layer Options” and “Content”. You’ll notice that the text in the editor block has a bunch of code in it.
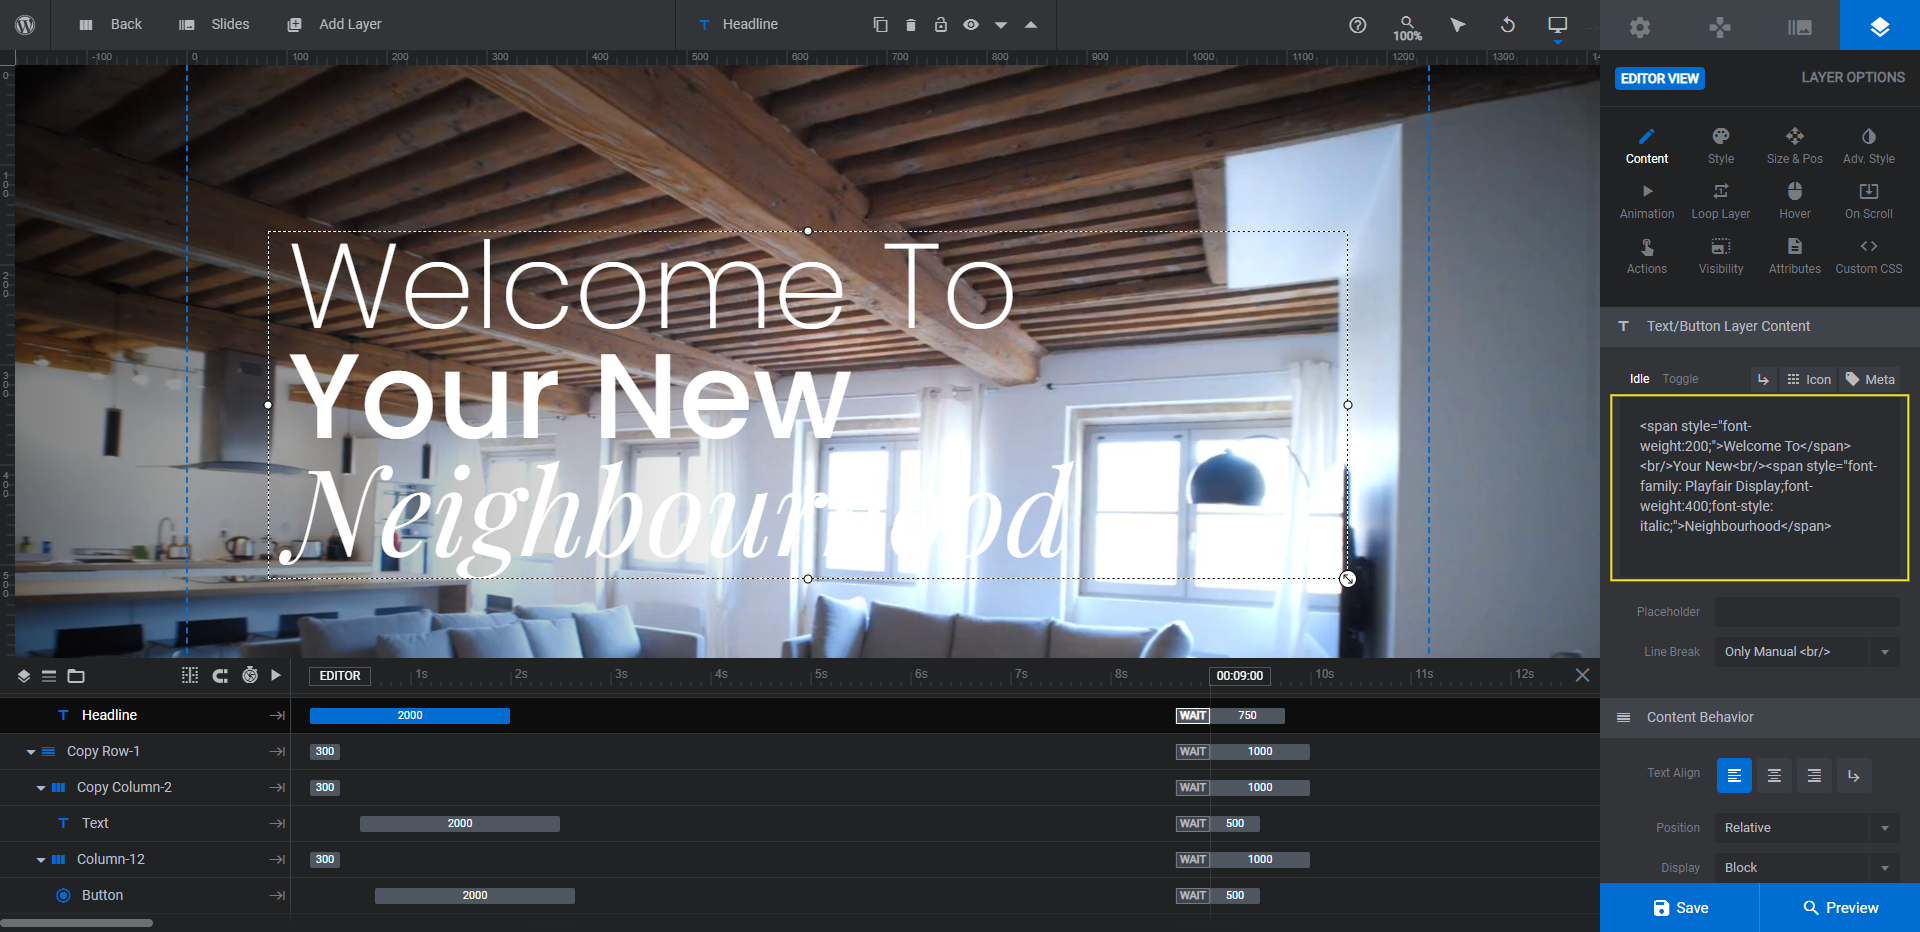
Here’s what it looks like in the first slide:
<span style=”font-weight:200;”>Welcome To</span><br/>Your New<br/><span style=”font-family: Playfair Display;font-weight:400;font-style: italic;”>Neighbourhood</span>
When editing the Headline text, only replace the words in bold above. Aim to make your own headline no more than four or five words.
The Text layer is free of coded formatting, so you can replace all the text in that editor block.
One thing to be mindful of is the text wrapping. If you don’t add any hard breaks (by pressing enter or using < /br>), the description will run as wide as the column’s width allows for. To create a more attractive paragraph, add breaks in the middle like this:
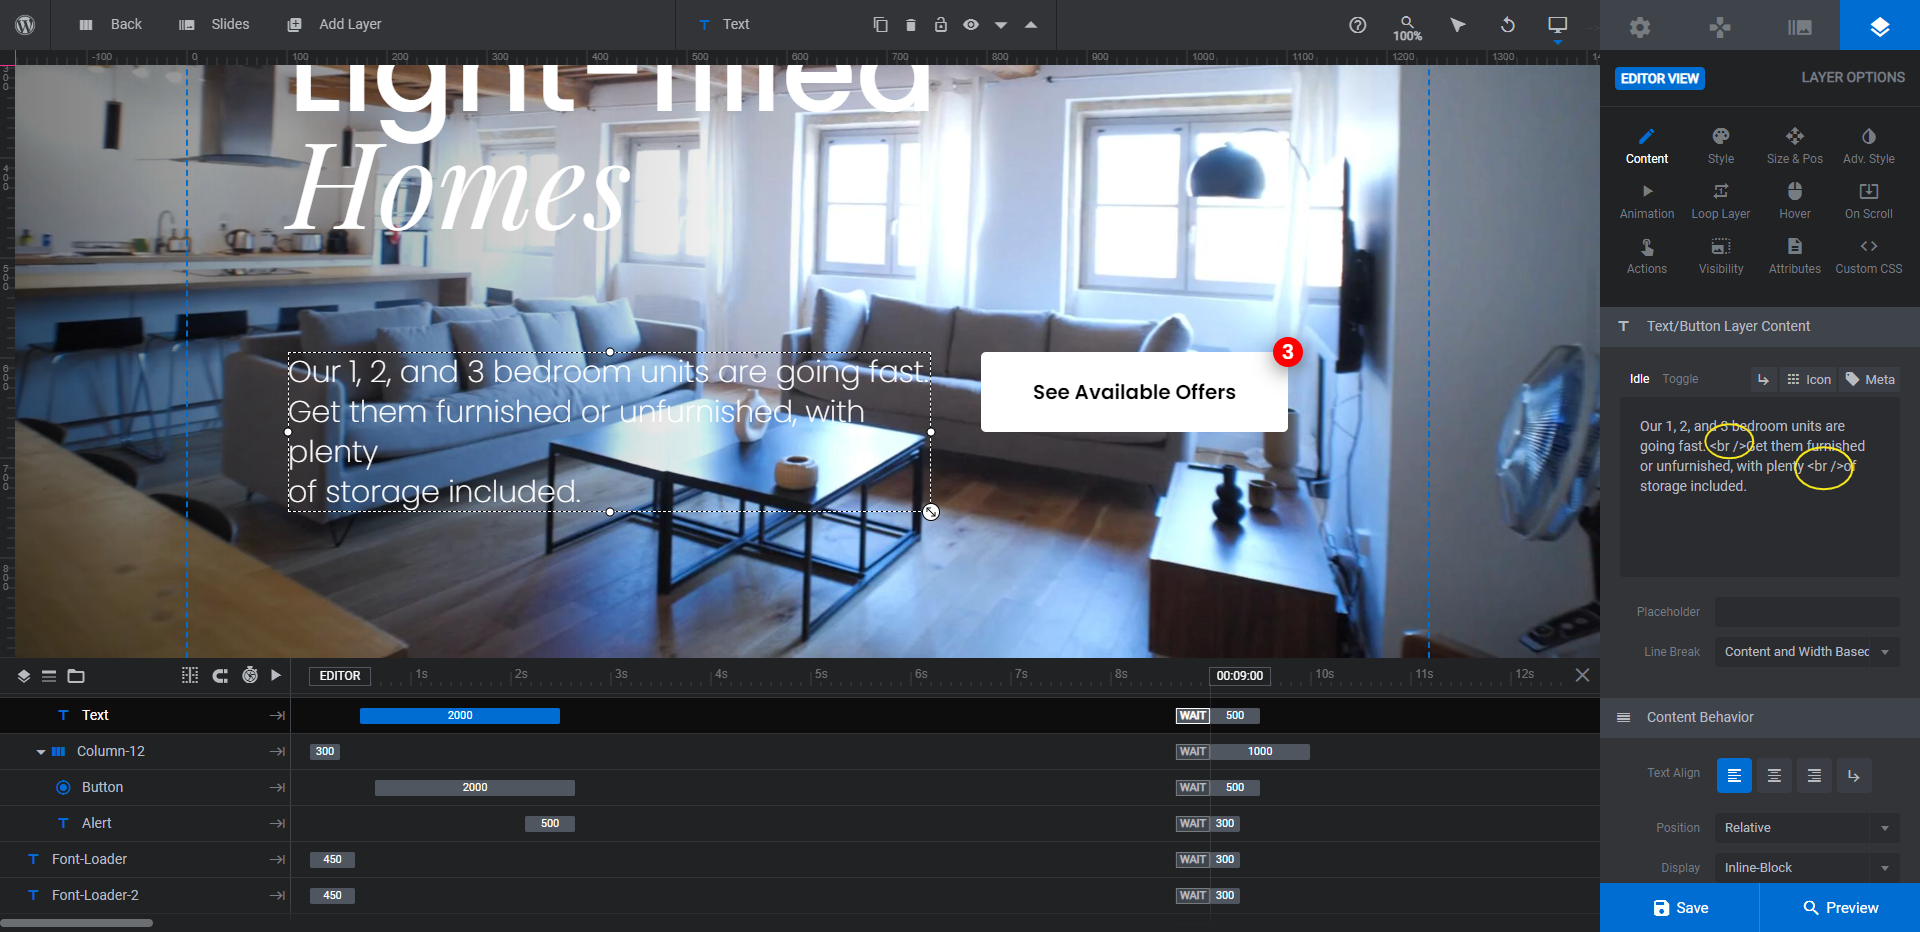
Check the frontend preview to confirm that the line breaks look good. The canvas might not perfectly reflect what the Text looks like.
Repeat this process for all of the slides and save your changes in between each.
Learn more:
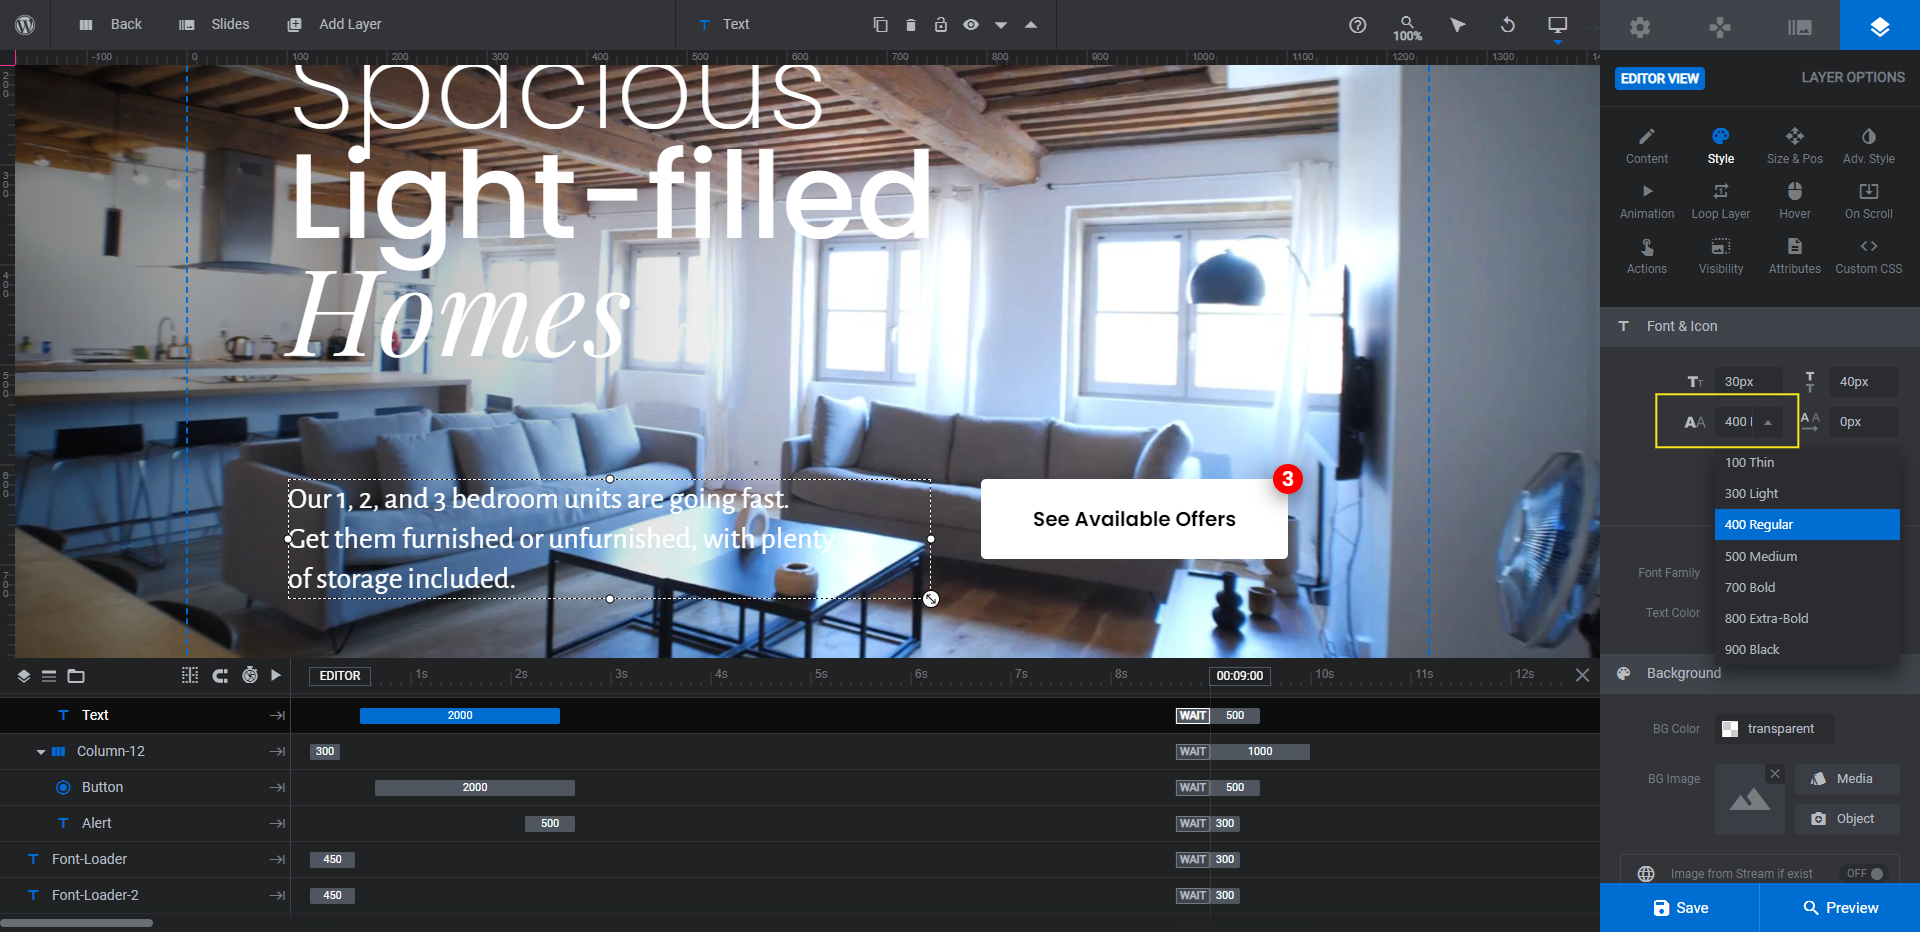
Step 4: Style your font
There are two fonts used in our text layers: Poppins and Playfair Display. The Headline uses a combination of the two as well as different stylized versions of the fonts.
Before you do anything else, decide what the two fonts are that you want to use for your hero slider. If you’re going to replace the existing ones, find a plain sans serif to replace Poppins and an equally sized/spaced serif to replace Playfair Display.
We’ll be replacing ours with Alegreya Sans and Alegreya.
To customize the fonts, you’ll need to do a number of things:
First, select the layer called Font-Loader. This is an invisible text layer that loads our serif font. To change the font, go to “Layer Options” and “Style”.
Then, select the layer called Font-Loader-2. This is an invisible text layer that loads our sans serif font. To change it, go to “Layer Options” and “Style”.
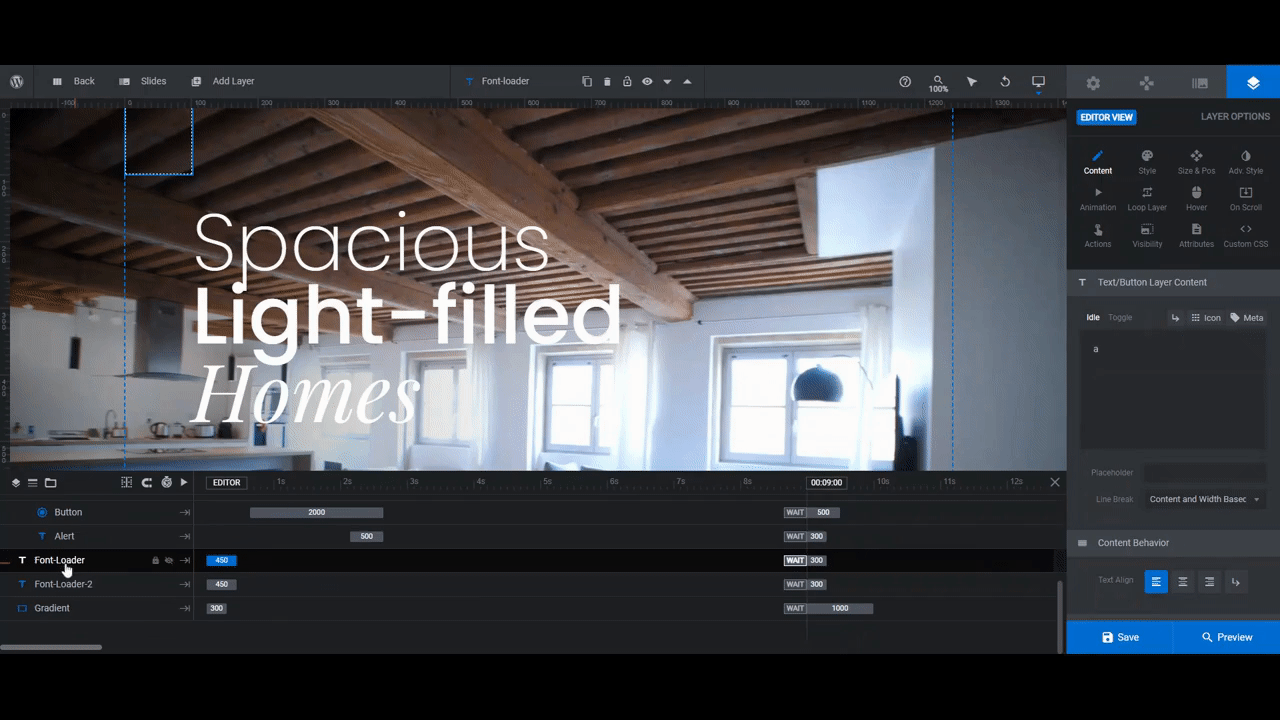
Make these same changes throughout the other slides before moving on.
Next, select the Text layer. Set the font to your sans serif. If the font is too thin, open the weight dropdown and select a heavier style. Aim to keep it around 200 or 300.
Repeat this process for the Text layer in each slide.
Lastly, we need to update the Headline layer. Select the layer and set the font under “Style” to your sans serif. Then go to the “Content” tab and replace this part of the string with the name of your serif font:
<span style=”font-weight:200;”>Spacious</span><br/>Light-filled<br/><span style=”font-family: Alegreya;font-weight:400;font-style: italic;”>Homes</span>
When you’re done, repeat this process in each of your slides. Save your changes when you’re done.
Learn more:
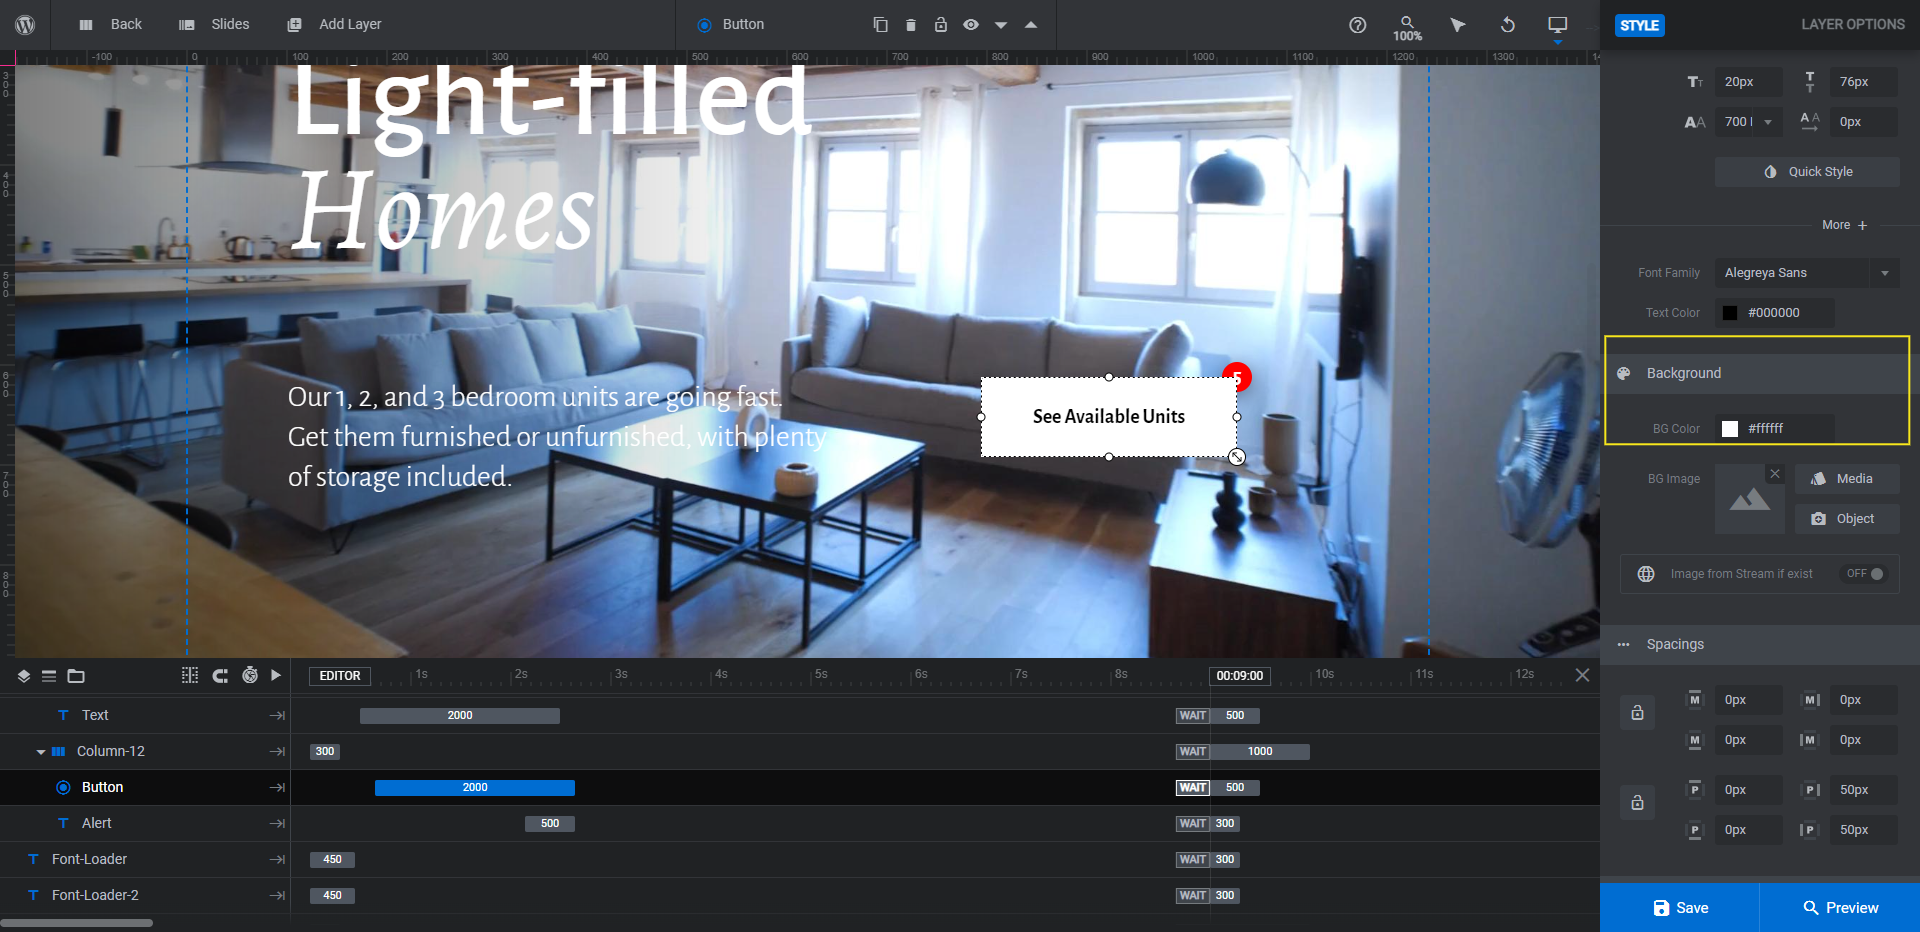
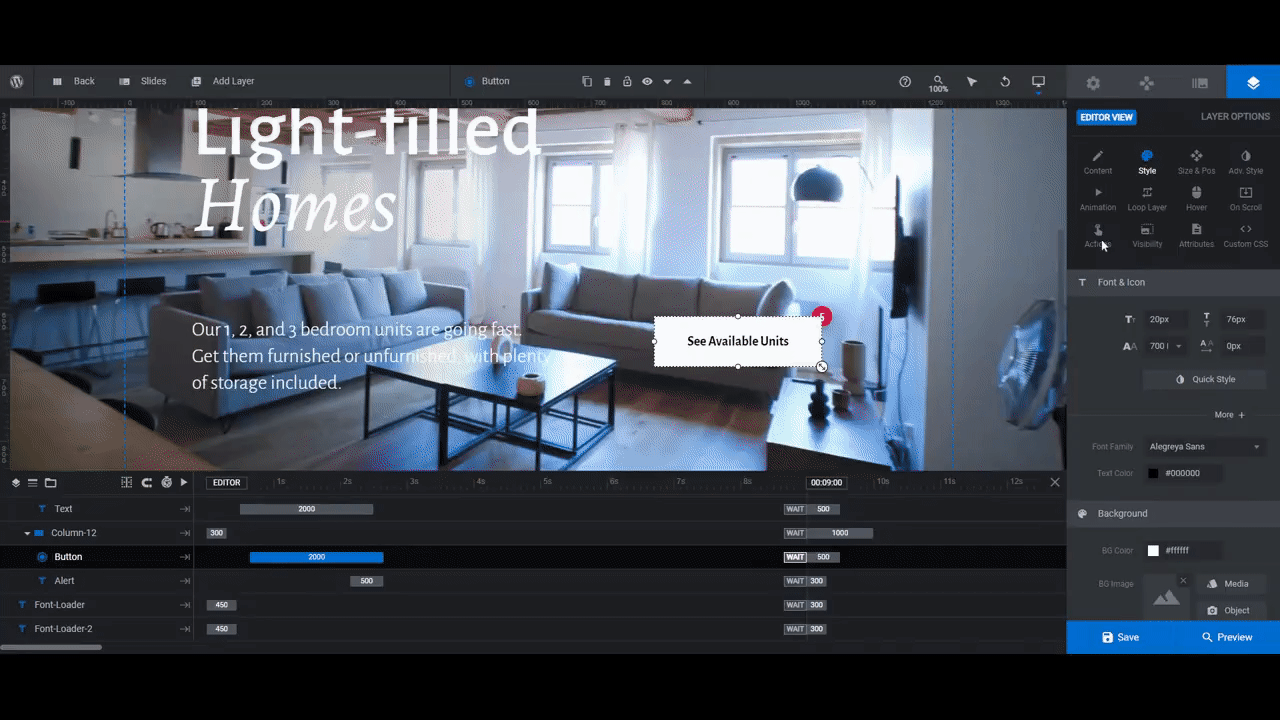
Step 5: Program the button
The Button layer has two components. Button is the call-to-action button. Alert is the red circle in the top corner of it.
Note: You don’t need to keep the Alert layer in your slider if it’s irrelevant. Just select it in the timeline editor or canvas and then hit Backspace or delete to remove it. Or, if you’d like, you can keep it only in the slides that it applies to. For instance, we’re going to keep it in the first slide that directs people to the availability page.
To edit what each layer says, go to “Content” and “Layer Options” to replace the text.
To change the fonts to match the ones used in the rest of your slider design, do so under “Style”.
With the button you also have the ability to change the background color of the button in its idle and hover states.
To change the normal appearance of the button, go to “Style” and “Background. To change the hover-triggered appearance of the button, go to “Hover” and scroll down to the “Style” section.
You’ll also want to add custom links for each button.
To update the links, go to “Actions”. Click on the Simple Link option on the right to add a new one.
After you enter the Link URL, close the modal to save your changes. Repeat the process in each slide, adding a custom link that relates to the feature being advertised.
Learn more:
Step 6: Customize the slider navigation
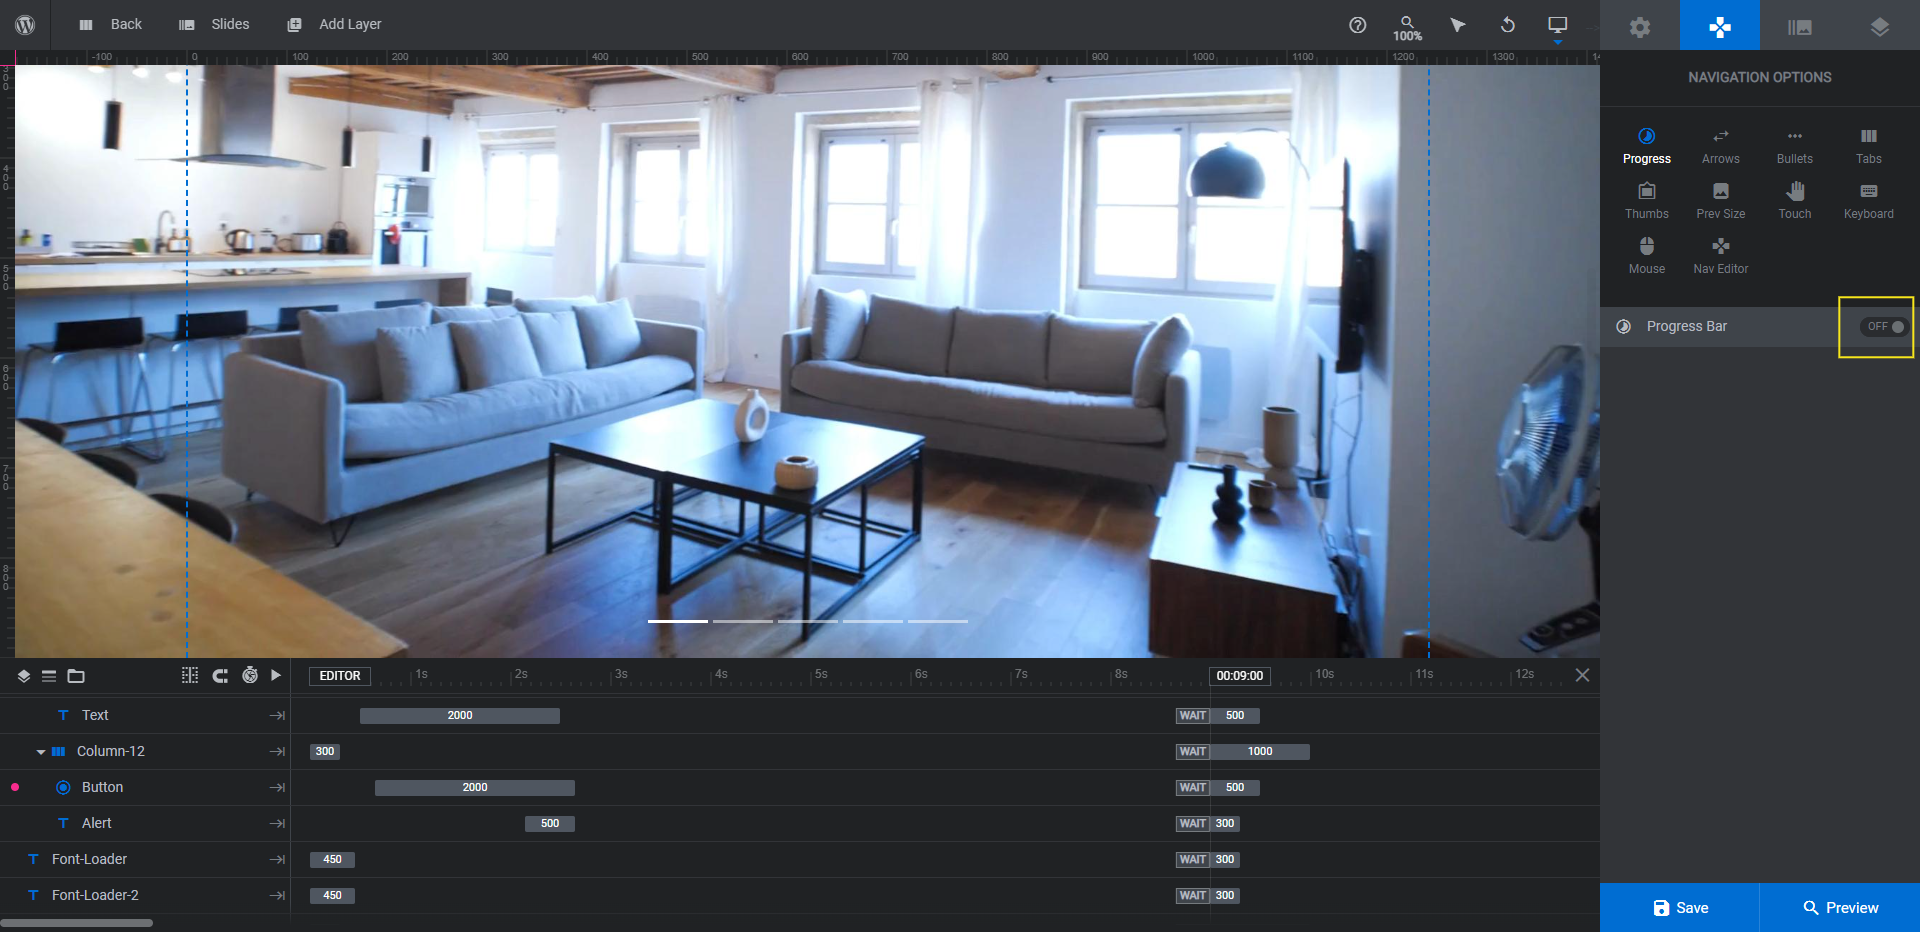
The last element to edit in this slider is the navigation. Go to “Navigation Options” and you’ll find two types of navigation have been activated.
The progress bar that runs up the left side of the slider is under “Progress”.
You can customize the placement, speed, and appearance of the progress bar here. If you’d rather remove it from the slider, switch the toggle at the top to the off position.
Next, go to “Bullets”. If you’d like to modify the style of the thin bars at the bottom of the slider, use the settings here to do so. There are over a dozen preset options to choose from.
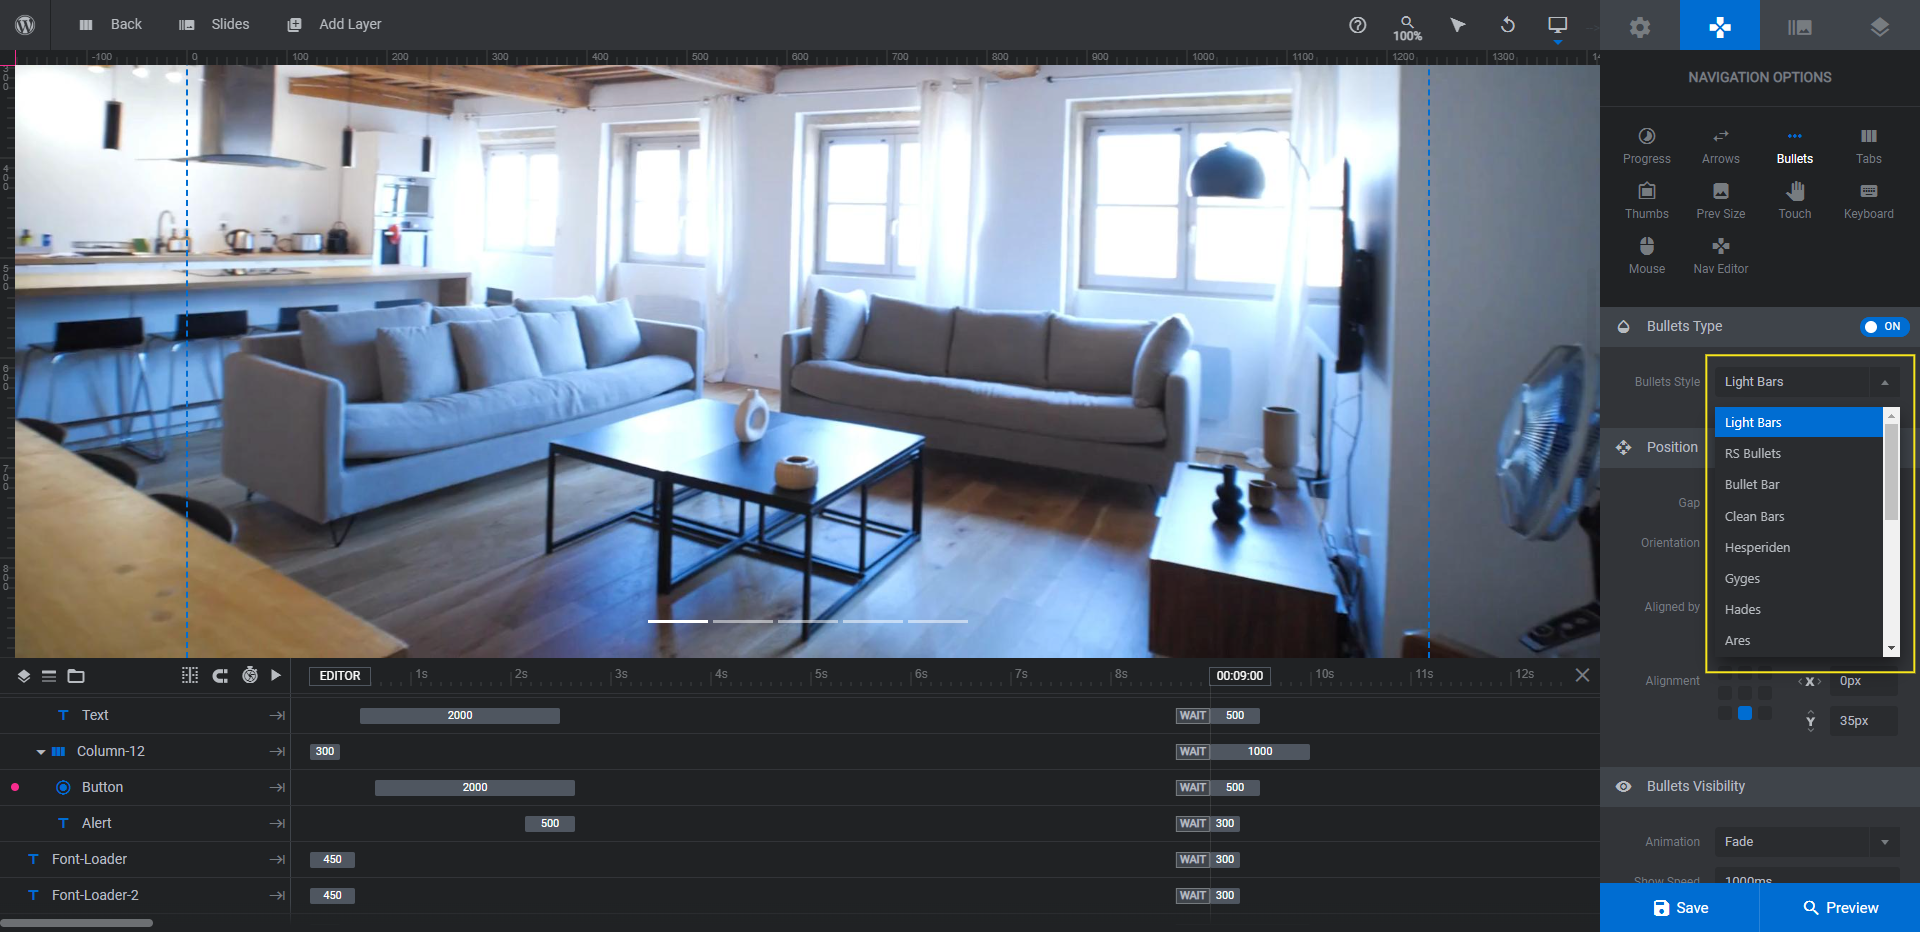
Note: Some of the bullets options come with a hover-triggered effect, like Zeus does:

If you like this effect, you’ll need to take an additional step to create a custom thumbnail and title for each slide. To do this, go to “Slide Options” and “Thumbnail”. Replace the existing thumbnail images with one that matches your slide.
Pro tip: If you click “Reset”, it’ll automatically pull in an image based on your video or photo.
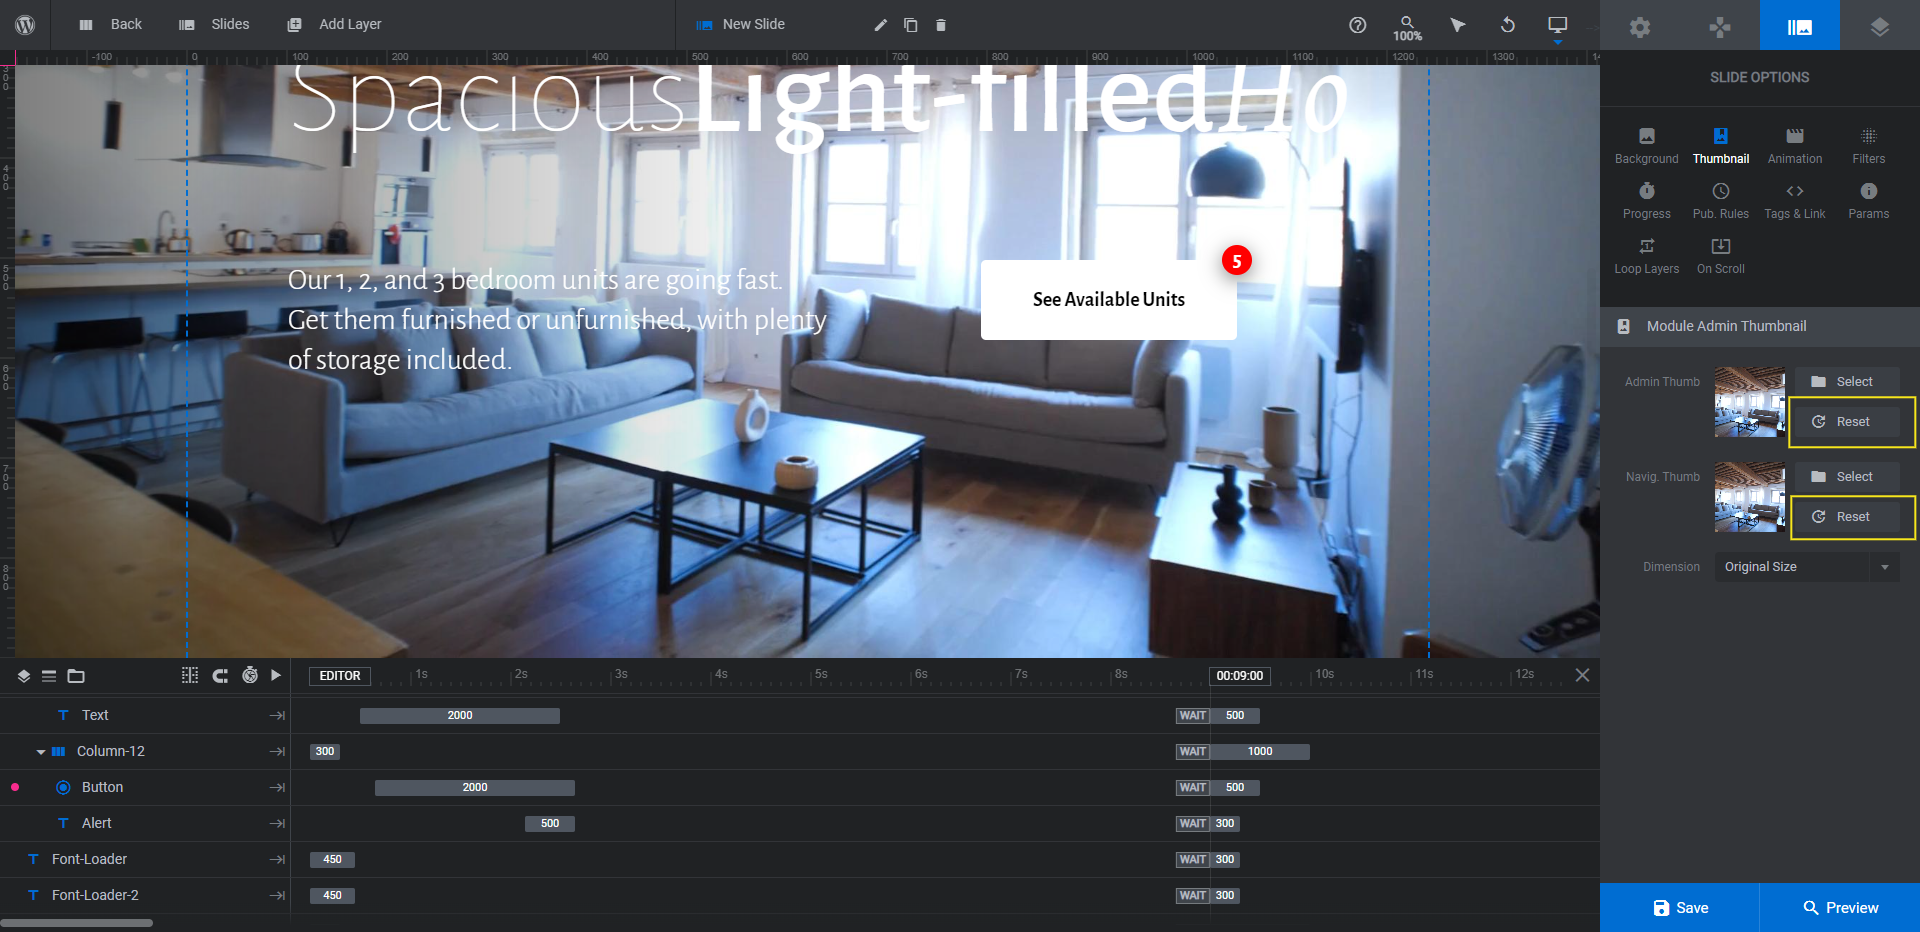
Lastly, go to the top toolbar and edit the name of the slide. Keep it short. Just a one-word descriptor will do.

Go through and do this for each slide. Then preview your work to see how the new navigation looks and works on the frontend. Save your changes when you’re satisfied with how it turned out.
Learn more:
Get prospective renters excited about your property with a stunning hero slider design
Residential listings sites are a useful tool in the marketing of rental property. However, if you’re tired of having to compete for views and want more creative control over your property, it’s time to build a website for your rental community.
Kick things off the right way by creating a hero slider that shows off the best aspects of your property. The Real Estate Showcase Slider template will help you create this slider in no time at all.


