

Everyone seems to be short on attention and time these days. Yet, they continue to turn to the Internet for the information they need.
Whether you’re creating a website that publishes articles, blog posts, news stories, articles, or some other type of informative content, you need a way to get the visitor hooked. Many times what people do is read the intro and then scan through the headers to get a high-level overview of the page.
Why not bring that overview straight to them instead? In this tutorial, we’re going to show you how to repurpose the beautiful Fashion Website Slider template to create an engaging summary slider that can be placed at the top of your content pages.
Table of Contents:
- Step 1: Install the slider template
- Step 2: Update each slide’s background color
- Step 3: Edit the headline, description, and slide number
- Step 4: Upload a big and small image
- Step 5: Edit the button text and design
- Step 6: Update global layers
- Step 7: Add navigational cues
How to create an engaging summary slider
This versatile slider template can be used for a variety of purposes. If you use the template as it was originally designed, you’ll have a unique and captivating way to showcase your work or products:
Just like all Slider Revolution’s templates, you can edit this one to make it truly your own. In the following tutorial, we’ll show you how to remove the gallery component from the slider and turn it into a summary of the subsequent post:
If you’d like a Slider Revolution refresher before you begin, review these resources:
Step 1: Install the slider template
When you do a search for “Fashion Website Slider” in the Slider Revolution plugin, you’re going to encounter three options:

The one labeled “Package” contains both modules — the modal (the pop-up photo gallery) and the image slider.
If you intend on keeping the modal gallery in your design, install the full package. If not, install the Fashion Website Slider MODULE (in purple).
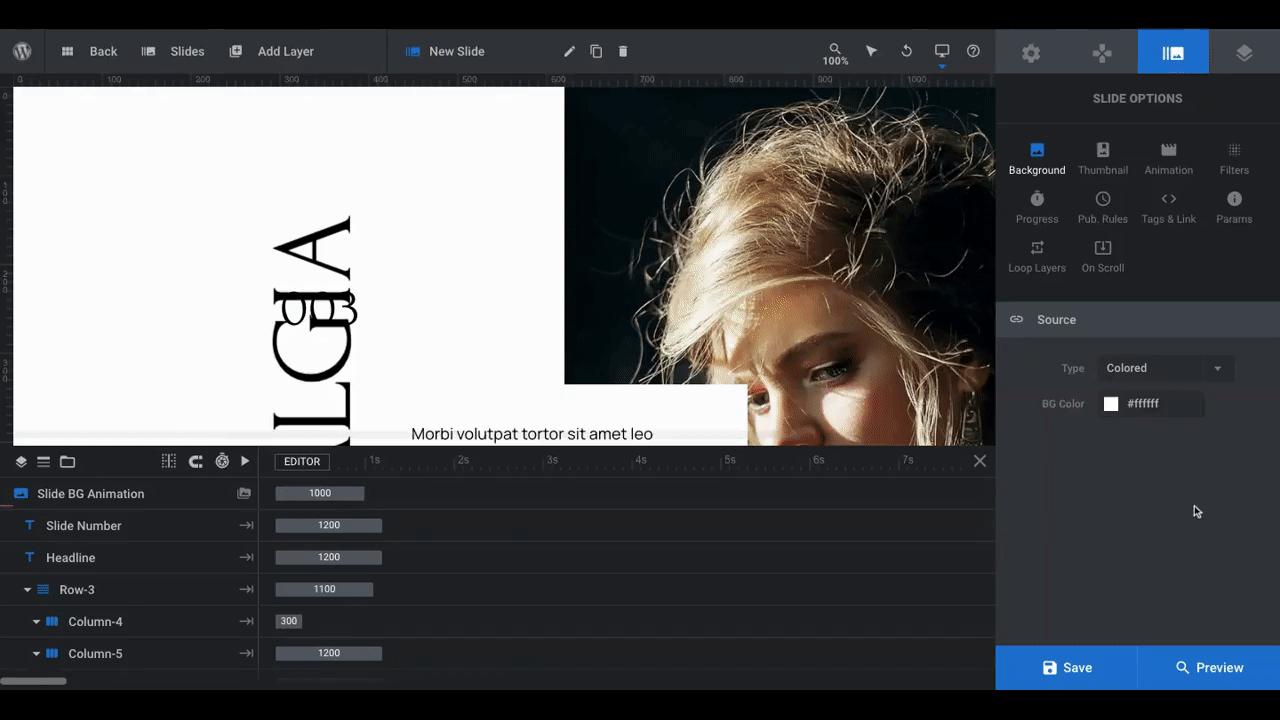
Step 2: Update each slide’s background color
Right now, the white background looks sharp next to the dramatic fashion photography. However, if you’d like to change up the background color — either to make it match the background of your website or to give this summary slider a pop of color — you can do that in this step.
Go to “Slide Options” and “Background”. From here, open the BG Color selection dialogue and add your own:
If you want to use this color across all your slides, save it as a preset so you can quickly retrieve it from the color selector.
To do this, change the “Preset Group” to Custom. Enter a name next to “Save Preset”. Then click “Save Preset”:
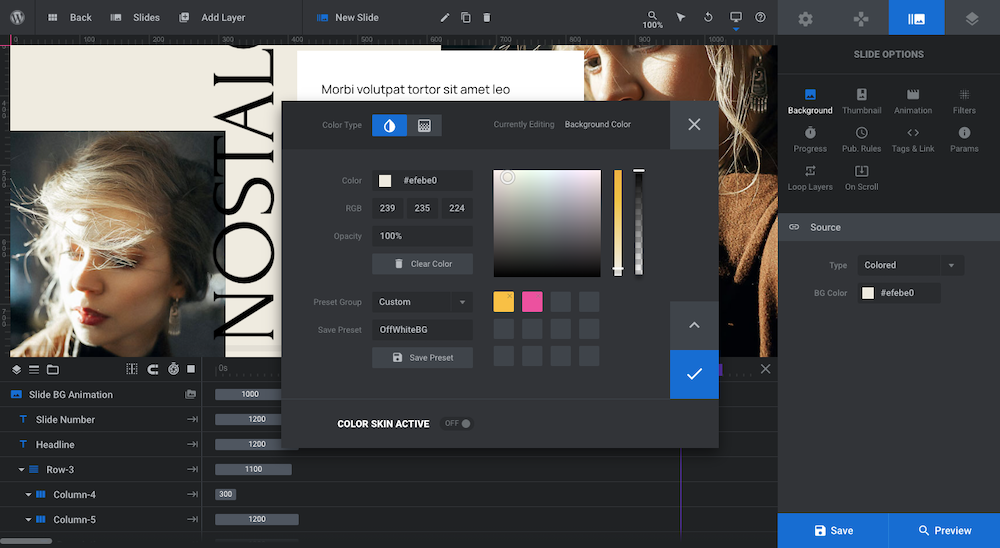
The newly saved color will appear on the right next to your other color presets.
Go ahead and edit the background of your other slides now. We’ll deal with the text layer background color in the next step.
Learn more:
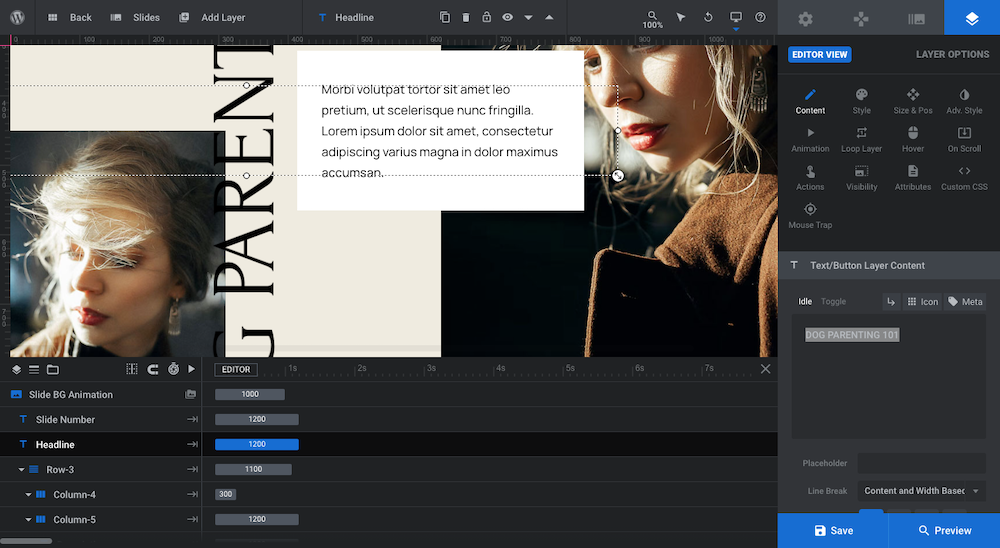
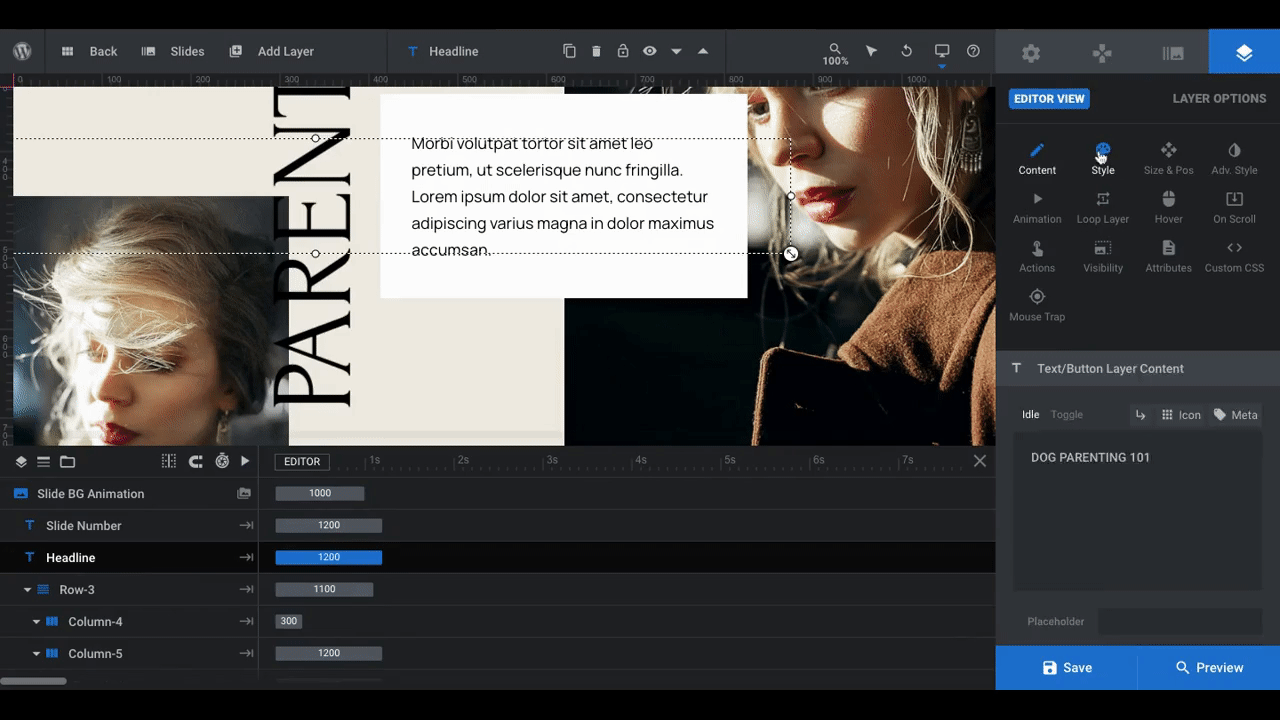
Step 3: Edit the headline, description, and slide number for each slide
Because this slider will serve as a high-level overview of the content below, each slide should present a summary of one topic or section. Think of it like a table of contents with visuals and a description.
In this step, we’re going to deal with the text components on each slider. There are three:
- Headline
- Description
- Slide Number
To edit these layers, select them one at a time from the timeline editor and go to “Layer Options”. Edit what the text says under “Content”:
To make other adjustments to the text, use other “Layer Options” settings.
You can edit:
- Font, case, size, and style under “Style”
- Size and positioning under “Size & Pos”
- Text shadows, strokes, and spikes under “Adv Style”
Use these settings for all text layers in each slide.
Here are some tips on what to do with each field:
Headline
Since the headline runs vertically along the page, you’re not going to be able to place a lot of words here.
If you’d like, you can keep the wording the same from slide to slide by placing the page’s title there. If you’d prefer, you can give each slide an original title. You may just need to use a truncated version of the section name so it all fits on one line.
Description
This is the paragraph in the center of each slide. Summarize each section here using one to two sentences.
Pro tip: If you want to add bolding to any of the text in the description, code it in by placing <strong> and </strong> around the words to be bolded:
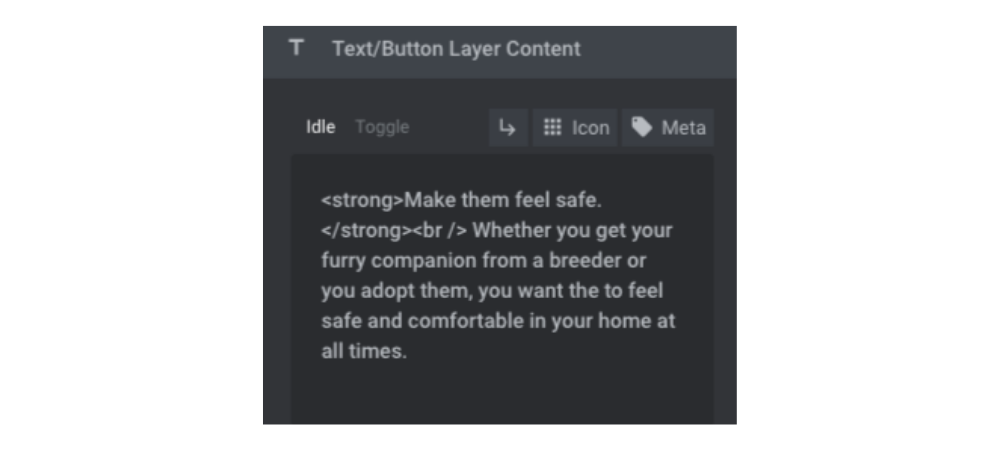
You can also code in a hard break this way. Either enter <br /> where you want to break the line or click on the arrow button (next to “Icon”) just above the text editor.
Before you move onto the last text layer, make sure to edit the background of the description text layer if you changed the slide’s background color. To do this, go to “Style” settings, “Background”, and then input your new BG Color.
Slide Number
What you see in the canvas editor in Slider Revolution isn’t necessarily how the Slide Number field will display on the front end of your site.
For starters, if it looks like it overlaps with the headline, open Preview first to confirm. If it does, you can change the layer’s alignment under “Size & Pos”. Just remember to make the same adjustments to that field in every slide.
In terms of what this text field says, you can program it to say something other than the slide number. The slide currently uses Meta that looks like this:
0{{current_slide_index}}
This tells us that the number “0” will appear next to the current slide number.
To replace this string with completely custom text, remove the existing text and meta and enter your own. If you’d still like the slide number to appear along with something else, consider updating the text to something like this:
Tip #{{current_slide_index}}
Since our summary slider is recapping the five tips in the post, this is what makes the most sense for us. It’ll end up saying something like “Tip #1”.
When you’re done hashing out what to put in each text layer and how to style them, apply those same changes to all slides.
Learn more:
Step 4: Upload a big and small image for each slide
Each slide contains two image layers. The smaller one on the left is a layer called Image Left. The larger one on the right is called Image Right.
When selecting images for each slide, make sure that each one is taller than it is wide and that the subject of the photo is in the center. The template’s image layer settings should take care of the rest for you.
To upload your new images, select the layer you want to replace from the timeline. Then, go to “Layer Options” and “Style”. Next to BG Image, open the Media Library and upload your new image:
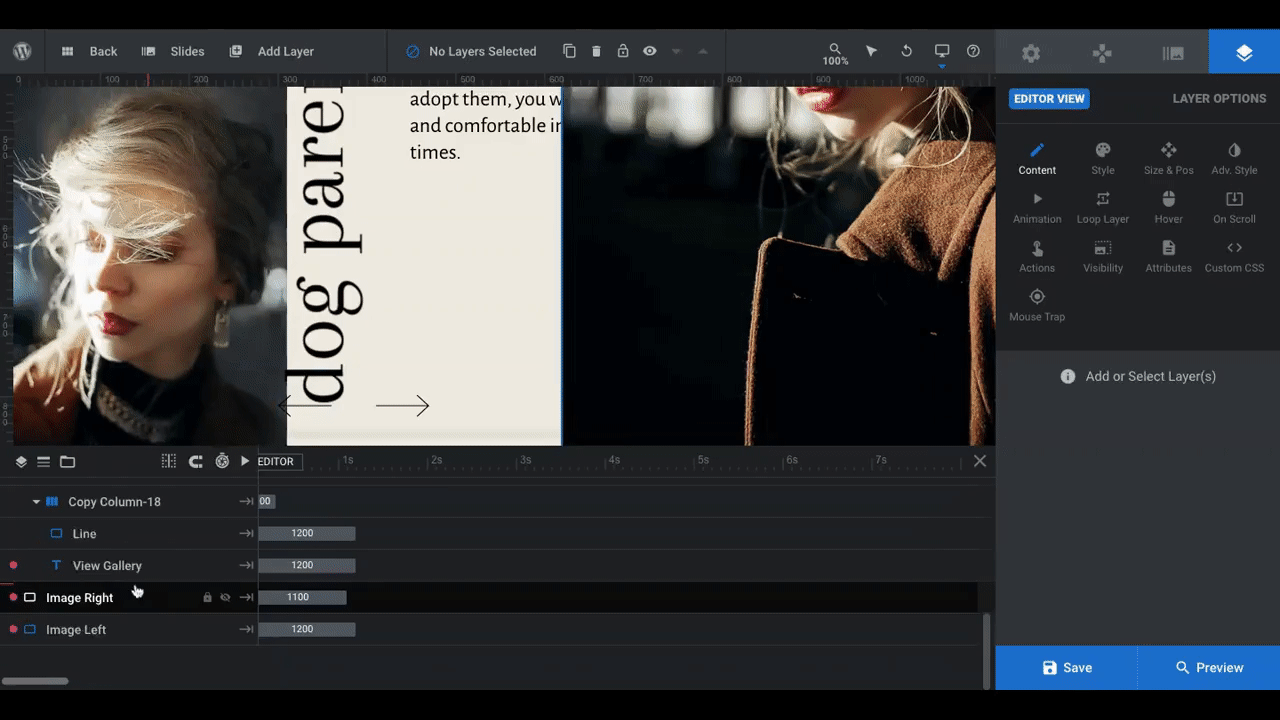
If you run into issues with the photo’s size or positioning, make adjustments to it under “Size & Pos” settings.
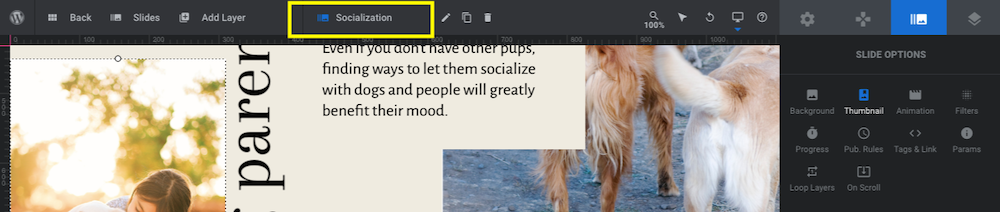
Before you move onto the next slides, it’s a good idea to update the slide’s thumbnail image. Go to “Slide Options” and “Thumbnail” to do this:
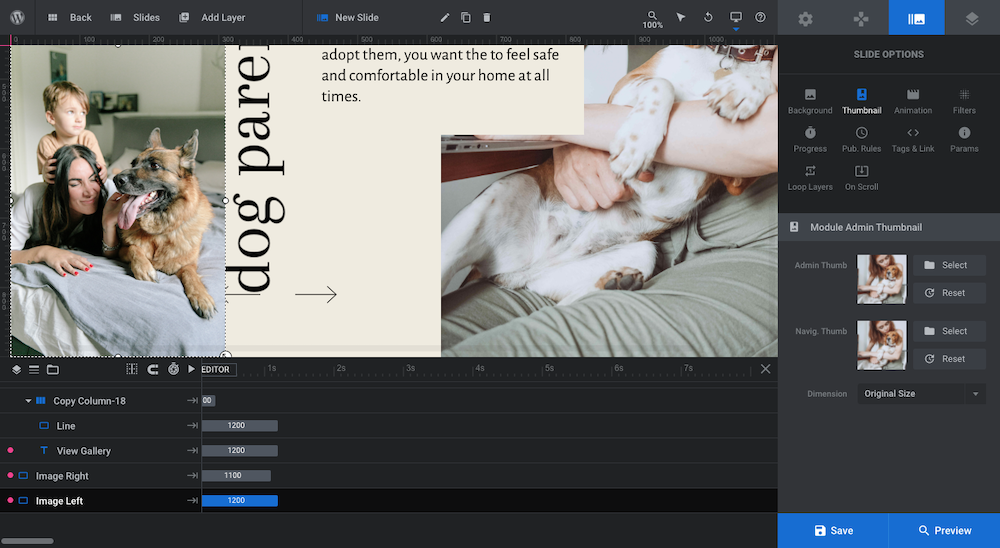
This is beneficial for a number of reasons. For one, the Slides controller in the toolbar will accurately reflect each slide when you hover over it. In addition, if you decide to use thumbnail images in your navigation, they’ll be ready to go.
Pro tip: Renaming each slide so it describes the content will also make it easier to manage your slides:
Just click on the slide’s name in the toolbar and type over it to change it.
Learn more:
Step 5: Edit the button text and design
There is a row of layers at the bottom of each slide. On the right side are two layers called Line and View Gallery.
When a visitor clicks the View Gallery link, it will open the Modal module (where the image gallery is). We’re not using that feature from the template, though, so we want to convert this to a regular button layer.
The first thing we’re going to do in this step is delete the layer called Copy Bottom Row. This will remove the entire row containing:
- Arrow-Left
- Arrow-Right
- Line
- View Gallery
Select the row layer in the timeline and hit “delete” on your keyboard to remove it.
To add a new button, go to the toolbar, hover over “Add Layer”, and select “Button”:
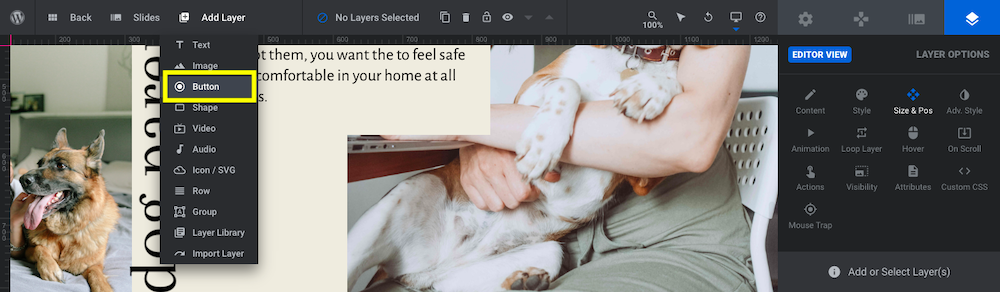
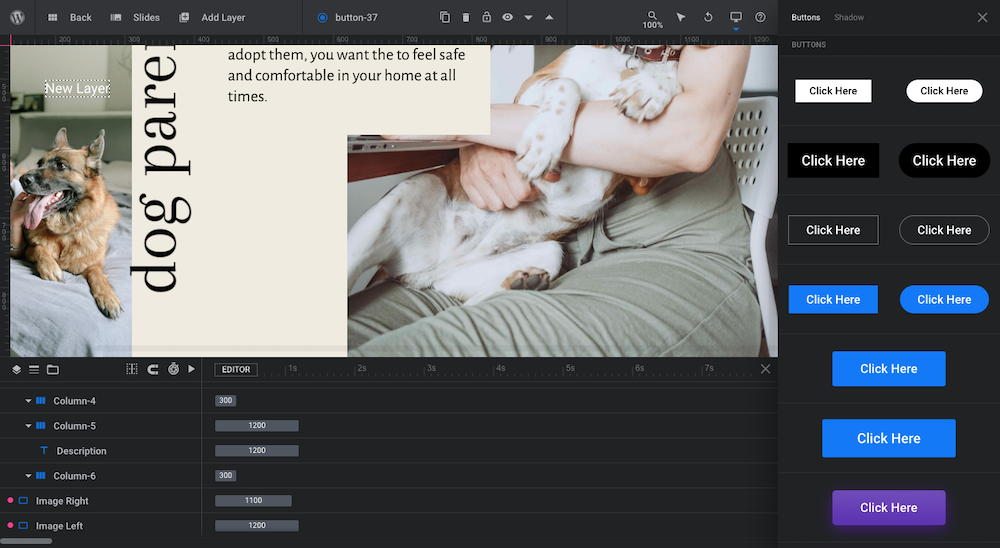
Slider Revolution will provide you with a number of pre-designed button options. Choose the style you like best to add it to the slide.
Pro tip: Take your time hovering over each button design. Each one has a unique hover animation. By picking a button with an animation you like, that’s one last thing you’ll have to customize:
Your new button style will be added to the slide. However, you’ll need to move it into place. You can do this as you customize the rest of the button’s design:
To edit what the button says, go to “Content”.
To change the font, size, style as well as the button background colors, use “Style” settings.
To move the button to a new spot on the slide, use the settings under “Size & Pos”.
To update the button’s hover state like text and background color, go to “Hover” settings.
To edit where the button links to, do so under “Actions” — but only once you’ve created the post it’ll be embedded into.

Pro tip: The button doesn’t have to go on every slide. For instance, if you add the button to each slide, you can link each out to the corresponding header tag on the page. On the other hand, if you add the button only to the last slide, you can link it to the start of the next section.
When you’re done designing the new button, preview your changes. Check it in responsive mode — on desktop, laptop, tablet, and mobile — to ensure that it looks good across all devices, too.
Learn more:
Step 6: Update global layers
Global Layers are typically used in Slider Revolution for two purposes. The first is to add branding and a menu to landing pages or microsites. The second is to add layers that always appear regardless of which slide the visitor looks at.
We don’t need Global Layers for the first purpose as this slider will be embedded into our post. So we can delete the relevant layers:
- Row-9
- Menu
These are both groups of layers. When you click on the top group name, it will delete everything beneath it.
When you’re done, the only layers that should remain are the ones that make up the floating cursor:
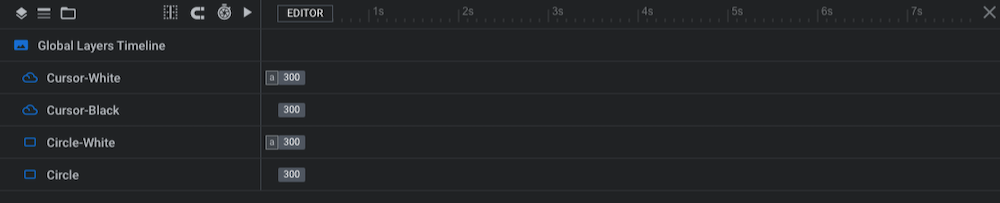
You might want to update the color of these components if they don’t show up well against your slider’s background color. If that’s the case, select them one by one and make those edits under “Style” settings.
Pro tip: Try not to go too dark with the cursor’s color. You want it to be noticeable but not prominent. It’s merely there to encourage visitors to engage with the slide.
Learn more:
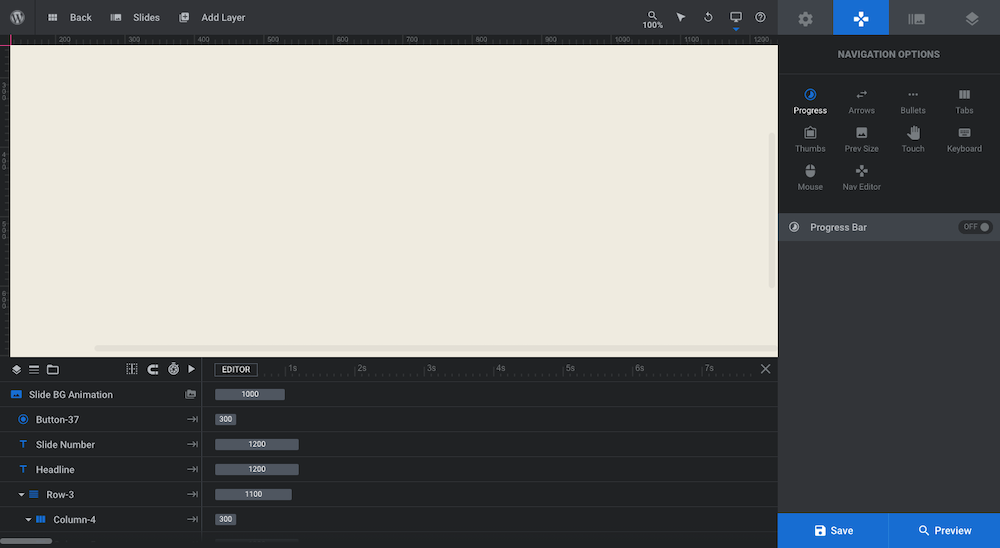
Step 7: Add navigational cues
We removed the custom-built arrow navigation from our slides, so in this step we’re going to add a replacement navigation system. To do this, go back to your slides and then open up “Navigation Options”:
We’re going to add a hybrid bullet/thumbnail navigation to the bottom of our slider. You’ll find this setting under “Bullets”:
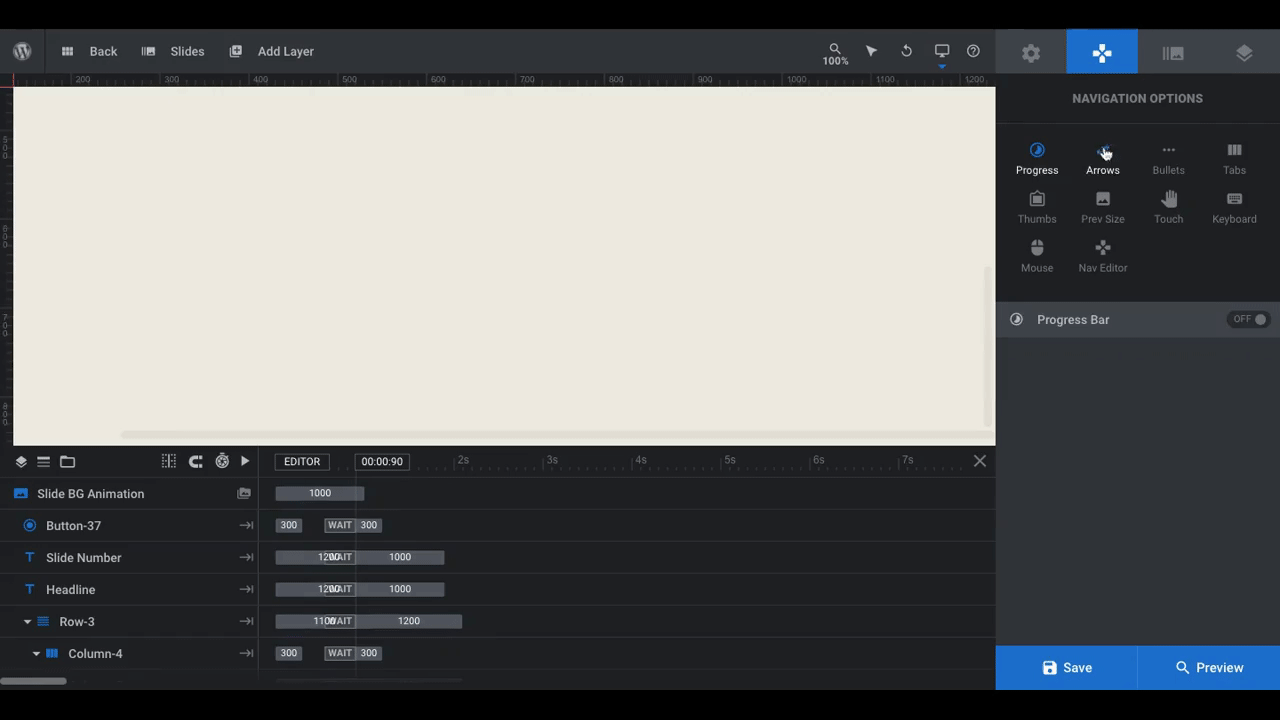
The style of bullet we’ve chosen is called Dione. Unlike many of the options under the “Thumbs” navigation settings, Dione thumbs are a bit smaller. We don’t want them to overwhelm the rest of the imagery, so these thumbnails are perfect.
Whichever navigation setting you choose to activate (and you can add more than one if you feel it’s needed), spend some time going over the settings. You can customize the size, placement, color, and other styles for each.
Learn more:
Replace your TL;DR sections with this beautiful summary slider
Many authors will provide readers with a TL;DR (too long; didn’t read) section that summarizes what they didn’t want to read. That assumes that your visitors won’t want to read the content. But what if they do?
Don’t leave it up to them to scan down the page to scope out your headers and imagery to see if the post is worth reading. Instead, create an attractive summary slider with the Fashion Website Slider template that you can place at the top of your content pages. You’ll instantly engage readers with your content and in a more meaningful way, too.


