
When building a hero image for a digital product — like mobile apps, streaming services, tech devices, or design software — there tends to be a formula we all follow. Big headline, short description, and call-to-action button placed next to a promotional video or photo of the product.
It’s not really a formula you want to mess with as it offers visitors the perfect preview of the digital solution. That said, what you can do to shake things up is to create a transformative environment around these components. Not only will it look really cool, but it’ll get visitors wondering how else this brand and product will differ from the competition.
In this tutorial, we’re going to show you how to edit the Video Hero Header template along with the particle animation add-on that comes with it to create a custom techno-scape for your hero section.
Table of Contents:
- Step 1: Edit copy in the slide
- Step 2: Update button text and design
- Step 3: Add your video
- Step 4: Customize the Astronaut Grid layers
- Step 5: Update slide background color
- Step 6: Delete color gradient blocks
- Step 7: Create your own particle wave animation
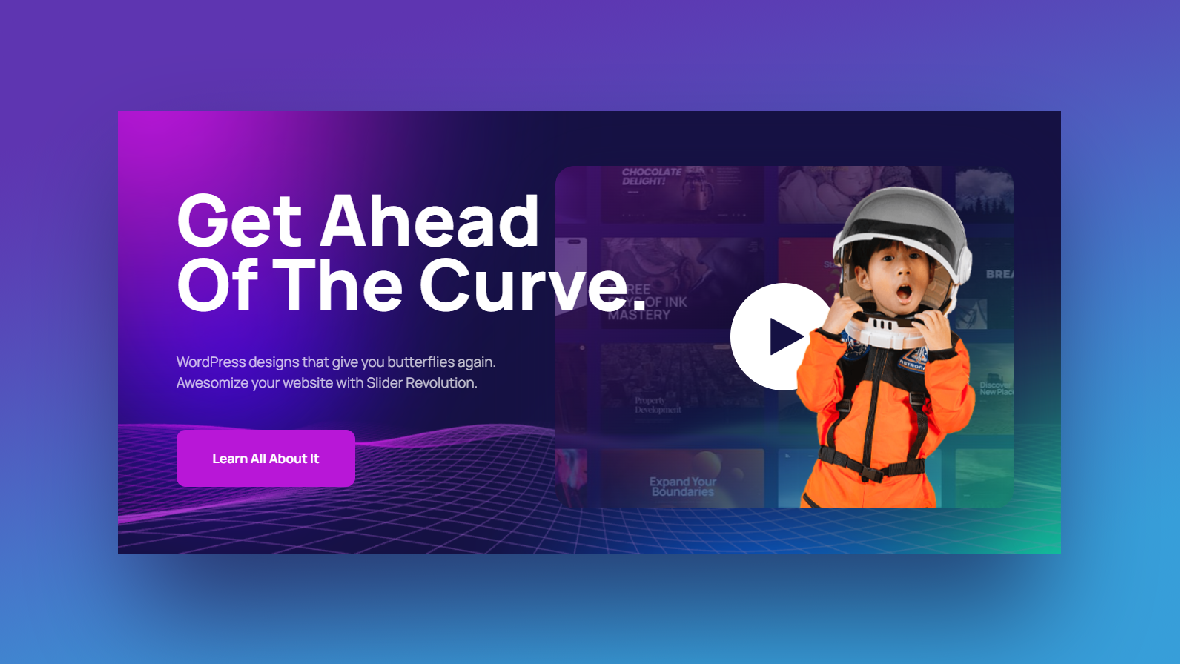
How to Create a Custom Hero Image Design Using Particle Animation
Particle animation is one of those design trends that was meant to help brands market and sell digital products. One way to use it would be to surround your product and promotional copy with a trippy wave-like design like the one in the Video Hero Header template:
That’s not the only kind of particle techno-scape you can create with Slider Revolution. After you install and customize the other parts of the template, you’ll be able to choose a particle wave preset or create one of your own.
Here’s what we’ll be showing you how to create in the following tutorial:
Before you begin the tutorial, make sure you’re up to date on how to use Slider Revolution:
Step 1: Edit copy in the slide
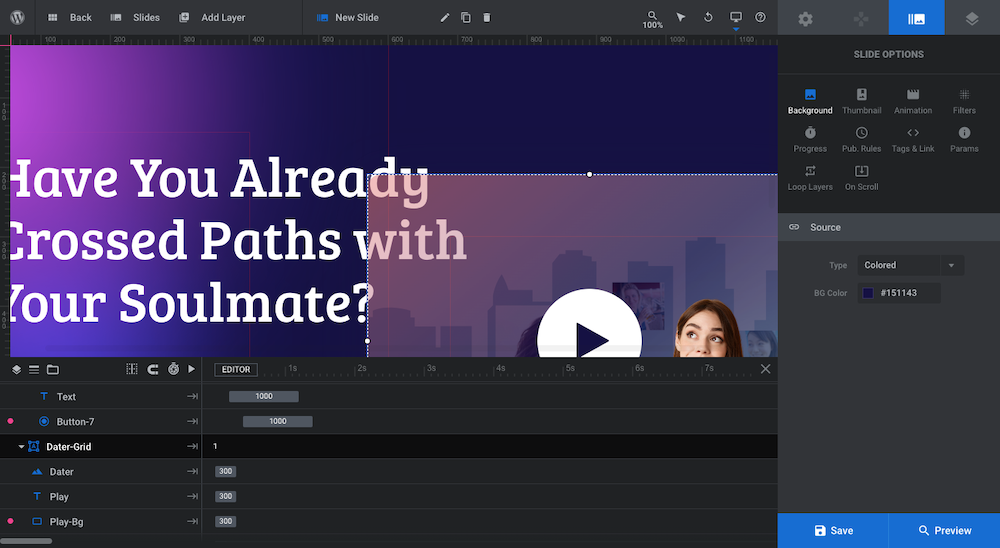
We’re building a hero image for a new dating app in this tutorial. To edit the copy in the slide to reflect this, we need to tackle the Headline and Text layers one by one.
Go down to the timeline editor and locate the group of layers called Texts. Click on the Headline layer to open “Layer Options” on the right.
You can customize the:
- Text under “Content”
- Font and styling under “Style”
- Size and positioning under “Size & Pos”
- Text shadow, strokes, and more under “Adv Style”
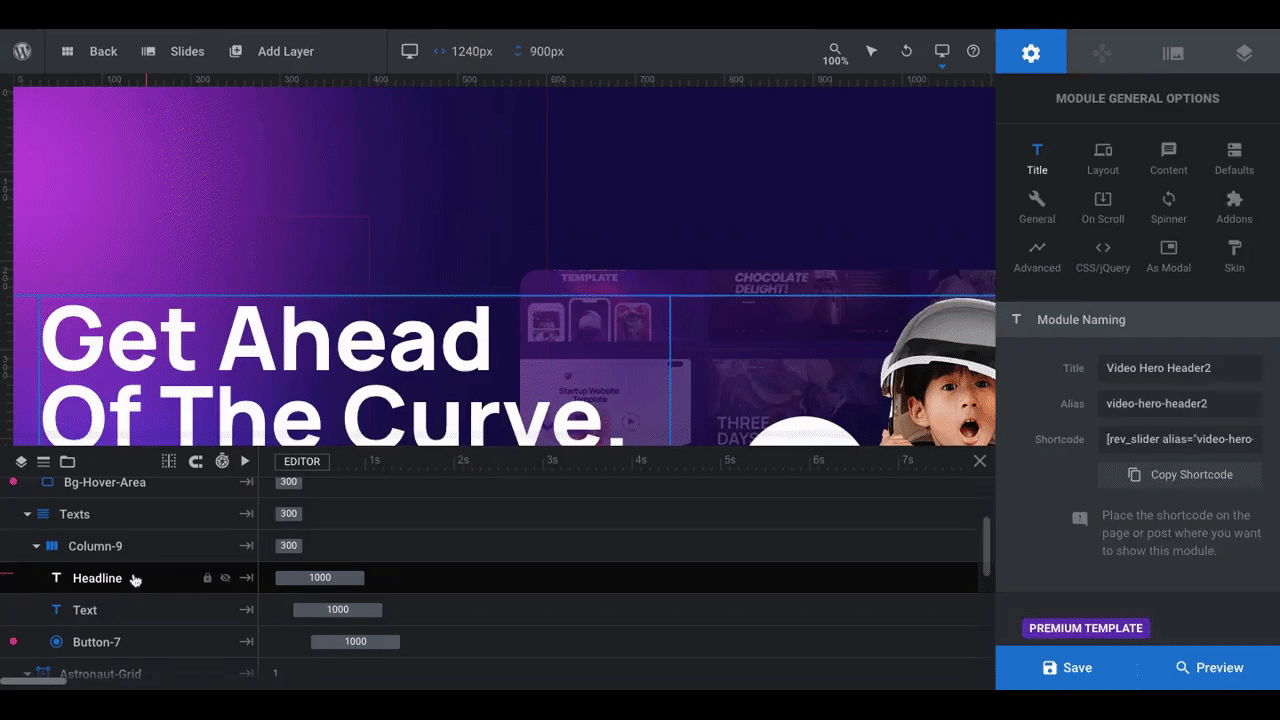
Repeat this process for the paragraph Text layer. We’ll deal with the button in the next step.
Learn more:
Step 2: Update button text and design
You’ll find the button layer under the Texts group as well. Click on the Button-7 layer in the timeline editor to open up the “Layer Options” settings for it.
To edit the text inside the button, use the same process as Step 1. To customize the design of the button, you’ll use additional settings found in “Layer Options”.
Edit the background color (or gradient) of the button under “Style” and “Background”. You can also adjust the spacing within the button and the rounding of the borders from “Style” settings.
To give the button a shadow, use the “Adv Style” settings and “Box Shadow” to do this.
In addition, the button changes the way it looks when someone hovers over it. To alter this hover state, go to “Hover” settings and “Style”.
Here’s how that editing process would work:
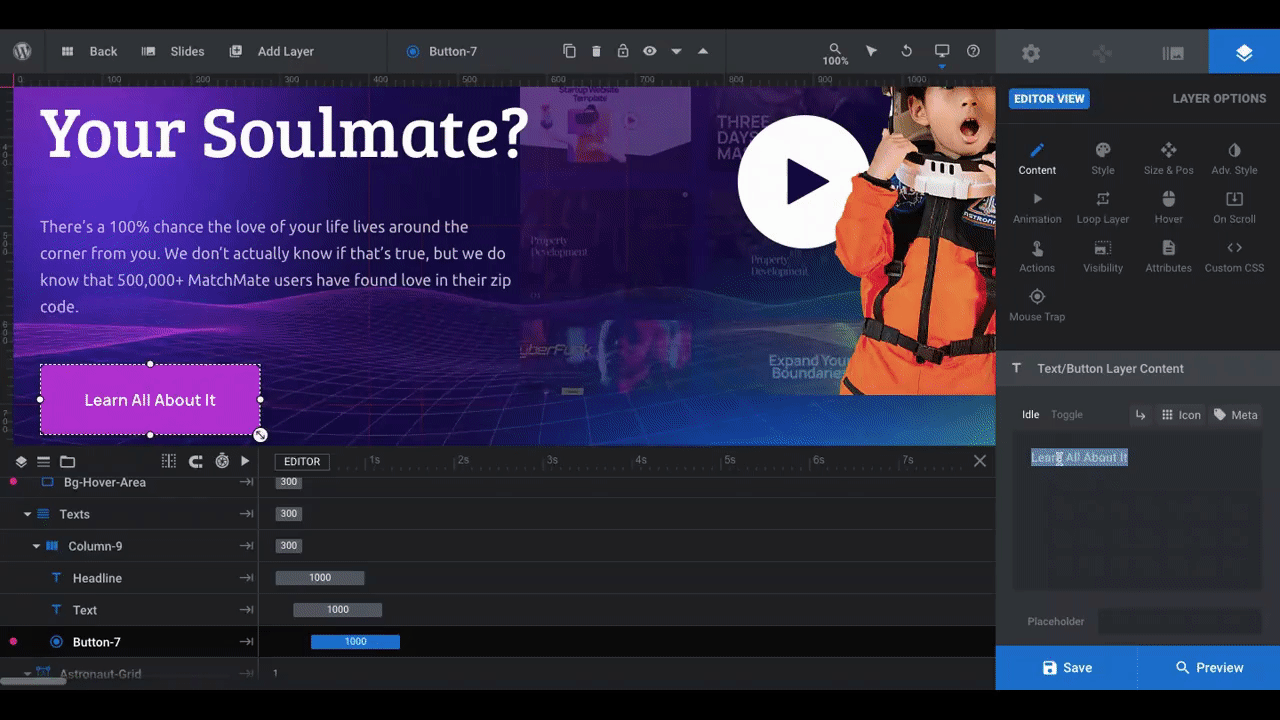
One thing to point out is that we changed the button’s solid color to a gradient and added a third color to the spectrum of colors. The color selection dialogue link below will provide you with guidance on how to create your own gradient if this is your first time.
Pro tip: If you haven’t figured out the color palette for your hero image yet, you may want to save this step until the end. That way, you won’t have to redo your colors later on.
Learn more:
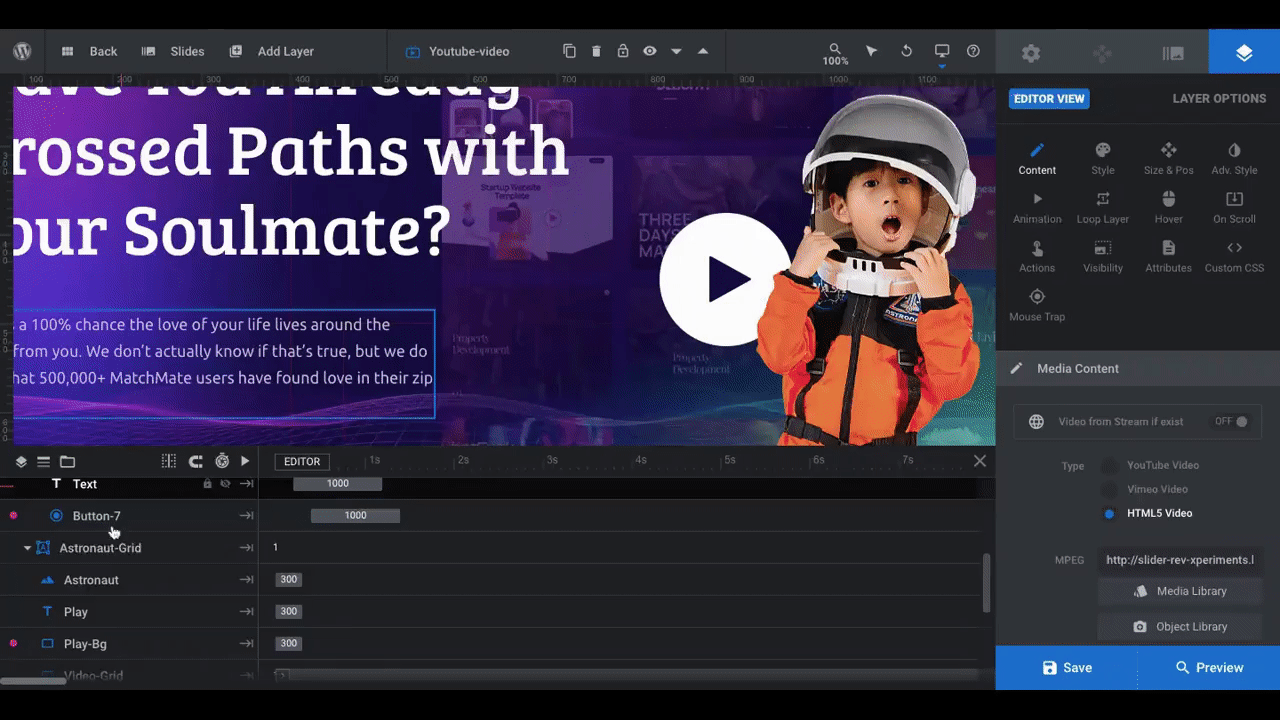
Step 3: Add your video
There are two groups in the timeline editor that deal with the video component in this slide. The one called Astronaut-Grid deals with the promotional imagery that will get people to engage with it. Leave that be until the next step.
In this step, we’re going to focus strictly on adding the actual video file to YouTube-Popup-Group. Unless you have a preference for how the Closer or BG-Hover-Area layers appear, the only thing you’ll update is the YouTube-Video layer.
To edit this layer, select it from the timeline editor. Go to “Content” and “Media Content”. There are three ways to source your video:
- From YouTube
- From Vimeo
- By uploading an MP4 file
For YouTube and Vimeo videos, you’ll need to input the video ID. For an MP4, upload your file directly to the Media Library:

There are additional settings lower down on the page that enable you to customize the video player. If you want to make any adjustments, do so there and then save your changes.
Learn more:
Step 4: Customize the Astronaut Grid layers
When visitors arrive on your home page, they’re not going to see a regular video player. Instead, they’re going to see a scrolling promotional image with a big “Play” button on top as well as a persona standing in front.
To create this engaging composition of elements, you’re going to need to do a number of things. First, go to the timeline and locate the Astronaut-Grid group.
Next, you’re going to edit all of the components except the Play and Play-Bg layers.
The Astronaut layer is the astronaut kid standing in front of the video player. To replace this photo with one of your own, do the following:
- Use a cutout photo — i.e. one with no background content.
- Pick one where you see the person’s full body or the bottom-half is cut off the way it is with the astronaut.
- Size it using the same dimensions as the astronaut, which is 260px x 500px.
- Download the file with a transparent background.
To upload your file, select the Astronaut layer in the timeline, go to “Content”, and add it to the Media Library:
If you need to adjust its positioning, you can do so under “Size & Pos”.
Pro tip: It’s always a good idea to rename layers when they no longer accurately represent the content. To change a group or layer name, select it and then go to the toolbar at the top. Highlight the name and replace it with your own.
The next layer to edit is the Video-Grid. This is the scrolling preview/promotional image that appears on top of the video player. To replace Slider Revolution’s image with your own, create an image that’s 1992px x 600px.
The Video-Grid is a different kind of layer than an image layer. To upload your replacement, select the layer in the timeline, then go to “Style”. You can replace the graphic under BG Image:
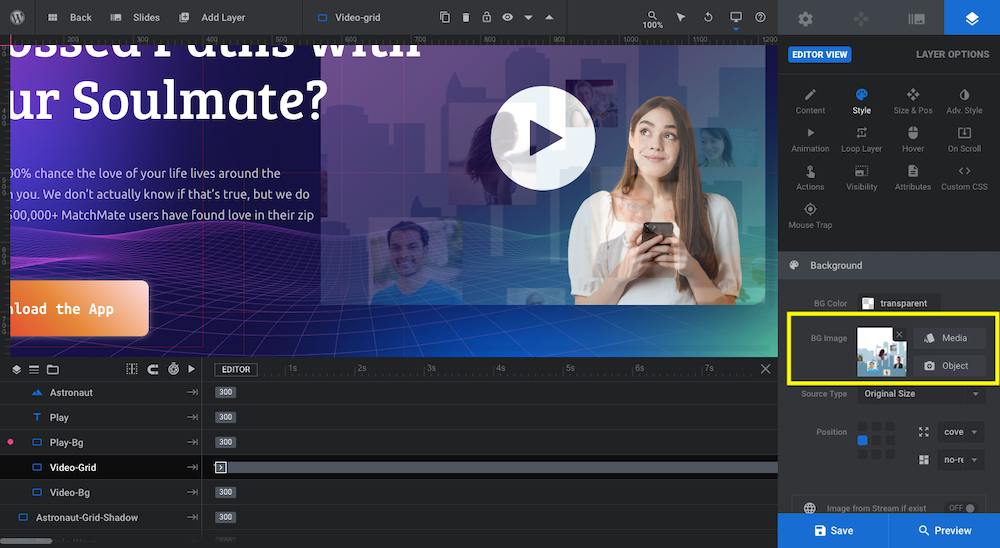
If you weren’t able to create an image that was sized the same as the previous graphic, you may need to adjust its positioning before moving on.
The last layer to edit is the Video-Bg. The scrolling graphic is semi-transparent so you can see some of the particle animation behind it. What this background layer does is add a semi-transparent gradient behind it.
To customize it with your own gradient, select the layer in the timeline and go to “Style”. Then open the BG Color modal:
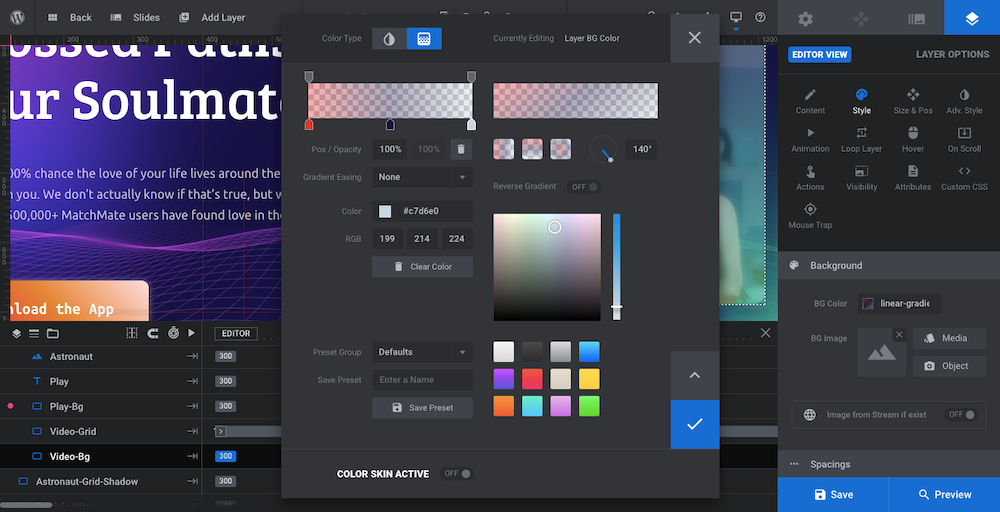
The resulting colors are subtle thanks to the transparency effect applied to them, so feel free to add a bright splash of color if that’s part of this hero image’s color palette.
Learn more:
Step 5: Update slide background color
There are three components that make up the background of this slide:
- The solid background color
- The radial gradient layers
- The particle wave animation
We’re going to tackle them one at a time in the remaining three steps.
To edit the background color, open “Slide Options”:
Under “Background” and “Source” is where you’ll change the BG Color.
You’ll also have to update the module’s background color. This is the color that appears before all the content in the slide loads. You’ll find this setting under “Module Options” and “Module Background”:
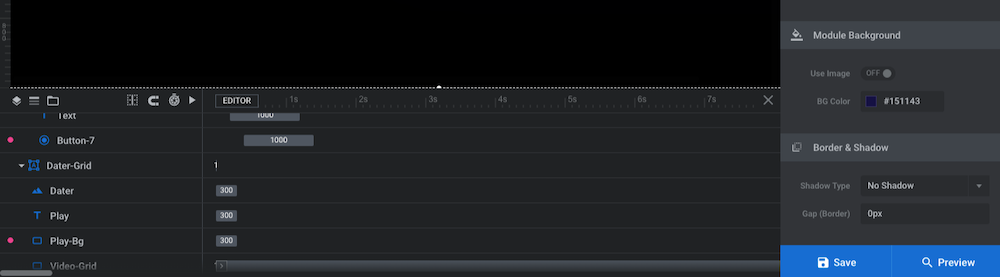
Update it to match the slide’s new background color.
Learn more:
Step 6: Delete color gradient blocks
The color gradient “lights” look really cool when paired with a particle animation like the wave. It looks like they reflect off the moving lines while also framing the video player well.
That said, that’s not the kind of atmosphere we’re going for here. We’re creating a landing page for a mobile dating app. But it’s no ordinary dating app. This one connects singles with people they’ve crossed paths with in their local zip code.
Because of this, we want to create a background that depicts the infinite expanse of the universe to emphasize the localized approach to dating. So we don’t need the color gradients for that.
To delete the Pink, Purple, Blue, and Green layers, you first have to unlock them in the timeline editor. Hover over them one at a time and click the lock icon so that it disappears. Then, select them at the same time using the “command” or “CTRL” keys:

Remove these layers from your design by hitting the “delete” key. Then, save your changes.
Step 7: Create your own particle wave animation
In this last step we’re going to create a custom particle animation using the Particle-Wave layer and Particle Effects Addon.
Select the layer in the timeline and go to “Layer Options” and “Particle Wave”:
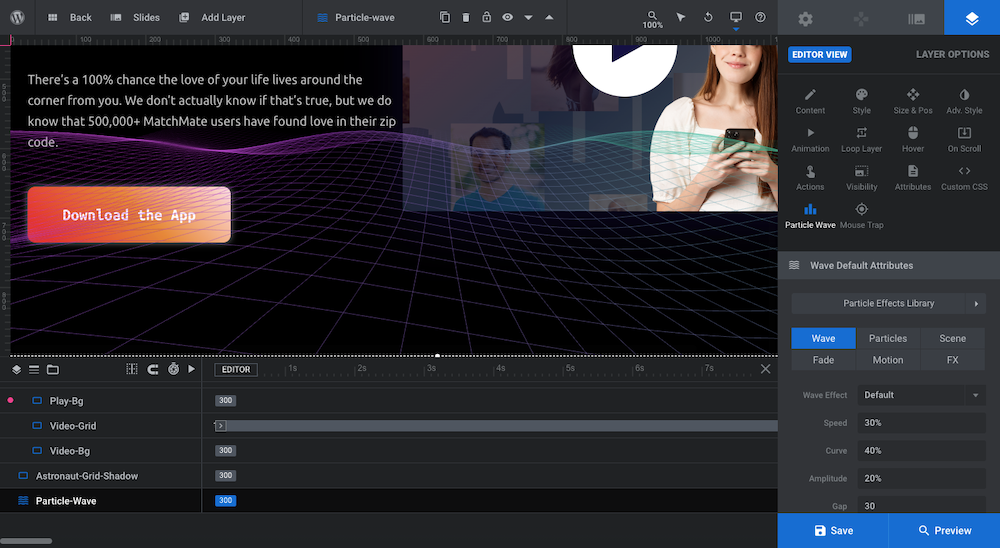
Here you’ll have access to all the settings that will help you create a custom particle animation — whether that’s a trippy wave-like design like the template has or something else. The Particle Effects Library comes with loads of Default Preset styles to choose from:

They all mimic real world structures and motion. Spider Web. Smoke. Honeycomb. Floating Waves. You can use a preset out of the box, you can start with a preset and customize it, or you can create your own custom preset.
For our purposes, we’re going to start with Galaxy. We don’t need to do much to customize this one, but we do want to make some alterations:
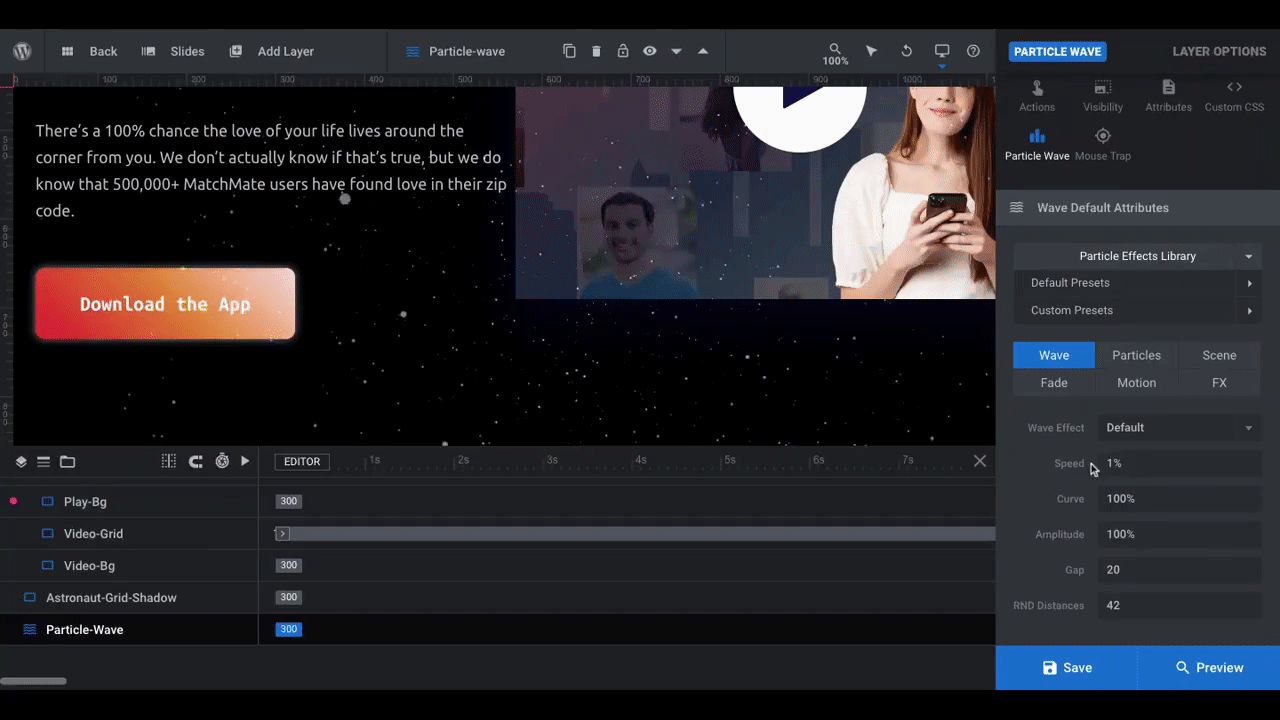
As you can see, you can change the type of Wave Effect. So even though we selected a Galaxy particle animation, we could put a Powerful or Funky twist on it and make it roll much like an ocean wave would.
The main thing we ended up changing here, though, was the color. We added a reddish gradient to the dots for a subtle pop up color in the background.
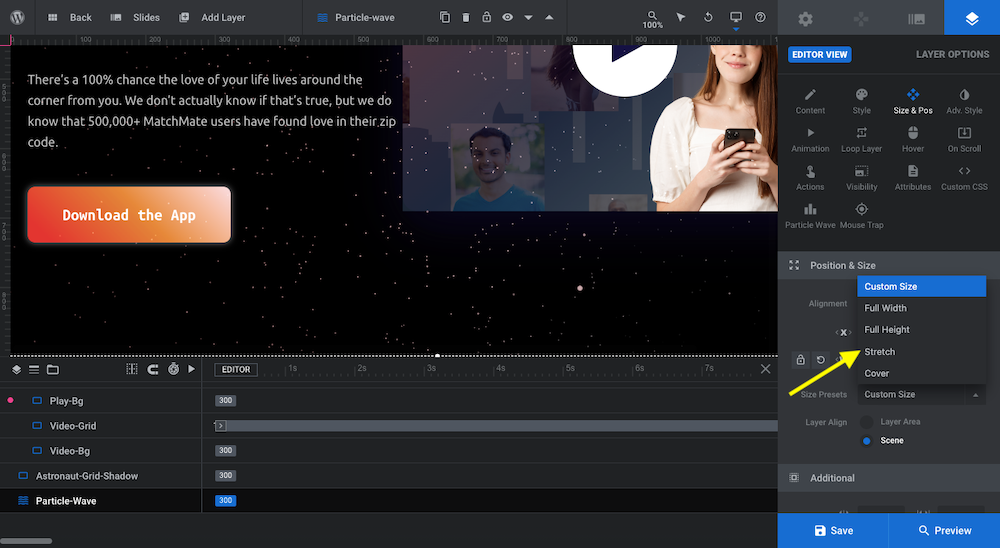
One other thing we need to do is adjust the positioning of our particle animation. With something like a wave that only takes up the bottom portion of the slide, you can set exact dimensions and positioning for it. For something like this where we want it to mimic the galaxy, it should fill the screen.
To fix this, we’ll go to “Size & Pos”, set it to “Scene” if it isn’t already, and then change the “Size Presets” to Stretch:
When you’ve finished configuring your new particle animation, save your changes and preview the design on the frontend. If there’s nothing else you need to change, you can add this hero section to your home page.
Learn more:
Create an immersive environment that sets the stage for your digital product
Websites promoting digital solutions tend to be minimally designed and somewhat predictable. Predictability isn’t always a bad thing as it makes it faster and easier for new visitors to find relevant information and calls-to-action.
That said, digital products are built in order to transform users’ lives. You don’t need to ditch the elements that prospective users expect and need to see — like the marketing message and companion video or image. However, you can design a transformative digital environment that sets the stage for what’s to come.
That’s now possible with the help of Slider Revolution’s Video Hero Header template and Particle Effects Addon.


