

The thank you page on websites has a tendency to feel cold and transactional, if it even exists at all. Rather than make customers feel like they’re just one in a long line of customers your website has to deal with, a thank you page should make customers feel like they’ve just interacted with a real team member.
The thank you page can be used anytime someone fills out a form. For instance:
- eCommerce checkout
- General contact
- Blog subscription
- Reservation booking
- Event or content registration
In this tutorial, we’re going to demonstrate how to use the 404 page collection to create an effective thank you page.
Table of Contents:
- Step 1: Delete the slide designs you don’t want
- Step 2: Delete the irrelevant layers
- Step 3: Update the slide’s background
- Step 4: Replace the ghost image
- Step 5: Write your thank you message
- Step 6: Do a responsive check
- Step 7: Connect the thank you page to your transaction
How to design an effective thank you page
While this slider collection was designed for 404 error pages, we can easily repurpose it for other pages that need to be short on content and high on impact:
For the following example, we’re going to edit slide #1 and turn it into a thank you page for the ecommerce site we started to build in this product slider tutorial:
If you need a Slider Revolution refresher, check out these quick-start guides first:
Step 1: Delete the slide designs you don’t want
This is a collection of 404 page templates. They’re not meant to be used as a rotating slider. Just one high-impact message is enough.
So the first thing to do is pare this slider down to just one slide. We’re going to use slide #1 with the floating ghost to create our thank you page.
To delete slides 2, 3, and 4, go to the top toolbar and “Slides”. Hover over the slides that need deleting and click on the trash can beside them:
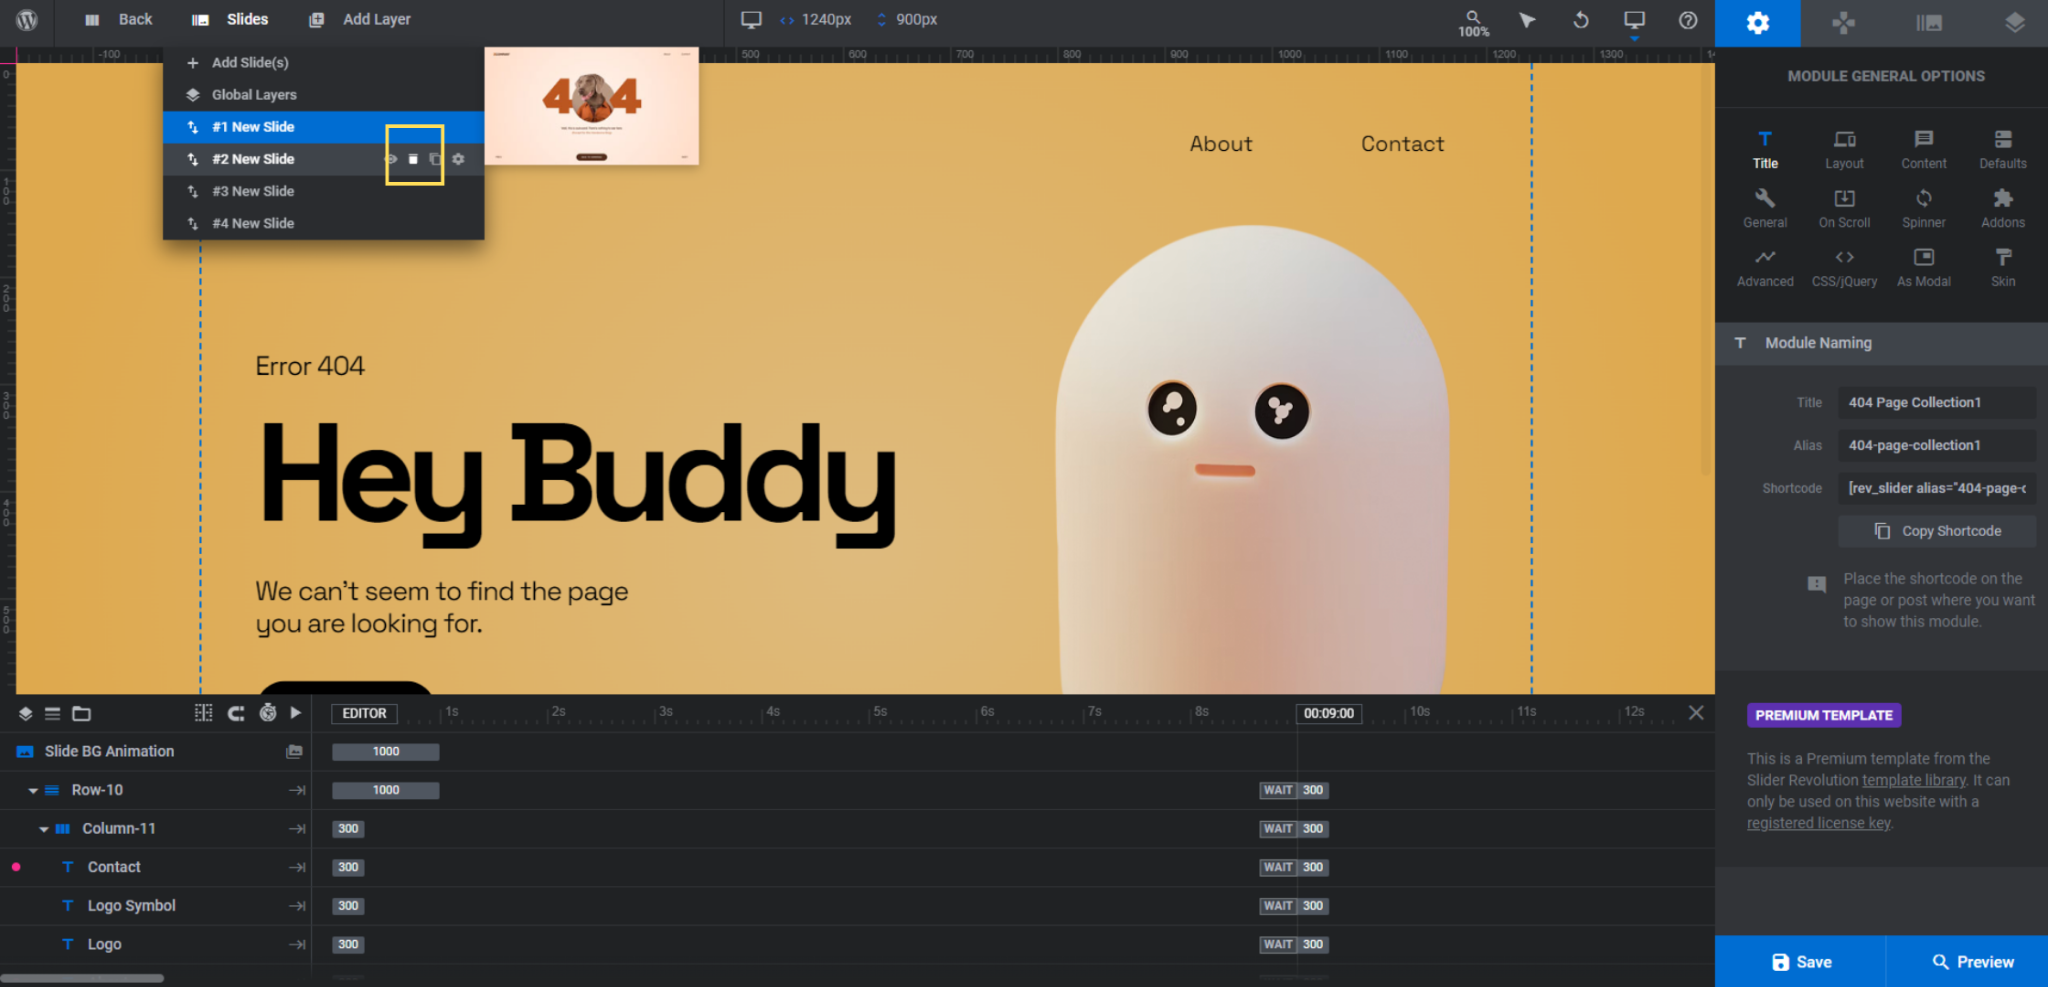
You should have only one slide remaining when you’re done (plus Global Layers, which we’re not using in this one).
Learn more:
Step 2: Delete the irrelevant layers
There are two groups of layers you won’t need in this thank you page template if your website has a header and footer:
- Row-10 contains the logo and navigation links that run along the top.
- Copy-Row-10 contains the slider navigation links plus company contact info at the bottom.
Deleting these layers is simple. Hold down the Ctrl key and click on the main row names (i.e. Row-10 and Copy-Row-10) in the timeline editor. Then, hit the delete or Backspace key:
This will remove the rows and all the layer content within them.
Learn more:
Step 3: Update the slide’s background
Go to “Slide Options” and “Background” to update the background of your slide. Currently, there’s a yellow gradient there. You also have the option of replacing it with a solid color, image, or video.
For our design, we’re going to set the background as an image. Since we used brightly colored backgrounds in our previous designs for this ecommerce site, we want to shake things up and get shoppers to really take notice of this thank you page.
To change the background to an image or video, open the “Type” dropdown and select the media type you want to use. Then, upload the graphic to the media library:
In addition, we’re going to apply a filter so our text shows up more clearly against the image.
You’ll find all of Slider Revolution’s preset filters under “Slide Options” and “Filters”. Choose the one that creates the right contrast and tone for your slide. We’re using Lo-Fi:
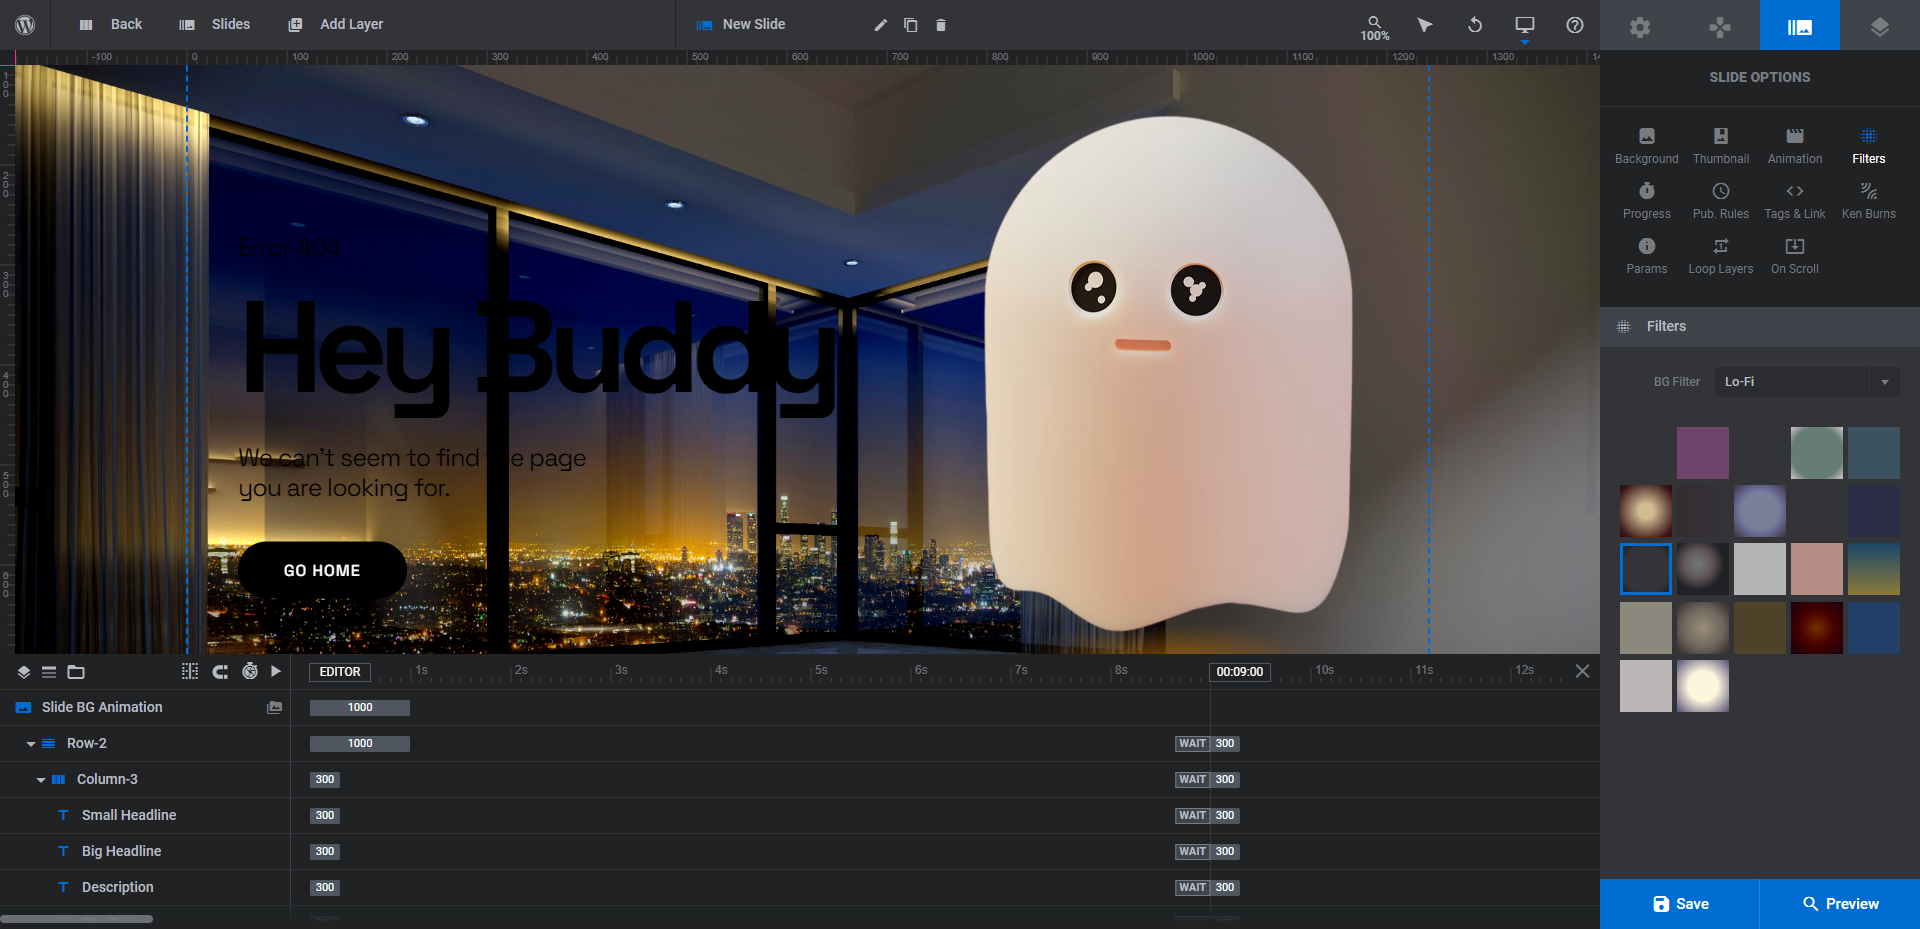
When you’re done, save your changes.
Learn more:
Step 4: Replace the ghost image
Even if you want to do something a little different with your subject image (in the template, it’s the floating ghost), don’t delete the existing Ghost layer. If you do that, you’ll have to recreate all of the animation and loop settings currently in there.
Instead, click on the Ghost layer (not the Ghost Group) in the timeline editor. Go to “Layer Options” and “Content”. From here you can upload your new image to the existing space in the slide:
Because our image is much bigger than the original ghost one, we resized it under “Size & Pos”.
If you end up making any changes to this image, it’s important to preview your work on the frontend to ensure the new image looks against your custom background. If it doesn’t, continue to adjust the size and position until you’re happy with the end result.
There are a couple other things we need to do in this step because of the image we’re using.
First, we need to delete the Shadow layer that gave the ghost a hover-3D look. Select the Shadow layer in the timeline and hit the Backspace or delete key.
We also need to deactivate the bobbing movement of our image. If yours floats in space, you can keep that effect intact. However, we want our subject to feel more stable.
To deactivate this setting, go to “Layer Options” and “Loop Layer”. Click the toggle next to “Enable Loop Effects” to disable the effect:
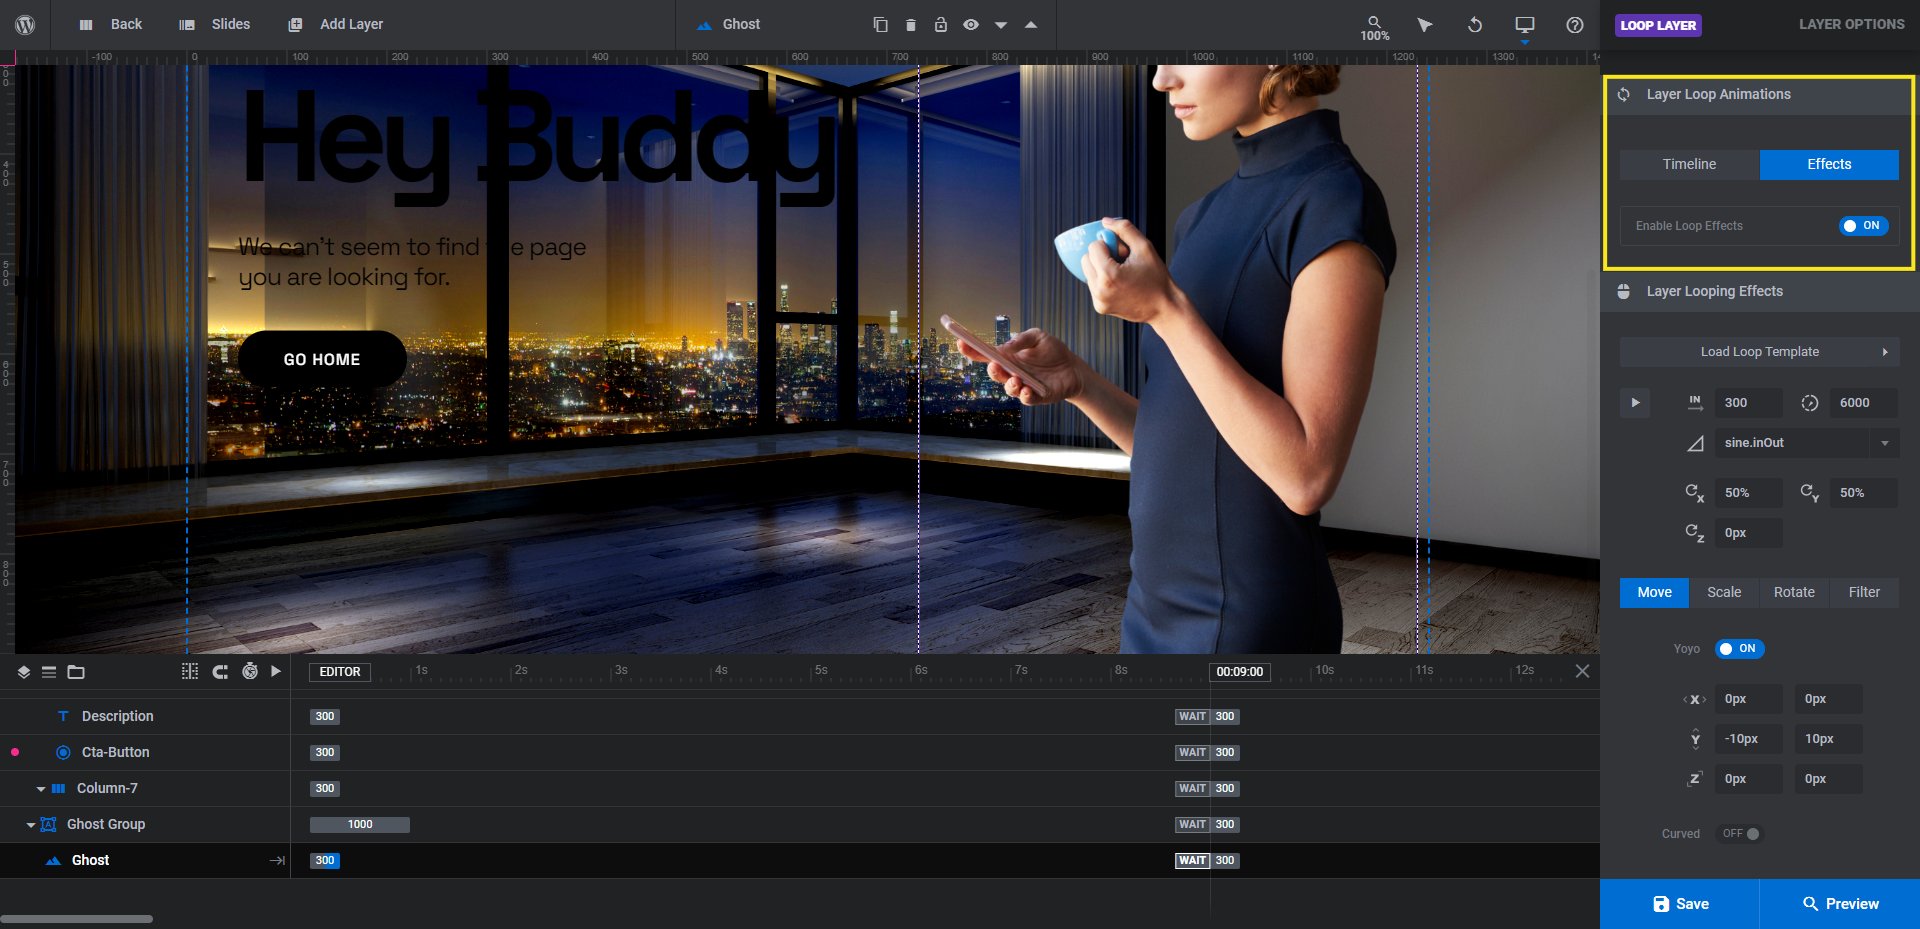
Save your changes when you’re done.
Learn more:
Step 5: Write your thank you messaging
There are three text layers and one button layer in this template. We’re going to preserve all four layers and update them so they’re reflective of the thank you message we want to send.
Typically, an effective thank you message includes three components:
- The thank-you or confirmation message so customers know their order went through. We’ll set this as the Small Headline.
- Instructions or tips on what they should do next. We’ll set this as the Big Headline and Description.
- A call-to-action (i.e. keep shopping, follow us on social, share with friends/family, etc.). We’ll set this as the Cta-Button.
To edit the text layers, select them one at a time from the timeline editor. Go to “Layer Options” and customize them using the settings there:
- Change what the text says under “Content”.
- Update the font, color, size, weight, spacing, and more under “Style”.
- Add advanced styling like text shadows or strokes under “Adv Style”.
Pro tip: If you’ve already set up the other pages for this ecommerce site or, at the very least, the home page product slider from the previous tutorial, use the same fonts and style settings here. There’s no sense in creating a completely different typographic style or color palette for the thank you page.
You’ll want to customize these same settings for the button layer. In addition, you’ll need to use:
- “Style” to update the button background and border colors.
- “Adv Style” to adjust the button shadow color.
- “Hover” to adjust the button’s hover state (i.e. colors and animation).
To connect the button to the corresponding page, use “Actions” to program in your link.
When this is all done, the big white lettering up top and the hot pink button down below provide a nice contrast to the moody setting surrounding it. This will make it easier for visitors to focus on the tips or instructions you provide for them.
Learn more:
Step 6: Do a responsive check
With our slide design finished, we can now do our responsive check. Open up the Preview of your thank you page. Then, toggle between the four device variants, making sure to interact with your design to see how it looks on each device:
We could easily resize the graphic for the tablet and phone variants using the responsive editing tool inside of Slider Revolution:
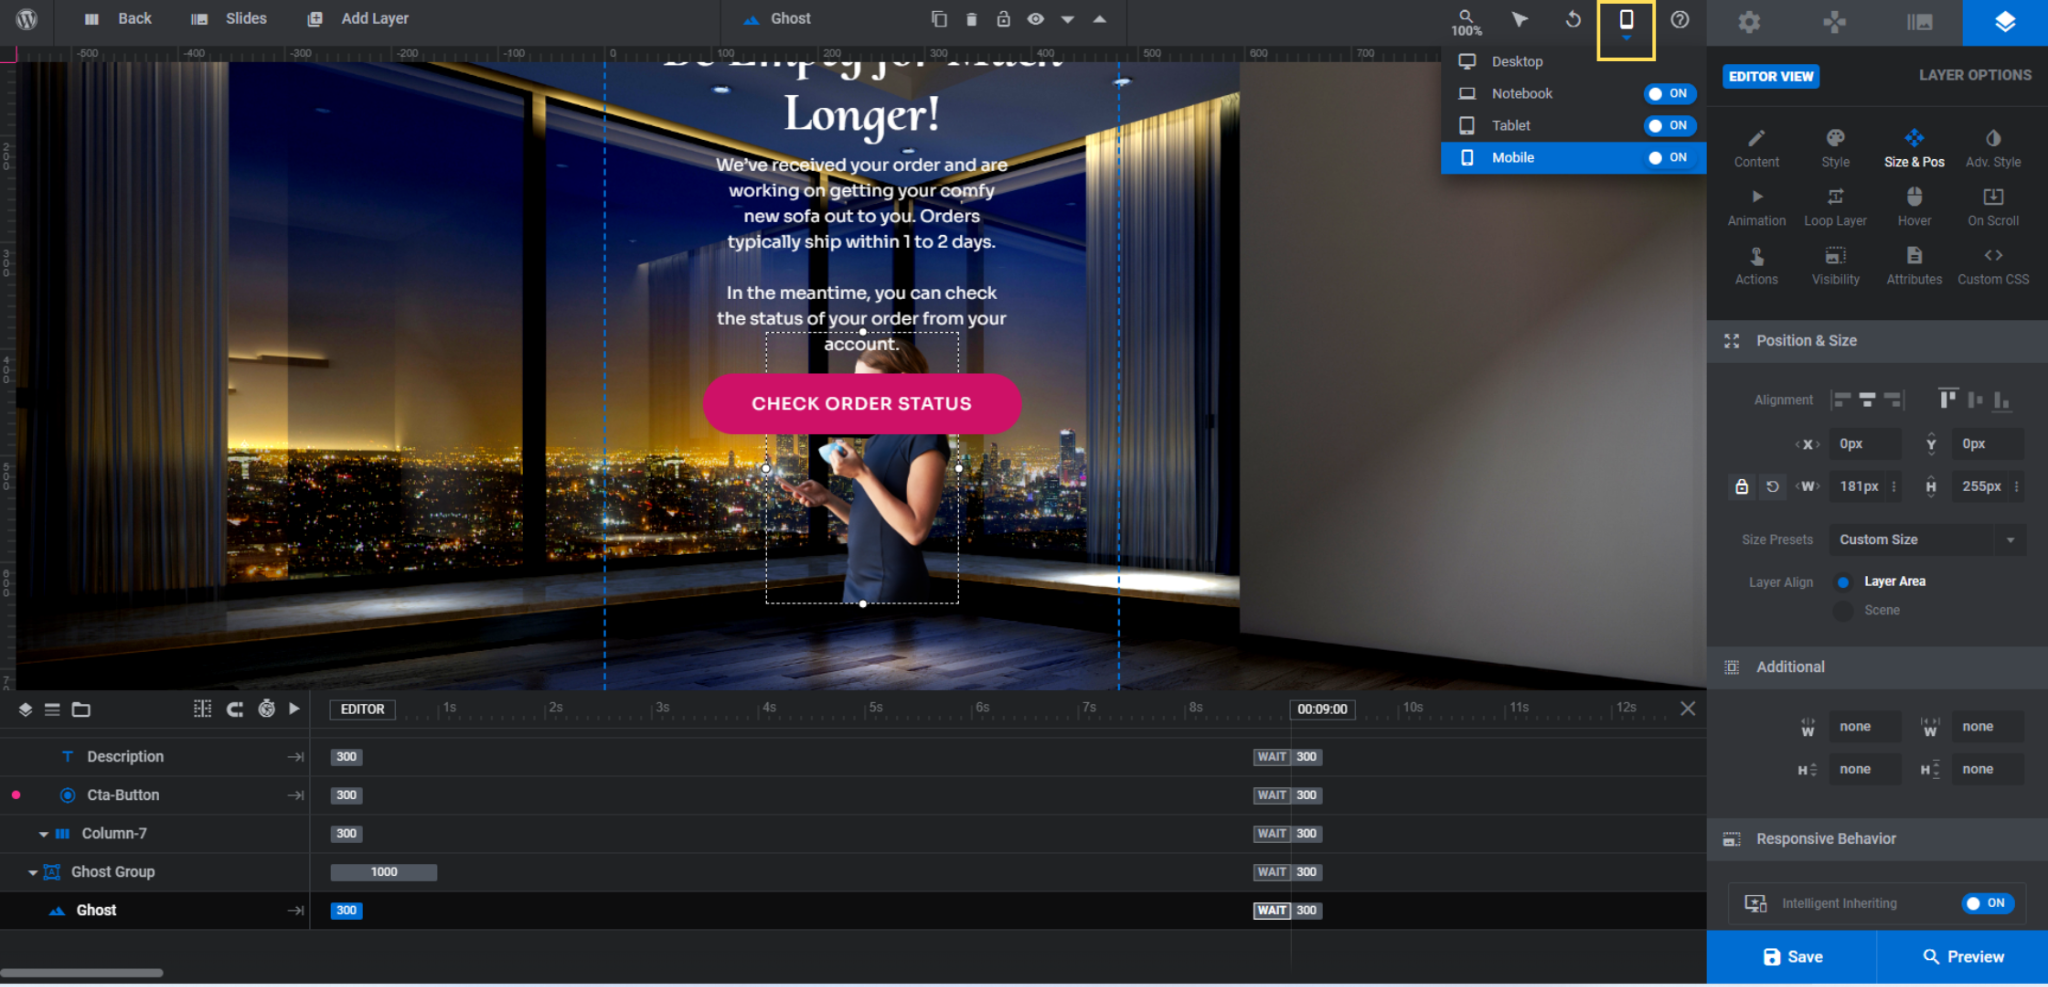
However, this graphic isn’t a critical component of this page. The main goal is to confirm the purchase and then help the customer with their next steps. By keeping it in there, we’d only make the thank you page longer than it needs to be.
So, what we’re going to do is go to “Visibility” settings where we’ll hide this image from the Tablet and Mobile experience:
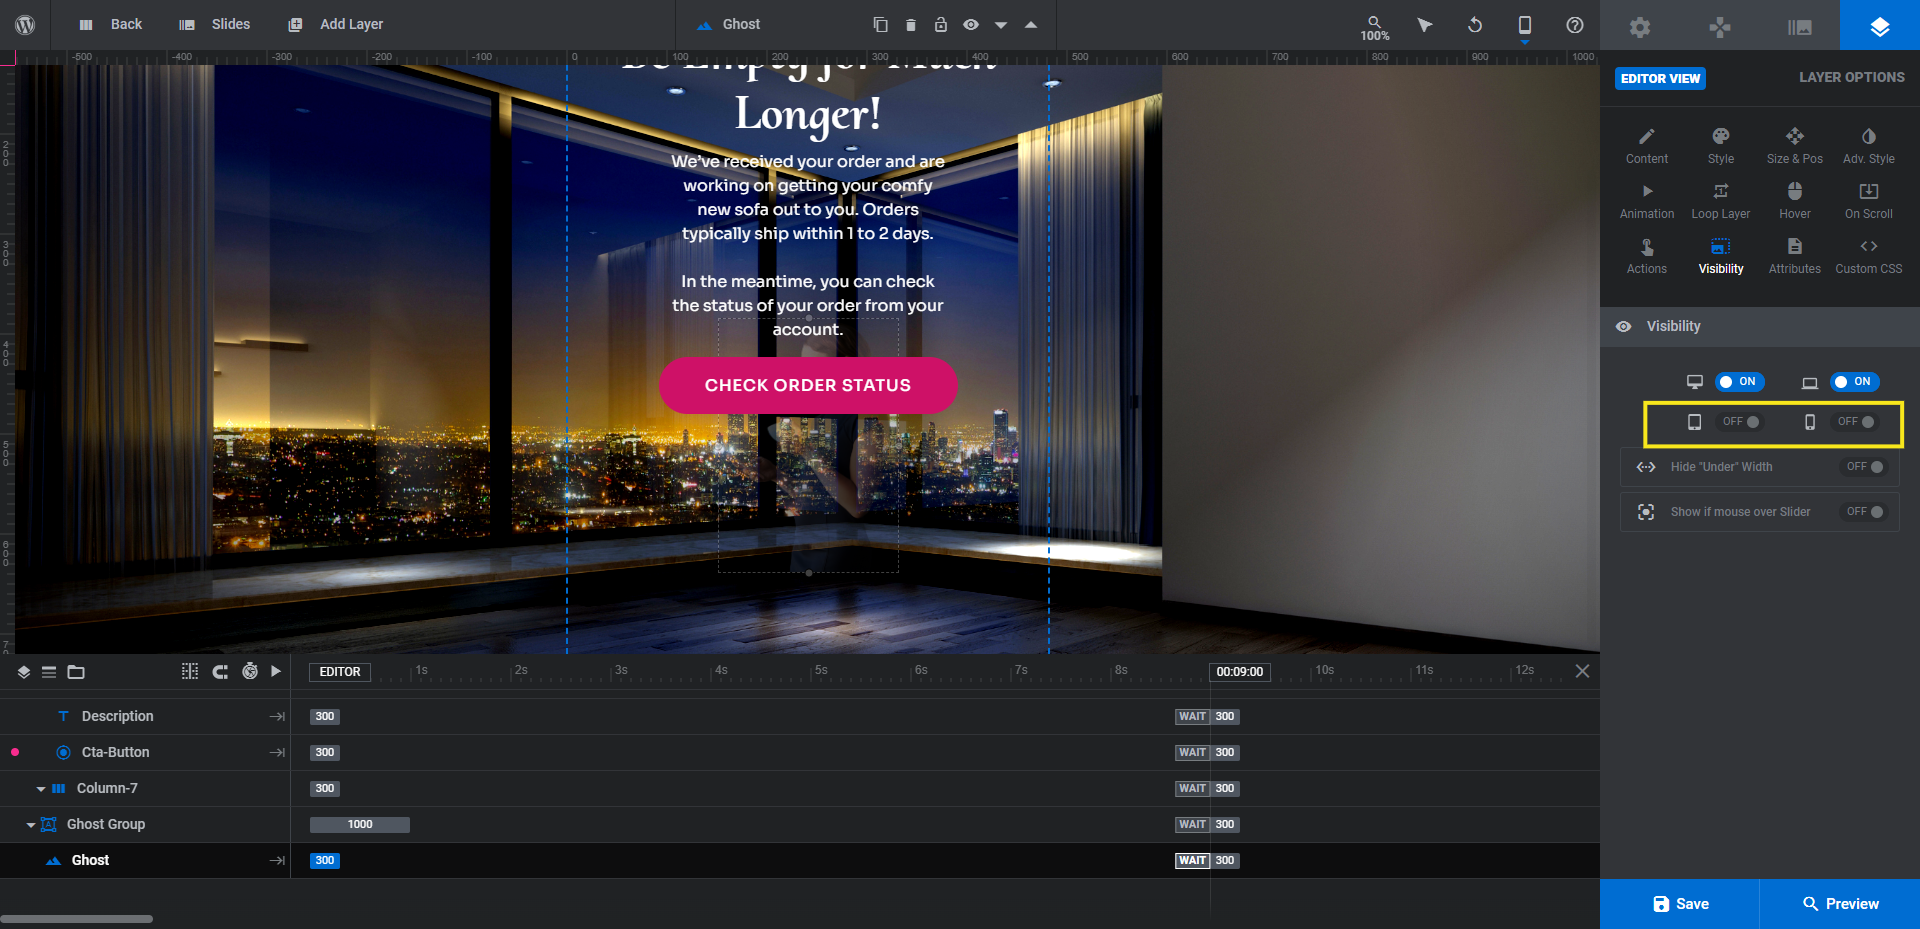
You can still see a faded version of the graphic when editing your slide from these device views. However, it won’t show up on the frontend of the page anymore.
Learn more:
Step 7: Connect the thank you page to your transaction
The final step is to set up a page for your thank you slide design, then connect it to your transaction plugin.
First, click the “Back” button at the top of the Slider Revolution editor to exit out of your design. Go to “Pages” and add a new page called “Thank You”.
Slider Revolution has its own widget. Search for it in the list of WordPress widgets, select the thank you design you just created, and add it to the page:
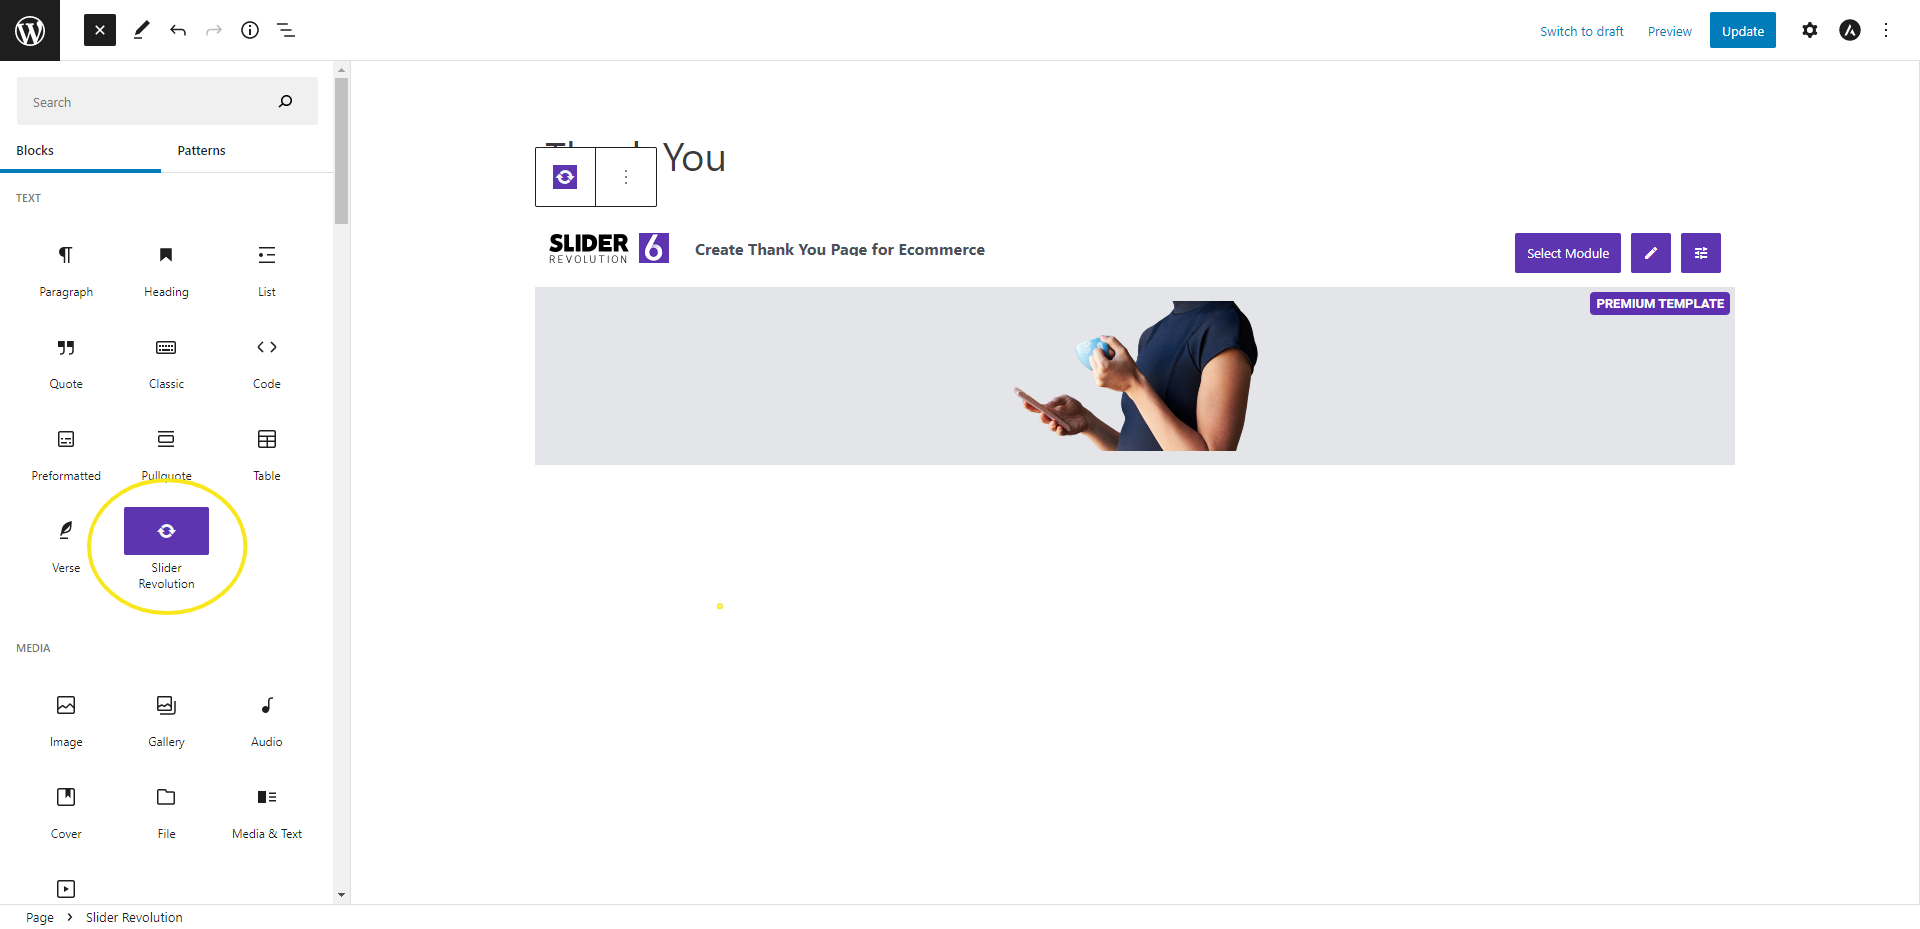
You should see the thumbnail image of your slide, not the full design you created here. To see the slide on the page, open up the Preview of the page.
Note: You may need to adjust other settings — like removing the page title or making the page fit full-width. However, the slide itself should look good when you preview it on the live page. If there are any issues, return to Slider Revolution to work them out.
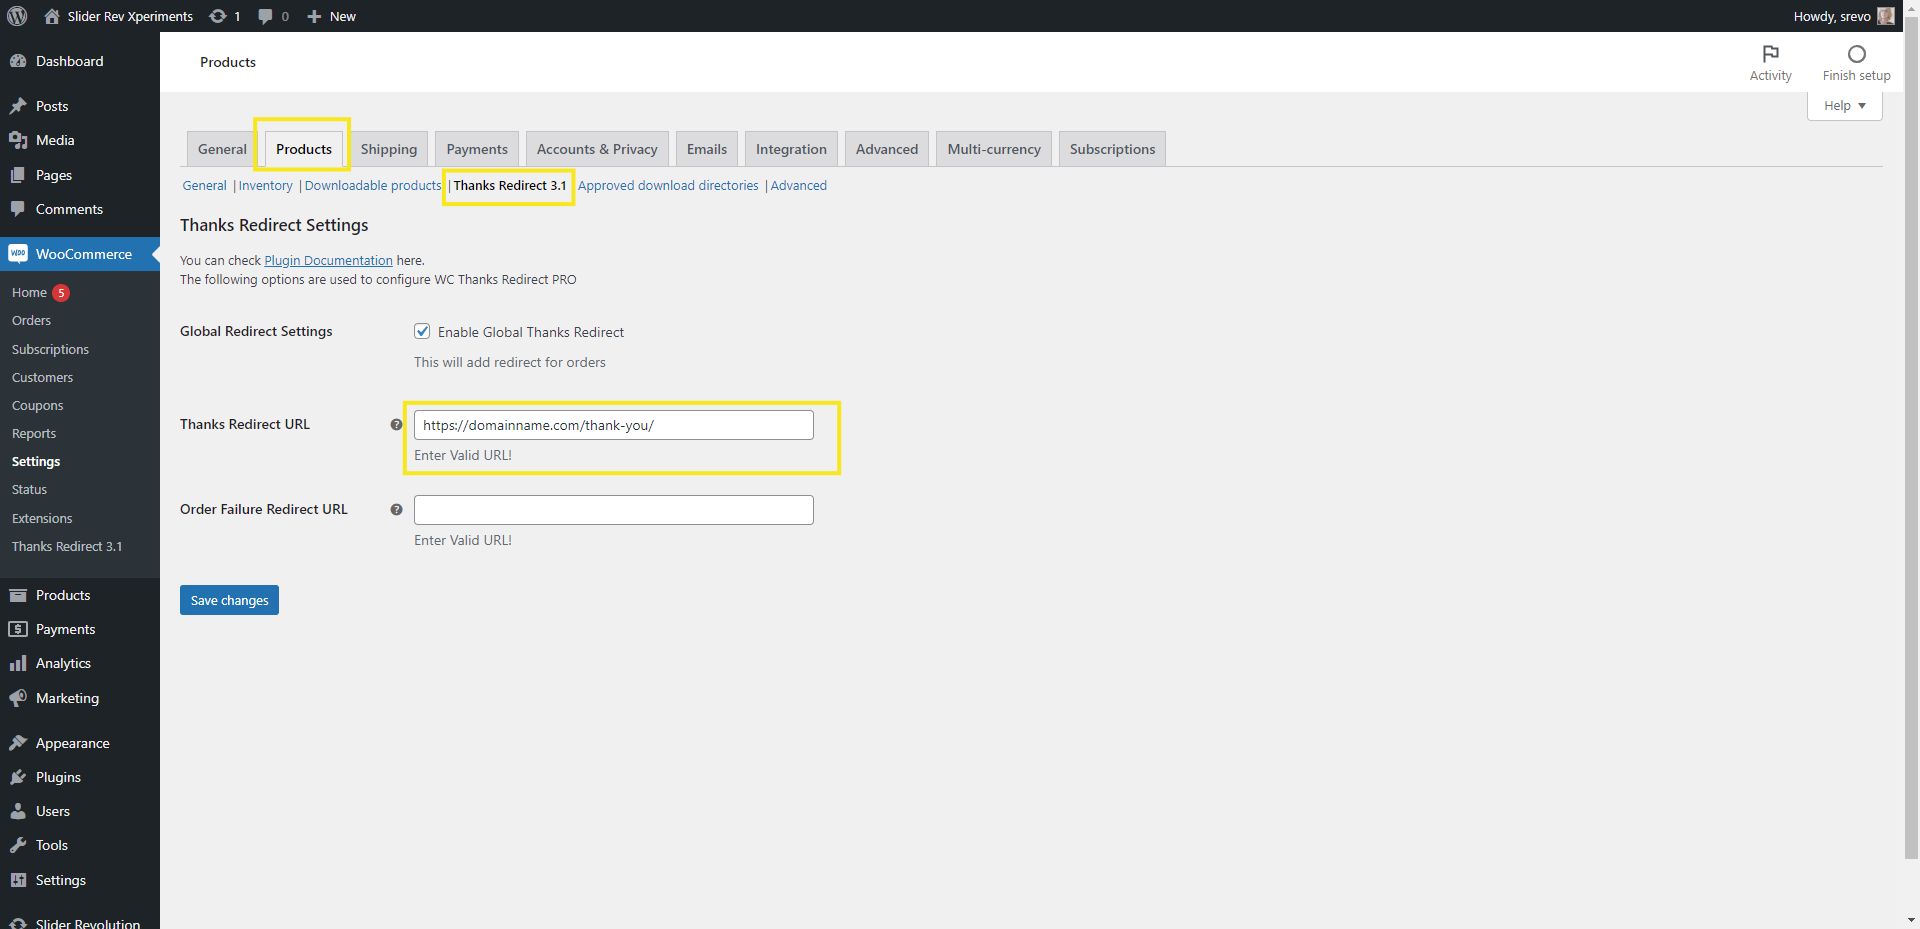
Now, if your thank you page is going to be connected to the WooCommerce checkout, you can’t do this with the regular WooCommerce plugin without a premium extension. The free Thanks Redirect for WooCommerce plugin has a workaround though.
With the plugin installed, go to WooCommerce Settings. Open up the Products tab and go to the newly added Thanks Redirect option. Enter your new Thank You page URL into the corresponding field and check the box above it:
Save your changes to activate the thank you redirect.
By the way, other transaction plugins typically make this process easier. Contact form plugins, for instance, ask you to input a redirect page when you set up your forms. WooCommerce can just be a little tricky sometimes.
Learn more:
Surprise your shoppers with a great looking thank you page
Just because a Slider Revolution template has been designed for a specific use case doesn’t mean you can’t repurpose it for your own needs. The 404 Page Collection is a great example of this.
Translating a single-page design for a 404 page into a thank you page isn’t a huge stretch. What’s more, the key components you need are all there. Just like with other templates, all you really need to do is spend your time on customizing the content and let Slider Revolution handle the hard stuff.


