
If you’re looking for an effective way to immediately capture the attention of website visitors, an animated hero image is a good way to go about it. Even better is an animated hero image that moves in time with your visitors’ scrolling motions.
Don’t worry. You don’t need to be a professional animator or illustrator to create advanced animations like these. All you need is a combination of Lottie and Slider Revolution to create this fun and engaging intro for your home page.
In this tutorial, we’ll show you the fastest and easiest way to do this as we take you through the process of customizing the Food Delivery Lottie Scroll template.
Table of Contents:
- Step 1: Prepare your Lottie files
- Step 2: Strip out the environment
- Step 3: Replace the bike Lottie
- Step 4: Edit Title 1 and Title 2
- Step 5: Update the attribution notice
- Step 6: Rebrand the scroll Lottie
- Step 7: Rebrand the circle layers
- Step 8: Replace the food Lottie
- Step 9: Edit Title 3 and Title 4
- Step 10: Customize the CTA button
How to create an engaging Lottie animation for your home page
Website animation can be a tricky balance. You want the animation to engage visitors, but you don’t want it to steal the show. A good way to do this is by making it meaningful and relevant.
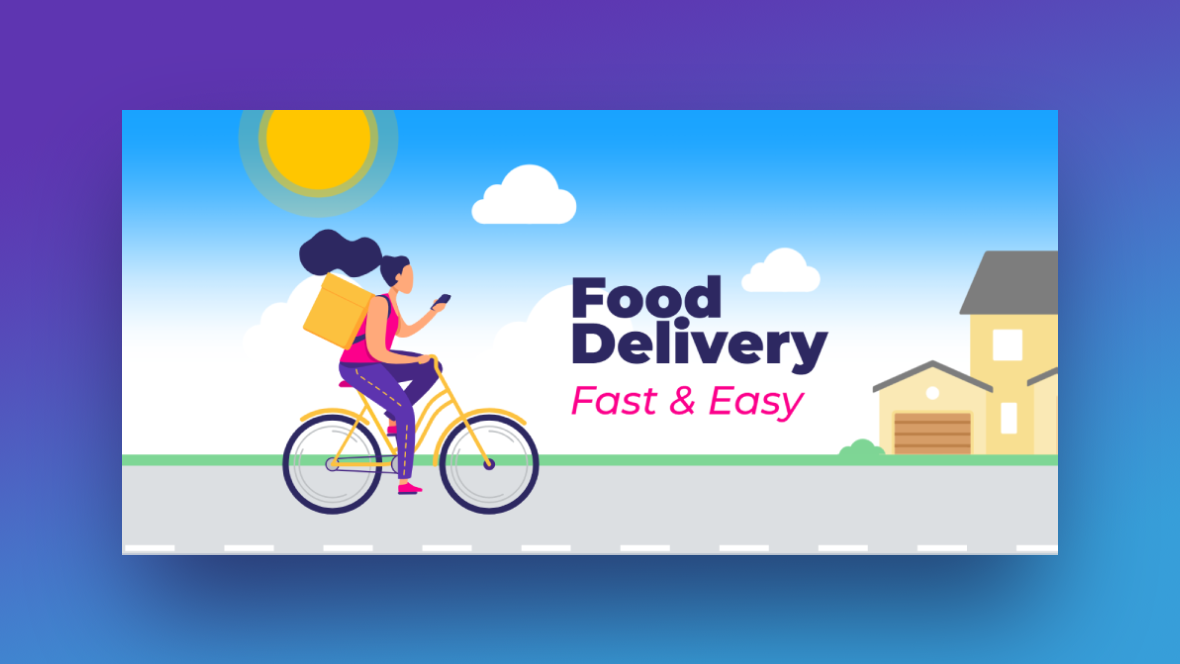
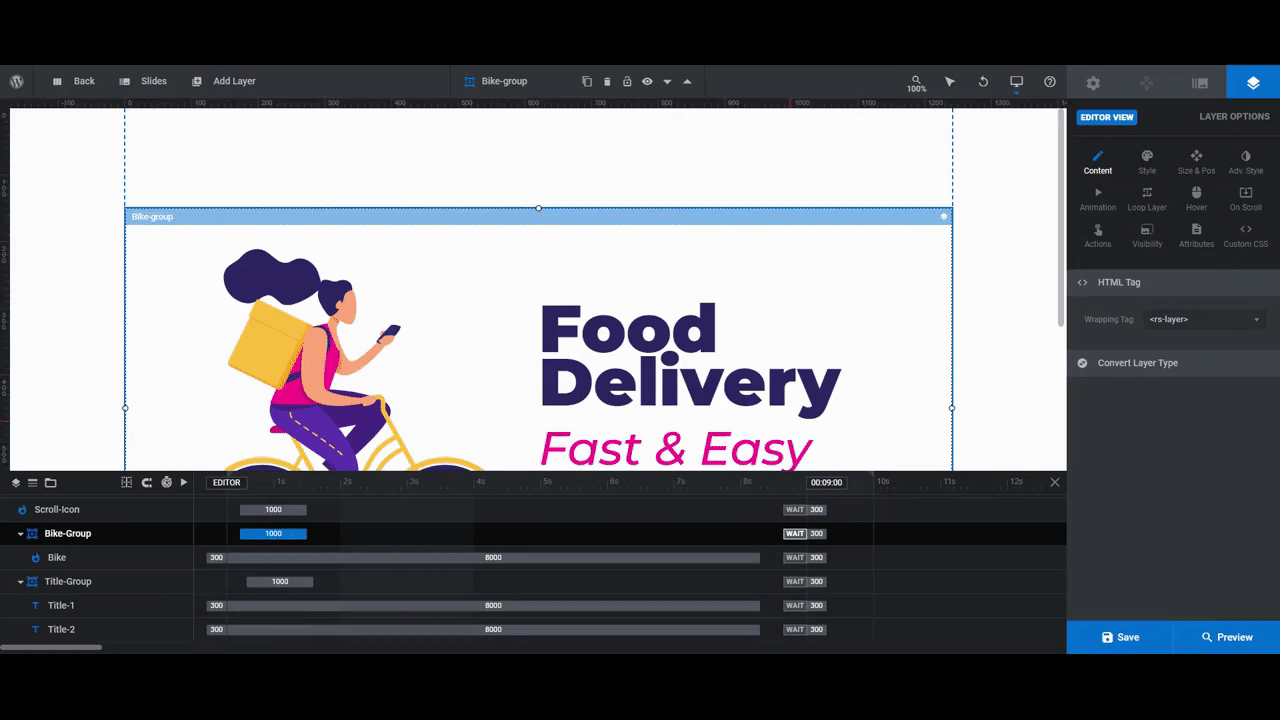
Take a look at the Food Delivery Lottie Scroll template:
There are nine Lottie animations inside this single template. It doesn’t feel overwhelming though. That’s because there’s a right time and place for each.
In the following tutorial, we’re going to show you how to repurpose this scroll-triggered animation for a landing page promoting a music app:
Before we start, make sure you’re familiar with the Slider Revolution basics:
Step 1: Find your Lottie files
Although there’s just one slide in this template, there are a lot of moving pieces to deal with. Depending on the time and budget you’re working with, as well as how far you want to go with customization, you may decide to keep your edits to a minimum.
It’s okay if you decide to do that. You can still create a unique-looking scroll animation even if you only use a couple of the Lotties and then rebrand the colors and typography. In fact, that’s what we’re doing in this example.
In addition to removing the neighborhood backdrop, we’re going to replace and/or customize only three of the nine Lottie animation layers (the ones in bold):
- Bike
- House
- Cloud-1
- Cloud-2
- Cloud-3
- Cloud-4
- Sun
- Scroll-Icon
- Food
Take a look at the original template and figure out how many of these Lottie layers you want to keep in order to achieve the effect you’re going for. Then, go to LottieFiles and start looking around for graphics to use.
Note: Lotties are customizable and you can make color changes inside of LottieFiles. However, Slider Revolution also includes color customization tools (among other things). So save those edits for now.
When you’ve found the Lottie files you’re going to use, download the file as a JSON:
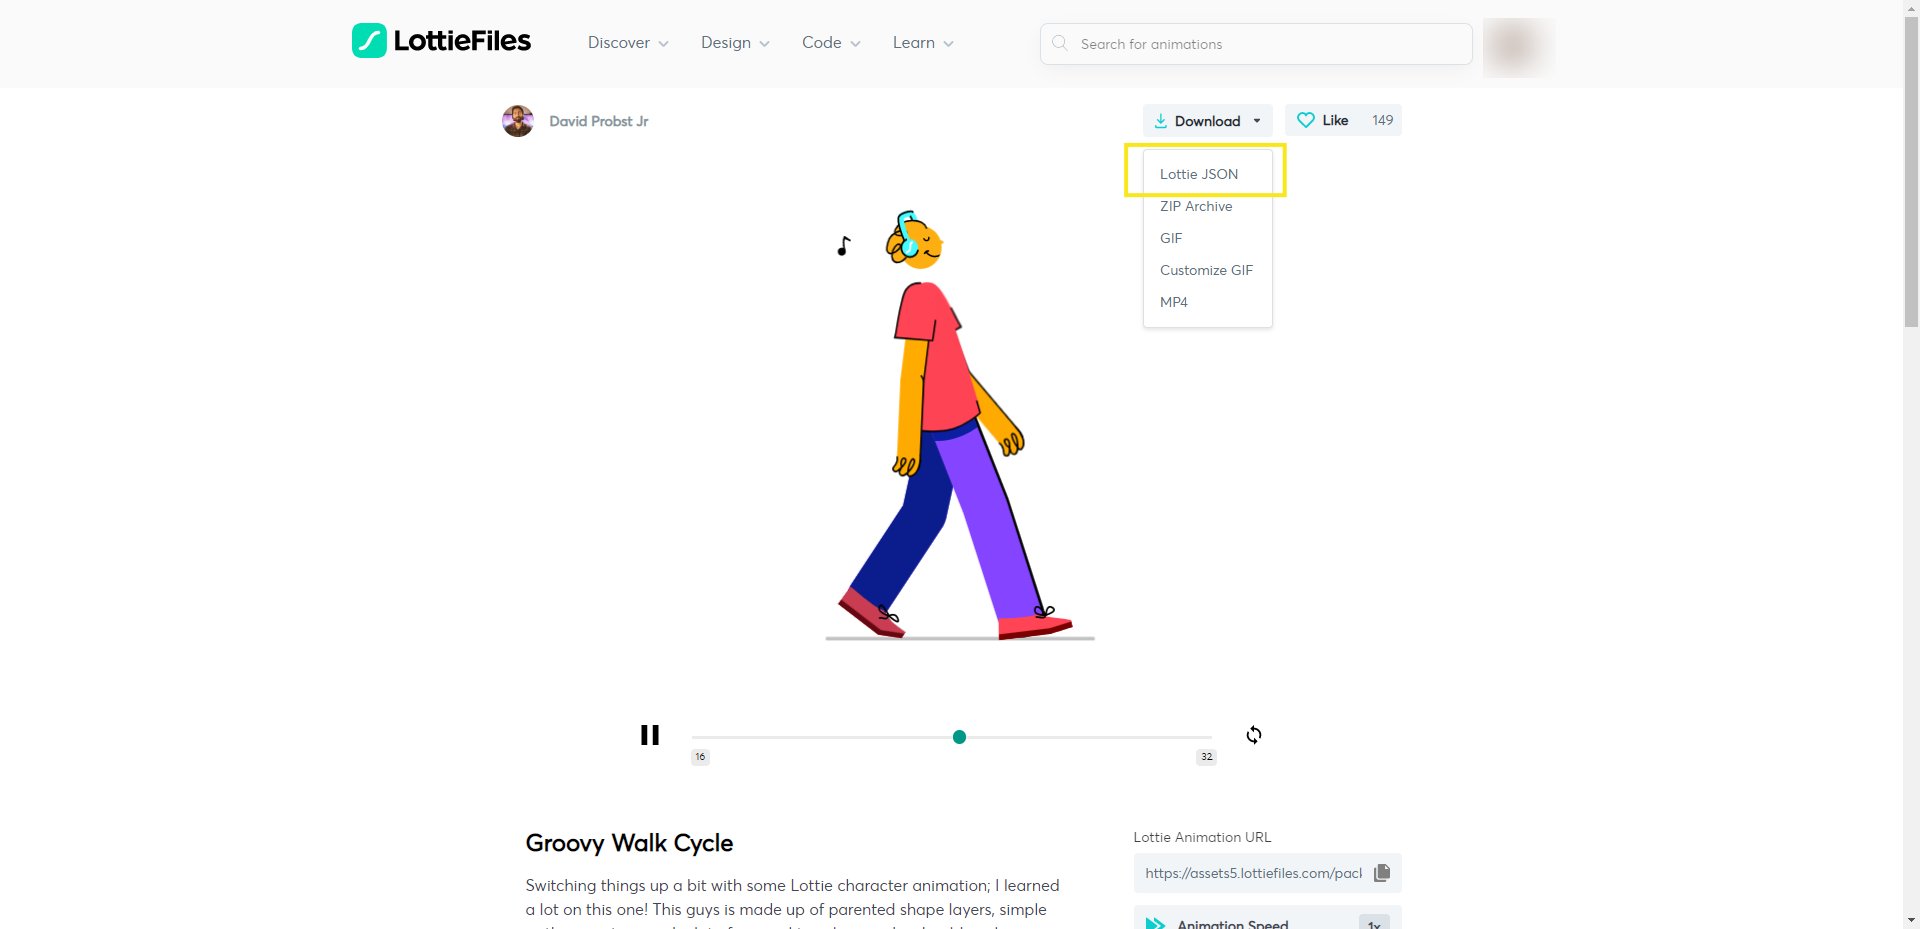
Then, save a copy of the link to the file. You’ll want to provide attribution for each of the Lottie authors your animations come from at a later stage.
Step 2: Strip out the environment
There are various ways you can repurpose the existing neighborhood background if you wanted to. You could make a car go driving through it. You could have someone walking or running down the road. Or you could put playing kids in the grass.
For the minimal effect we’re going for, we’re going to strip out all of the background elements.
The quickest way to do this is to hold down the Ctrl or CMD key and then select each of them in the timeline editor. When you hit delete or Backspace, it will instantly remove the backdrop.
These are the layers to delete if you’re following along with us:
- House-Group
- Cloud-Group
- Sun
- Street-Lines-Group
- Grass
- Street
- Sky

If you want to add a different background component, you can do so under “Module Options”, “Layout”, and “Module Background”. You can add a static image here or change the background from white to another color or gradient.
We want the scrolling effect to have a big impact, so we’re going to keep it simple and leave it white.
Learn more:
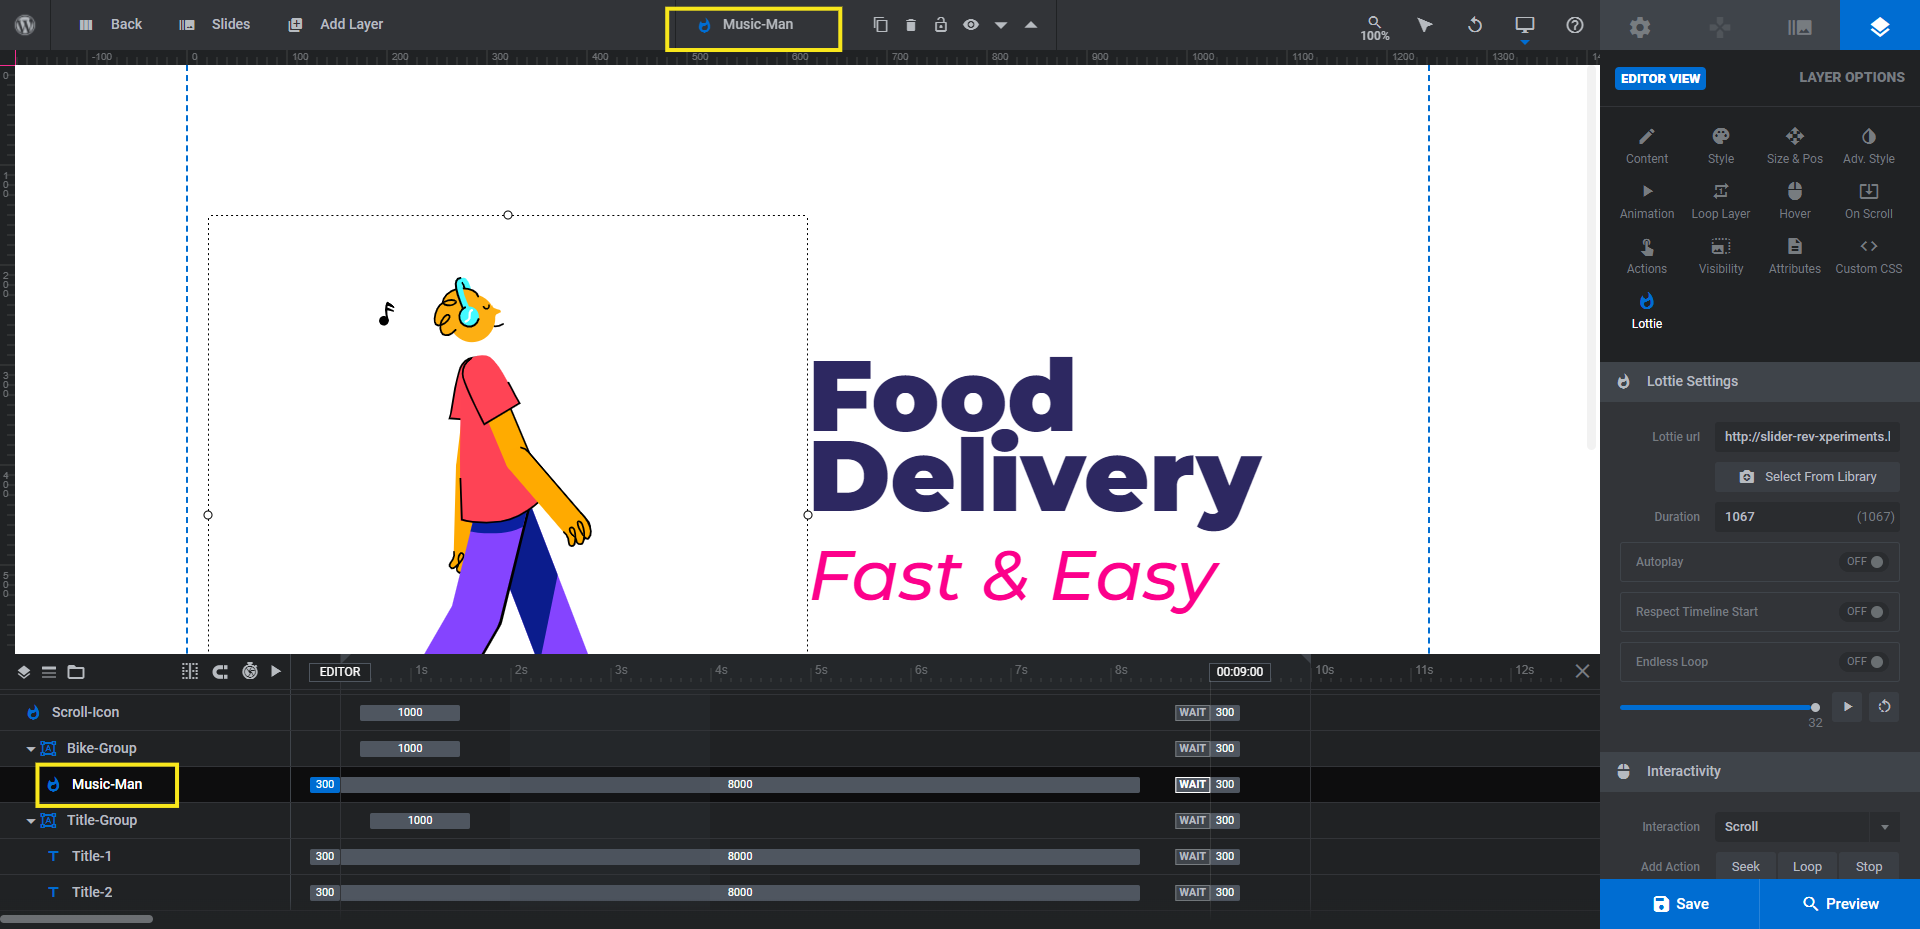
Step 3: Replace the bike Lottie
The bike Lottie plays an important role in this scrolling animation. While it appears to be a static element at first glance, it ends up moving in pace with the visitors’ scrolls “down” the page. This element is what will capture and hold their attention until the next Lottie appears.
For our scrolling animation, we’re going to replace the Bike layer with one of a groovy walk cycle, designed by David Probst Jr..
There’s no need to delete the existing Lottie in order to add your own. Select the Bike layer from the timeline editor. Then, open up “Layer Options” and “Lottie” settings.
Click on the “Select from Library” button. This will open up the Lottie library. While the Lottiefiles.com integration isn’t yet active, you can upload your JSON file to My Lottie Library and it works just the same.
Click the Import Lottie Files button in the bottom-left and upload your file:
By replacing the Lottie with your own, you won’t have to reconfigure all the animation settings from the original file.
Note: If you want to alter the animation settings — like making the Lottie play in an endless loop instead of just once — you’ll find them under “Lottie Settings”.
Before we customize our new bee-bopping Lottie, let’s first rename the layer in the timeline editor. This will help us keep things organized while also making it clearer what we’re editing.
To rename the Bike layer and the Bike-Group that contains it, click on each in the timeline editor. Then, change the name in the top toolbar:
The last thing to do is customize the look of our Lottie. Go back to “Lottie” settings and scroll to the bottom. You’ll find that Style Editing Active is already toggled on.
This setting pulls in all the colors from the Lottie file. To edit the basic colors, click on any of the color swatches under Grouped Colors to open the Color Selection Dialogue:
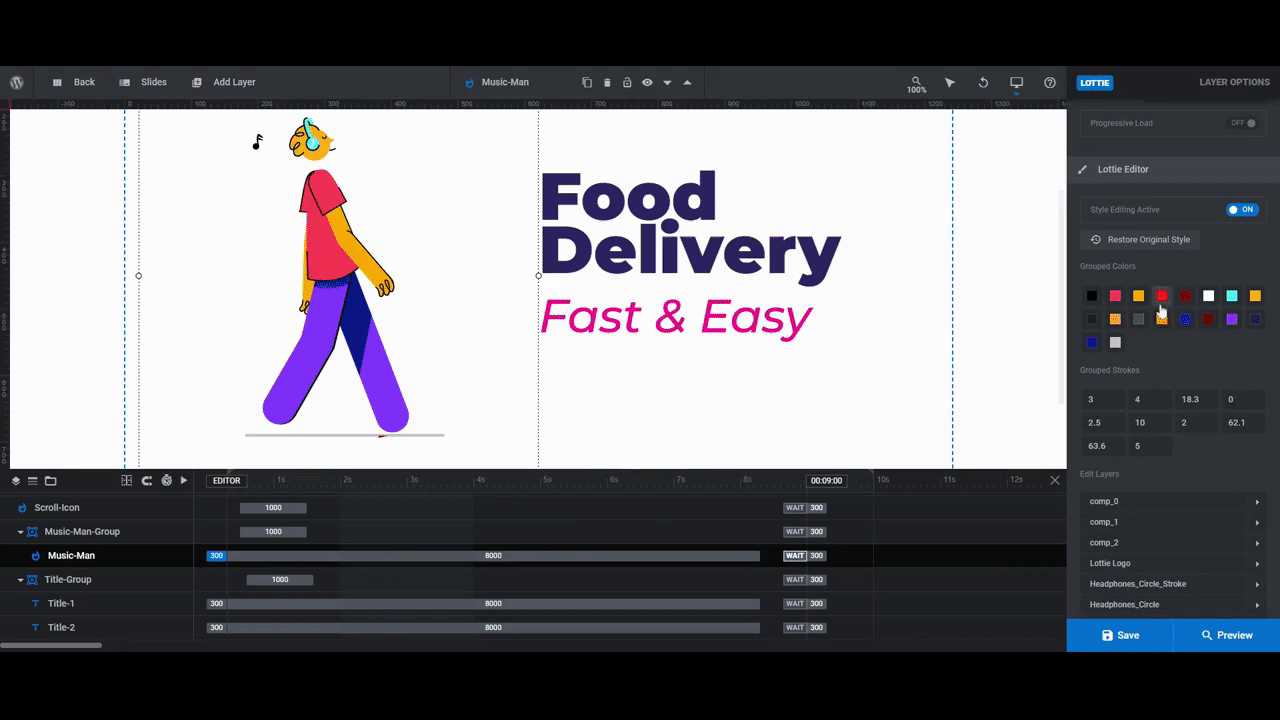
If you want to get into the nitty gritty details of each piece of the Lottie, use Edit Layers instead.
On the other hand, if you change your mind and want to go back to the original colors, click the Restore Original Style button at the top of the Lottie Editor.
Learn more:
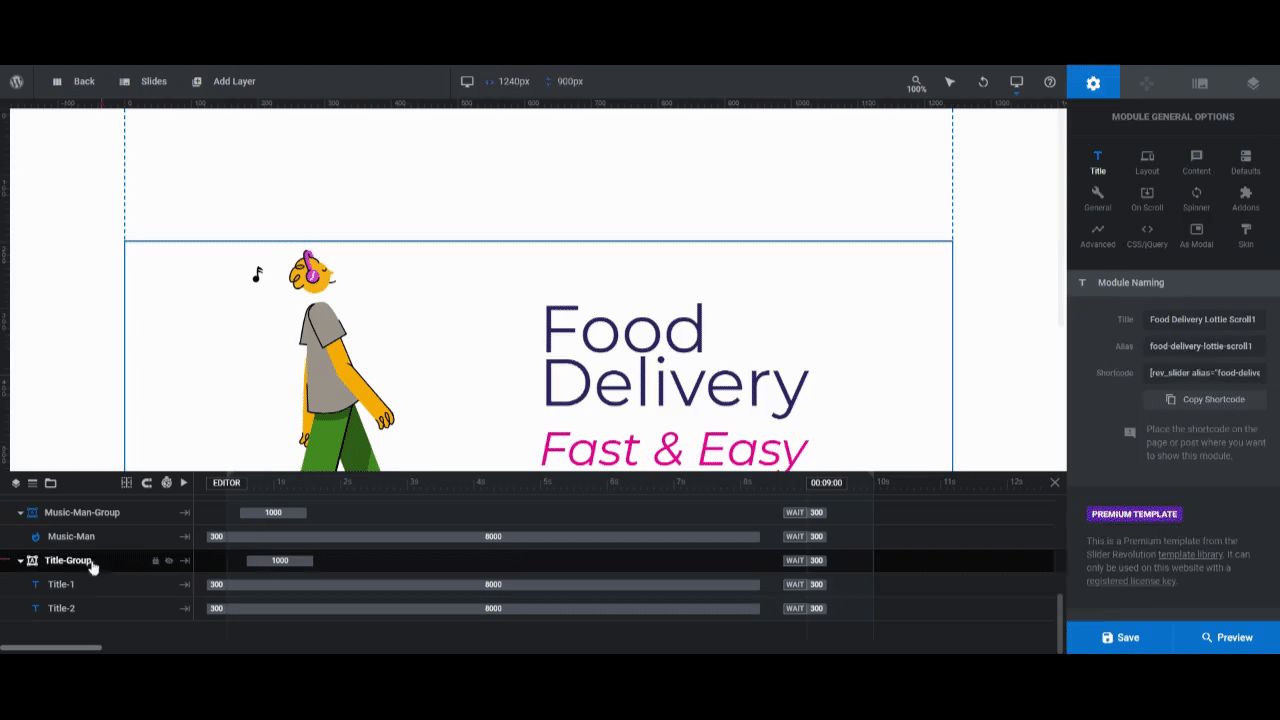
Step 4: Edit Title 1 and Title 2
There are two groups of titles in this template. The Title-Group containing Title-1 and Title-2 appears alongside our music man Lottie and is the one we’re going to customize first.
Locate the layers in the timeline editor. Select Title-1 to start.
To edit what it says, go to “Layer Options” and “Content”. Enter the new text in the field. To change the font, color, size and weight, and general style, go to “Style” and configure the settings.
Do the same thing for Title-2.
When you’re done, preview your changes across all devices. You can do this by clicking the blue “Preview” button in the bottom-right corner. Then, switch between the responsive views at the top of the preview screen. You want to ensure that any color or size adjustments you make will look good to all users.
Learn more:
Step 5: Update the attribution notice
The Attribution-Notice layer is the small bit of text in the bottom-right corner of the screen. This is where we give credit to the Lottie designers who created our animations.
The easiest way to edit this text layer is to leave the code in the text editor intact:
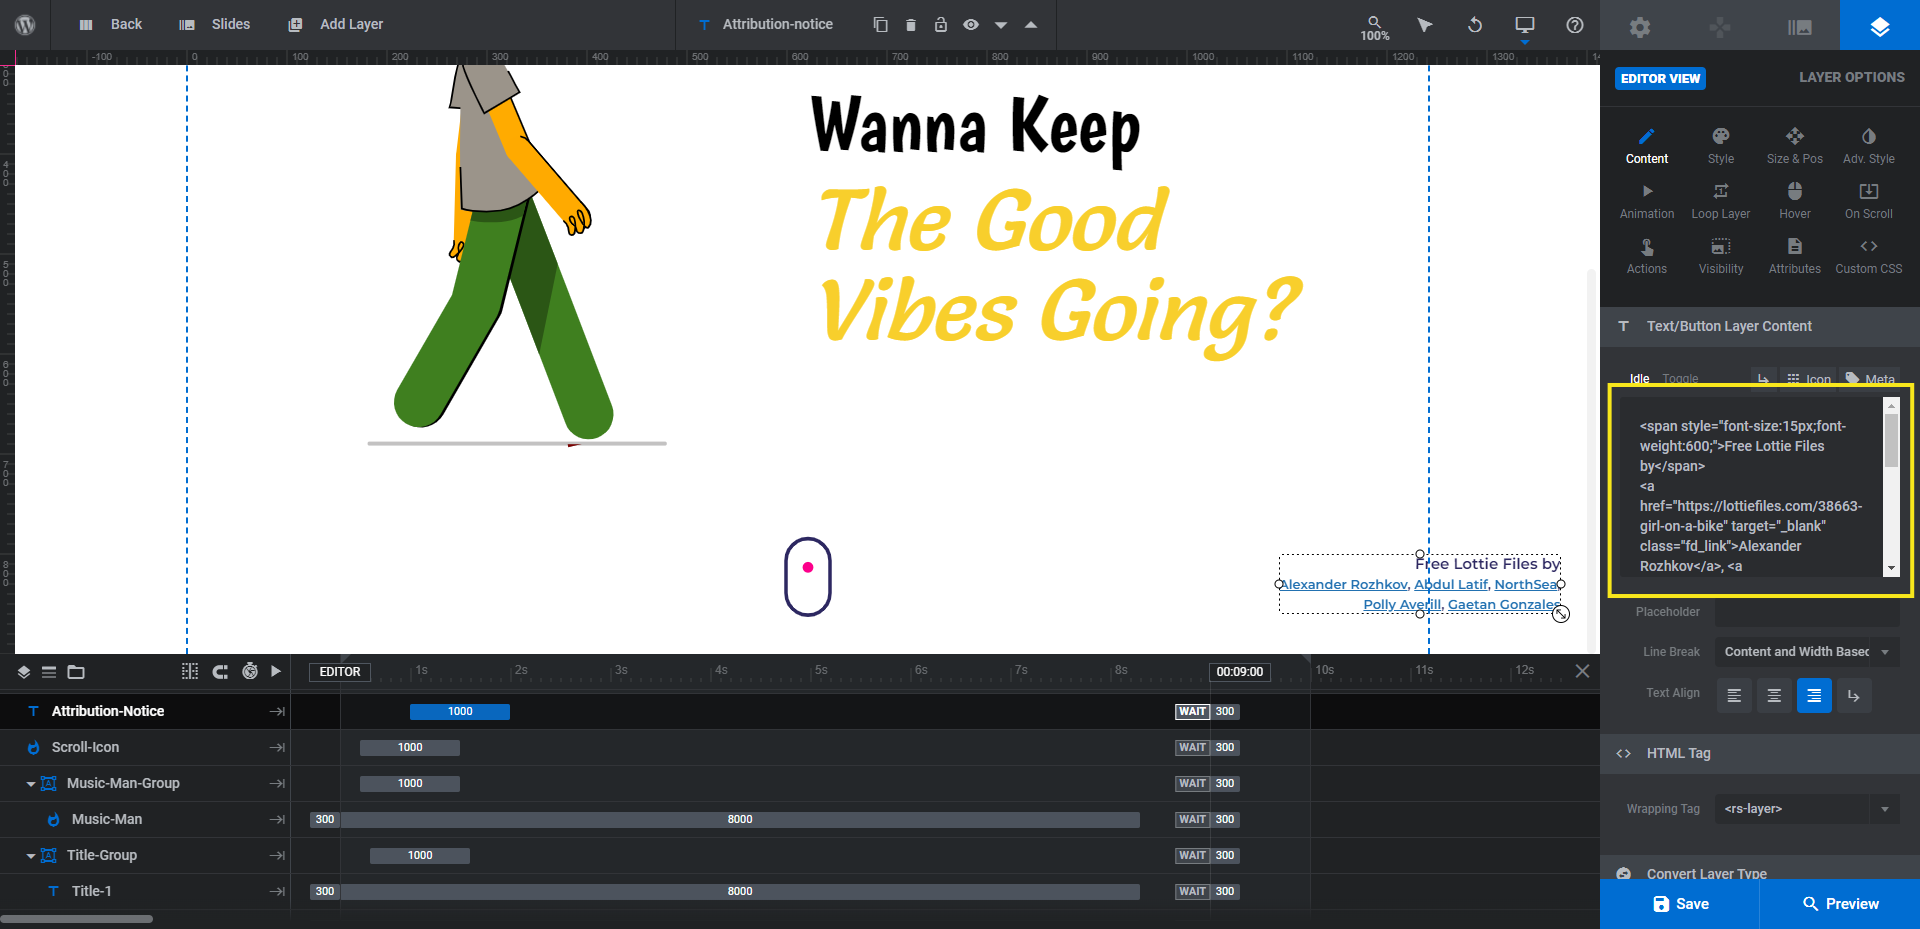
By replacing only the URLs and Lottie designer names in the existing HTML, you won’t have to write any custom code. For reference, here’s what our attribution notice ended up being:
<span style=”font-size:15px;font-weight:600;”>Free Lottie Files by</span>
<a href=”https://lottiefiles.com/10181-groovy-walk-cycle” target=”_blank” class=”fd_link”>David Probst Jr.</a> and <a href=”https://lottiefiles.com/11063-play-music” target=”_blank” class=”fd_link”>Psycho Khan</a>
We shortened the attribution line since we only have two Lotties and two authors. We didn’t have to edit anything else though.
When you’re done updating the text, update the font and color under “Style” so it matches the rest of the branded typography in the slide.
Learn more:
Step 6: Rebrand the scroll Lottie
The last component to edit in the initial animation screen is the Scroll-Icon Lottie. We’re going to keep the existing Lottie design, but we’re going to update the colors so they match the rest of our branded content.
To do this, select the Scroll-Icon layer in the timeline editor and go to “Layer Options” and “Lottie”. There are two colors to edit:
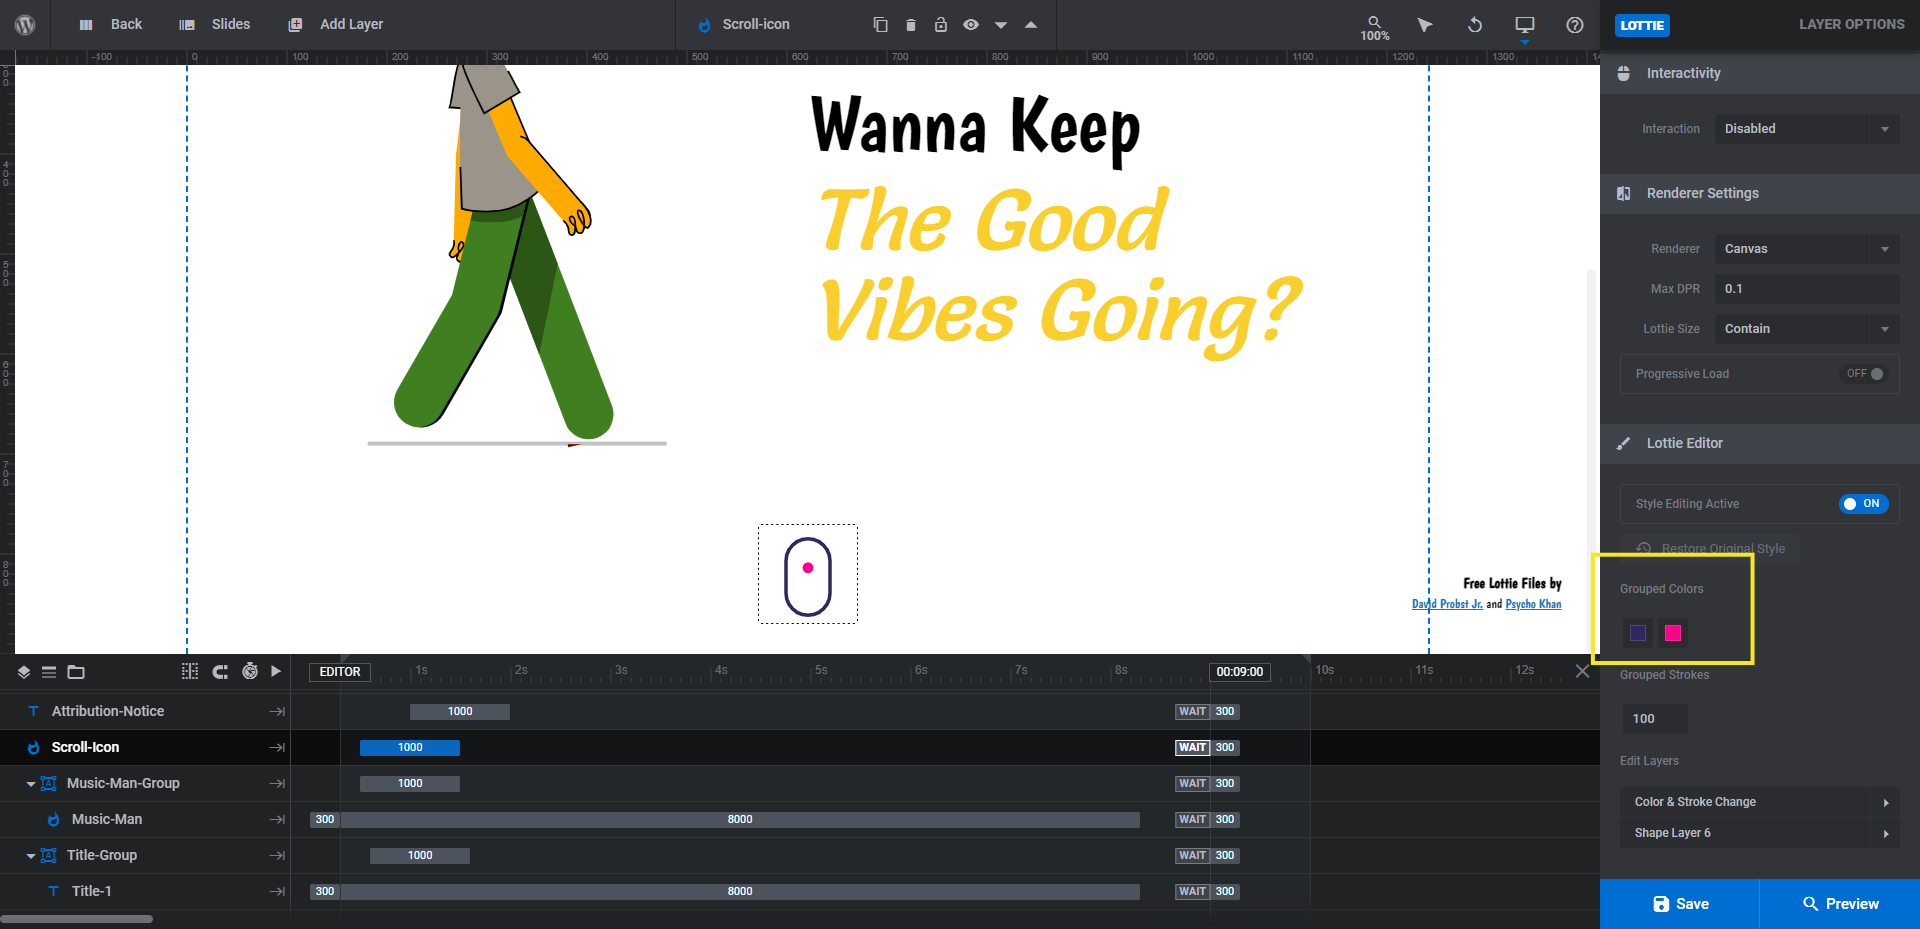
Just as you did before, click on each color swatch to open the color selection dialogue. You can set your new colors there.
Step 7: Rebrand the circle layers
To make it easier on ourselves while we edit the next segment of the scrolling animation, we’re going to hide all of the layers we just customized. This won’t hide them on the frontend of the site, only in the editor so we can focus better.
As of right now, there are a number of layers and groups hidden. Keep them as they are. Then, go ahead and hide the following:
- Attribution-Notice
- Scroll-Icon
- Music-Man-Group (or whatever you renamed the Bike-Group to)
- Title-Group
You’ll do this by clicking on the eyeball icon that appears when you hover over them in the timeline editor:
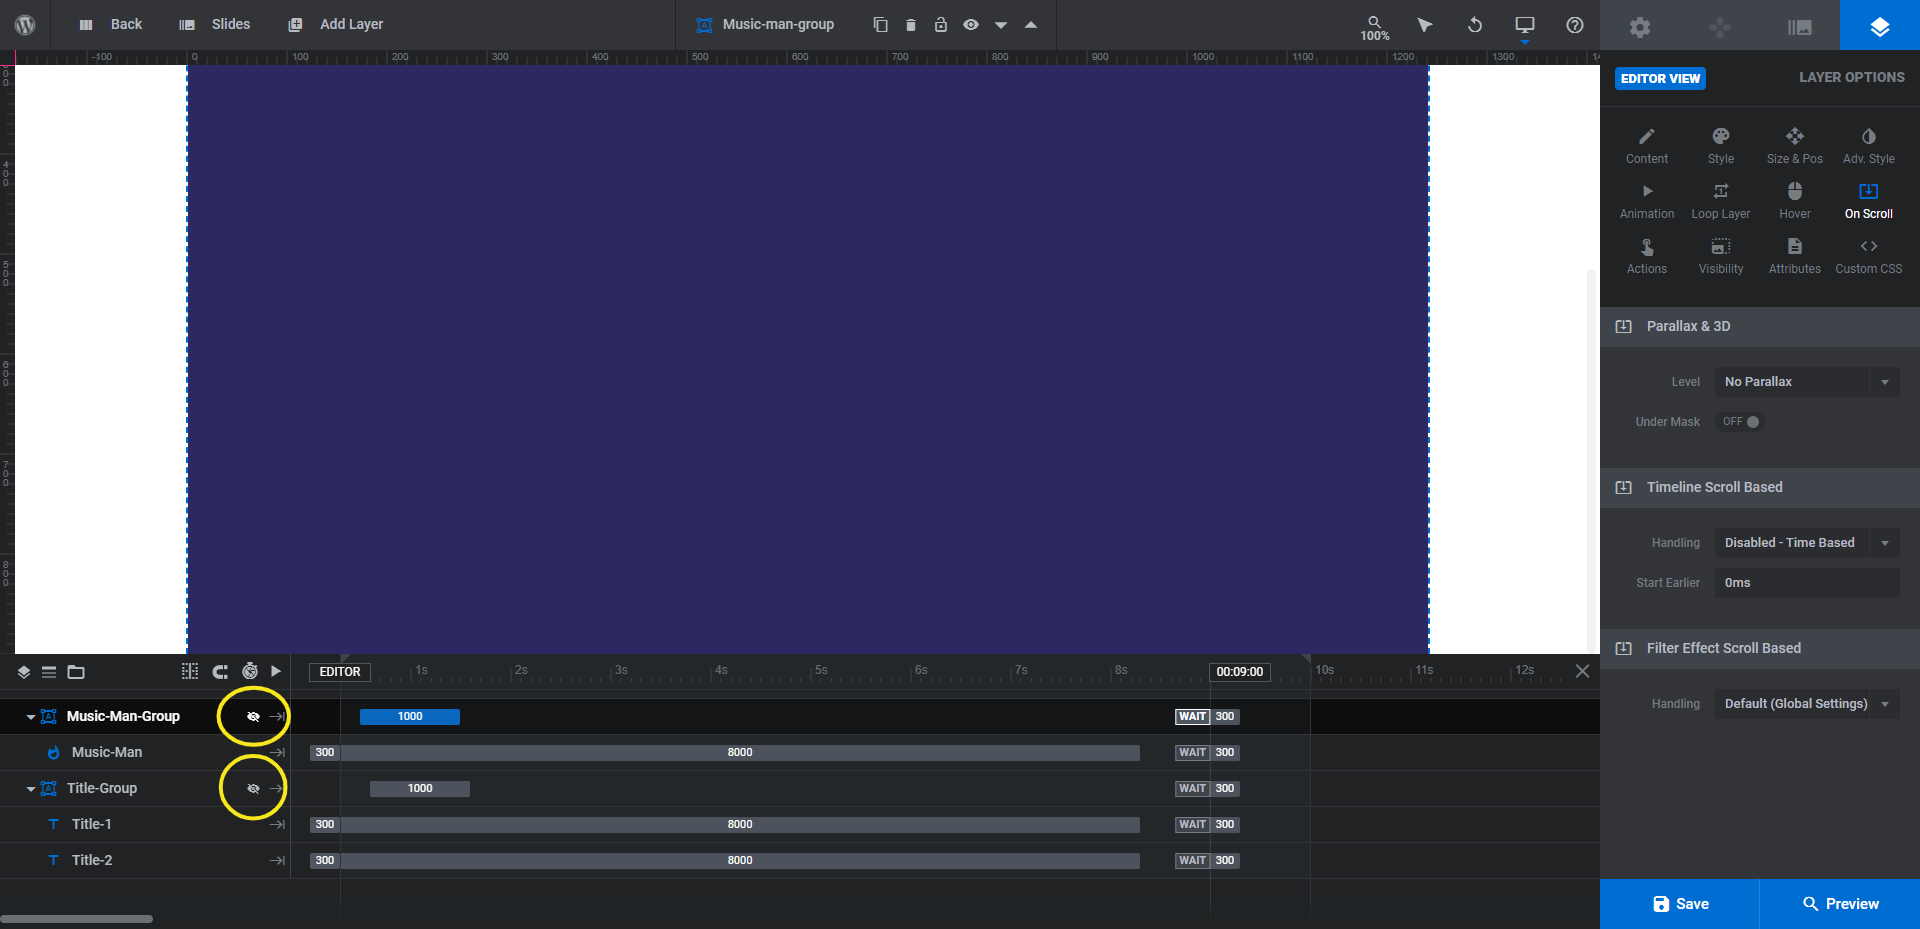
This should leave only the Circle layer in view in the canvas above.
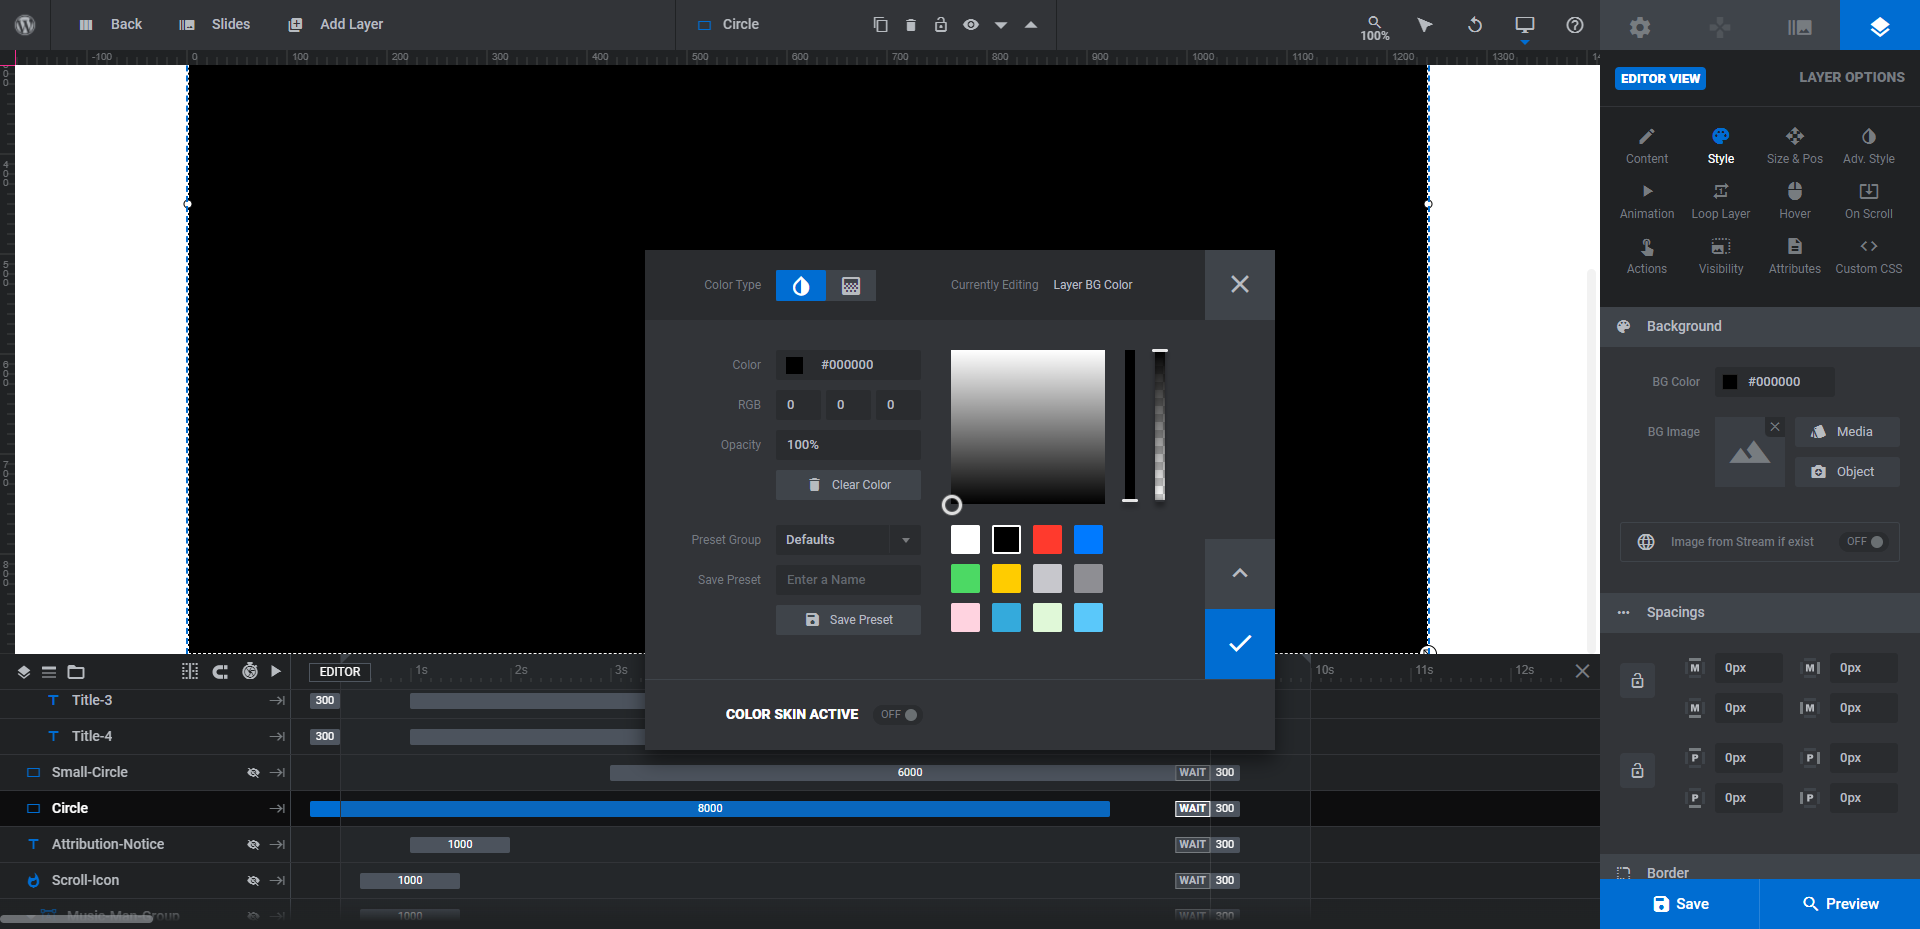
This circular shape is the one that enters the screen from the left and fills the space as the Lottie character exits out the right side. All we need to do is change its color under “Style” settings and “Background”:
Next, we’re going to bring into view the following layers:
- Cta-Button
- Food-Group
- Title-Group-2
- Small-Circle
This will allow us to see everything remaining we need to work on in the canvas.
Before we wrap this step, let’s finish customizing the circular shape layers. Click on the Small-Circle layer and go to “Style” settings and “Background” to change the color (just as you did with the big circle).
Keep in mind that this small circle is going to sit behind your new Lottie, so you want to use a color that won’t appear in the Lottie. In addition, it should contrast nicely against the Circle layer background you just set.
Learn more:
Step 8: Replace the food Lottie
We’re going to repeat the process from Step 3 to replace and customize the Food Lottie file.
First, select the Lottie in the timeline editor and open up “Lottie” settings. Click Select from Library to upload your new file. We’re using a play music Lottie designed by Psycho Khan for ours.
Next, rename both the Food layer and Food-Group to make editing this slide easier in the future.
Finally, customize the colors of the new Lottie under “Lottie” settings (if needed):

Note: This particular Lottie is set to endlessly play. If you’d like to set it up to move only when triggered by the user (like when they scroll), enable the “Interactivity” setting and choose your trigger from there.
When you’re done, preview the changes on the frontend to make sure there’s no clashing of colors between the Lottie and the background.
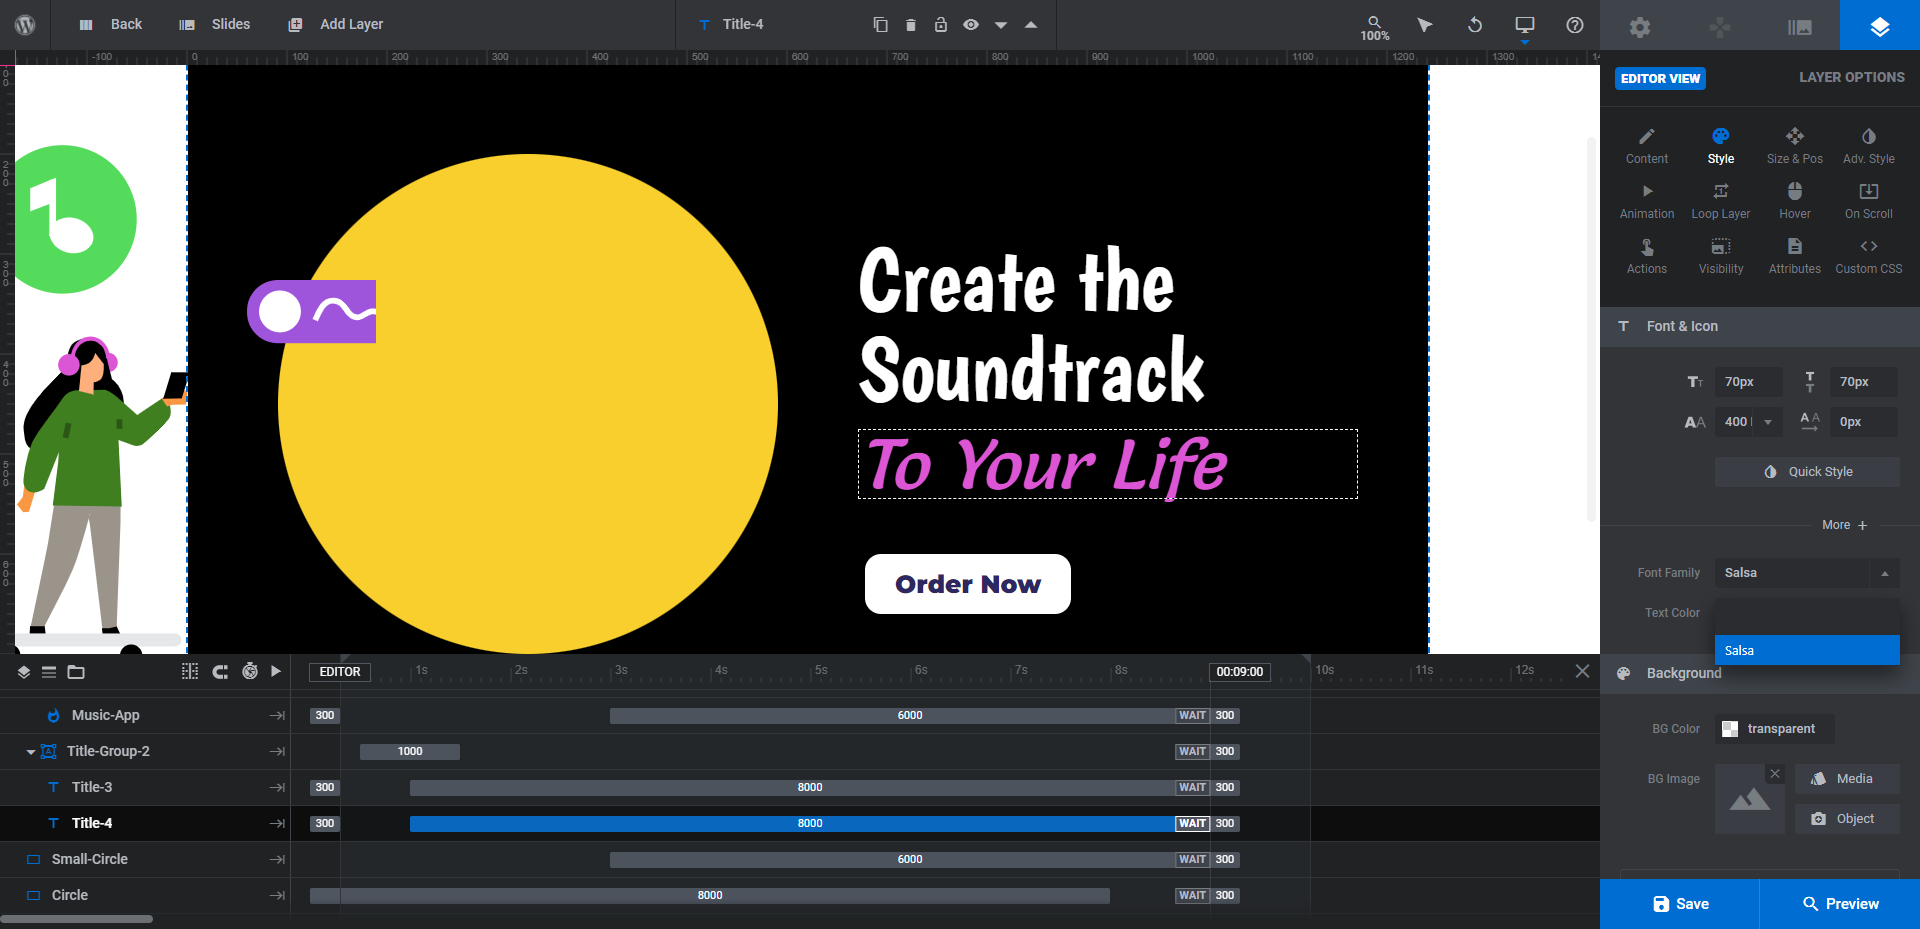
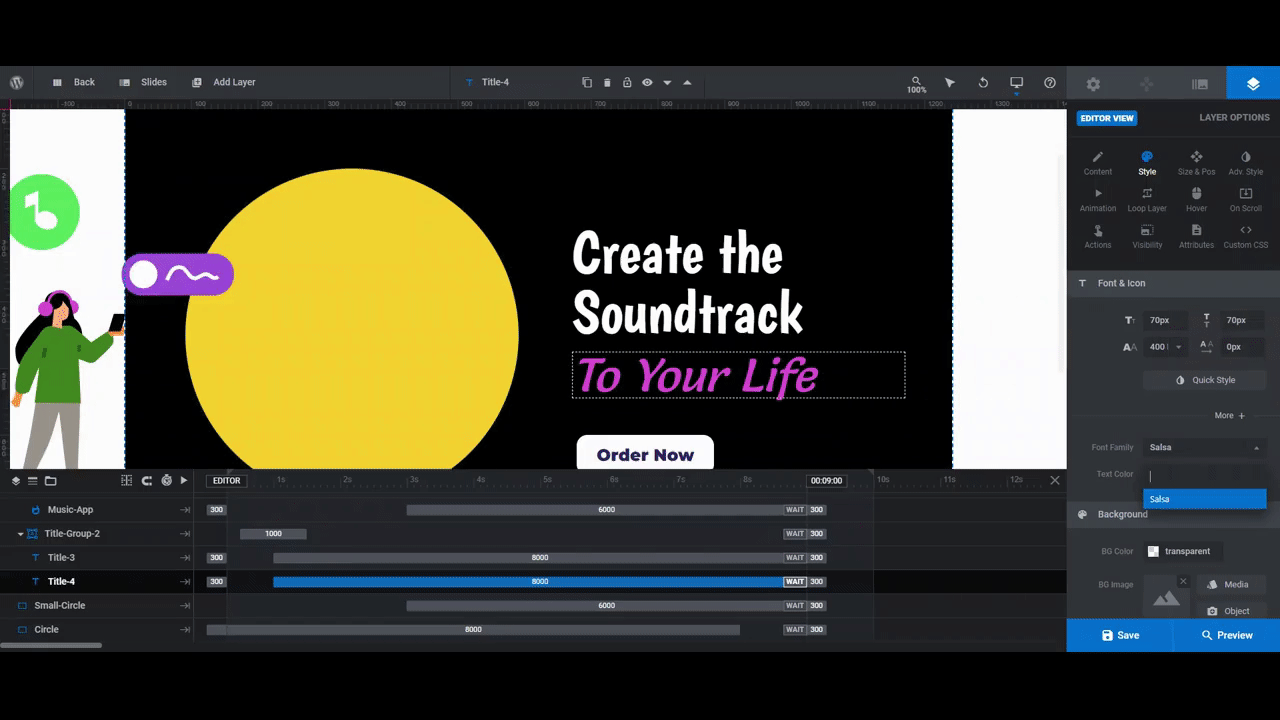
Step 9: Edit Title 3 and Title 4
Repeat the same thing you did in Step 4 to edit Title-Group-2’s Title-3 and Title-4 layers. Change the text under “Content” and then update the typography and styles under “Style”.
If you want to make additional changes to your typography, do it before moving onto the final step.
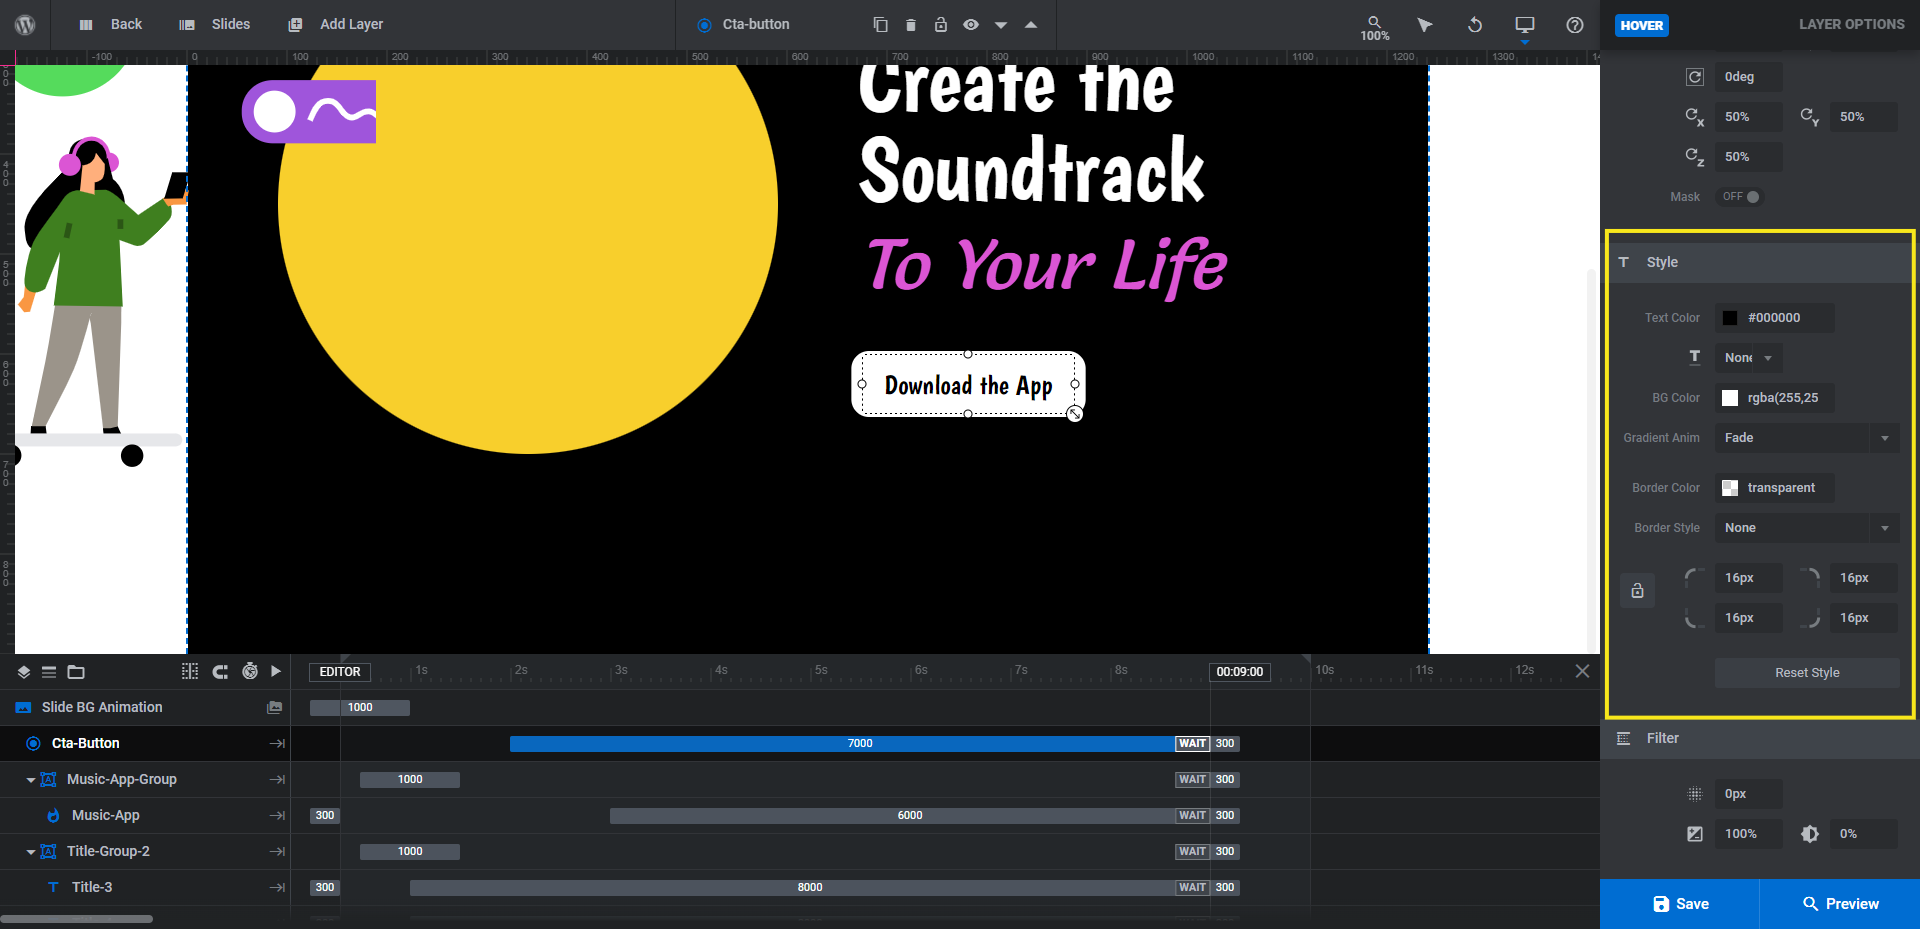
Step 10: Customize the CTA button
The only thing left to edit is the call-to-action button that appears under the title layers in the end screen. Click on the Cta-Button layer in the timeline and then edit it the way you did the text layers:
Additionally, you can edit the button’s background color under “Style” and “Background”. You can also modify its appearance in its hover state under “Hover” and “Style”:
When you’re done modifying the button, do one more preview of your work to make sure you’re satisfied with everything. If you are, save your changes and then publish this new Lottie animation slider to your home page.
Learn more:
Get more engagement with a show-stealing animated slider
There are tons of ways to make this Lottie animation template your own. And it won’t take much time to do it either.
What’s nice about the Food Delivery Lottie Scroll template (and other Slider Revolution templates) is that you can customize as much or as little of the design as you want. For example, you can see how we’re still able to create an engaging scroll animation even after we strip down the background to white and black.


