

Many ecommerce home pages are designed the same way, giving shoppers a barrage of products and categories to sift through. When your home page is an overwhelming mess, it becomes useless to shoppers and forces them to do all the work from the navigation.
Exploration through your store’s categories and sub-categories from the navigation is still important. However, your home page should be a useful shopping tool that kicks off visitors’ experiences the right way.
Slider Revolution offers a creative solution to this problem. With the WooCommerce Liquid Slider template, you’ll have a well-organized area to highlight your newest, most popular, and discounted products. Not only that, the template comes with an eye-catching liquid effect that’s bound to capture the attention of any shopper who passes by it.
Table of Contents:
- Step 1: Set up WooCommerce
- Step 2: Figure out which products you want to showcase
- Step 3: Connect your WooCommerce stream to the slider
- Step 4: Preview your slider and make changes to your products as needed
- Step 5: Edit your slides’ text layers
- Step 6: Edit product image settings
- Step 7: Customize the BubbleMorphs
- Step 8: Update the navigation
Learn how to add an eye-catching liquid effect to your product image slider
The original WooCommerce Liquid Slider template is designed to highlight trendy clothes from an online retailer:

In this tutorial, we’re going to show you how to adapt this slider and liquid effect to highlight other products. We’ve created this particular slider for a sporting goods store:
To begin, make sure you’ve reviewed the following tutorials:
Then, install the “Woo Liquid Slider Template” in Slider Revolution.
Note: If you want to manually update the slider with hand-picked products, images, and info, choose the “Static” option. If you want the slider to directly import the details from your WooCommerce products, use the non-static version.
Here’s what the two options look like side-by-side. Static is on the left (with the purple image) and non-static is on the right (with the pennant image):
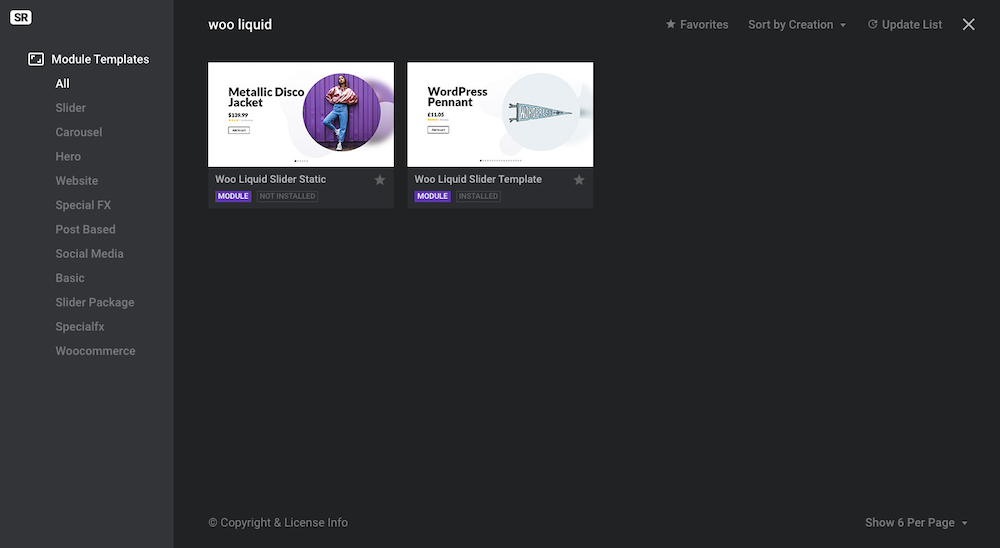
The layouts are the same, it’s simply a matter of where you source the content from. In the following tutorial, we’ll use the non-static version.
Step 1: Set up WooCommerce
Before you can do anything with this template, you’ll need to set up your WooCommerce store if you haven’t already.
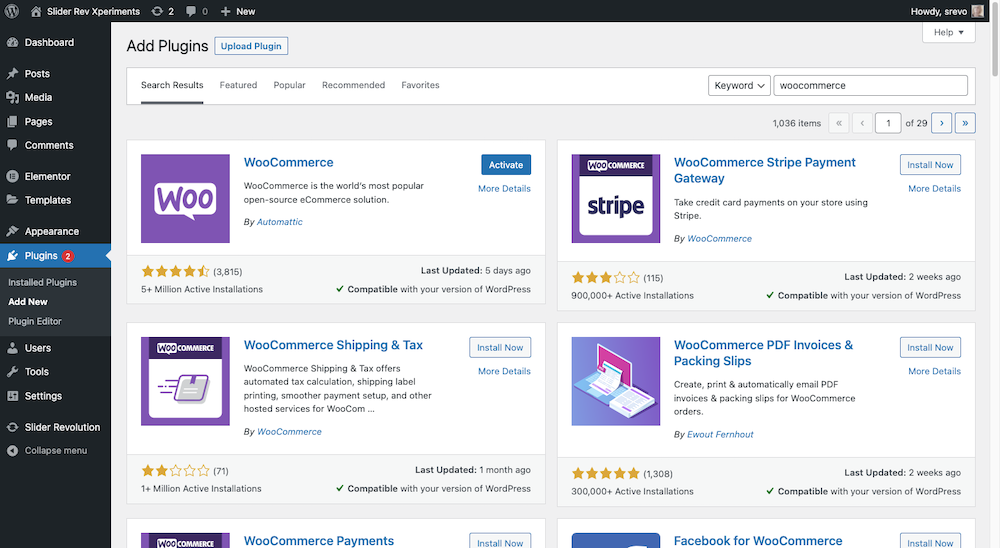
To do this, install and activate the WooCommerce plugin:
Second, complete the WooCommerce setup walkthrough. It’s a simple multi-step questionnaire that will allow WooCommerce to do some of the configuration for you.
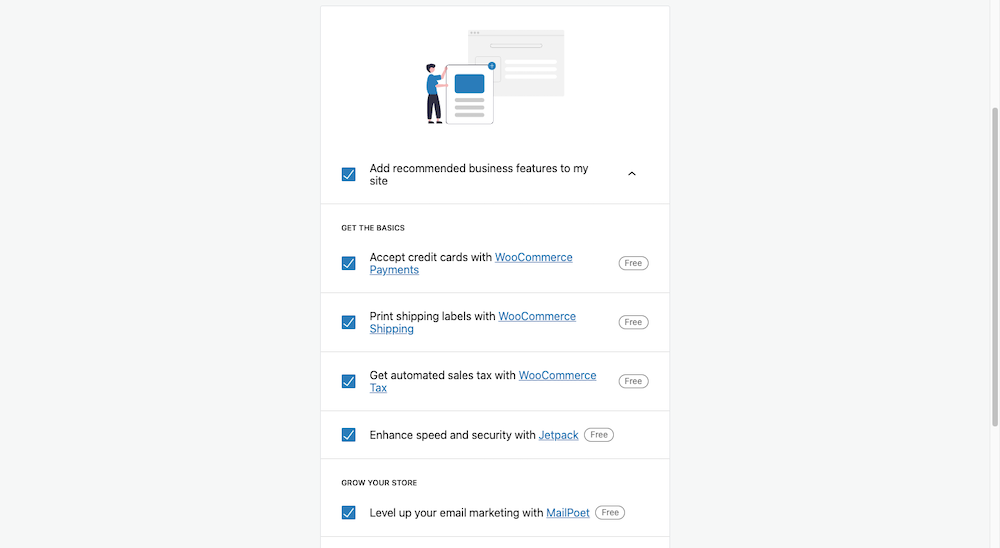
It can also add plugins that you might need based on the type of store you indicate. Review the recommended plugins, uncheck any you don’t want, and then let WooCommerce take care of activating them:
Next, WooCommerce will show you a “Get ready to start selling” checklist after you complete setup. Follow it step by step.
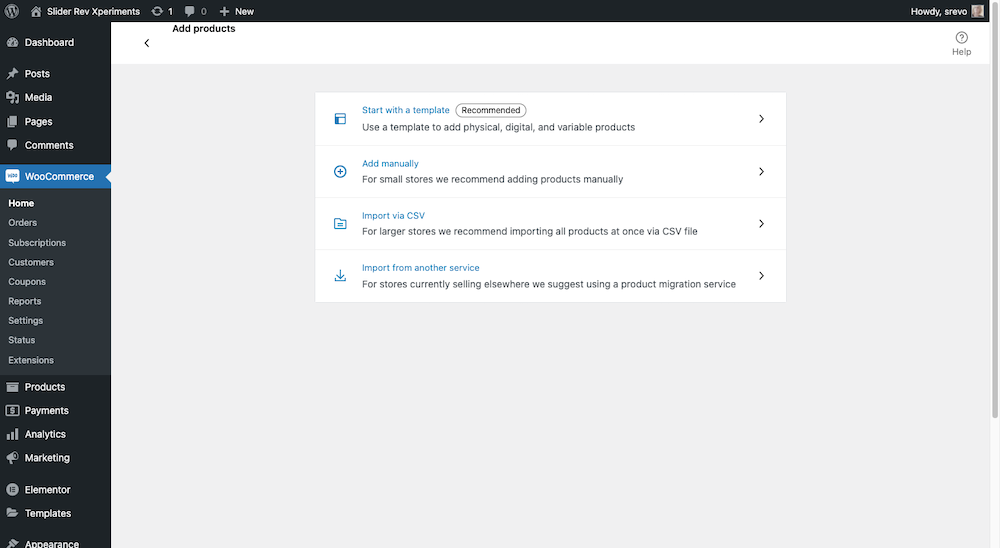
Start by loading your products into the store. This is a critical step as you need to have products in order to create your slider:
Pro tip: Don’t forget to categorize your products, even if you’re running a smaller shop. When we customize the slider template, you’ll see how product categories come into play.
Step 2: Figure out which products you want to showcase
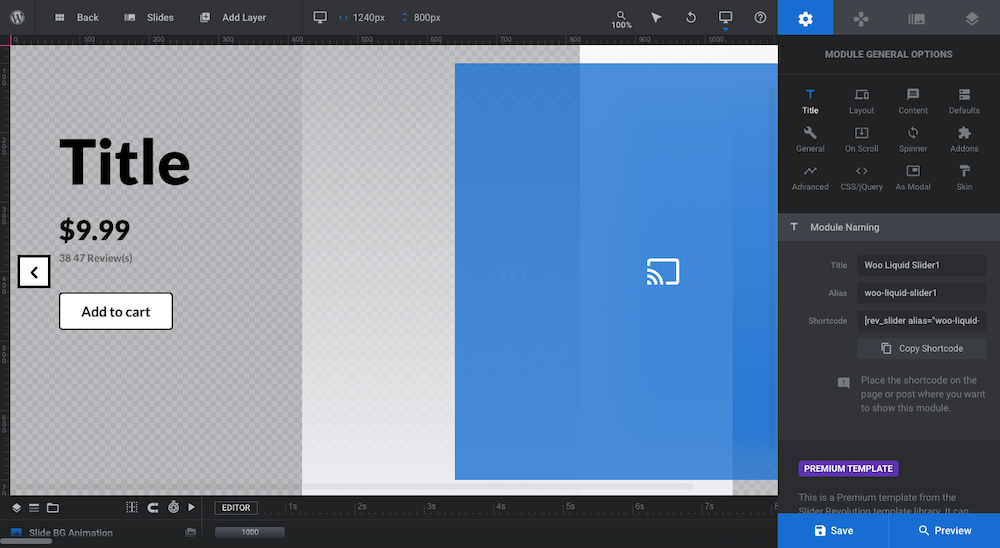
The slider template is configured to pull in products from your WooCommerce store. That’s why you don’t see any actual content when you open it up in Slider Revolution:
As I mentioned before, you can use this slider in one of two ways:
One way is to let the slider do the work for you. By connecting it to your WooCommerce “stream”, the slider will import the content from Products for you.
Another way is to use the slider to promote specific products, like the latest releases or holiday-related gift recommendations. If you know exactly what you want to spotlight, then manually loading the details of each product into the better option for you. And, for that, you’ll use the “Static” slider template.
For our purposes, we’re going to leverage the WooCommerce integration so our slider will always highlight the newest camping gear in our store.
Step 3: Connect your WooCommerce stream to the slider
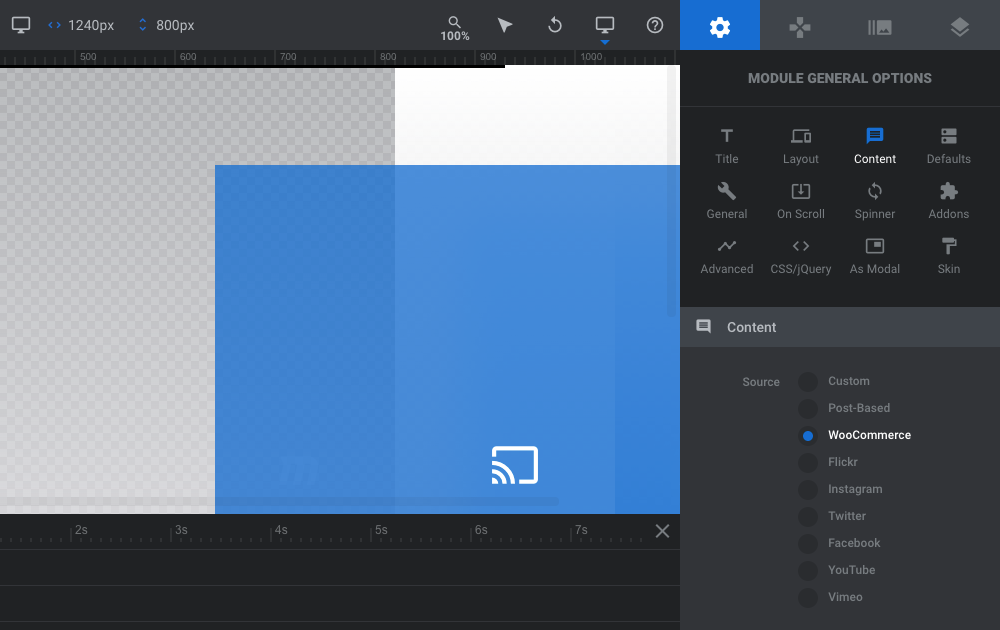
Go to “Module Options” and “Content”. You’ll see that “WooCommerce” has already been selected from the “Source” options:
Leave that setting as is.
Scroll down to “Types & Categories” next. Make sure “Products” is selected as the “Types”:

If you only want to show products from a specific category, then click on the field next to “Product Category” and select the category or categories you want to include in the slider:
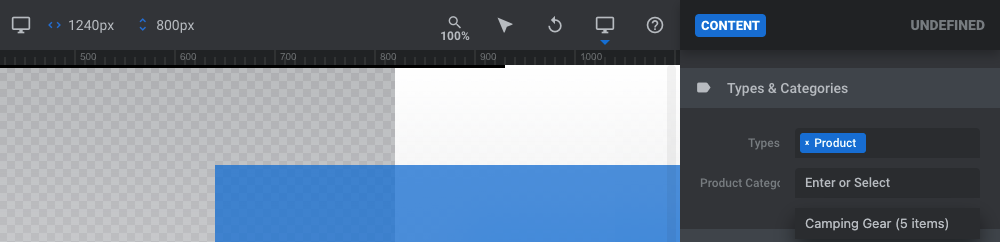
We only have one category set up in our store so far, so “Camping Gear” is the only one to choose. If that’s the case for your store — and will remain that way — then you don’t need to bother with setting a category. This is only if you want to display results from one specific category out of many.
In the next set of content settings you’ll find “Filters”:
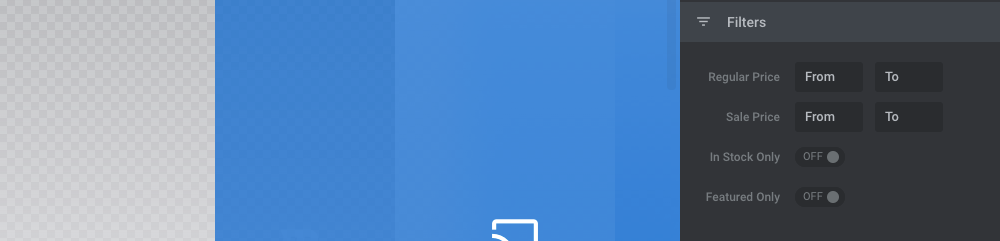
If your slider is pulling from a large repository of products, use these filters to narrow down which ones will be shown:
- Set a regular price range
- Set a sale price range
- Display “In Stock Only”
- Display “Featured Only”
You don’t have to use all these filters. Just know that they’re there in case you need them.
The last set of content settings allows you to set parameters for sorting:
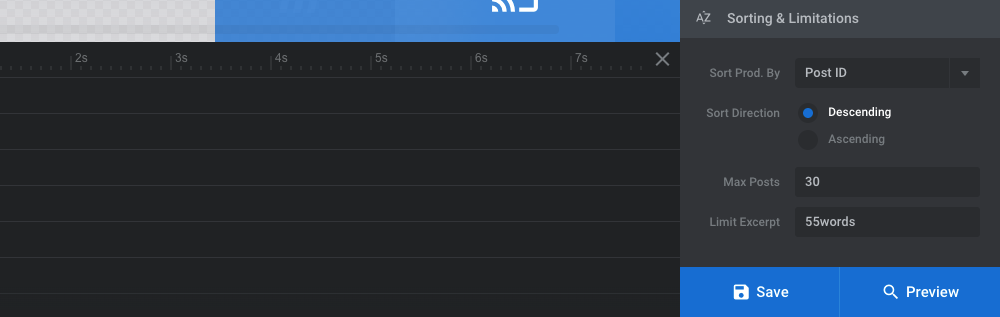
You can sort your products by:
- Regular Price
- Sale Price
- Number of Sales
- SKU
- Stock Quantity
- Post ID
- Date
- Title
- Slug (URL)
- Last Modified
- Number of Comments
- Random
- Unsorted
- Custom Order
You can also use this section to set a limit on how many products appear in your slider. If you want to use this slider to more effectively sell your top products or new releases, then try to keep the products capped between three and five. That way, visitors won’t be overwhelmed by the choices.
If you’re going to show an excerpt of the product’s description, you can also limit how many words appear as well.
Learn more:
Step 4: Preview your slider and make changes to your products as needed
Before we move onto designing this slider, let’s review the results from our WooCommerce content choices. Click on the blue “Preview” button in the bottom-right corner and take a look over your slider content:
Scroll through each of the slides. If you feel as though the images need replacing or the text shortened up or lengthened, return to your Products and clean them up there.
Note: If you encounter an error that reads “No slides found…” when you try to preview your slider, it may be due to a caching error:
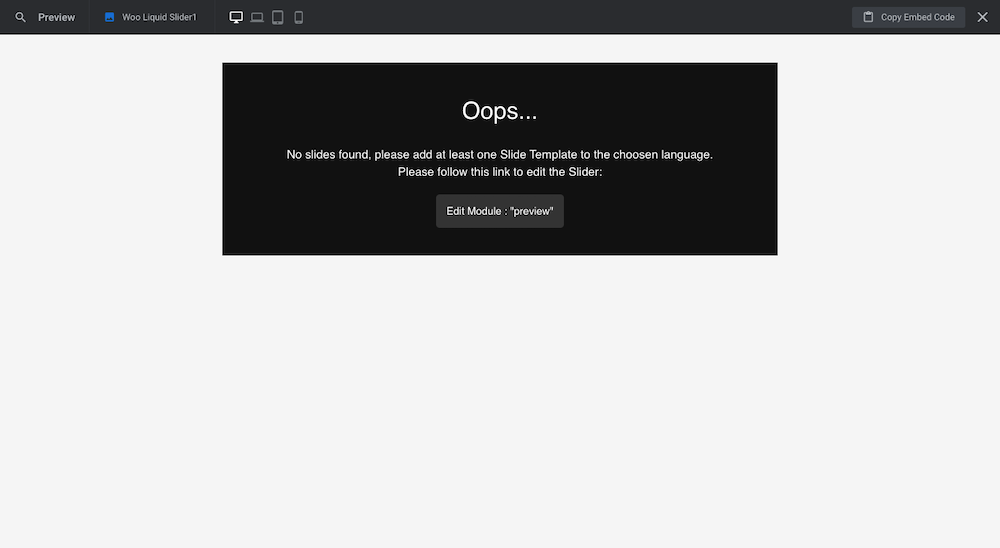
The easiest way to clear this error is to disconnect “WooCommerce” from under “Content”. Set it to “Custom”, save your changes, then go ahead and set it to “WooCommerce” once more. Save your changes and then preview the slider. The imported content from WooCommerce should be there.
Step 5: Edit your slides’ text layers
With the way this template is set up, you only have to make customizations to one slide. They’ll then automatically apply to all the others that get generated from your WooCommerce stream.
In terms of editing the text layers, there are a couple of things to consider. The first is whether or not you’re happy with the existing layers.
For instance, because my store’s products are all brand new, they don’t have any product reviews. It doesn’t make much sense to keep the reviews field there:
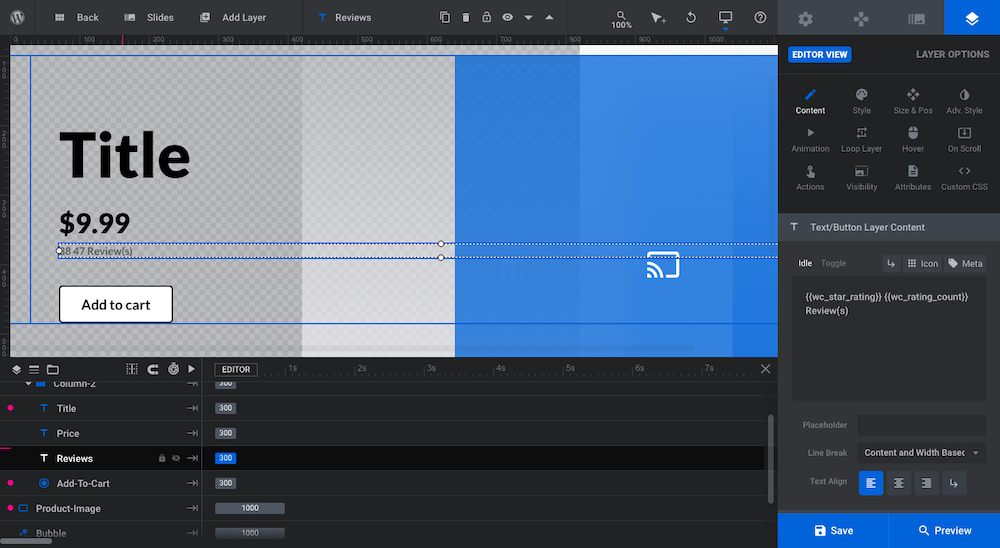
That said, you don’t need to delete this field entirely. If you’d like to replace it with another piece of metadata from WooCommerce, select the layer, open “Layer Options”, and go to “Content”:
The “Text/Button Layer Content” editor contains shortcodes that enable this slider to pull in the most recent data from the rest of WordPress. To update the information that will appear in this field, click on the “Meta” tab in the top-right corner of the editor:
Under “WooCommerce”, you’ll find other ecommerce-specific fields like categories, tags, and stock quantity. You may also want to check out the metadata available under “Post” as you can add fields like excerpts if you feel that a short description will help you get more clicks.
We’re going to remove the field entirely as the title, price, “Add to cart” button and image will suffice.
This now leaves us with three text layers to style. To edit each layer, select it in the timeline on the left and open the corresponding “Layer Options” on the right. Basic styling to typography — like font, color, and size — can be managed under “Style” settings:

We’ve updated our text layers with the Cabin font family and updated the size of our headline just slightly.
You can make additional adjustments to your text under “Size & Pos” as well as “Adv Style”, if you prefer.
As for the button, you can edit the style of the text as well as the button’s design from the same layer settings. With the button, however, you also have to consider how you want to style the button background (fill color) and border:
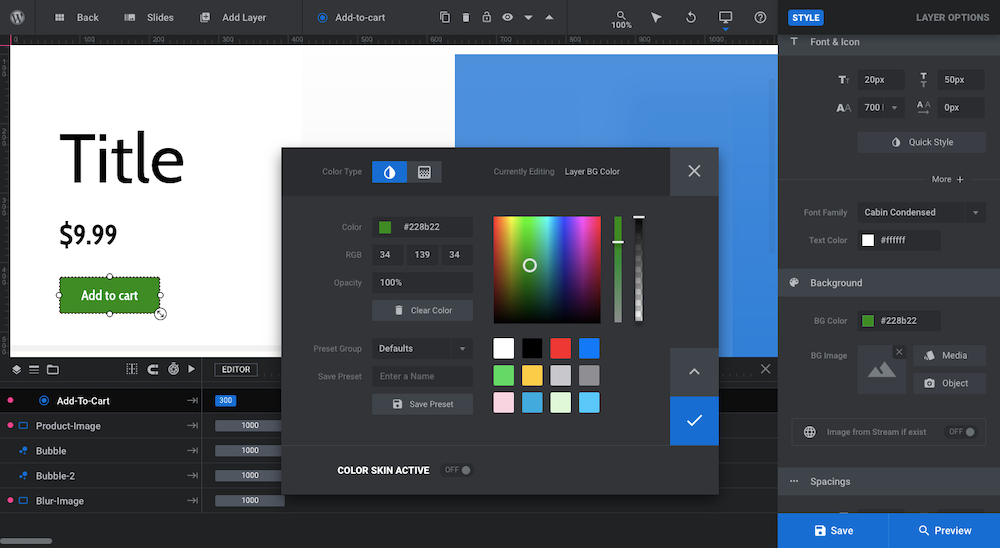
We don’t want to do anything too crazy with the button, so we’re going to apply a simple solid color to the background and change the font to white.
This button also has a hover effect applied to it. To change it, go to “Hover” settings, scroll down to “Style”, and update the button hover style there:
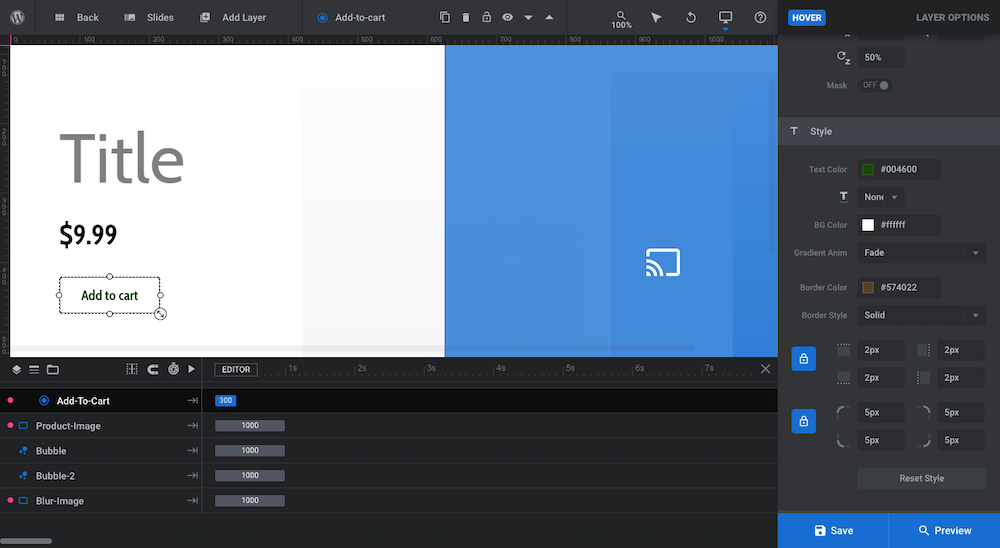
When people hover over the “Add to cart” button for any of these products, the button will flip to a white background with dark green text.
Learn more:
Step 6: Edit product image settings
The product image on the right side of the slider isn’t going to look exactly like the one you uploaded. That’s because it has a transparent border that gives it a rounded appearance like this:

This effect has been created under “Layer Options” and “Style”. Scroll to the bottom of the settings panel and you’ll see that the borders have been set to 400px all around:
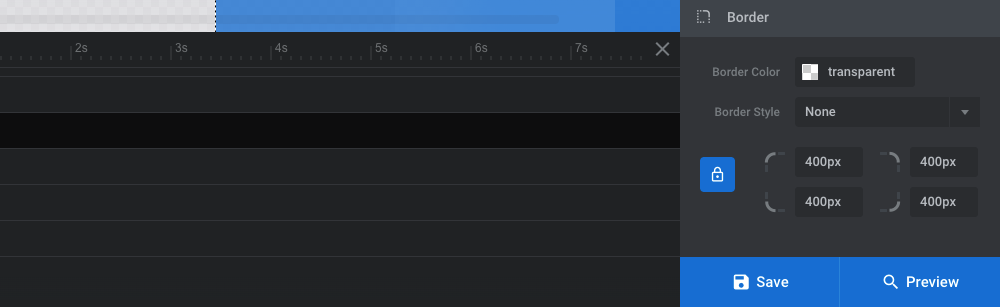
If you’d like to remove the rounded edges or straighten them out a bit, make those adjustments here.
Pro tip: You can experiment with other image settings under “Layer Options”. Just keep in mind that the point of using this slider design is to allow the liquid background effect to draw visitors’ eyes to the product images. So doing too much with your image design could be too much for your visitors.
By the way, the “Blur-image” layer is a near-identical copy of the main product image shown in the slider. One way in which it differs is its position:
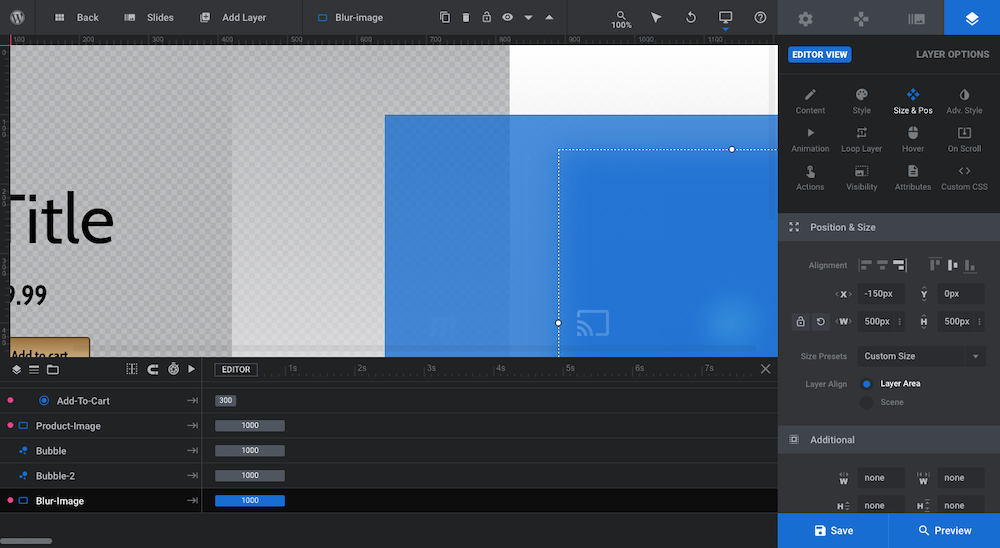
Whereas the “Product-image” shape sits at 0px on the x-axis, the “Blur-image” sits at -150px. This is what allows colors from the image to appear behind the liquid effect.
Another way in which it differs is the layer that blurs it. You’ll find this setting under “Animation” and “Layer Filter”:
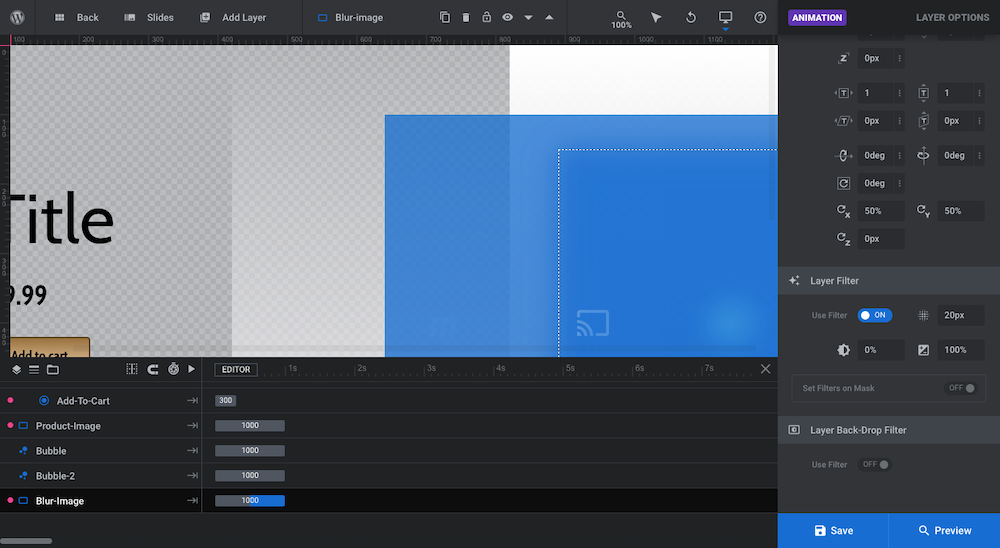
With a 20px filter applied to the image, the grayscale at 0%, and brightness at 100%, we see the basic colors of the product, without any of the details. Feel free to change up either of these settings if you want to customize how the liquid effect appears.
Learn more:
Step 7: Customize the BubbleMorphs
With the main details of your slides finalized, you can now turn your attention to the BubbleMorphs that create the eye-catching liquid effect behind your product images.
There are two “Bubble” layers in the template. There are a couple of ways to edit them.
The first is to edit the “Background Color” under “Style”. Both layers use a partially transparent off-white gradient:
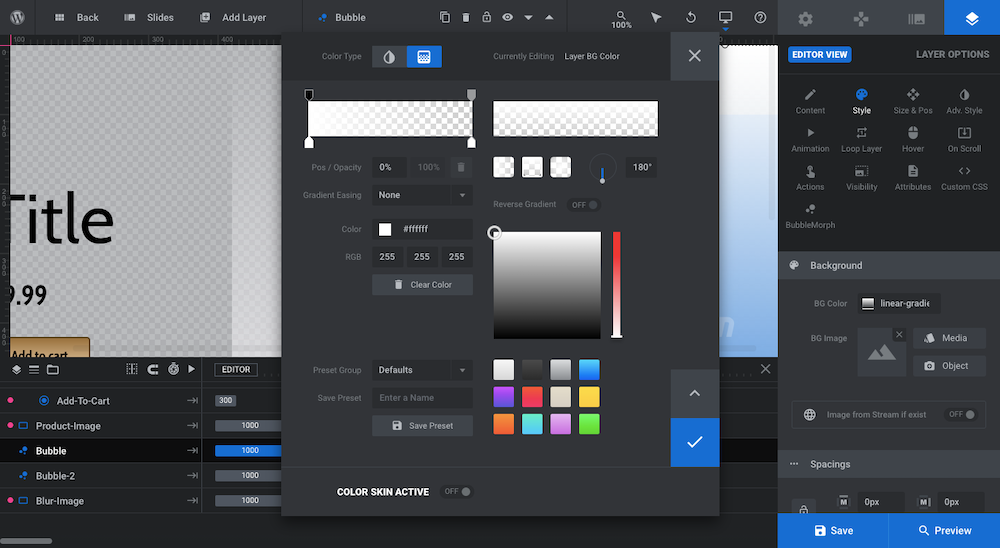
The colors of the BubbleMorphs blend nicely with the white background of the slide, so the effect we have now is perfectly subtle.
Pro tip: To create a more intense liquid effect, consider changing the background color of the slide as well as the BubbleMorphs. This is really only a good idea though if your slide contains a minimal amount of text and you’re displaying very simple product images.
You can also make adjustments to each layer under “BubbleMorph” settings:
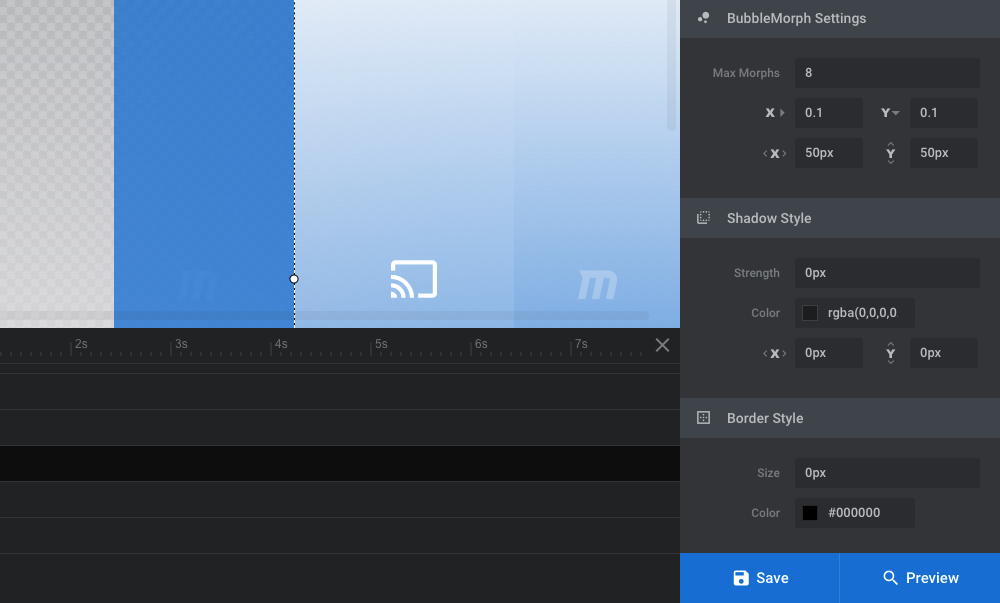
Use “BubbleMorph” settings to change:
- Set the maximum number of bend points in each bubble
- Change the speed at which they bend
- Increase or decrease the space around the boundaries of the bubble
Use “Shadow Style” to make your bubbles look more 3D. You can:
- Enhance the shadow
- Change the color of the shadow
- Manipulate which direction the shadow moves
You can also adjust the size and color of the bubble’s border (if you want one).
Learn more:
Step 8: Update the navigation (optional)
The last thing to take care of is the navigation. The template has three navigational elements activated:
- Progress: A line appears at the top of the section to let visitors know how long they have before the slide automatically changes.
- Arrows: Arrows appear on each end of the slider, giving visitors control over when the slider moves.
- Bullets: Dots appear at the bottom of the slider that tell visitors how many slides there are. They can also use them to skip to a different one.
For sliders with only a few slides, you might not feel like all of these navigational cues are necessary. If that’s the case, go to “Navigation Options” and untoggle the ones you don’t want to use:
For the remaining ones, review the settings for each and make sure they are designed in a way that makes sense for your ecommerce brand as well as the products you’re selling.
For instance, we wanted something a little less pronounced, so we switched the arrow type to “Hesperiden”:
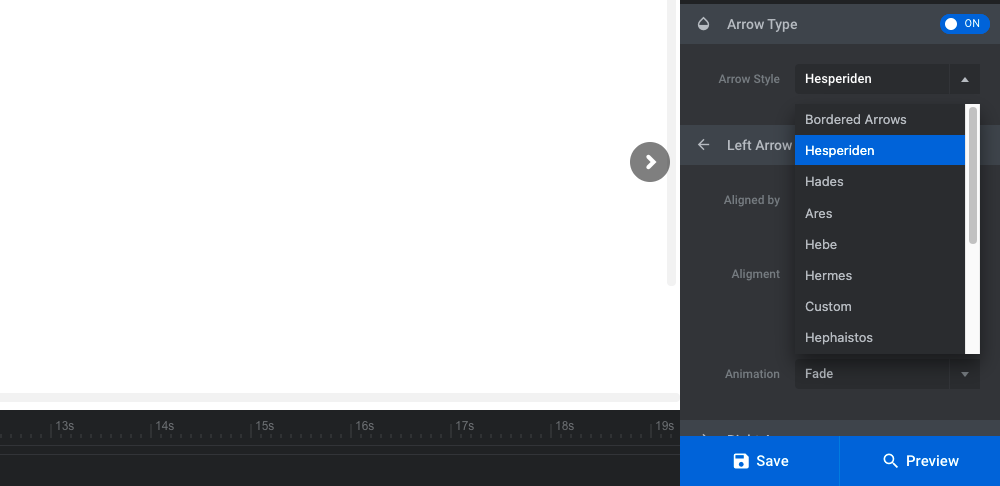
You have complete control over the style, placement, animation, and more, so take a look around and see if there’s anything you’d like to adjust before saving and publishing the slider to your home page.
Learn more:
Give your ecommerce products the attention they deserve with Slider Revolution
The goal in using this Slider Revolution template is to get shoppers to notice certain products in your store and to increase their sales through increased visibility. By displaying them in a well-organized slider with an eye-catching liquid effect, you’ll accomplish just that.


