
It can be tricky to sell scented products online. Because no matter how great the product packaging or the company’s branding looks, customers are going to want to know what the products smell like.
On the web, we don’t have the option of including a scratch-and-sniff sticker or allowing customers to open the product’s lid to catch a whiff of what’s inside. So the next best thing is to include imagery that visually describes the recognizable and enticing scents of the product.
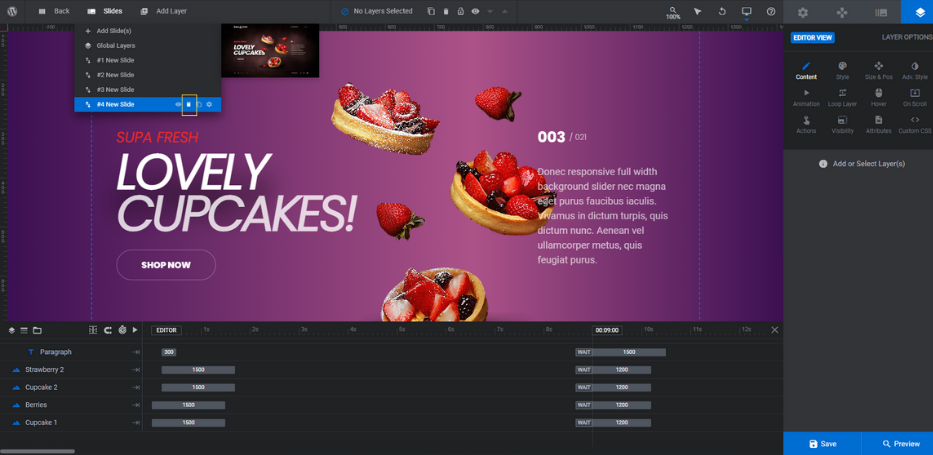
In this tutorial, we’re going to use the Delicious Full Width Slider template to demonstrate a creative way to promote products and their unique scent profiles. While each product will take center stage (as it should), its yummy aroma will be visually depicted in the background.
Table of Contents:
- Step 1: Remove global layers
- Step 2: Delete slide layouts you don’t want and create replacements
- Step 3: Create background gradients
- Step 4: Delete text layers you don’t need
- Step 5: Replace the product graphics
- Step 6: Add your scent images
- Step 7: Edit the text
- Step 8: Update the navigation
How to visually promote products and their scents online
The Full Width Slider slider template can be used to promote products for food and drink companies. That’s what it was originally designed for:
It can also be repurposed for companies that make scented products — like perfumes, deodorants, candles, bath bombs, etc. Anything that has an enticing aroma would work:
If this is your first time designing with Slider Revolution, read up how templates and modules work before you start the tutorial:
Step 1: Remove global layers
Unless you’re creating a microsite from this product slider, you won’t need the global layers that are in there now. To remove the header links, menu modal, and social links, hover over “Slides” in the toolbar and select Global Layers.
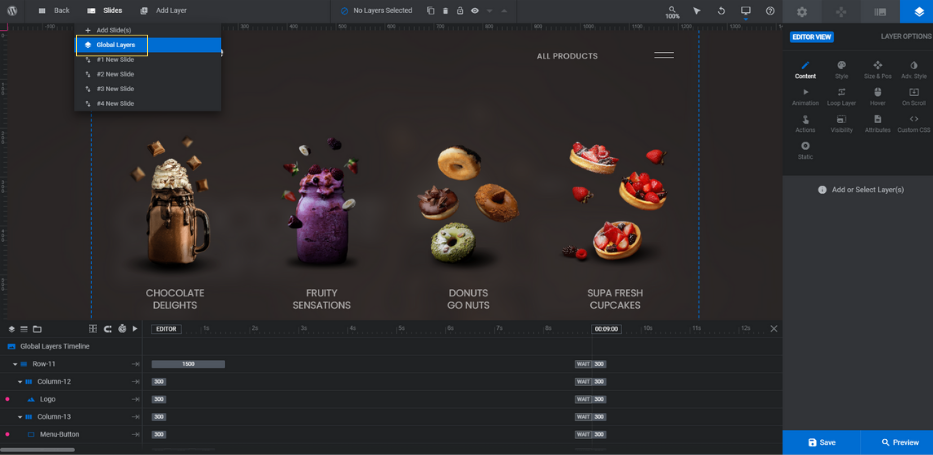
The fastest way to delete these layers is to hold down the Ctrl or command key, then select the following in the timeline editor at the bottom:
- Row-11
- Menu
- Copy-Row-11
Hit the Backspace or delete key and this will clear out all of the layers.
Exit out of Global Layers and open up the first slide from the “Slides” dropdown.
Learn more:
Step 2: Delete slide layouts you don’t want and create replacements
There are two different types of slides in this module.
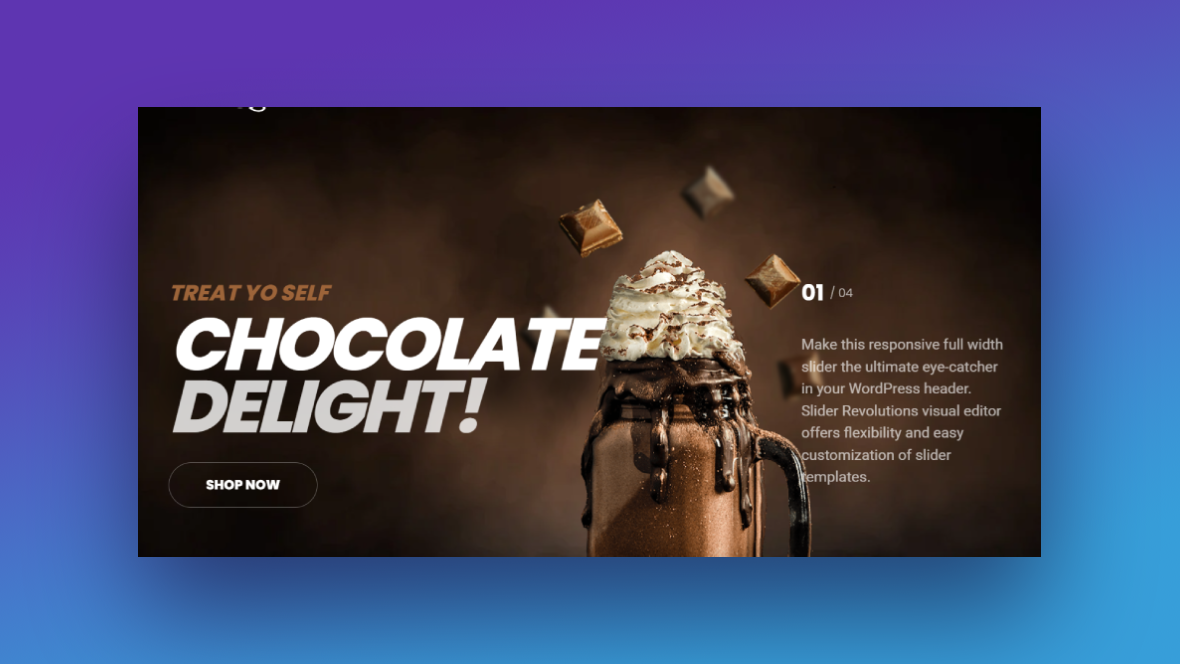
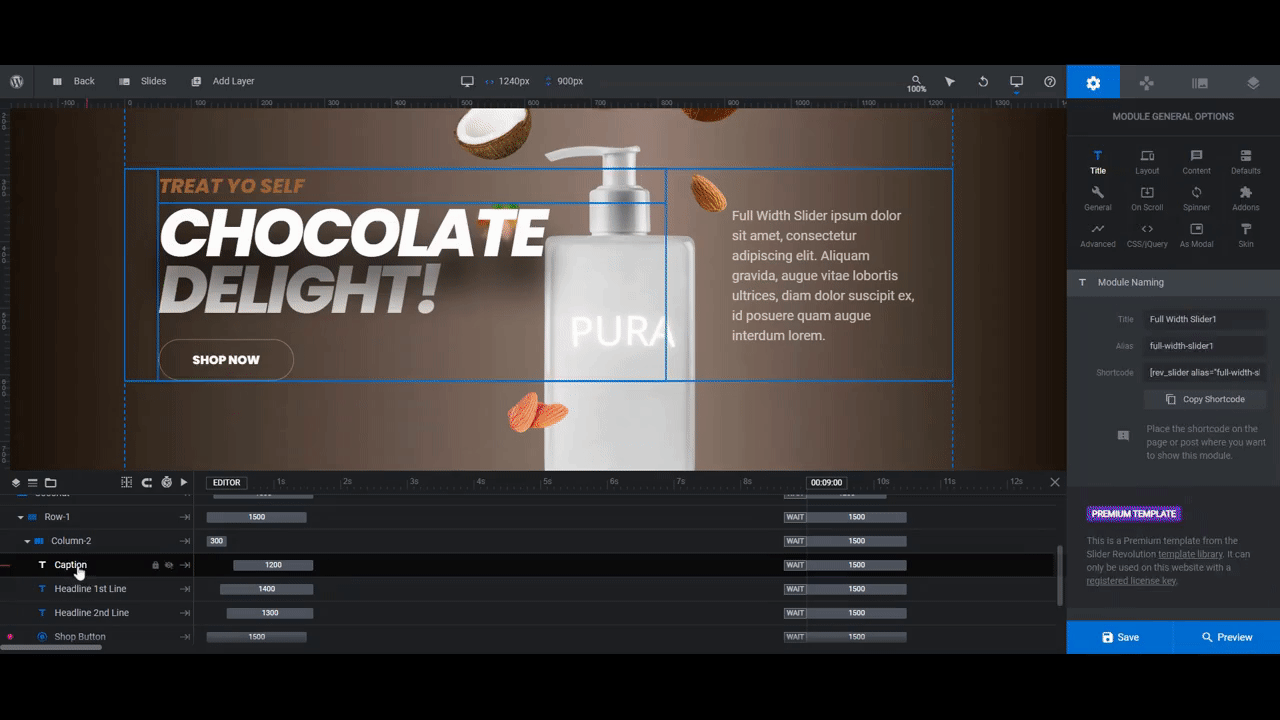
The first layout you’ll find is in Slides 1 and 2 and looks like this:
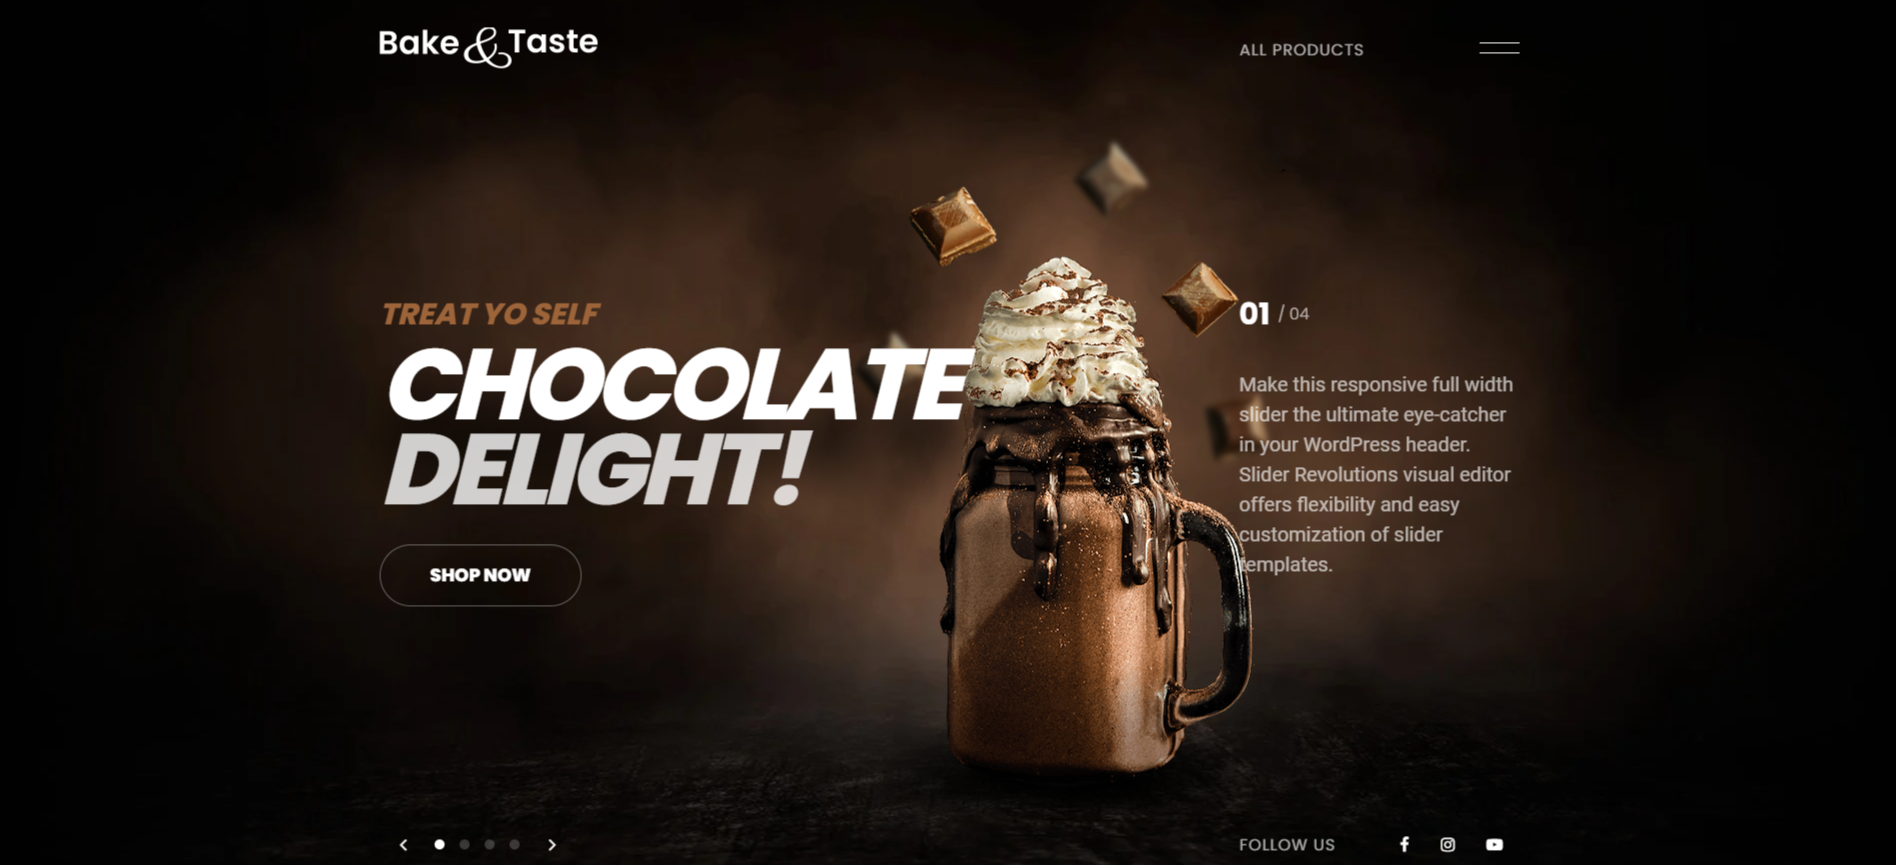
The product is a mug with a tasty drink inside of it. In the background, ingredients float around.
The second layout you’ll find is in Slides 3 and 4 and looks like this:
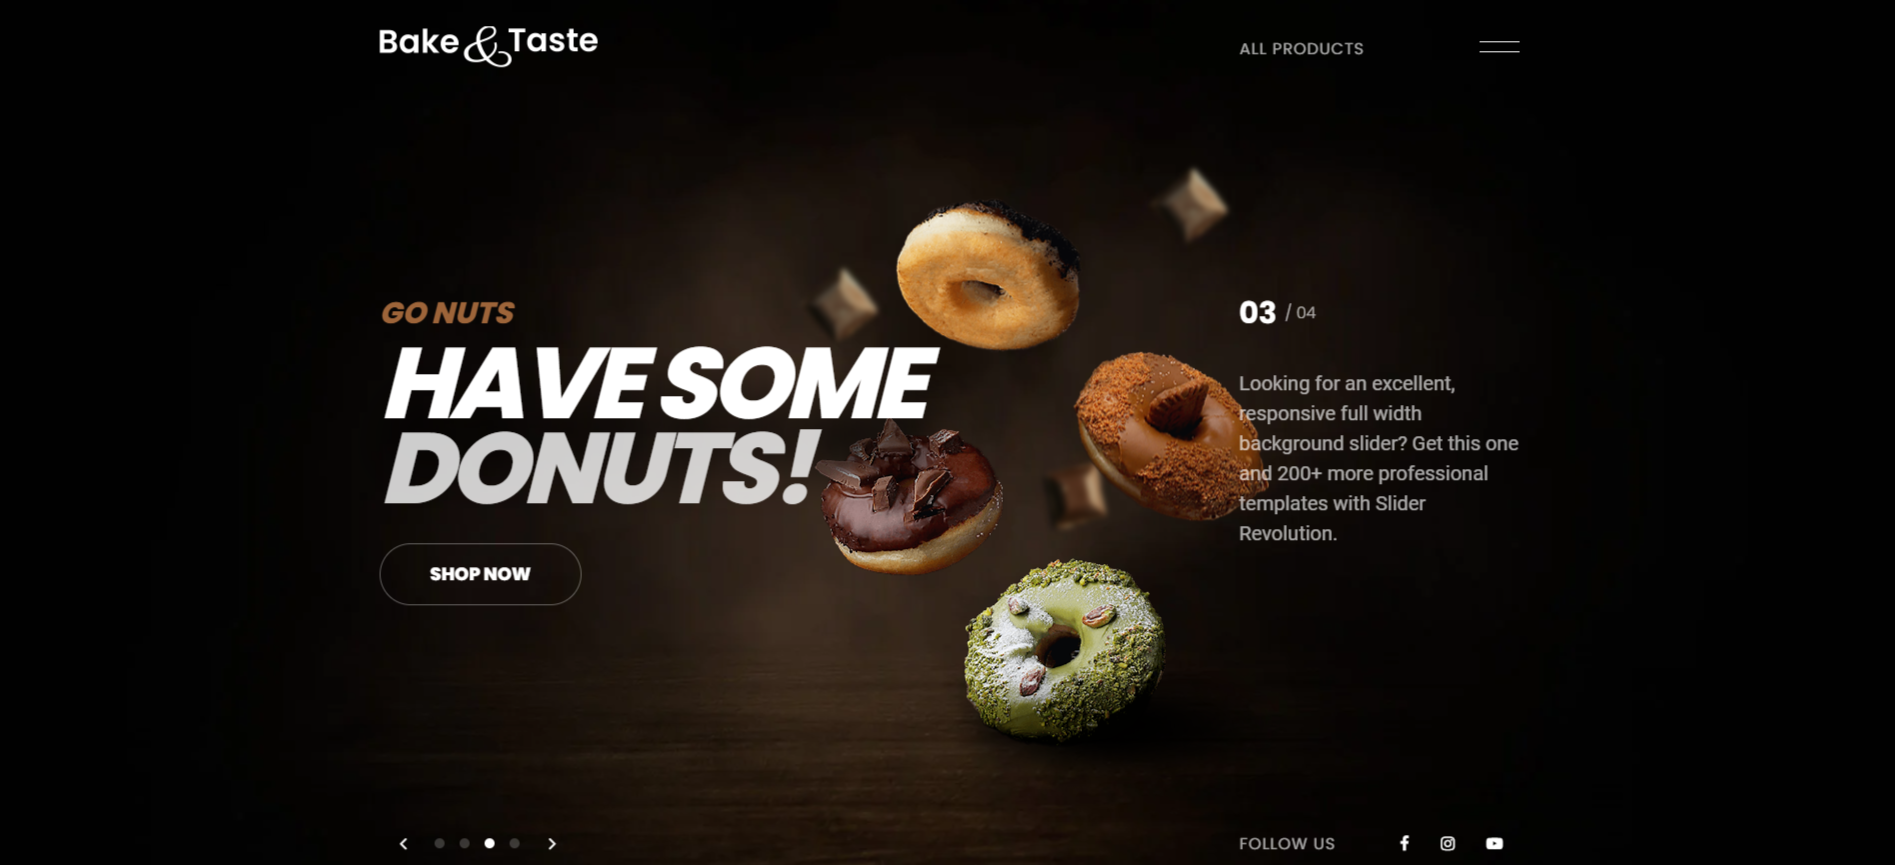
There are still some floating ingredients in the background. However, there are multiple product images (in this example, four doughnuts) instead of just one.
Before you do anything else, choose one layout to use for all of the slides.
Decide which of these two styles/layouts you prefer. Then go to “Slides” and delete the two slides that you won’t be needing by clicking on the trash can icon beside them.
Then duplicate either of the two remaining slides using the copy/duplicate icon next to the trash can and fill out the rest of your slider.
Learn more:
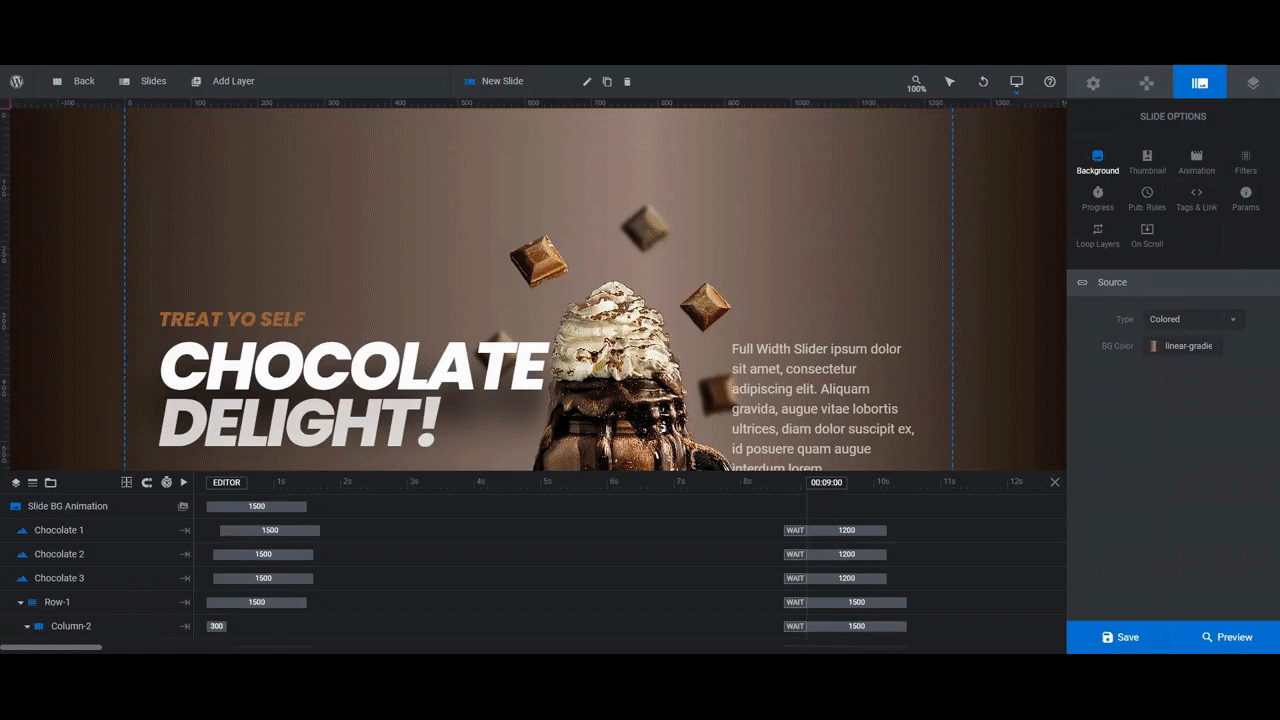
Step 3: Create background gradients
To edit the background of the slides, go to “Slides Options” and “Background”.
Currently, the background for each slide is a textured image. You can upload an image of your own to the Media Library to replace the existing one.
Pro tip: The current background images are 2300px by 900px. Size your new images to those same dimensions to reduce the editing you have to do in Slider Revolution.
You also have the option to switch the Type to Colored. This will enable you to set a solid or gradient color as the background. This is the route we’re going to take.
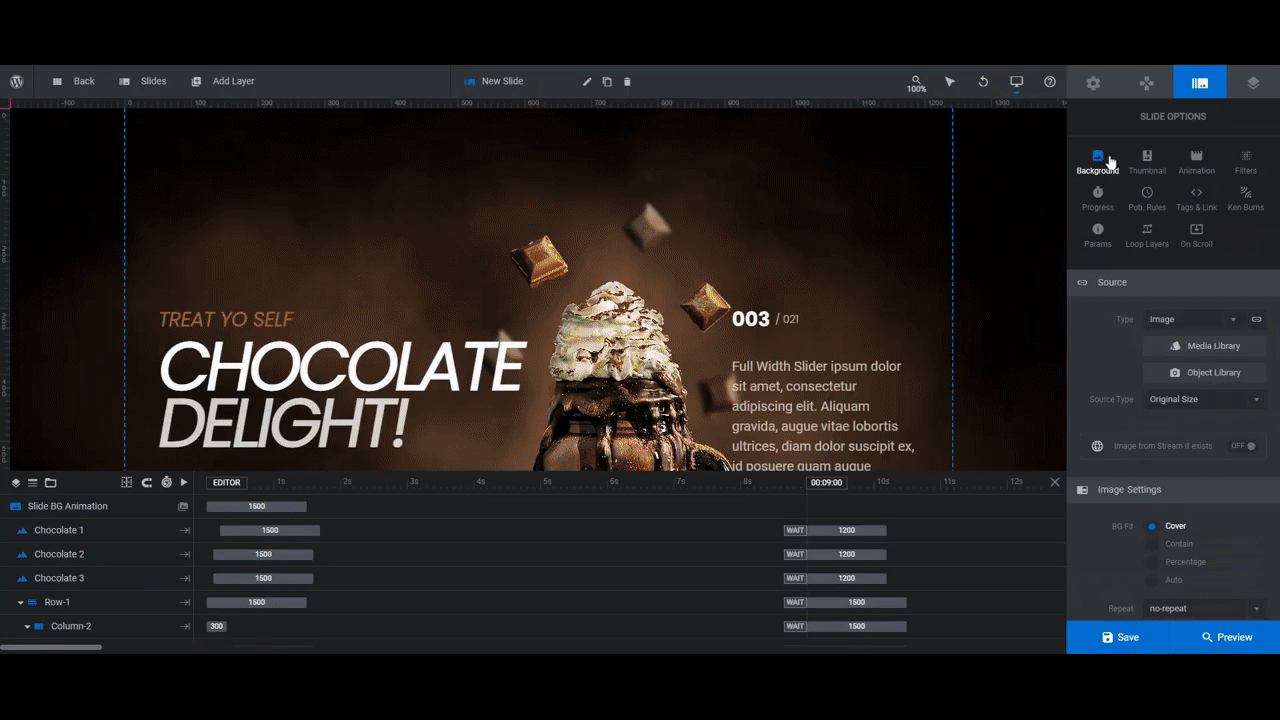
You have plenty of options to work with in the color selection dialogue. You can go with a solid color or you can switch to the gradient tab at the top and create something a little more visually interesting. You can also choose from preset colors or gradients at the bottom or create your own at the top of the panel.
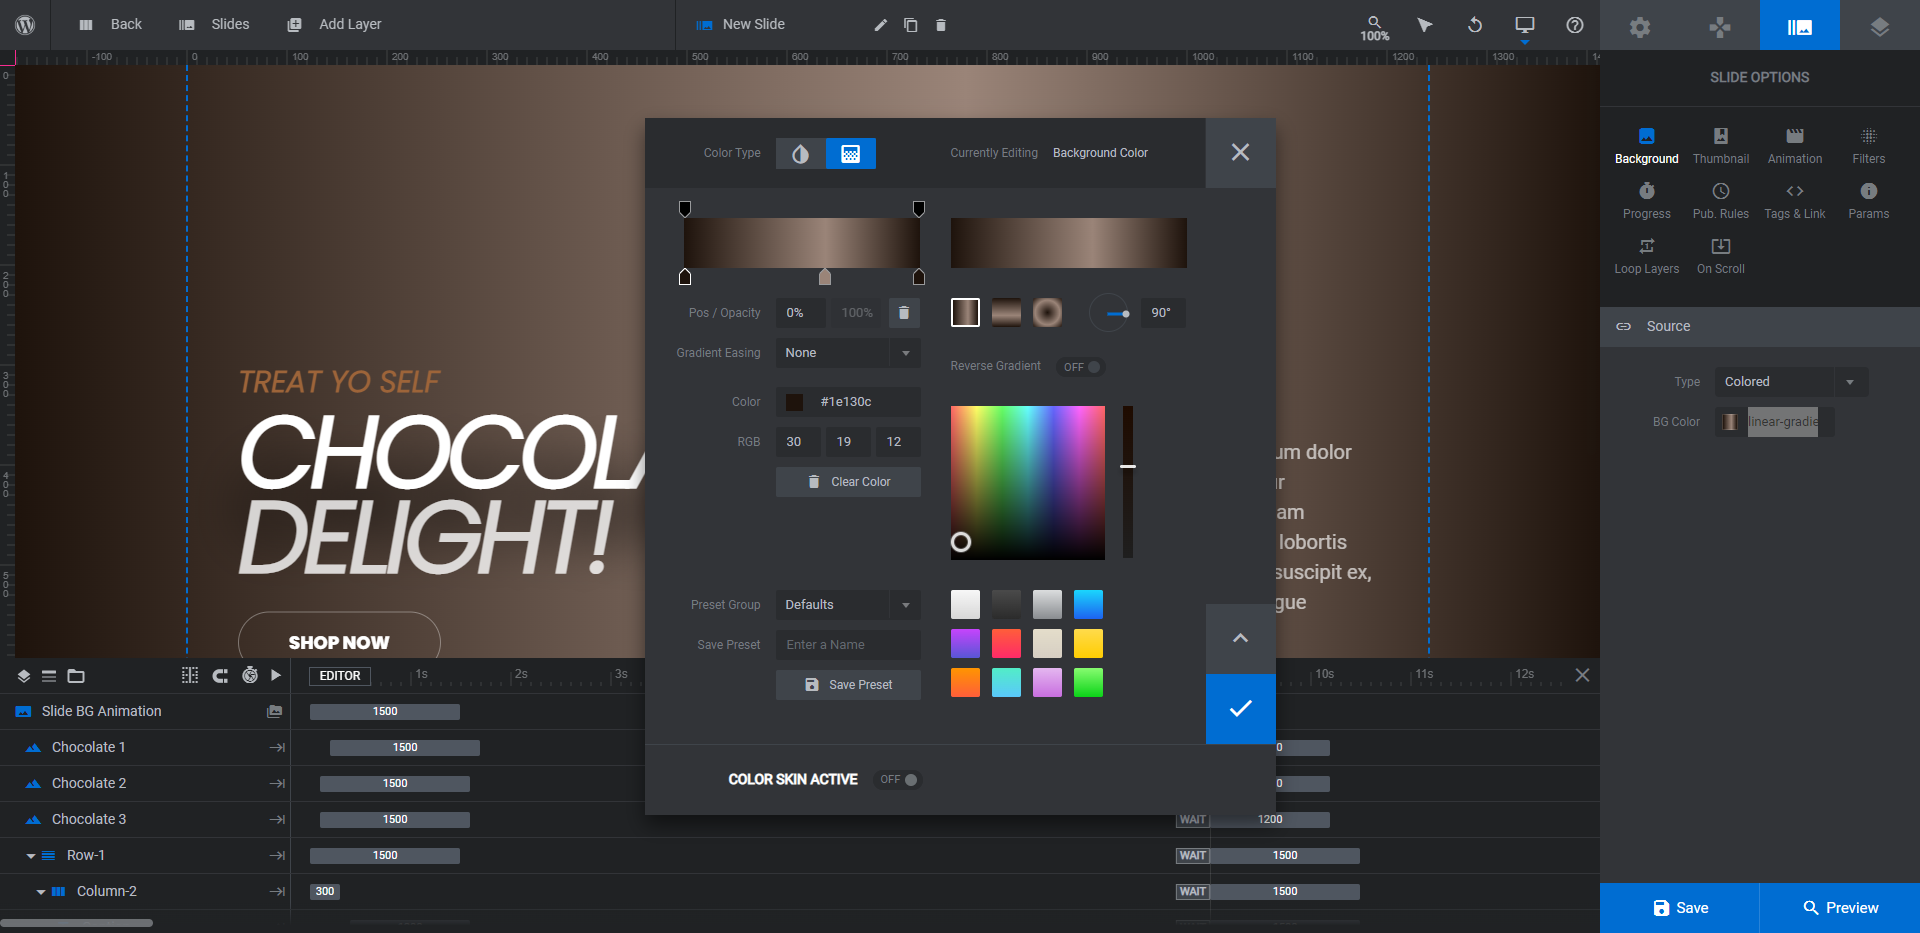
For our gradient, we placed a lighter color at the 60% mark and set it to a vertical gradient. This allows the lighter portion of our gradient to act like a spotlight on our product image.
Save your changes and repeat this process for the remaining slides.
Learn more:
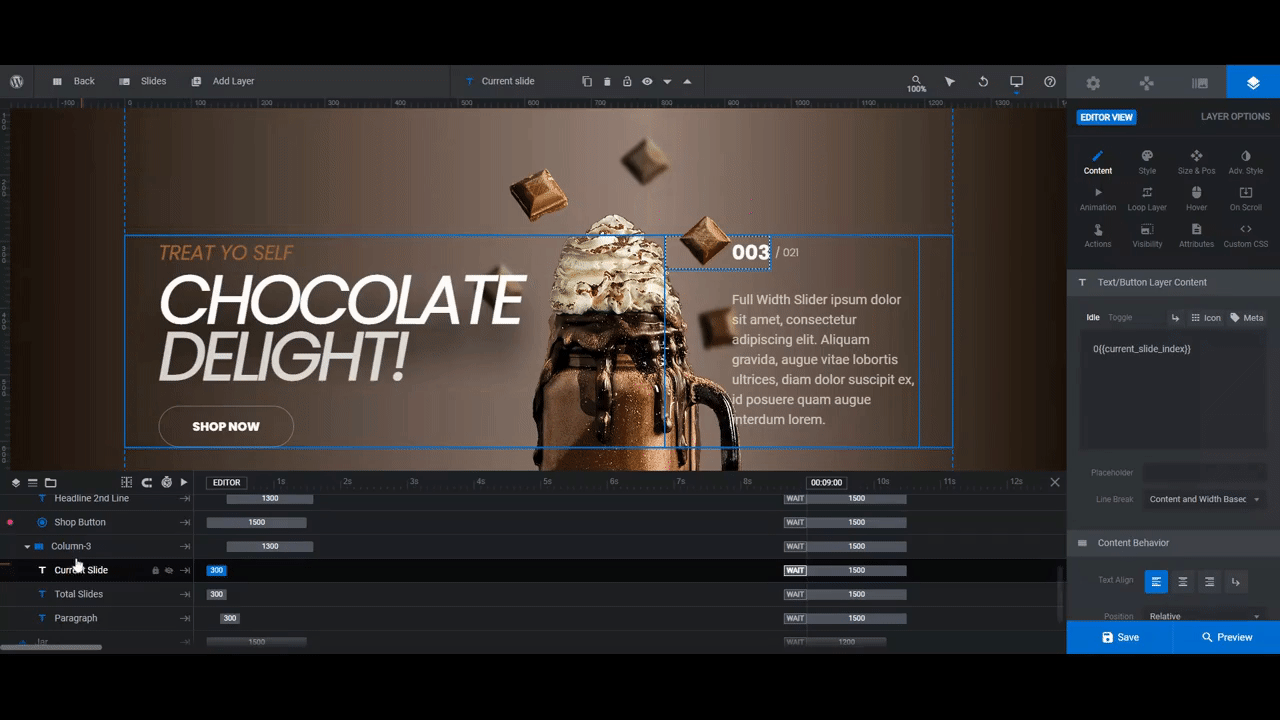
Step 4: Delete text layers you don’t need
Each layer has the same text layers in it:
- Caption
- Headline 1st Line
- Headline 2nd Line
- Shop Button
- Current Slide
- Total Slides
- Paragraph
If you want to keep all of these layers, feel free to do so. If you want to delete any of them, select them from the timeline editor and hit the Backspace or delete key to remove them.
For our purposes, we’re going to delete the Current Slide and Total Slides layers as we don’t need to tell visitors how many products we’re promoting. That would be useful, however, for a larger slider, so if you decide to add slides it would be a good idea to keep those layers in there in that case.
Notice that when you delete these layers that the Paragraph layer moves to the top of the column. If you’re okay with that, then there’s nothing else to do.
However, if you’d like to vertically center the Paragraph text, select Column-3 and then choose the middle-align setting next to Vertical Align.
Repeat this process for all of the slides.
Learn more:
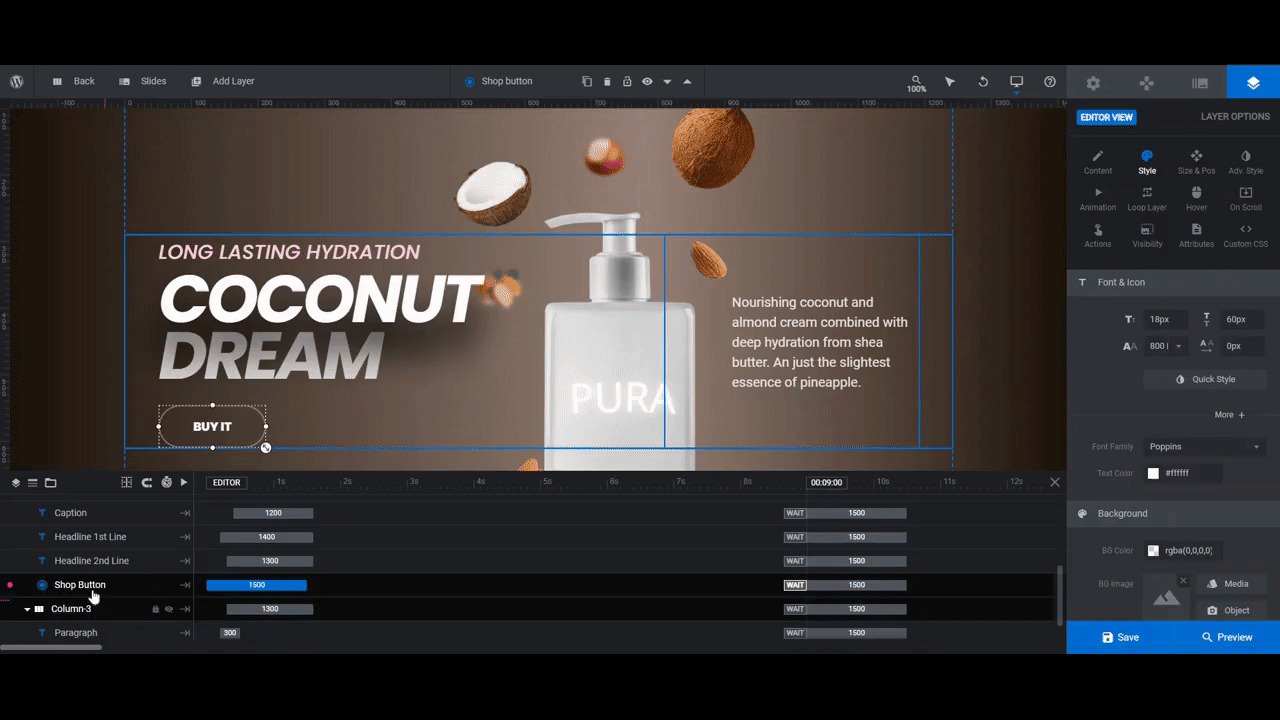
Step 5: Replace the product graphics
If you’ve chosen to use the layout with the single product, then the layer to modify in this step is called Jar. If you’ve chosen the other layout, you’ll need to identify the four image layers for each slide.
Note: The Jar image is 400px by 600px. Try to replace it with an image of the same size or smaller so that your image doesn’t hide any of the text or ingredients around it.
To replace the image, select it in the canvas or timeline, then go to “Layer Options” and “Content” to upload your new one to the Media Library.
If you have to make changes to the size or position of the image once it’s inside of Slider Revolution, remember to do a responsive check and edit the device variant accordingly before you move onto the next step.
Learn more:
Step 6: Add your scent images
You can keep all of the floating ingredient/scent images around your product. You can also delete some of them if you don’t need that many. Conversely, you can add more. The best way to do that would be to right-click on a blurry or non-blurry ingredient layer and select “Duplicate”.
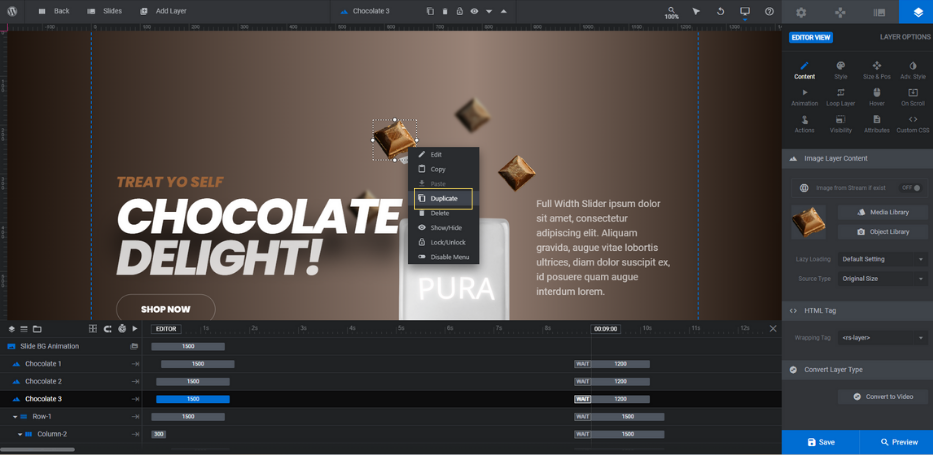
That way, you won’t have to pre-program all of the settings to match the others. All you’ll have to do is upload the new image file and then move it into place in the canvas.
As for replacing the layers themselves, do the same thing you did to replace the main product image.
Note: The ingredient/scent layers are all different sizes. They range between 50px and 200px in width. So it’s a good idea to keep your new graphics within that range as well.
If you need to resize or reposition any of the scent images, go to “Layer Options” and “Size & Pos”.
Use the W (width) setting to resize. Use the X (horizontal) or Y (vertical) settings to move it around. (You can also drag-and-drop the ingredient layers into place in the visual canvas.)

Remember to do a responsive check if you make any size or position changes.
Learn more:
Step 7: Edit the text
There are four text layers and one button layer remaining in these slides. To edit the text, use the settings under “Layer Options”:
- Change what the text says under “Content”.
- Change the font, color, and styling under “Style”.
- Change shadows, text strokes, and other style customizations under “Adv Style”.
Go through each slide, edit the text layers, and apply the styles consistently.
Your button may need some additional customization in this step. For instance:
- Add a fill color to the button under “Style” and “Background”.
- Edit the border color and style under “Style” and “Border”.
- Change how the button looks when someone hovers over it under “Hover” settings.
The one last thing to do is add a custom link to each button. Select the Shop Button layer and then go to “Actions”.
There is already a Simple Link added to each button. Swap out the existing Link URL for the link to your product page.
When you’re done, exit out of the panel to save your changes.
Learn more:
Step 8: Update the navigation
When we deleted the global layers, we removed the arrowheads that sat to the left and right of the bullet bar. So now we need to modify the existing navigation elements so our visitors can easily control the slider.
Go to “Navigation Options” and start with “Progress”. There is currently a semi-transparent white progress bar affixed to the top of the section.
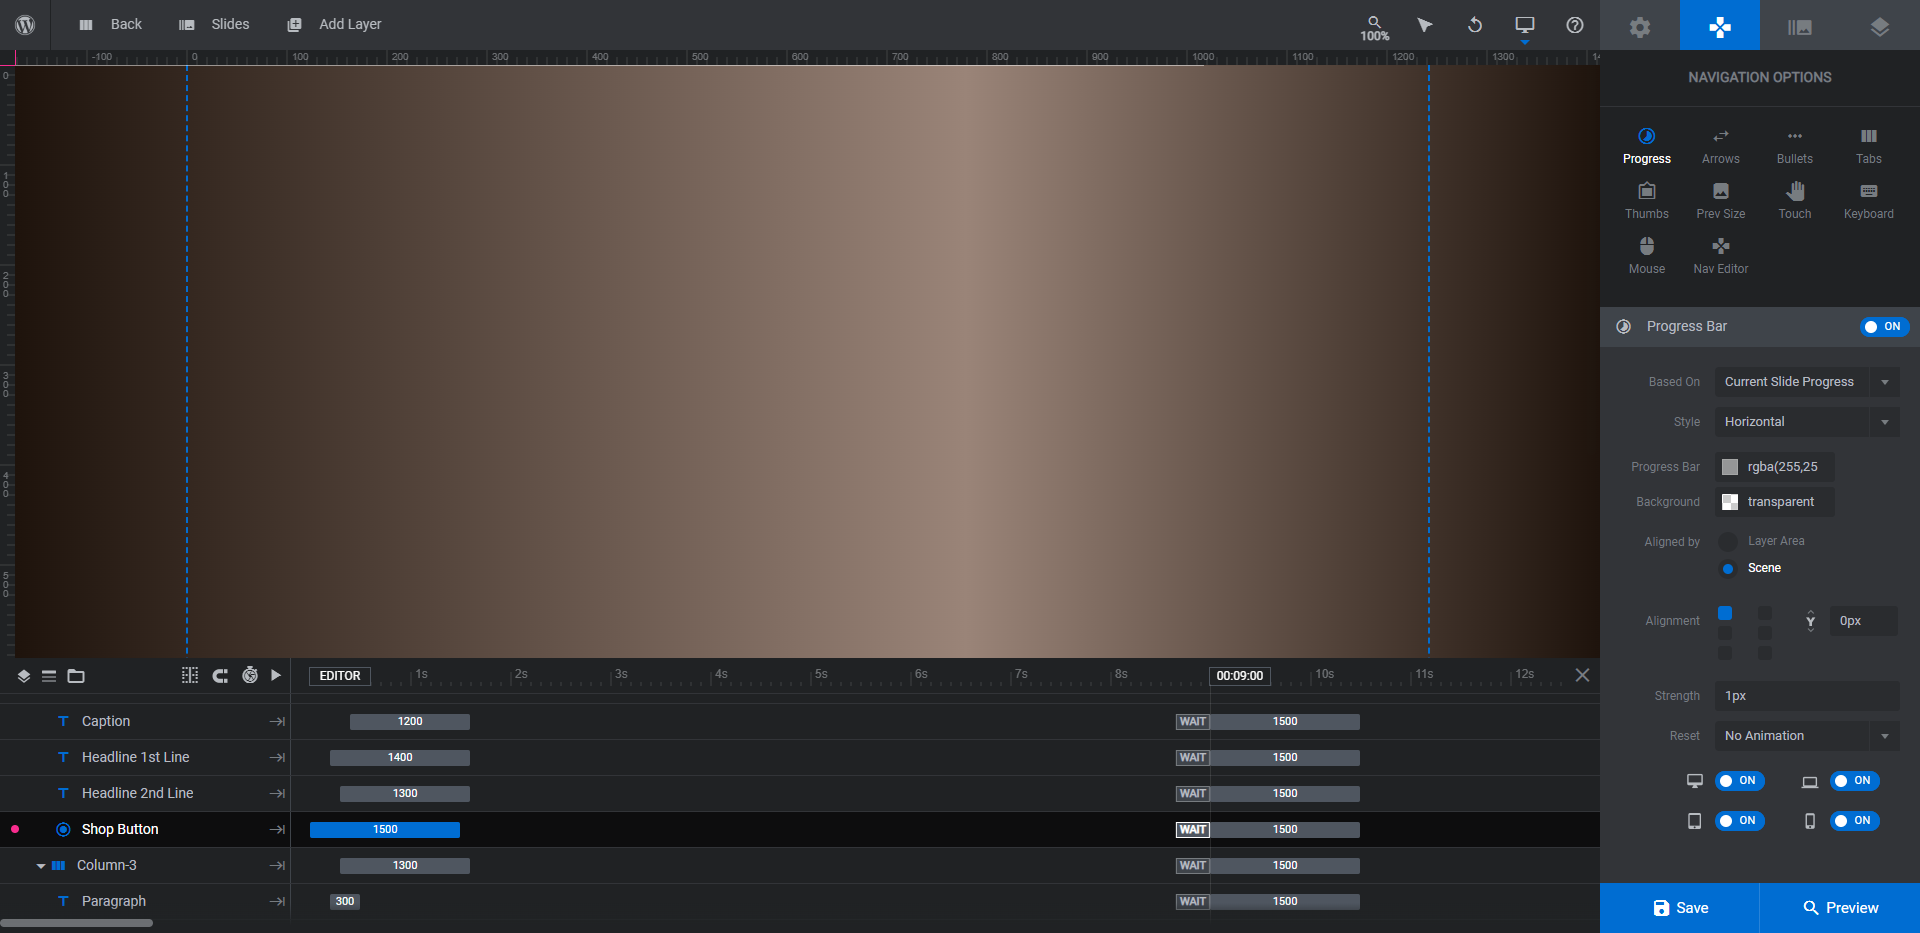
If you’re struggling to see it against your new background colors or images, edit the amount of transparency from the color selection dialogue. You can also modify the thickness of the bar next to the Strength setting.
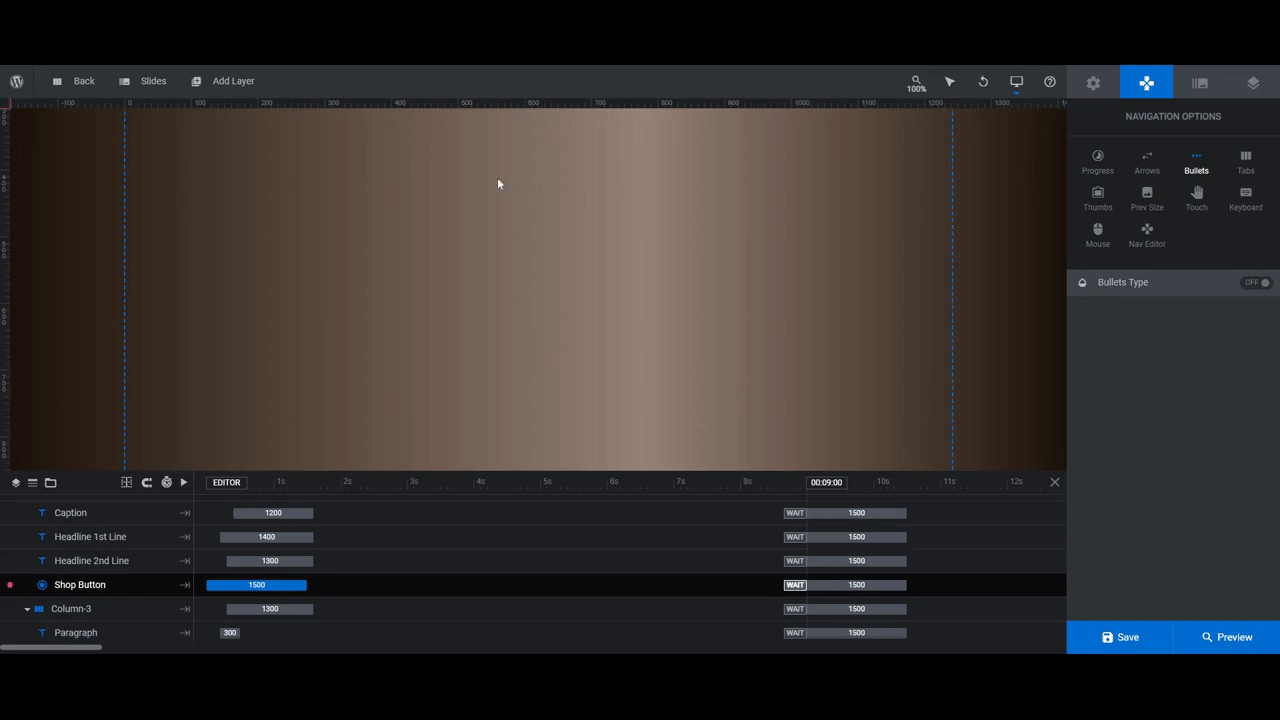
Next, go to “Bullets”. The bullet bar currently sits at the bottom of the screen over towards the left.
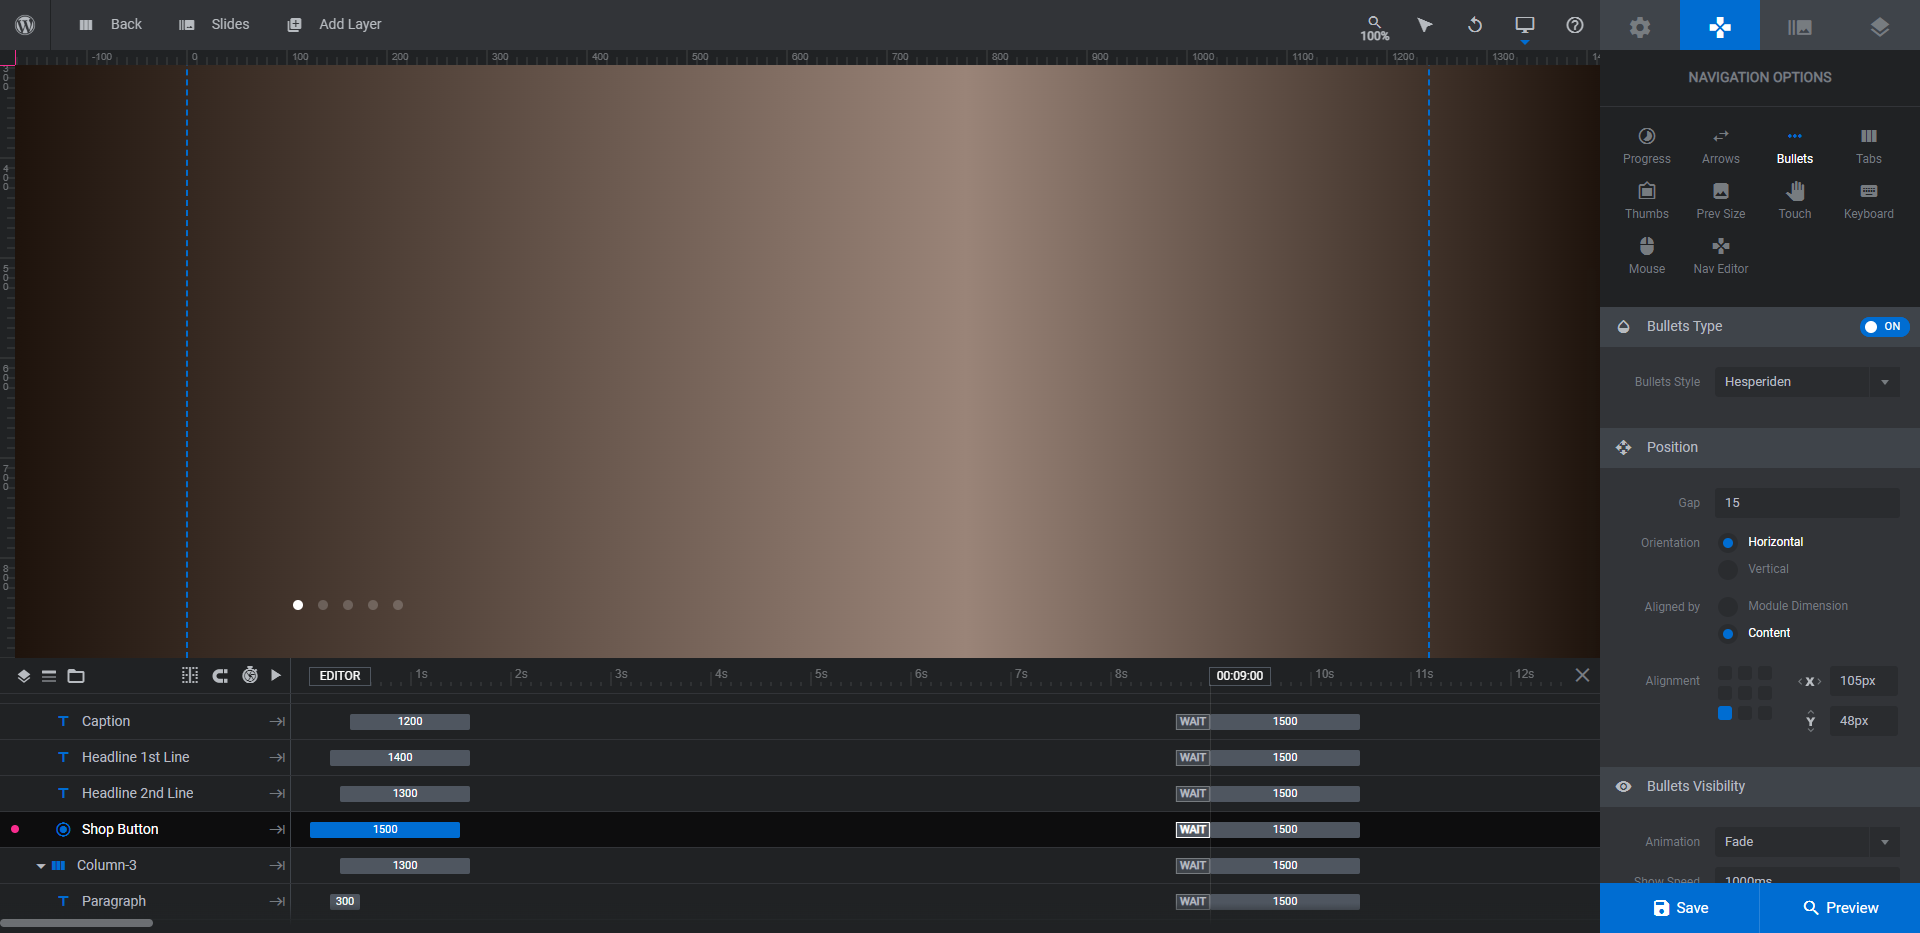
Note: You’re free to keep the bullets here if you want to visually let visitors know how many slides there are. If your slider is small enough (i.e. four or fewer slides), you can get away with disabling the bullet bar by switching the toggle to OFF.
The last thing to do is add arrows to the slider so visitors can control the pace of the slides.
Select “Arrows” and then go through the settings one by one to choose an arrowhead style, set the placement of them (usually the left and right margins are best), and then style them as needed.
Open the Preview occasionally to ensure that the arrow placement, style, and animation all look exactly as you want them to. When you’re done, save your changes. Your product slider is now ready to add to your site.
Learn more:
Create a product slider that looks (and smells) great
Even though the web is a mostly visual medium, we can use visuals to convey other sensory data to visitors. And when it comes time to promote products with different alluring senses, this type of “scented” design can be effective.
With the Full Width Slider template, you’ll have a quick and easy way to frame your scented products with their signature scents. Even if visitors can’t smell them through the web page, the visuals will help them identify which products match their personal scent preferences.


