

Consumers don’t just buy from companies because they sell affordable products or services they need. These days, they want to know that they’re buying from good companies.
There are a number of ways to demonstrate this. One way is to show off a commitment to fostering a positive company culture where employees are treated well, enjoy the work they do, and are excited to serve their customer base.
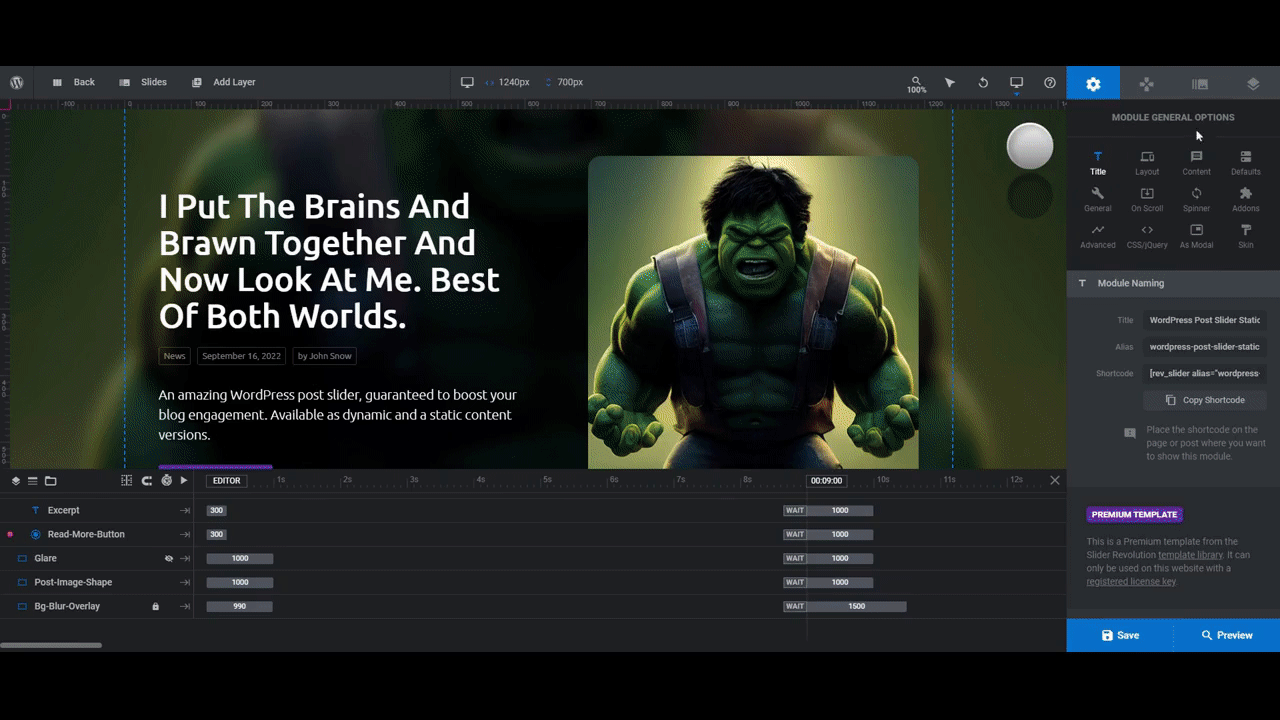
With the Superhero WordPress Post Static Slider template, it’s easy to make your employees look like superheroes. This comic-inspired slider will help your website achieve two important outcomes: It will give your employees a chance to step into the limelight and to claim the credit they deserve for their hard work. At the same time, it will give your customers a chance to get to know your employees better.
Note: Make sure to install the “Static” version of this template. The other one (non-Static) looks similar, but it’s set up to pull in content from your blog. The Static template is the one that’s fully customizable.
Table of Contents:
- Step 1: Delete every slide but one
- Step 2: Superhero-fy your employee photos
- Step 3: Update the slide background image and thumbnail
- Step 4: Replace the main employee image
- Step 5: Customize the employee’s personal introduction
- Step 6: Duplicate the slide and fill in the details
How to design a comic-inspired slider that gives your employees the superhero treatment
It doesn’t matter if you’re Team Marvel or Team DC Comics. When it comes to your brand, it’s not going to be Captain America or Wonder Woman who steps up to bat for you. It will be your employees.
With this comic-inspired slider, you can make your employees look like the heroes they truly are:
In this tutorial, we’re going to move away from the glossy Marvel look of the template and turn it into something that better resembles a graphic novel for our tattoo parlor:
If you’re in need of a Slider Revolution refresher before you begin, check these out:
Step 1: Delete every slide but one
You’ll be able to customize this employee showcase slider more quickly if you start with one slide. This way, you’ll finalize all of your styles here. Then, after you duplicate the slide, all you’ll need to do is customize the details instead of replicating the styles all over again.
To delete slides in Slider Revolution, go up to the toolbar and hover over “Slides”. A set of icons appears next to each slide when you hover over it. Click the trash can icon to delete:
The slides all use the same layout and amount of content, so it doesn’t matter which ones you delete and which one you keep.
Learn more:
Step 2: Superhero-fy your employee photos
You can convert your employee photos into anything you want so long as it fits with your brand’s style. For instance, you could create cartoon baby versions of your team for a daycare website. The trick is to find an app that enables you to quickly achieve the desired effect.
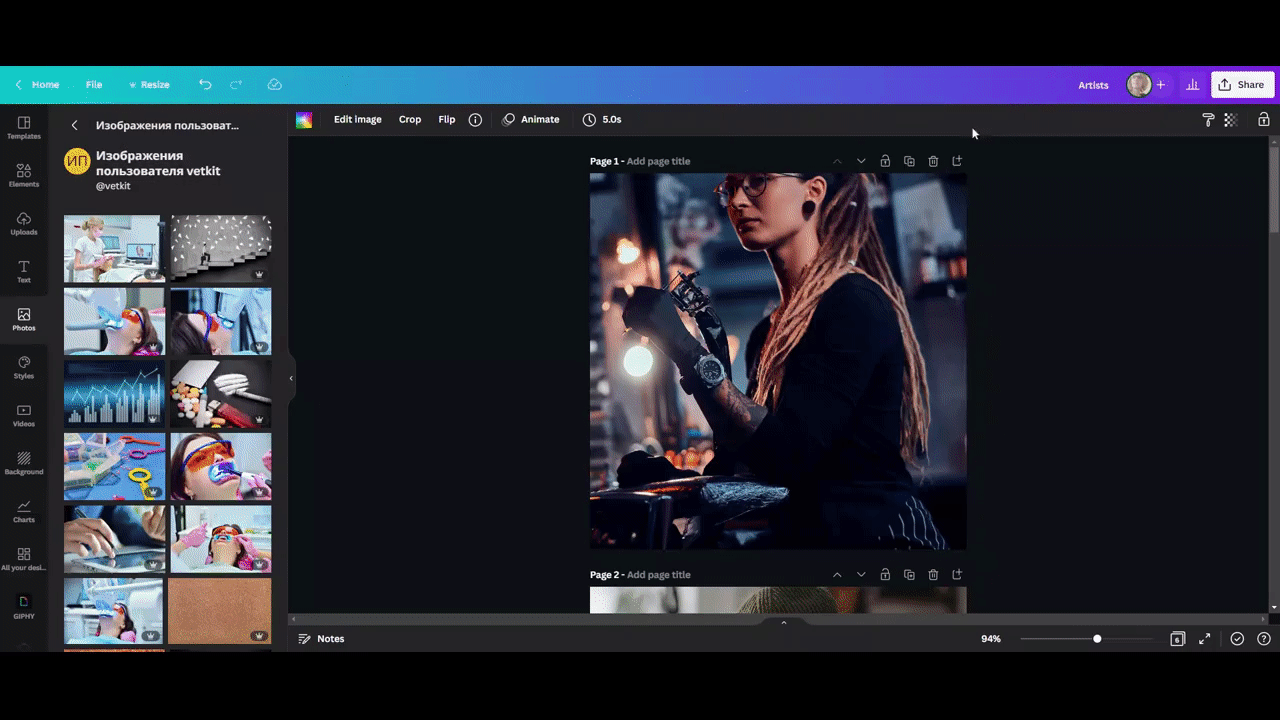
For our graphic novel treatment, we’re going to use Canva. There’s an app in there called Prisma which enables you to convert your photos into different styles of paintings:

Upload your photos into Canva (or whatever design software you’re using). The images in the template are 600px x 600px, so set up your canvas using those same dimensions. This will reduce how much editing you have to do in Slider Revolution.
To add a filter in Canva, select your photo, click on “Edit Image”, and then search for the Prisma settings. We’ve applied the Camelcade style to give our employees’ photos an edgy hand-sketched look:
There are a couple of other things you need to decide at this stage.
For starters, the superhero photos in the template have a color background, which is what gives them a trading card look in the template. However, the tattoo shop background is important to our brand’s and artists’ identities, so we’ve chosen to leave them in.
Also, the slider template places the same superhero version of the photo into two spots in the template — in the foreground as the moving card and in the background as a blurred image.
Because we want to give our design a darker, grittier graphic novel look, we’re going to place the altered photo in the foreground and the original in the background. Take a look at the before-and-after GIFs we showed you of the slider and decide which type of effect you want to create. Then export the files that you need.
Note: With image sliders, you always need to be mindful of how many image files you put in them. The more images, the longer it can take to load.
The original template uses the same image in each slide, which is useful for maximizing the slider’s performance. If you use different image versions as we’re doing in this tutorial, just remember to keep the file sizes on the smaller side (no bigger than 600×600) so they don’t interfere with loading speeds.
Step 3: Update the slide background image and thumbnail
With your employee images exported, you can now upload them into Slider Revolution. You’re going to use them three times in this slider template. We’ll deal with two of those instances in this step.
Go to “Slides Options”. First, upload the untreated employee photo as the “Background” image. Then, go to “Thumbnail” and attach the painting version of the image to your “Admin Thumb” and “Navig. Thumb”:
We’re not going to modify the built-in navigation in this slider template. However, we need to make sure the navigation thumbnails match our new photos so they show up correctly on the frontend.
Note: There is a layer called BG-Blur-Overlay that you’re going to see under “Layer Options”. This is what gives the background image you just uploaded its blurry look. If you want to make adjustments to this effect, that’s where you’ll do it. Not under “Slide Options”.
Learn more:
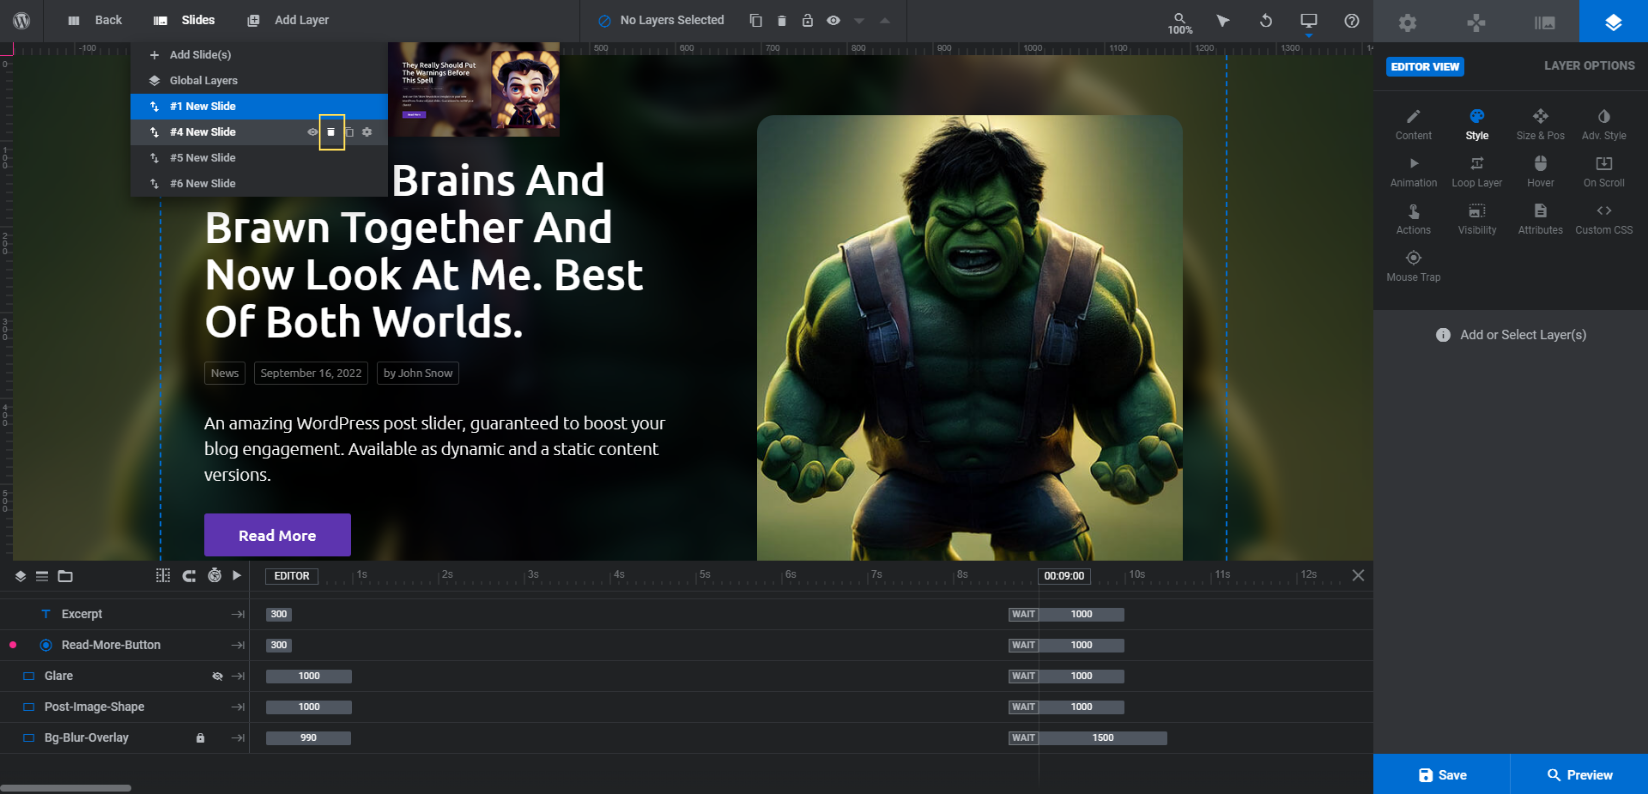
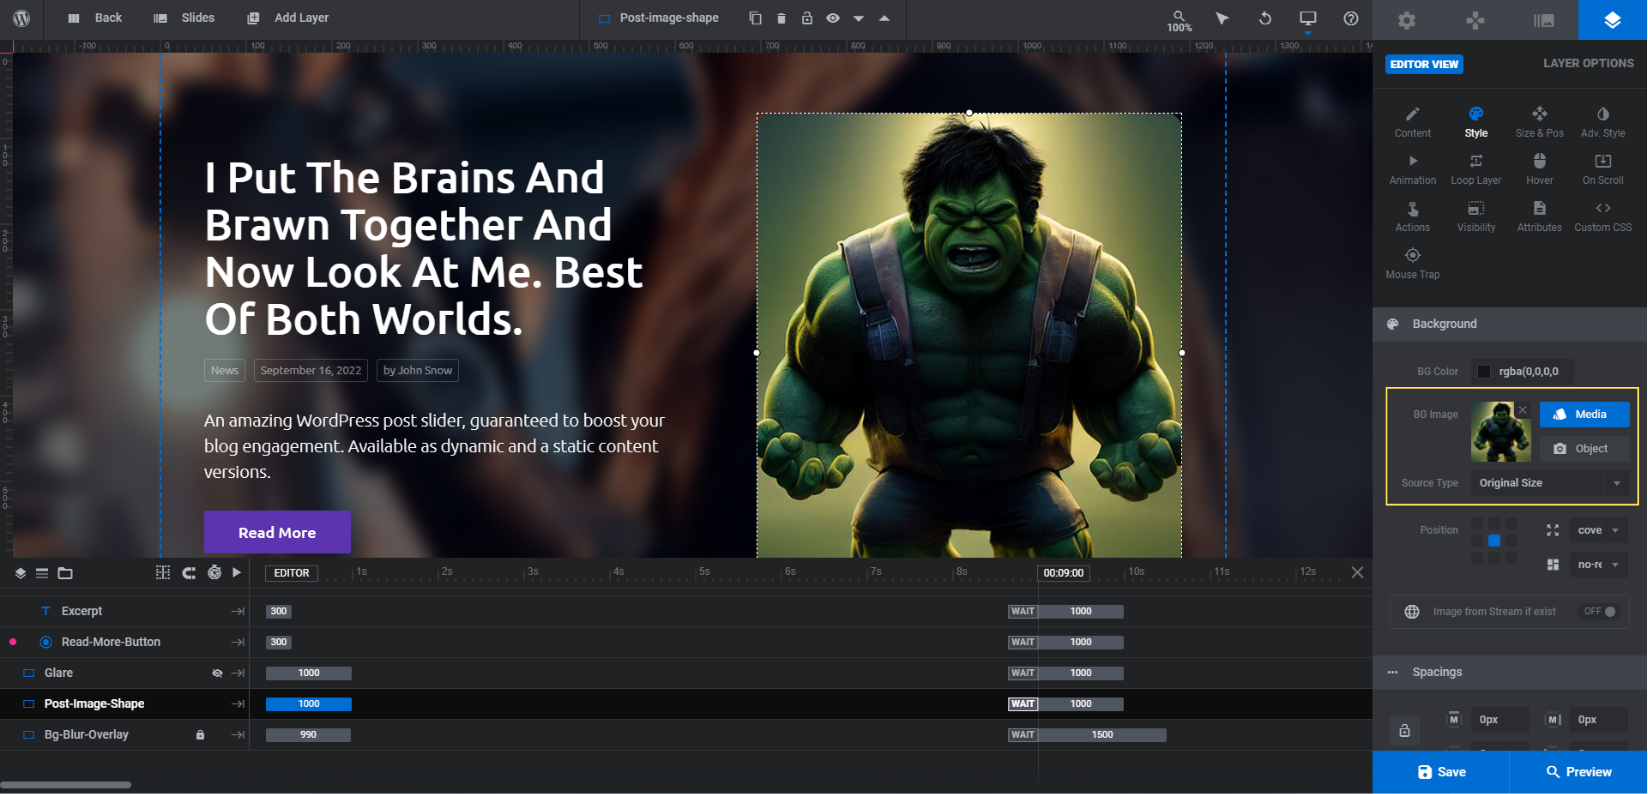
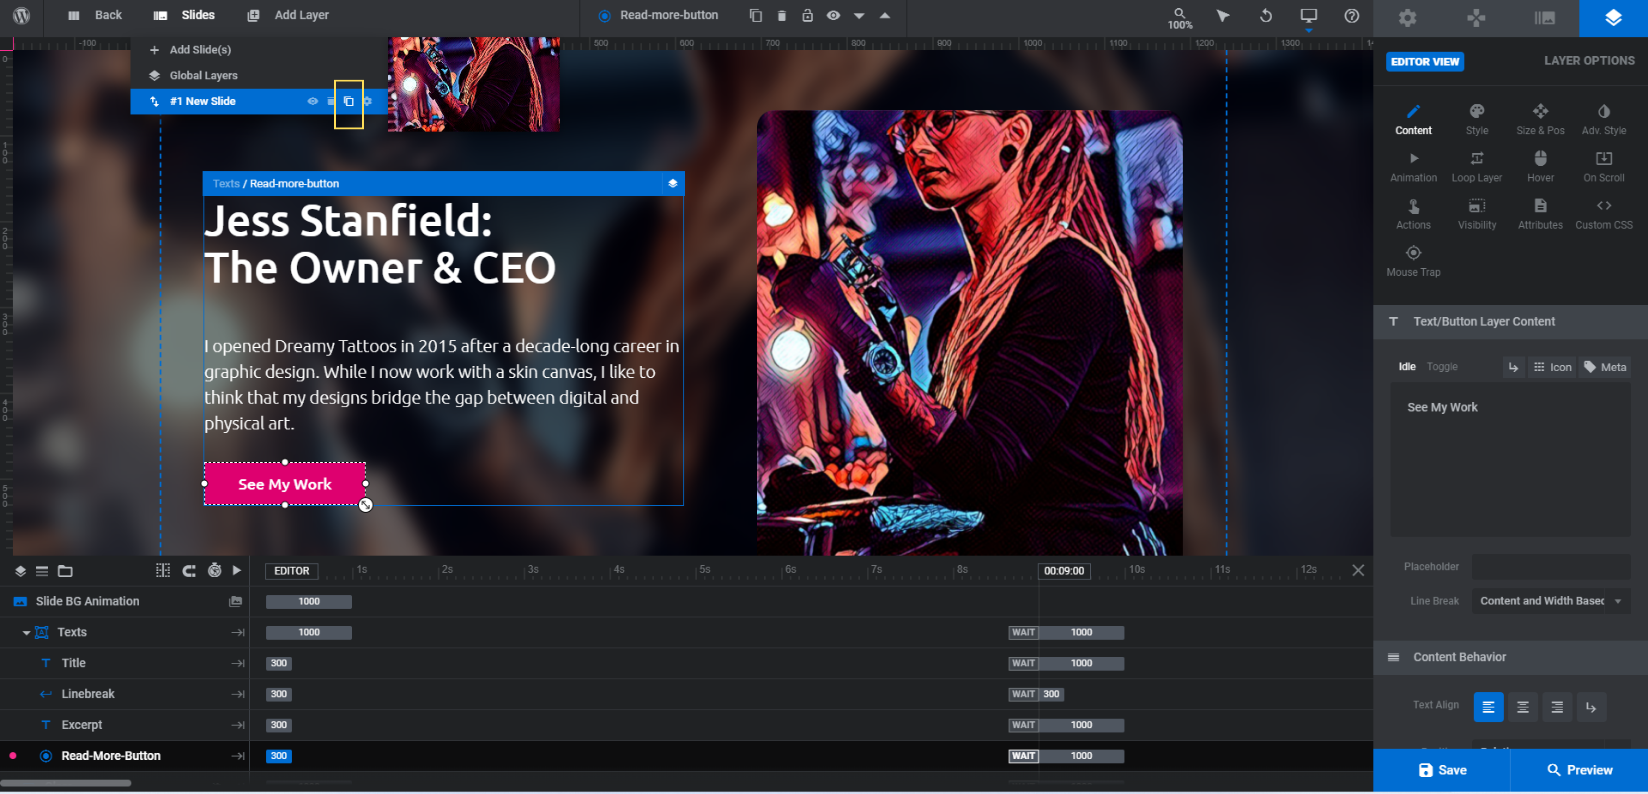
Step 4: Replace the main employee image
Let’s turn our attention next to “Layer Options”. The layer called Post-Image-Shape is the employee photo card that appears in the foreground.
To replace the photo, select the layer in the canvas or timeline editor. Go to “Layer Options” and “Style”. Upload the painting version of the photo here:
Note: If you preview this slide right now and hover over the card, you’ll see a glare pass over the photo. This is created with a layer called Glare. Leave it be as this will give the image more of a card-like appearance when someone moves their cursor over it.
Learn more:
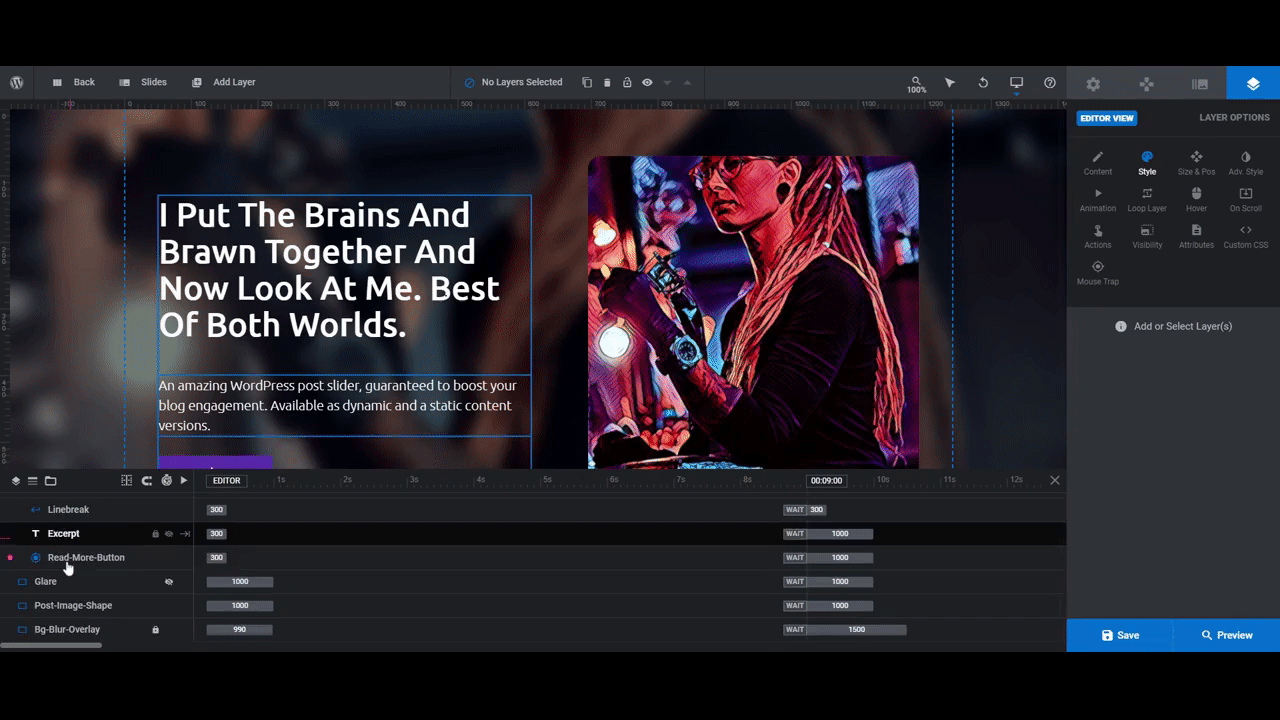
Step 5: Customize the employee’s personal introduction
The last pieces we need to finalize are the text layers. In this step, we’ll be editing the following:
- Title will become the employee’s headline.
- Excerpt will become their personal introduction.
- Read-More-Button will point to their portfolio page.
There are three additional text layers here: Tag-1, Tag-2, and Tag-3. If you are planning to direct people to a corresponding blog post about the employee, these fields could be useful. You can put whatever metadata you feel is relevant in there.
Note: Our slider isn’t going to connect to the blog, so we’re going to delete those tag layers. To do the same, hold down the Ctrl or command button on your keyboard. Then select the three layers. Hit Backspace or delete to simultaneously remove them from the slide.
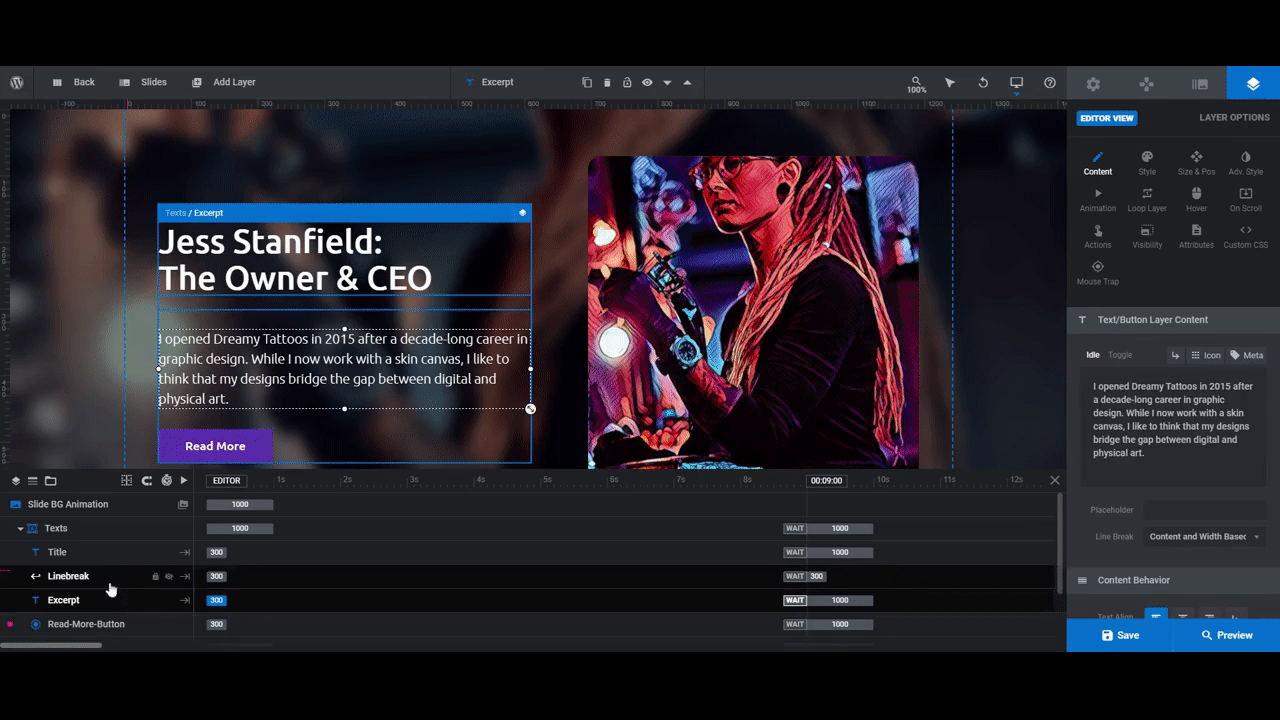
To edit the remaining text layers, select them one at a time in the canvas or timeline editor. Go to “Layer Options” and use the settings there to customize them.
“Content” will enable you to edit what the text says. “Style” is where you go to customize the font and its appearance. You shouldn’t need the other settings for the Title or Excerpt layers:
The Read-More-Button layer will require some extra work. In addition to updating what the button says under “Content” as well as the fonts and colors under “Style”, you should configure the button’s hover state under “Hover”:
One other thing to edit is what the button does when a user clicks it. You’ll control this under “Actions”:
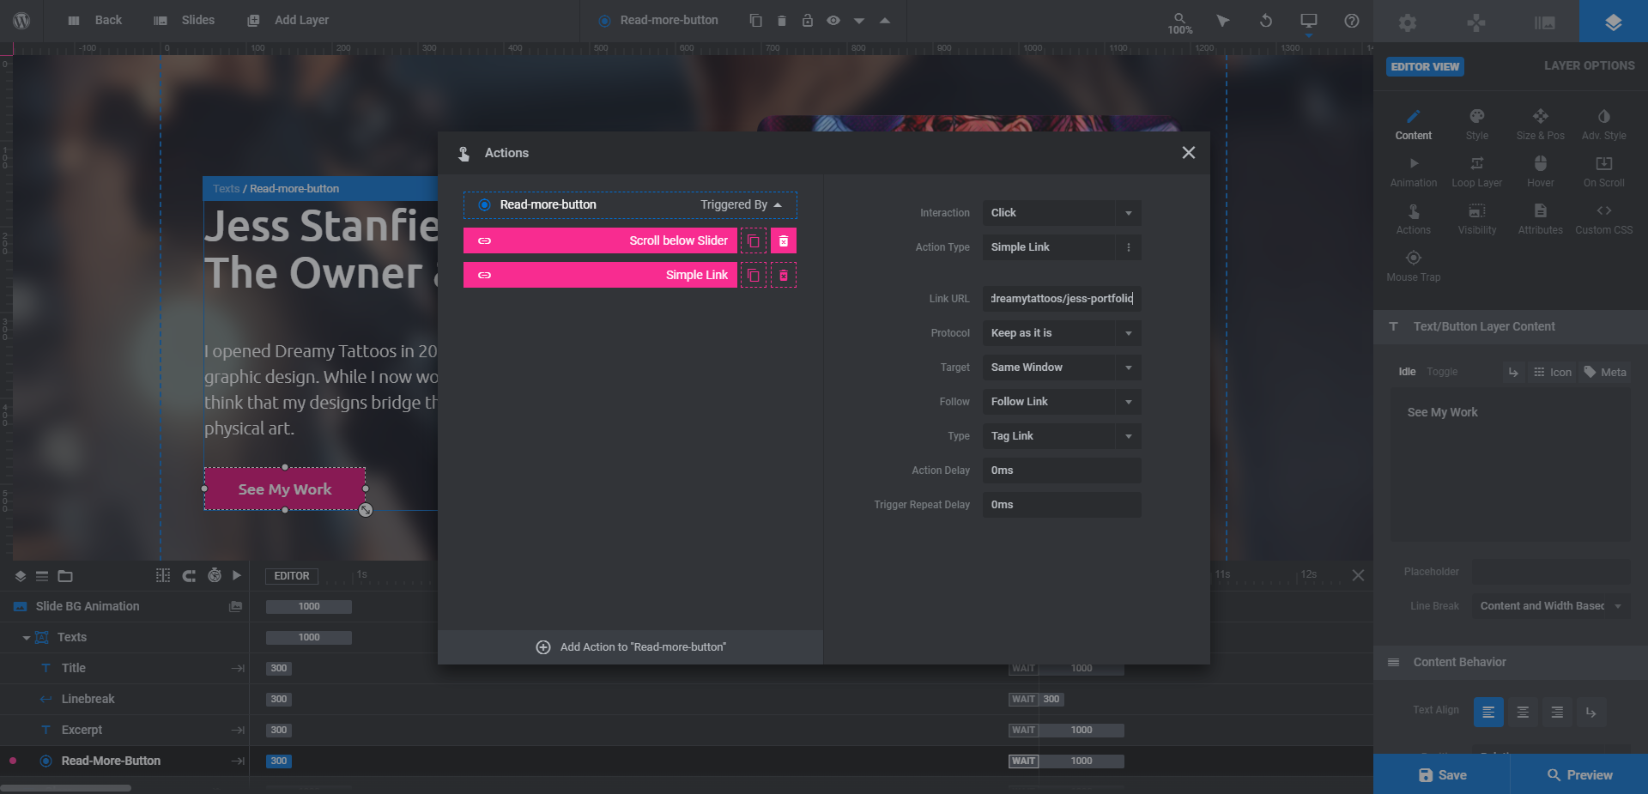
The button is currently set up to Scroll below Slider when someone clicks it. You can use this option if you want visitors to keep reading the content on the page they’re on.
Otherwise, click the trash can icon to the right of this setting to delete it. Then click Add Action to “Read-more-button” to add a new one. Set “Action Type” to Simple Link. Then enter your portfolio page’s URL (or whatever page you’re pointing to) under “Link URL”.
Learn more:
- Editing Text from Template Modules
- Adding and Configuring Button Layers
- Editing Links in Template Modules
Step 6: Duplicate the slide and fill in the details
The final step to do is add your other employees to the slider. To do this, go up to the “Slides” dropdown in the toolbar. Click on the copy icon next to your finished slide to duplicate it:
Do this for as many employee slides as you need to create.
As you go into each slide, you won’t need to edit the fonts, colors, or other styles you’ve established. Just replace the text, upload your employee photos, and update the button links:
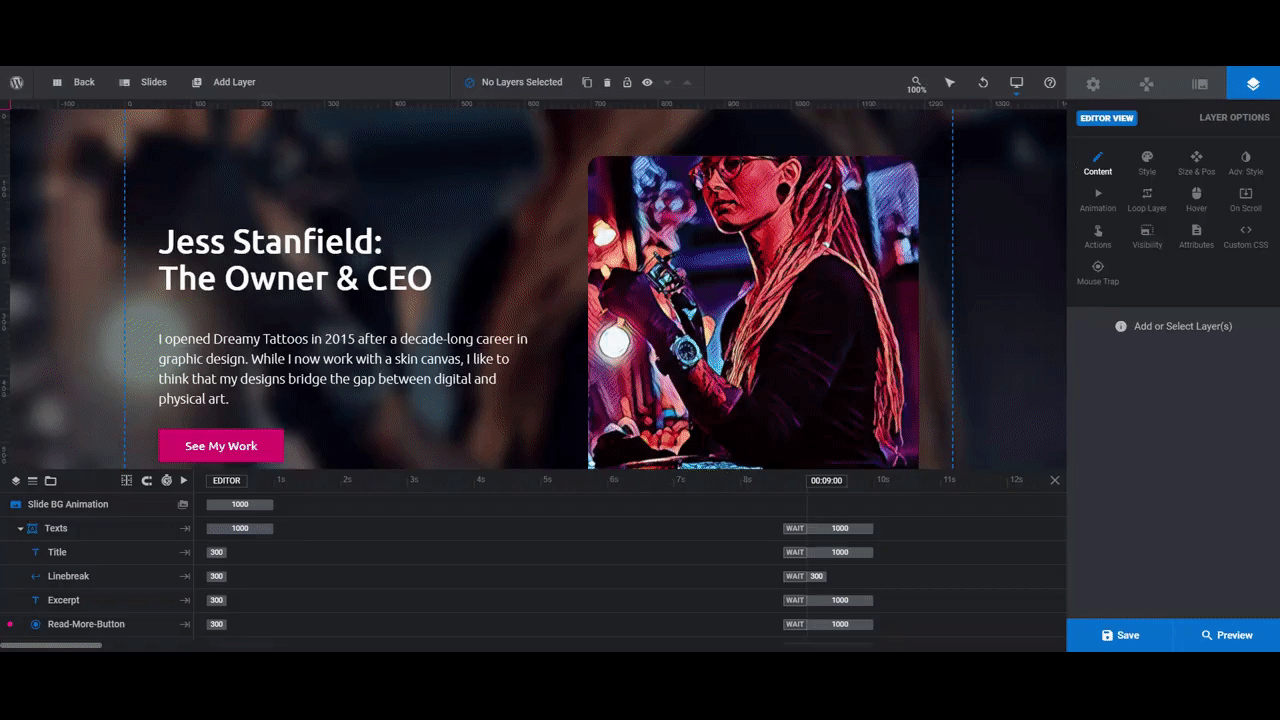
Save your changes between each slide. When you’re done, preview your work to make sure that everything is looking and working exactly as you want it to. When it’s good to go, add the slider to your Home or Team page using the Slider Revolution widget in your page builder.
Show your employees some love with this superhero slider template
There are so many different superhero themes to play around with these days, so don’t stress if the glossy Marvel look doesn’t fit your team’s style. All it takes is six steps to edit this comic-inspired slider template and to make it your own.


