
While we probably won’t ever go back to the days of skeuomorphism (at least not the way it looked in 2010), layering is still a valuable tool in web design.
Layers allow us to add depth to our designs, which can be useful in terms of improving aesthetics as well as click confidence. Layering can also help us create a unique composition — one in which text appears behind and between objects.
If you’re looking to really wow your visitors with your home page hero image, we have just the tutorial for you. Today, we’re going to show you how to place text behind objects in your hero image using the Mountain Parallax Hero template.
Table of Contents:
- Step 1: Get the lay of the land
- Step 2: Figure out what your composition will consist of
- Step 3: Edit the background
- Step 4: Remove and add image layers
- Step 5: Edit the text layers
- Step 6: Update the button design
How to place text behind objects and create an interesting optical illusion
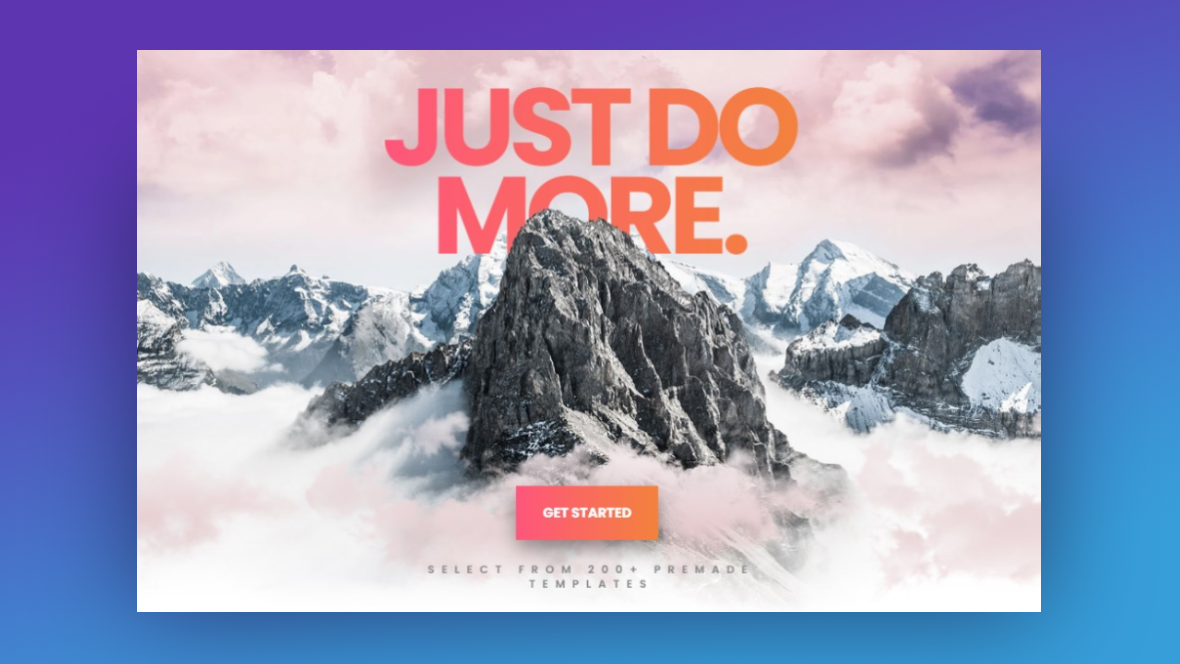
The template we’re starting with looks like this:

While you can create this kind of optical illusion layered effect with professional design software, that’s not necessary with Slider Revolution. In just six steps, we’ll show you how to edit the above template and make it look like this:
If you’re new to Slider Revolution or you’ve never edited one of our template, start here:
When you’re done, return to this tutorial and start here:
Step 1: Get the lay of the land
Before you can plan out what you’re going to do with this template, it’s a good idea to first get a sense for how the optical illusion works.
The best way to do this is to acquaint yourself with the template.
First, zoom out using the zoom in/out tool in the toolbar. This way you can see the full hero image as you select the various layers from the timeline below it:

Then, click on each lament one at a time. You’ll see that this template is nothing more than a composite of layers creatively placed atop one another.
Another thing to be aware of is how we create the order in which the layers are stacked:
The order of the layers in the timeline reflects the order of the layers in the design. So, the “CALLOUT” layer at the top of the list sits closest to the foreground of the hero image. The “Title” at the bottom is at the back of the layers. And behind it sits the background image of the mountain range..
To change the order in which the layers appear, simply drag and drop the layer into its new position in the timeline. You’ll see the changes reflected above as well as in the preview of the hero image.
Learn More:
Step 2: Figure out what your composition will consist of
What do you want your hero image to promote? And what kinds of imagery will you need to do that?
Once you know what your module will be about, you can figure out how much of the template you need to preserve in terms of images, text, animations, layout, and more.
For our purposes, we’re going to edit this template and use it to create the hero image for the fictional Sand City website.
Many popular cities and towns in the U.S. have “Visit” sites where visitors and locals alike can see what all the fuss is about and learn more about attractions, dining, accommodations, and more.
So, the hero image needs to be an enticing invitation to visit.
Pro tip: One of the benefits of using a Slider Revolution template is that so much of the work is done for you — including the responsiveness of the design. So, what we suggest is that you replace existing elements so you won’t have to build much from-scratch.
Since Sand City is a major beach destination, we won’t need the atmospheric elements from the template like the clouds or mountains. We will preserve the overall layout of the main text and image elements though.
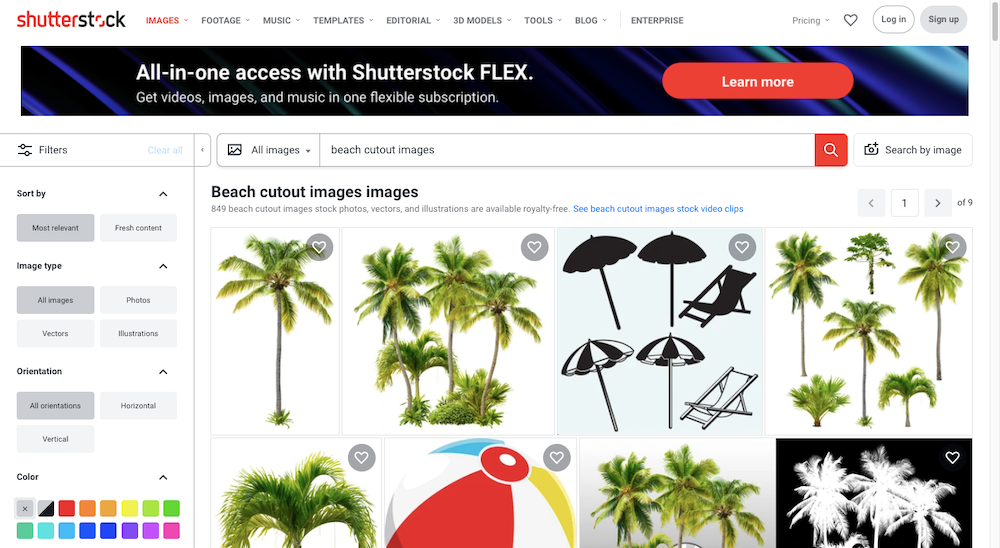
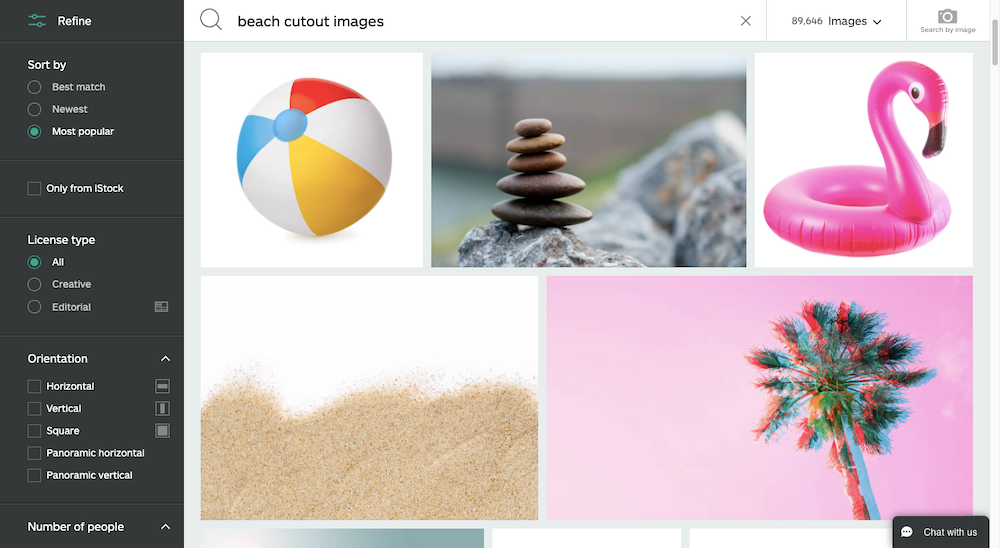
In order to layer text and elements the way the template does, you’ll need to use cut-out imagery. You can source these images (or illustrations) from premium stock photo sites like Shutterstock:
And iStock Photo:
Pro tip: While you can create designs that place text behind objects with a tool like Photoshop, you’ll lose the SEO and responsive design benefits. This is why you should do your layering within Slider Revolution.
Another tool you can use to find stock content and cut-out images is Canva. Not only does the tool have tons of stock photos, videos, textures, and other graphics available, but you can search specifically for “Cut-outs only”:

Pro tip: When downloading cut-out graphics, make sure they have a transparent background.
As a bonus, once you’ve found cut-out elements you like, you can create a rough mockup of what they’ll look like against your background using Canva. You’ll want to export the different images separately. But this will at least give you a chance to preview the combination before you add them to Slider Revolution.
Learn More:
Step 3: Edit the background
While the template uses a background image, you don’t have to replace it with another image. It all depends on what sort of setting and tone you want to establish.
To edit the background, go to “Slide Options” and “Background”. Go to “Source” and peruse the background types available. You can choose from:
- Image
- External image
- Transparent
- Colored
- YouTube Video
- Vimeo Video
- HTML5 Video
Pro tip: A color background would look really nice if you’re trying to shine a spotlight on a new product. If you go this route, consider making it a background gradient [link to gradient tutorial].
For our hero image, we decided to use a video of the ocean waves breaking on a beach. We could’ve put cloud layers in the top of the image, similar to the cloud layers at the bottom of the template. However, we thought the rolling ocean waves might be a more interesting way to add motion behind our static layers.
Learn More:
Step 4: Remove and add image layers
We’re now going to clean out any image layers we don’t need and add in the new one that will be the central focus of this hero image.
To delete existing template layers, click on them either in the visual editor or the timeline at the bottom. Then, hit the “Delete” key:
If you’re going to replace any of these layers with your own, do not delete them — especially the mountain layer in the foreground. Instead, replace them so you can preserve the template’s settings.
Pro tip: If you want to delete multiple layers at once, hold down the “Control/CTRL” button on your keyboard and select each one.
We’ve chosen to keep only one image layer from the original design: The mountain in the center.
To replace it, select the image and then go to “Layer Options”. Under “Image Layer Content” click on “Media Library” and upload your new image:

If you’re not happy with how the image flowed into the allotted space, open the “Size & Pos” settings:

From this tab, you can experiment with different “Size Presets” or manually change the width or height in the given fields.
If you want to change or customize the animation of any of your new layers, go to the “Animation” tab:

The clouds in the template are animated to move. Unless you’re replacing them with graphics that you want to animate in the same way, you’ll have to update their “IN” and “OUT” transition settings under “Keyframes”.
Pro tip: Whenever you add stock images to a module — specifically cut-out PNGs — check the “Optimize File Sizes” tool to make sure the objects aren’t gigantic.
The central image (the mountain) has a very subtle animation — it fades into view. This is something else you may want to change. Just keep in mind that if you go a similar route as we have with a background video, you want to keep all other movement in the design to a minimum.
Learn More:
- Editing Images in Template Modules
- File Size Optimizer
- The Fundamentals of Animation in Slider Revolution
Step 5: Edit the text layers
There are three text fields in the template:
- Title
- Button
- Callout
For a hero image, this is pretty standard. Your title will be the catchy headline that welcomes people to the site. The callout will explain further what they’ll find here. And the button will call on them to take the next step.
Pro tip: Depending on where you plan to use the module on your website, you might want different markup tags for your text layers. This can be set for each text layer individually under “Layer Options” > “Content” > “HTML tag”. This is useful if you want to differentiate between H2 and H3 headers, or header tags and paragraph text.
Let’s quickly swap out the text in our template for our own. To do this, click on any of the layers in the timeline or visual editor. Go to “Layer Options” and “Content” and edit the text:

Pro tip: To force text to break to the next line, insert <br/> in the spot where you want the hard break to occur. You’ll see an example of this in the template’s title.
Now let’s focus on how the text looks. It’s important to make it match your website’s branding while also ensuring that it contrasts nicely with the background image and image layers you’ve chosen.
For the title and callout text blocks, use the following settings to make adjustments:
- Style to change font, style, text color, background shading or spacing
- Size & Pos to change alignment and size
- Adv Style to rotate the text or to add a shadow or stroke
By the way, the title text has a specially coded gradient color in the template. While my text looks white while I work on it, the preview shows the original orange gradient from the template.
To override the default setting, go to “Attributes” and remove the blurslider-gradient under “Classes”:

When you’re done, your new custom color setting (if you applied one) will show in the final hero image.
Learn More:
Step 6: Update the button design
The last piece to edit in this template is your button design and animation.
To customize the look of it, use the same settings as you did your text. Also pay attention to the background and border settings under “Style”:

With Slider Revolution, you can either add your own custom colors or gradients or choose from one of many preset options. If you’re having a hard time picking a color or creating a gradient, peruse the presets to see if there’s something you can use or that you want to put a personal spin on.
If you end up changing the color and style of the button, you’ll have to do the same for its hover state. To do this, go to “Hover” settings under “Layer Options”:

For our button design, we didn’t change anything in terms of animation. However, we did alter the color.
To create the above effect, we selected the saved gradient color from the button’s normal state. Then, we turned the direction of the gradient around. You can see when we test out the hover state that it’s a small but noticeable change as the lighter green color switches sides.
Pro tip: To save any of your custom colors or color gradients for future use, open the color modal where you created the color. Give it a name and then click the “Save Preset” button.
The last thing to do in this step is to update what happens when someone clicks on the button. To do this, open your “Layer Options” and go to “Actions”:

The template has the button programmed to scroll the user down. However, if you’d like to direct visitors to another page, section, or to take another action, update the action here and save your changes.
Learn More:
- Quick Styled Headlines, Text Content, Buttons and Shadows
- Editing Links in Template Modules
- Mouse Hover Settings
Creatively combine your text and imagery with Slider Revolution
Sure, there are professional design tools that’ll enable you to place text behind objects (and between them) in your hero images. But not only does this require you to invest in expensive design software that you might not otherwise need, it can also compromise how responsive the design ends up being. Not to mention the SEO benefits you miss out on.
The best way to recreate this cool optical illusion is to repurpose Slider Revolution’s Mountain Parallax Hero template. In no time at all, you can combine your text and imagery in way that will make your visitors stop and take notice.


