
People spend hours online every day, so they’ve gotten used to websites looking and behaving a certain way. When you design a website that visitors can predict how to use and that aligns with their expectations, they feel more comfortable within it.
That said, a predictable design doesn’t have to be boring. In fact, small and intentional surprises can make the overall experience more engaging and memorable.
A unique way to do this is to add a revealing paintbrush effect to your hero image. In this tutorial, we’ll show you how to quickly create this effect on your home page using Slider Revolution and the Paintbrush Slider Template.
Table of Contents:
- Step 1: Come up with a strategy for your hero image
- Step 2: Remove the slides you don’t need
- Step 3: Edit the background
- Step 4: Edit the text layers
- Step 5: Customize the paintbrush image and effect
- Step 6: Repeat steps 3 to 5 for the other slides
- Step 7: Edit navigation controls (optional)
How to engage your website visitors with a revealing paintbrush effect
There’s so much you can do with the hero image to capture the attention of visitors — use bold gradients [link to gradient tut], create a split screen effect [link to split screen tut], or embed a video background [link to video background tut]. While you don’t see these techniques on every website, these design trends are becoming increasingly more common.
A surprise reveal, on the other hand, can be difficult to achieve without the right tools. With Slider Revolution’s templates and add-ons, that won’t be a problem for you.
In this tutorial, we’ll show you how to repurpose the Paintbrush Slider Template:
And take it to the next level with a custom paintbrush effect. Like this one:

It’s up to you what you want to reveal and how you want to do it. With this template, you can create an effect that mimics:
- A fun painting project
- Lottery ticket scratching
- The cleaning of a fogged-up window or mirror
If you’re new to Slider Revolution, read through these guides before you begin the tutorial:
Step 1: Come up with a strategy for your hero image
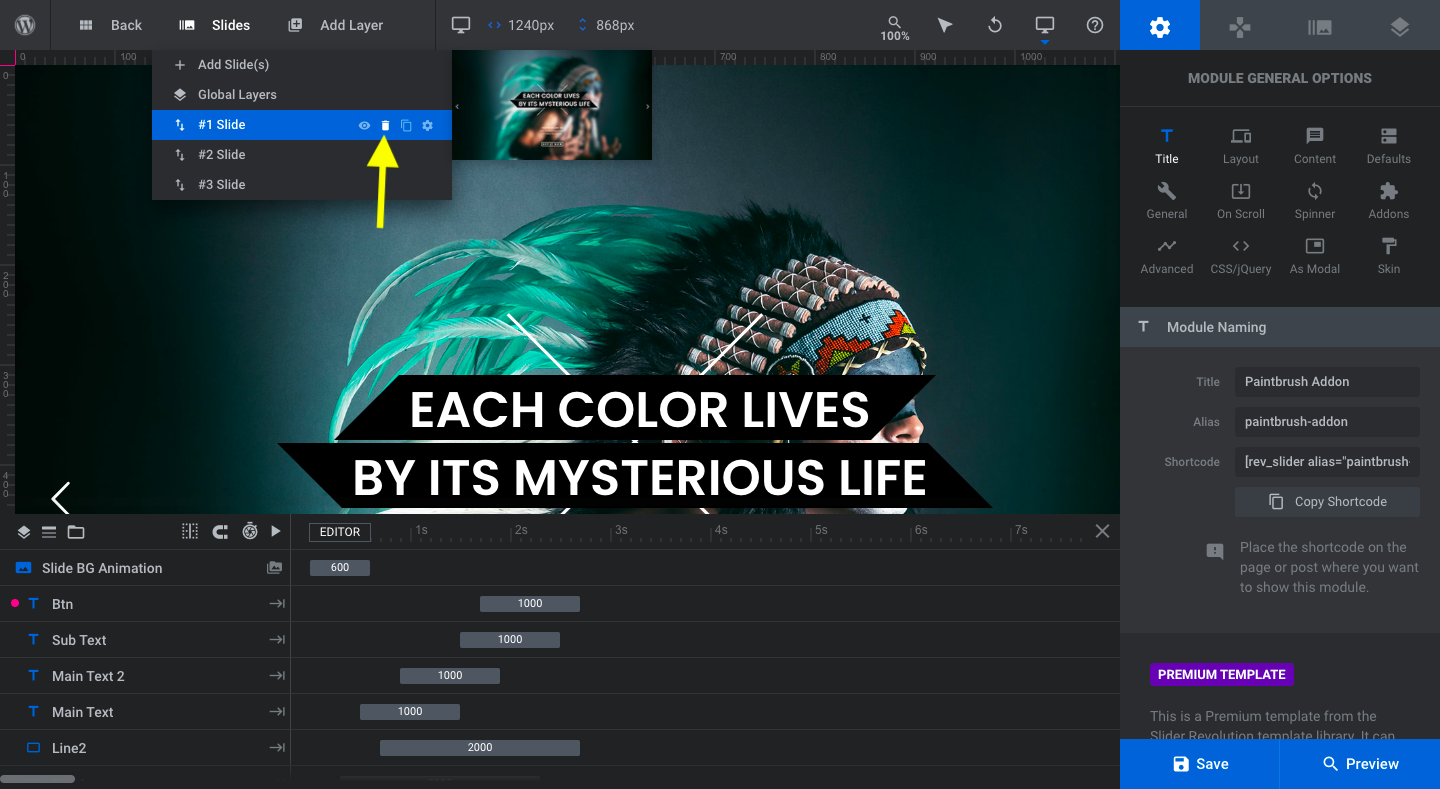
The template we’re using in this tutorial has three slides:
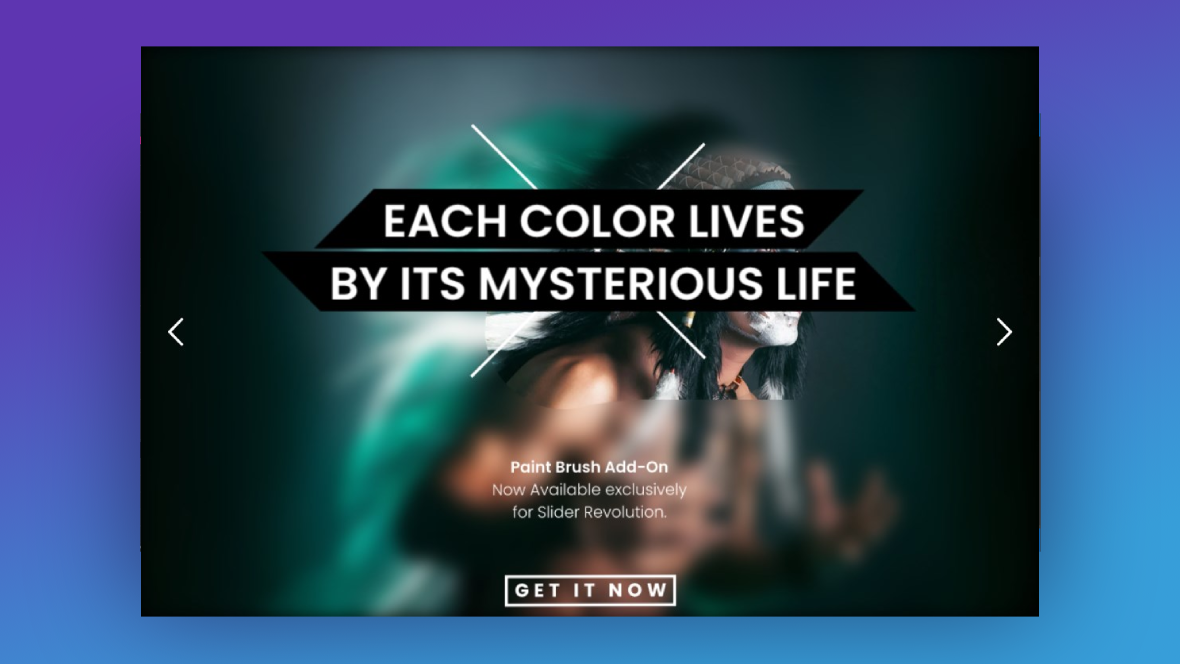
1 – Each Color Lives By Its Mysterious Life has a blurred background image. We can tell it’s a photo of a Native American man wearing a headdress. However, when the visitor mouses over it, the blurriness temporarily disappears.
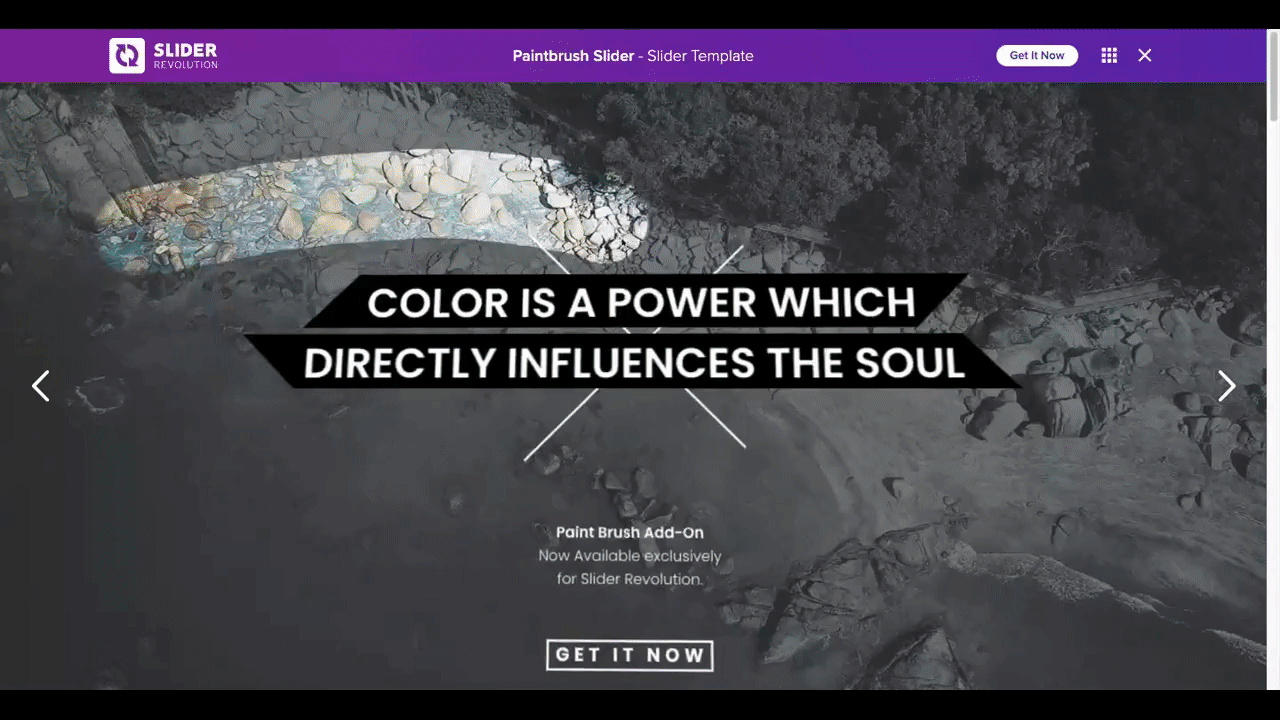
2 – Color Is a Power Which Directly Influences the Soul has a grayscale background of a shoreline. When the visitor mouses over the image, it looks like some of the grey gets wiped away to reveal the brilliant colors underneath.
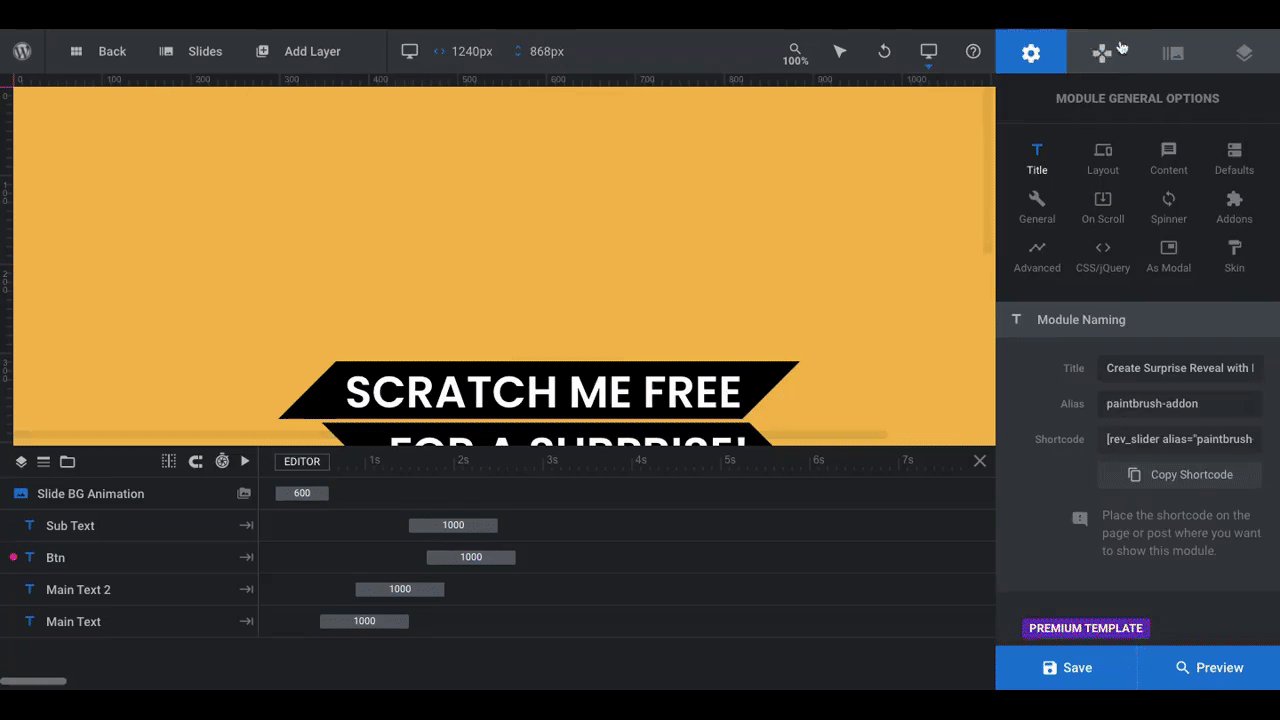
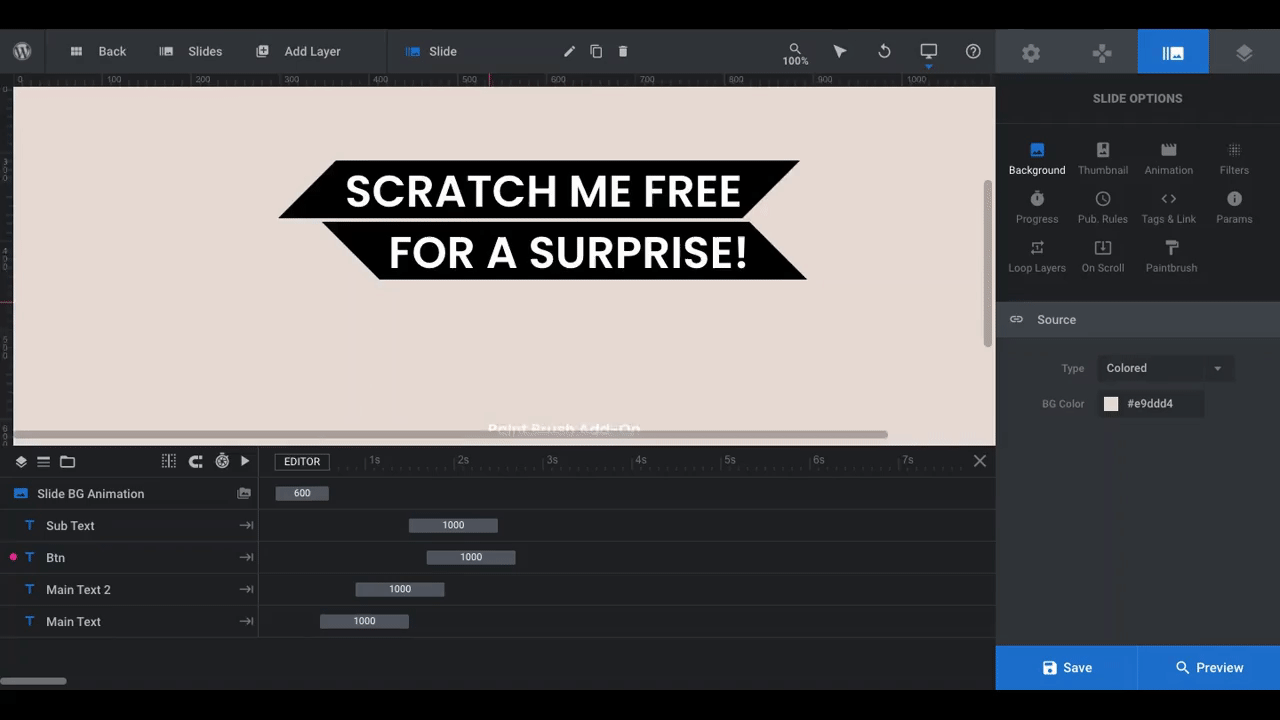
3 – Scratch Me Free for a Surprise has a bright orange background color. When the visitor mouses over the module, it scratches away at the color to reveal a car.
How will you repurpose this module template for your site? Do you only need one hero image or do you like the current slider design?
Pro tip: While all of these paintbrush effects will help you create a uniquely engaging design, be careful about overdoing it. If you decide to keep the multi-slide design, choose one surprise reveal effect to apply across all slides.
We’re going to use this template to create a promotional hero slider for our book retailer website. We’ll keep the slider design and apply the scratch ticket-style effect to all three slides.
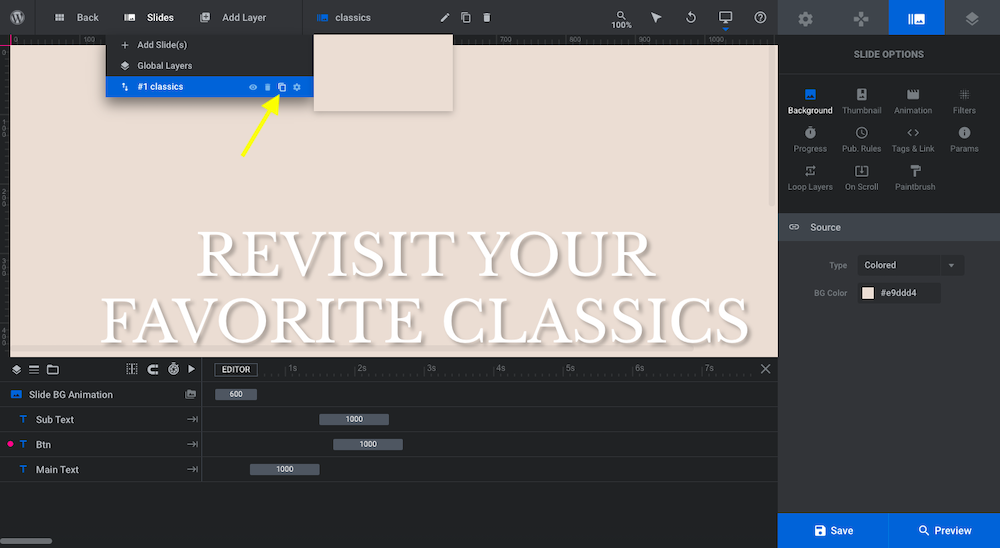
Step 2: Remove the slides you don’t need
Regardless of how many slides your hero will have, you need to delete two slides in this step.
Locate “Slides” in the toolbar at the top of the editor.
Hover over the slides with the paintbrush effects you don’t want. You’ll see a preview of them to the right so you know which ones you’re deleting:
To delete, click on the trash can icon next to the corresponding slide.
If you’re going to create a slideshow, hold on adding any new slides. You’re going to edit the slide that has the effect you want. Then you’ll duplicate it so all you have to do is customize the content on the other ones.
Learn more:
Step 3: Edit the background
When you look at this template, you would think that the background is the image that gets revealed. However, that’s not how the effect works.
The background, in this case, is the first color or image that we see.
- If you’re using the first slide, the background is the Native American man.
- If you’re using the second slide, the background is the grayscale version of the beach.
- If you’re using the third slide, the background is a solid orange color.
To edit the background, go to “Slide Options” on the right and click on “Background”:
Here you can change the background to an image, video, or another color (or gradient).
To add a graphic, click the “Media Library” button and upload your file.
To edit the color, do as I’ve done in the GIF above. Click on “BG Color” and swap out the HEX code next to “Color” in the modal.
Learn more:
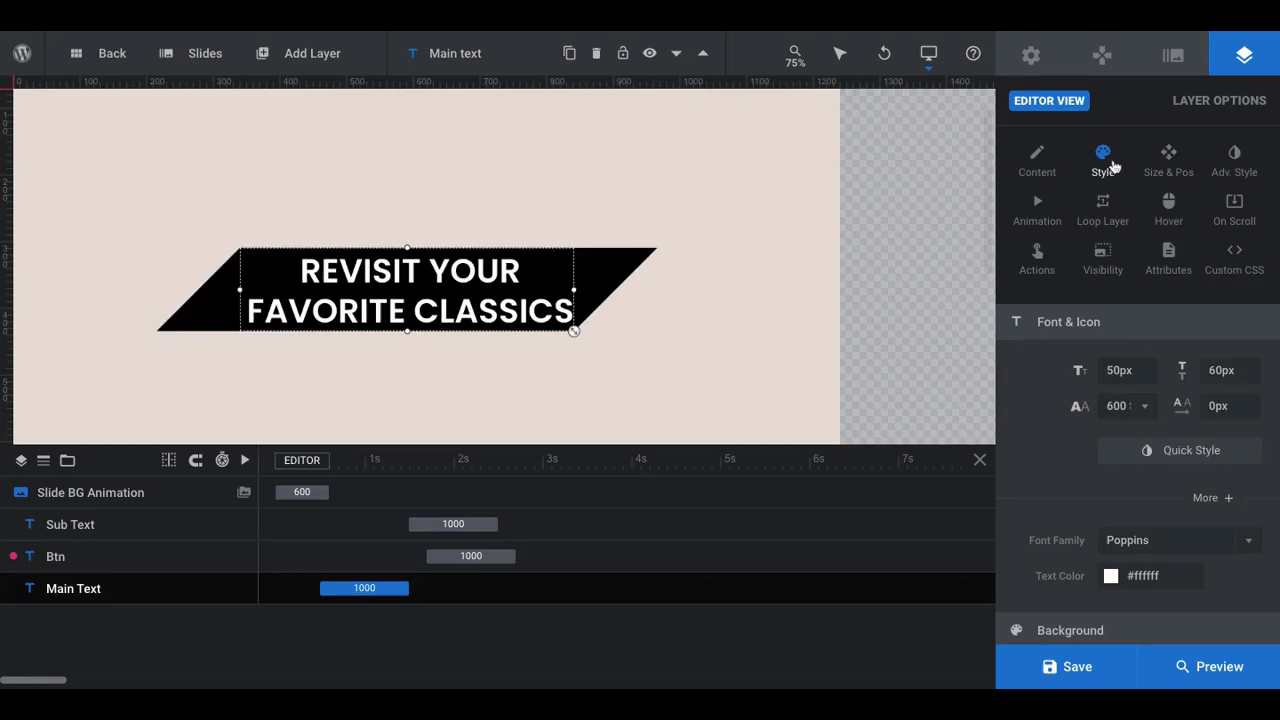
Step 4: Edit the text layers
This template has four text layers which you can see in the timeline editor at the bottom:
To edit these fields, click on them one at a time. The “Layer Options” will open on the right and you can modify them from there:
- Use “Content” to change what the text layer says
- Use “Style” to update the font, size, text color, background color, spacing, and border
- Use “Size & Pos” to update alignment, position, and size
- Use “Adv Style” to rotate or flip the text or to add a shadow or stroke
- Use “Animation” to modify the way the text looks as it transitions in and out of the slide
Pro tip: Be careful about the font colors you choose. You want your text to be readable against the paintbrush “background”, so you might have to play around with your font color later or add a background to protect the integrity of your copy.
There are additional animation settings you may want to configure. If the settings above don’t address what you’re looking for, look under Loop Layer and On Scroll to see if you can make the changes there.
One other area to look is under “Slide Options” and “On Scroll”:
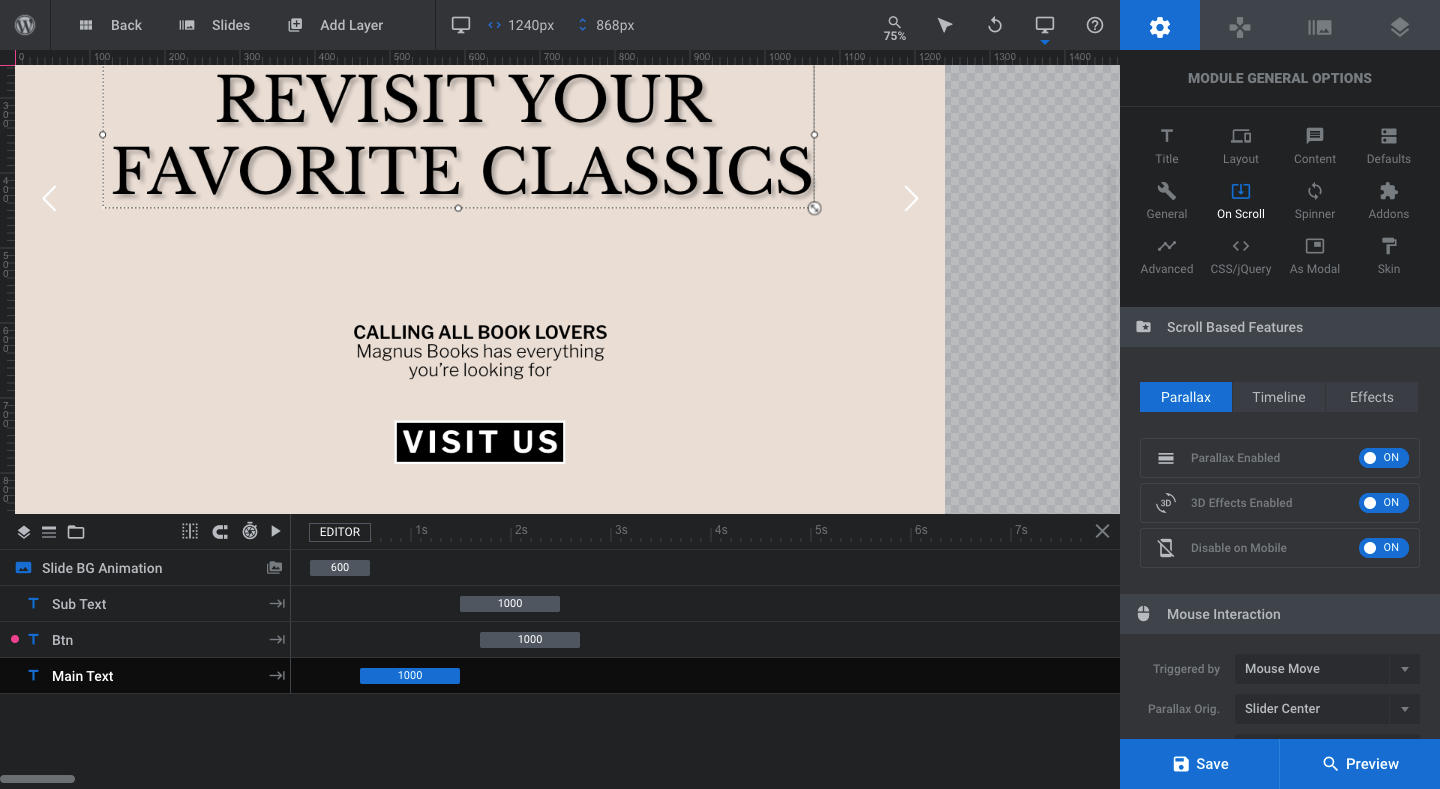
The settings under “On Scroll” are what give your text layers the wobbly feeling from the template. If you want to remove them, deactivate the settings here.
Learn more:
- Editing Text from Template Modules
- Importing Layers from the Library and Other Modules
- The Fundamentals of Animation in Slider Revolution
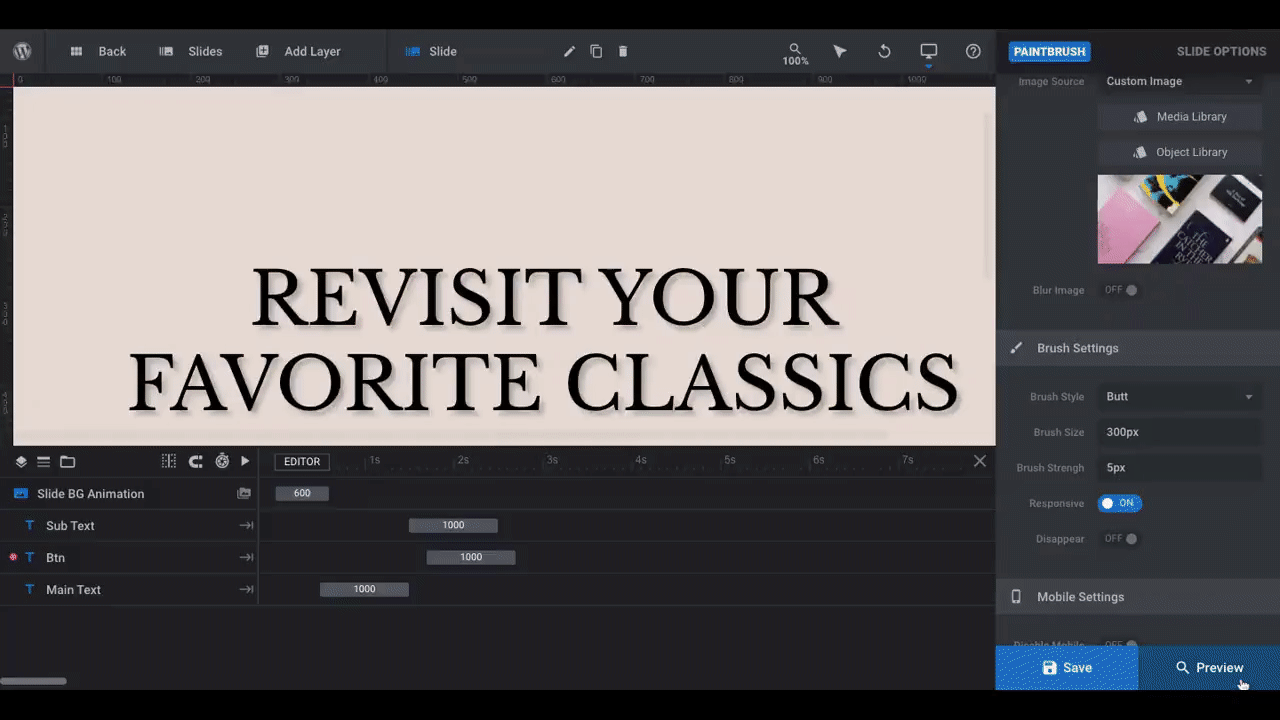
Step 5: Customize the paintbrush image and effect
The template comes pre-installed with the Paintbrush AddOn. To customize it, go to “Slide Options” and “Paintbrush”.
Replacing the existing image with your new image to reveal under “Image Settings”:
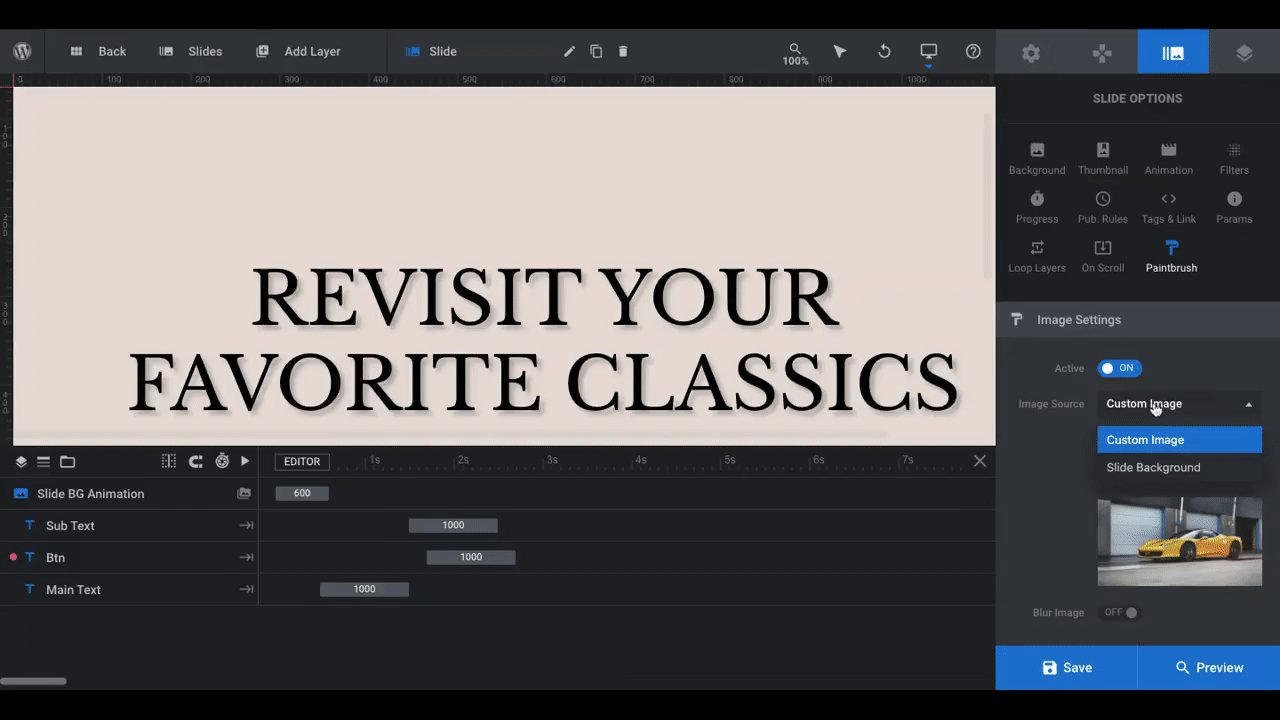
If you chose this particular slide because you liked the way the paintbrush effect looked and worked, you can leave the settings as is. However, if you want to add a blur to the image, change the size of the brush, or make the reveal disappear, edit those settings here.
By the way, now is a good time to preview your slide and make sure the contrast between the image and text works. By sorting that out now, you won’t have to worry about it in the next step.
Click the “Preview” button in the bottom-right corner to open up the live preview:
In this example, the text needs some tweaking as the black doesn’t show up too well against the background. Once you’ve made your changes and are happy with what you’ve done, save your changes and move onto the next step.
Learn more:
Step 6: Repeat steps 3 to 5 for the other slides
If you’re creating a hero image from this template, you can skip this step. If you’re creating a slider hero from this template, here’s what you need to do:
Go to the “Slides” controller in the top toolbar. Hover over the slide you just created and click on the copy icon:
Do this for as many slides as you want to add to the slider.
Pro tip: Add a custom thumbnail for each slide under “Slide Options” and “Thumbnail”. Also, change the name of each slide in the toolbar. This will make it easier to manage your slides.
Everything is all set in terms of layout, styles, and animation. All you need to do now is customize the content and imagery in the new slides. Go back through steps 3 through 5 and remember to save your changes when you finish each slide.
Learn more:
Step 7: Edit navigation controls (optional)
The template has the slider set to automatically scroll at set intervals. It also has left and right arrow controls that allow visitors to manually control the movement of the slider.
If you’d like to adjust the auto rotation settings, go to “Module Settings” and “General”:
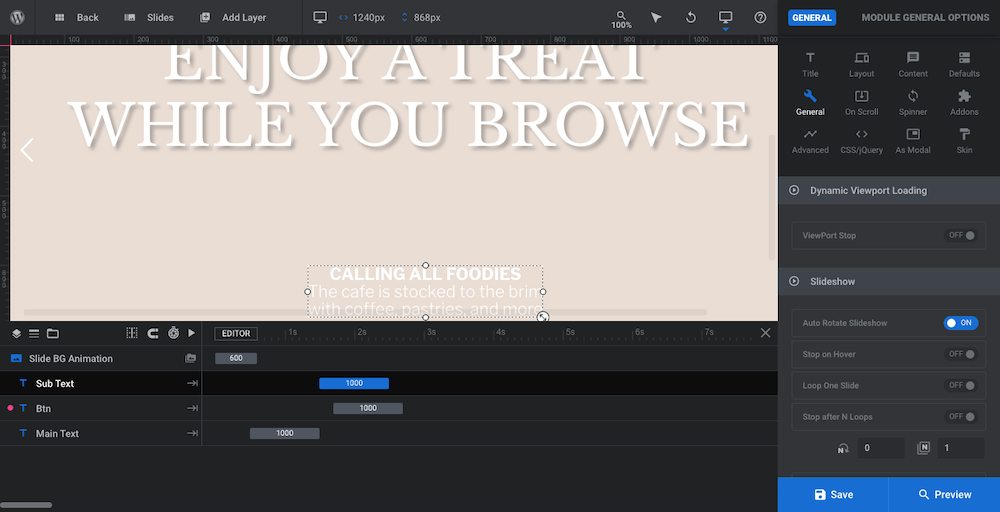
As it stands now, there should be more than enough time for visitors to read through all the content and play around with the reveal effect. However, if you’ve added extra content to each slide, it might be beneficial to prolong the rotation.
In terms of the navigation, you can modify it under “Navigation Options”:
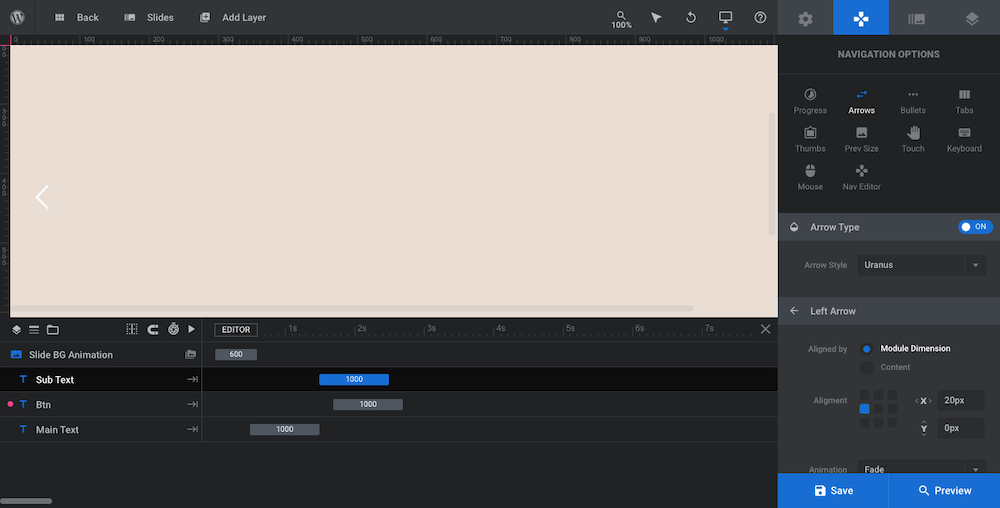
The only navigational elements in this template are the “Arrows”. From this screen, you can adjust the:
- Arrow style
- Alignment
- Placement
- Animation
- Size
- Color
If you like the arrows as is, leave these settings be. You can also experiment with the other navigation controls. The progress bar and bullets would work well with this particular template.
Learn more:
Which surprise reveal will you use?
The paintbrush effect is not an easy one to pull off when you use WordPress out of the box. Even the most popular page builder plugins won’t be of much help in recreating this effect.
With Slider Revolution, though, you’ll get a ready-made template that you can quickly and painlessly repurpose. The only question is, which of the surprise reveals will you use?


