Table of Content
Module Settings
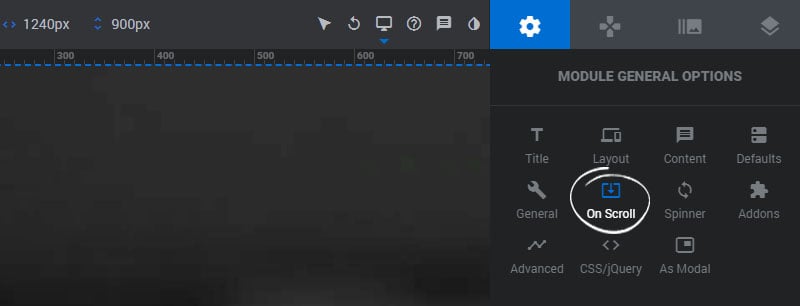
This is where the OnScroll features are activated for the Module. Then once activated, the Slide and Layer settings can be individually adjusted.
Parallax and Mouse Interaction
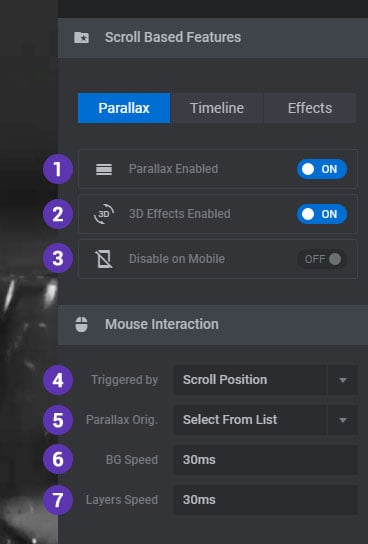
1. Parallax Enabled
Enable parallax effects for the Slide’s main background images and its Layer content.
2. 3D Effects Enabled
Enable 3D effects for the Slide’s main background images and its Layer content.
3. Disable on Mobile
Choose if the Parallax and 3D effects should be disabled on mobile devices.
4. Triggered by
Choose if the effect(s) should happen when the page is scrolled, on mouse move or both.
5. Parallax Origin
The origin point is related to the strength of the effect as the mouse moves. Choose “Mouse Enter” to place the origin at the point where the mouse first enters the module, or “Slider Center” for a more balanced strength.
6. BG Speed
The speed at which the Slide’s background will move.
7. Layers Speed
The Speed at which the Slide’s Layers will move.
3D Settings
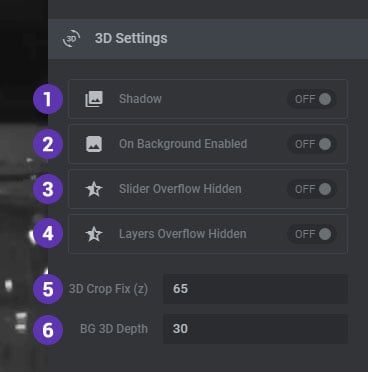
The 3D settings will become visible when the “3D Effects Enabled” option is switched on.
1. Shadow
Add an optional CSS3 box-shadow to the main background and content Layers to enhance the 3D visual.
2. On Background Enabled
Choose to apply the 3D effect to the Slide’s main background image.
3. Slider Overflow Hidden
Depending on the strength of the effect, the main background image may bleed outside the module as the effect takes place. Enable this option if you do not wish this to occur.
4. Layers Overflow Hidden
Depending on the strength of the effect, the slide’s content Layers may bleed outside the module as the effect takes place. Enable this option if you do not wish this to occur.
5. 3D Crop Fix
Adds a CSS3 “translateZ” value to the content to help avoid unwanted visuals in certain browsers.
6. BG 3D Depth
The depth value to use for the Slide’s main background image.
Parallax & 3D Depths
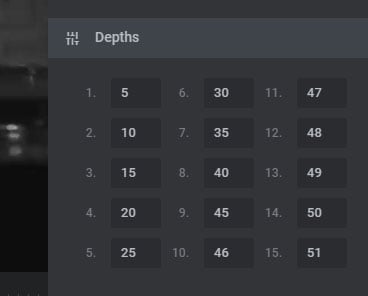
The Slide’s content Layers each have an assigned “Level” for the effect, set in the Layer Settings On-Scroll section. The number’s 1-15 in the screenshot to the right represent these levels, and the values for these levels represent the depths for the effect.
Timeline
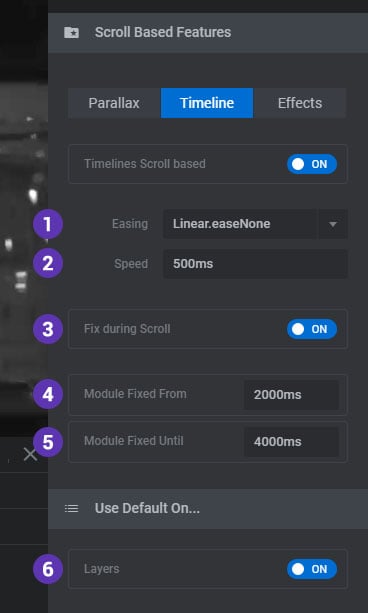
Normally the Slide’s timeline would play automatically. This option allows you to play aka “scrub” the timeline as the user scrolls the page with their mouse.
1. Timeline Scroll based
Enable the timeline scrolling.
1. Easing
The easing equation to be applied to the scrubbed timeline.
2. Speed
The speed at which the timeline moves based on the scrolling action.
3. Fix During Scroll
When enabled, once the playhead starts, the page will be in a “fixed” state until the play head ends.
4. Module Fixed From
The starting point where the page will be in a “fixed” state as the scrolling occurs and the timeline is scrubbed.
5. Module Fixed Until
The point when the scrubbing ends, and the page continues to scroll normally.
6. Layers
Enable the effect on Layers by default.
Effects
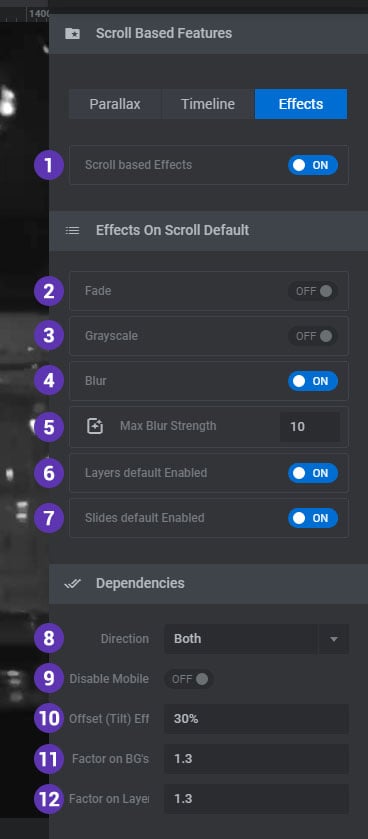
Apply Fade, Grayscale and Blur effects to the entire Slide and/or its Layers as the Module scrolls into and out of view.
1. Scroll based Effects
Enable the effects for your Module.
2. Fade
Fade your content into and out of view as the Module scrolls into and out of view.
3. Grayscale
Transform your content from black and white to color as the Module scrolls into and out of view.
4. Blur
Applies a CSS Blur Filter to your content as the page scrolls into and out of view.
5. Max Blur Strength
The maximum CSS Blur Filter value that will be applied to the content.
6. Layers default Enabled
Enable the effects on Layers by default.
7. Slide default Enabled
Enable the effects on the Slide’s main background by default.
8. Direction
Choose which scrolling direction the effects should be applied. Options are “Top”, “Bottom” or “Both” directions.
9. Disable Mobile
Disable the effects on mobile devices.
10. Offset (Tilt) Effect
Begin to apply the effects when this percentage of the Module has scrolled into view.
11. Factor on BG’s
The strength of the effect on the Slide’s main background.
12. Factor on Layers
The default strength of the effect on the Slide’s Layers.
Slide Settings
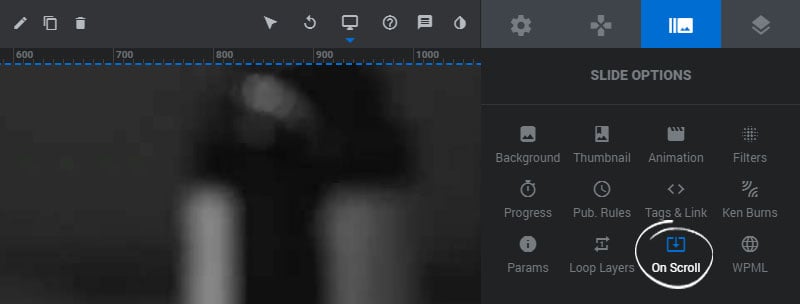
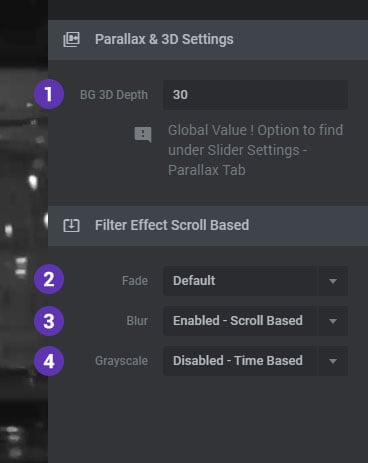
1. BG 3D Depth
The depth value to use for the Slide’s main background image.
2/3/4. Fade, Blur & Grayscale
Apply an effect to the Slide’s main background, based on the Module’s On Scroll settings. Choose “Default” to use the Module’s default setting, “Enabled – Scroll Based” to allow the effect when the page is scrolled, or “Disabled – Time Based “to only allow for On-Scroll Timeline effects.
Layer Settings
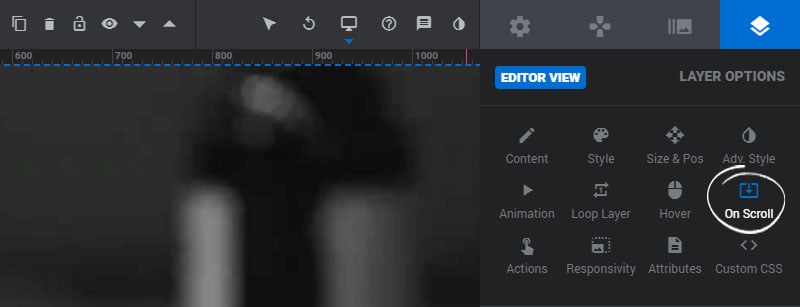
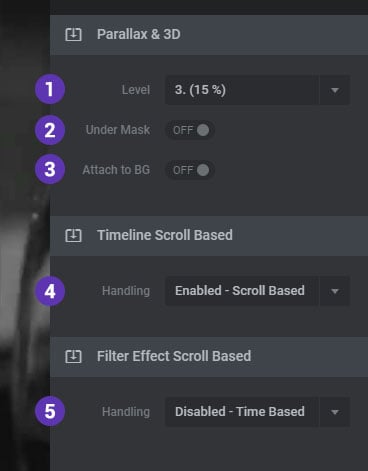
1. Parallax & 3D Level
The depth value to use for the Layer for the Parallax and/or 3D effect.
2. Under Mask
Applies a mask to the Layer’s bounding box. And when the Layer moves it will never bleed outside its mask.
3. Attach to BG
The Layers movement will be synced to the movement of the Slide’s main background.
4/5. Timeline/Filter Scroll Based Handling
Apply movement to the Layer based on the Module’s On Scroll settings. Choose “Default” to use the Module’s default setting, “Enabled – Scroll Based” to allow the effect when the page is scrolled, or “Disabled – Time Based “to only allow for On-Scroll Timeline effects.
