
Video is a popular trend in web design right now. It’s also a really important one.
Video is a user-friendly format that’s easy to consume. You can tell a story in a matter of seconds and you don’t even need to include a soundtrack. Just having captivating visuals is enough.
There are many ways to use video on a WordPress website, including front and center on your home page. And with an eye-catching video background in that spot, you’re sure to make a strong impression with visitors to your site.
The biggest problem people face when adding a background video to WordPress is a lack of control. You have to work with the options given to you or find tools outside of WordPress that enable you to edit your video before uploading it.
With Slider Revolution, you won’t have that problem. In fact, if you start with the Modern Portfolio Slider Reel template, a lot of the groundwork will have been laid for you, so you have more time to customize your video background to perfection.
Table of Contents
- Tutorial: How to edit the Modern Portfolio Showreel Slider template
- Step 1: install the Modern Portfolio Showreel Slider template
- Step 2: Delete the slides you don’t need
- Step 3: Edit the video background
- Step 4: Add a thumbnail of your video
- Step 5: Customize the look of your video
- Step 6: Change the animation
- Step 7: Edit your slider navigation
- Step 8: Add your copy
- Step 9: Edit global layers
- Ready to impress your visitors with a stunning background?
Tutorial: How to edit the Modern Portfolio Showreel Slider template
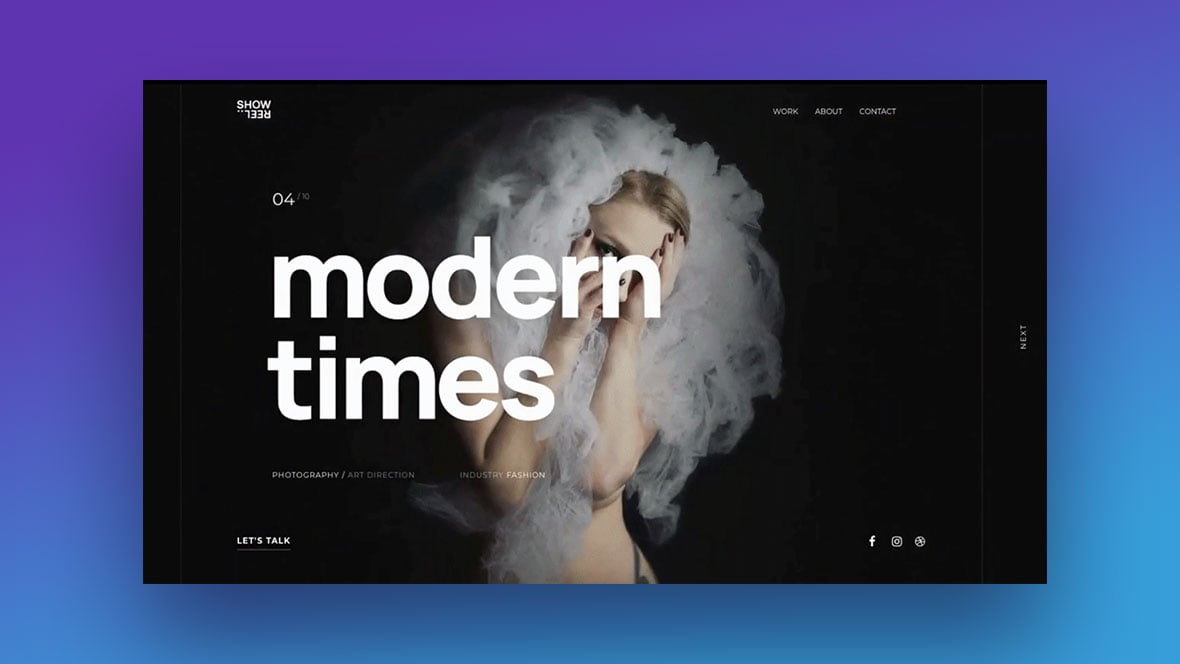
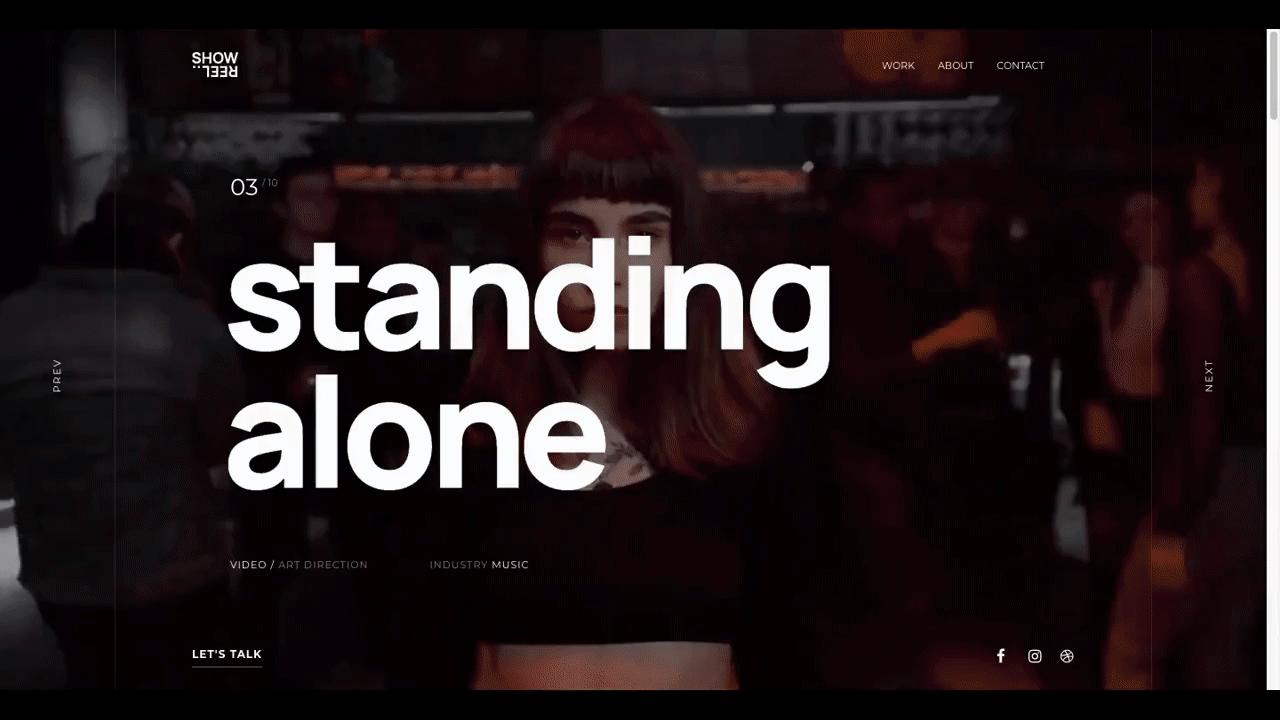
In today’s tutorial, we’re going to show you how to take this portfolio slider template:
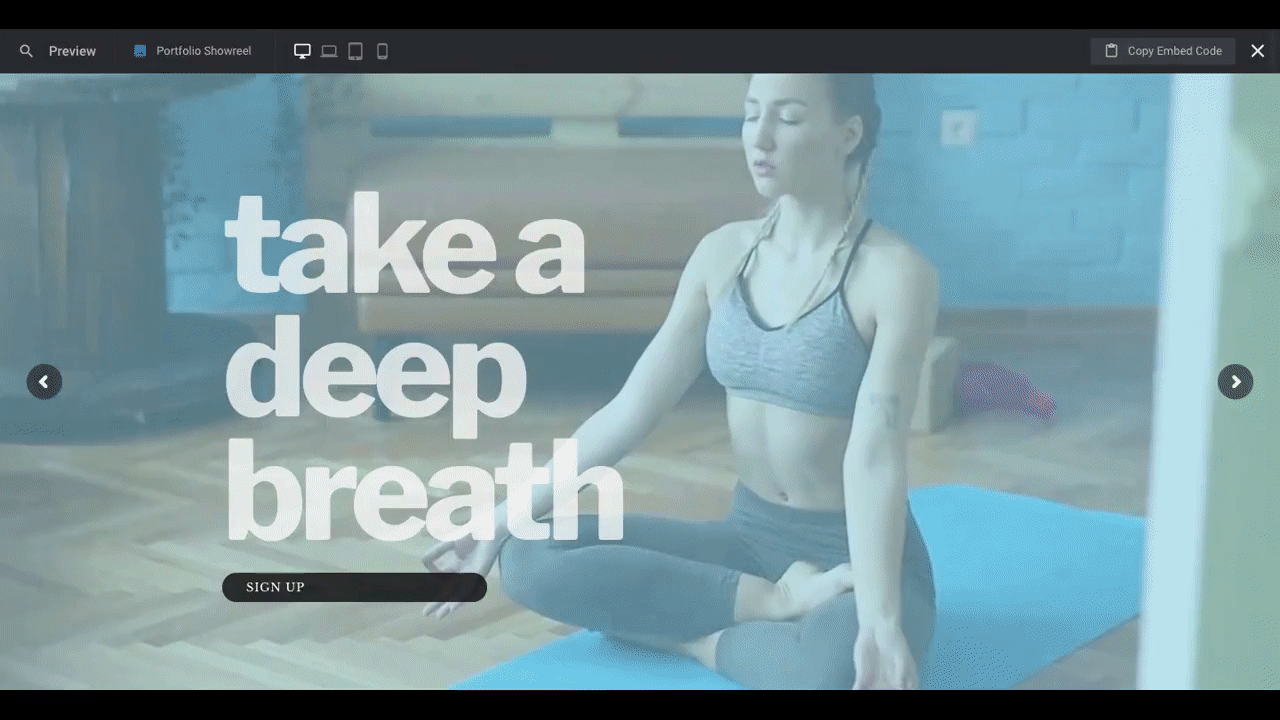
And repurpose it for a yoga studio’s home page hero section, like this: hero section, like this:
Video backgrounds look great on all kinds of websites.
Whether you want to use it to show off your portfolio of videos or photos, want to show your business in action, or simply want to set the scene, you can painlessly do this with Slider Revolution. And you won’t have to sacrifice a bit of control to do it either.
Note: If this is your first time using the Slider Revolution plugin, go through this tutorial [link to Slider Rev 101 post] and get the lay of the land before you jump in:
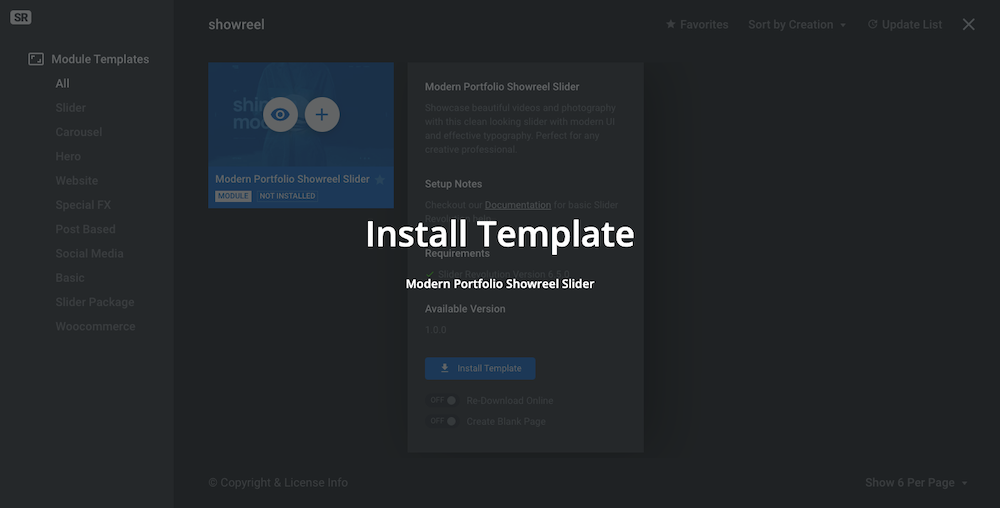
Step 1: Install the Modern Portfolio Showreel Slider template
Open the Slider Revolution plugin in WordPress. Scroll down and select “New Module from Template”:

From here, you can use any Slider Revolution template. However, to create your video background, you’ll want the one called Modern Portfolio Showreel Slider.
Use the search bar at the top to locate it:
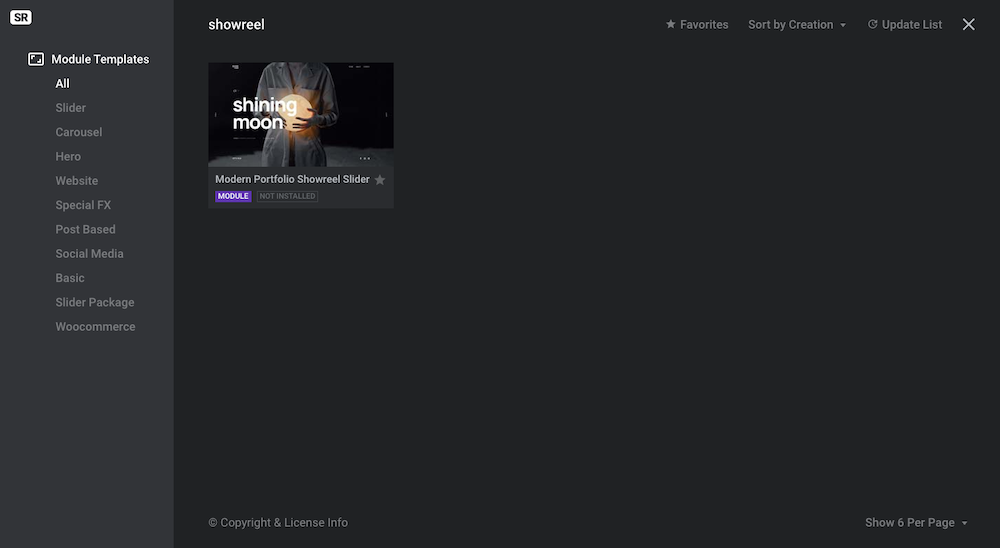
Hover over the template and click the plus-sign and then the blue “Install Template” button to upload it to Slider Revolution:
When you go back to the main Slider Revolution dashboard, you’ll find it waiting for you under “Search Modules…”:

Hover over it and click the Edit (pencil) icon to get started.
Learn More
Step 2: Delete the slides you don’t need
This template includes 10 slides. While this is a little much to put in the home page hero section of the site, it’s very useful for showing off a portfolio or product images internally.
If you’re using this template to build a video background for your home page, delete the slides you don’t need so you can focus on the ones that you do.
Pro tip: If you want to use this module as a hero scene with only one slide, delete all of the slides but one. Then, switch the layout of the module from “Slider” to “Hero”. Only the first slide will be shown and the navigation disabled. You can easily prepare multiple designs for your hero header and switch them out later by dragging a different slide into the first slot.
Go to the Slides dropdown at the top of the editor. Hover over each slide you don’t want and click the Delete (trash can) icon to remove the ones you don’t want:
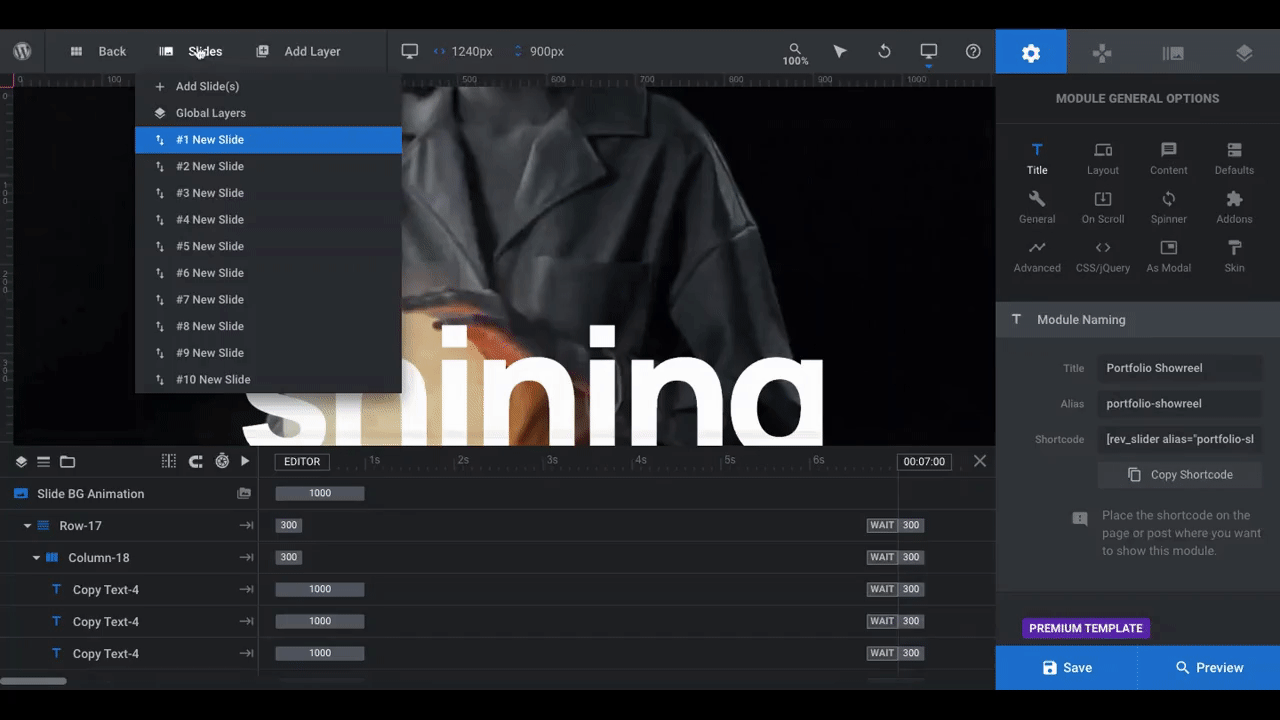
It doesn’t matter which ones you delete. Slider Revolution will rename them accordingly.
It’s okay if you don’t do them in the right order or change your mind later about the order they should appear in either, so don’t stress about that now. If you decide to change the order later, just use the up/down arrows in your Slide manager to move them around:
Pro tip: Delete all of the slides except for one if you plan on creating a custom but consistent look across all your slides. That way, you can edit the first slide with the fonts, colors, animations, and other settings that you prefer.
When you’re done, duplicate the slide however many times you need to. All you’ll have to do at that point is upload your videos and edit the copy.
Learn More
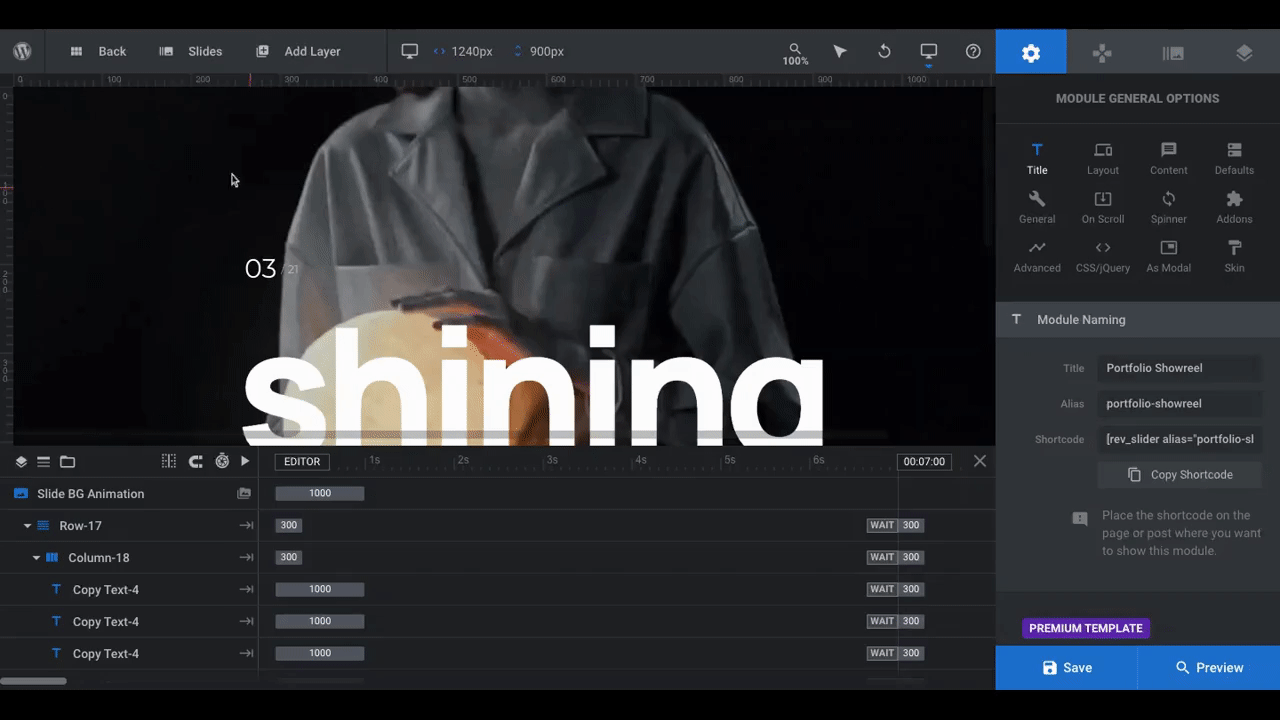
Step 3: Edit the video background
Click on Slide #1 from your list of Slides. To edit the video background, go to Slide Options on the right side of the editor and open the Background tab.
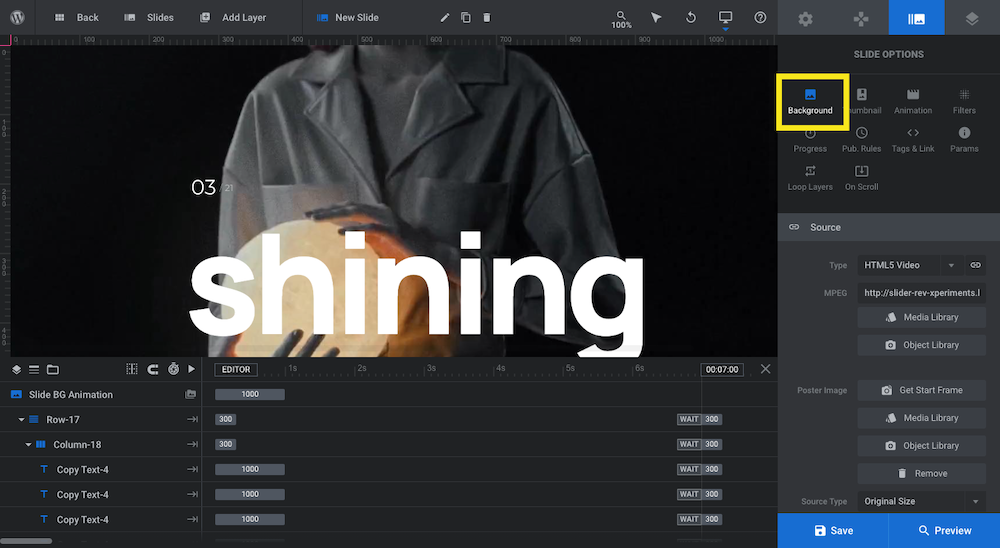
From here, you can upload a video to WordPress or import it from your YouTube or Vimeo account.
If you’re going to upload a video, open the Media Library. Either select the already uploaded video or upload it now. This works just like it does everywhere else in WordPress.
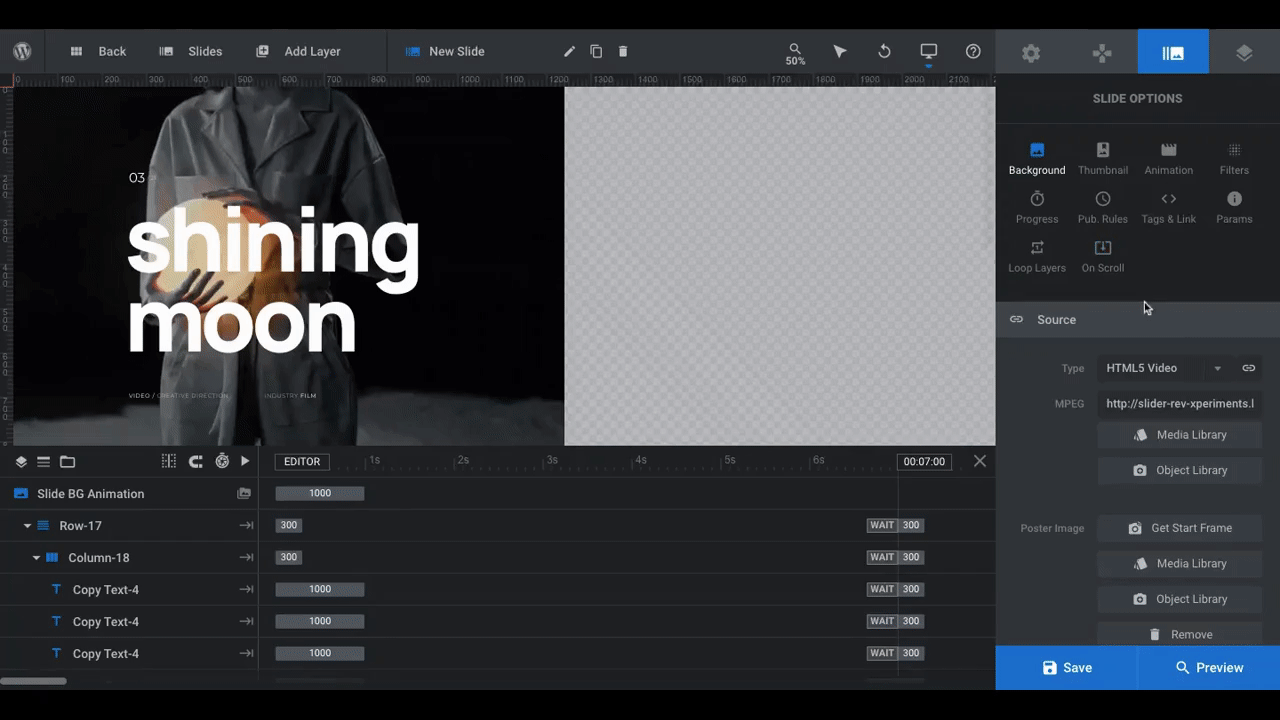
Save your changes.
Pro tip: If you feel like you don’t have enough room to view your module while you’re editing it, you can either zoom out or minimize the timeline. The zoom feature is at the top of the editor where the magnifying glass and % view are.
To collapse the timeline, click the “X” in the top-right corner of it.You can reopen the timeline by hovering over it.
Learn More
Step 4: Add a thumbnail of your video
The thumbnail is the image you see when you hover over your slides in the Slides manager. If you don’t update them, you’ll see the old slide images, which will make editing your video background slider difficult.
To edit these thumbnails, go to Slider Options and Thumbnail. Slider Revolution automatically generates a thumbnail when you upload your video so all you have to do is click “Reset” and it’ll select the right one.
If you want to upload a custom one, you can do that as well. It’s the same process as uploading other media to WordPress.
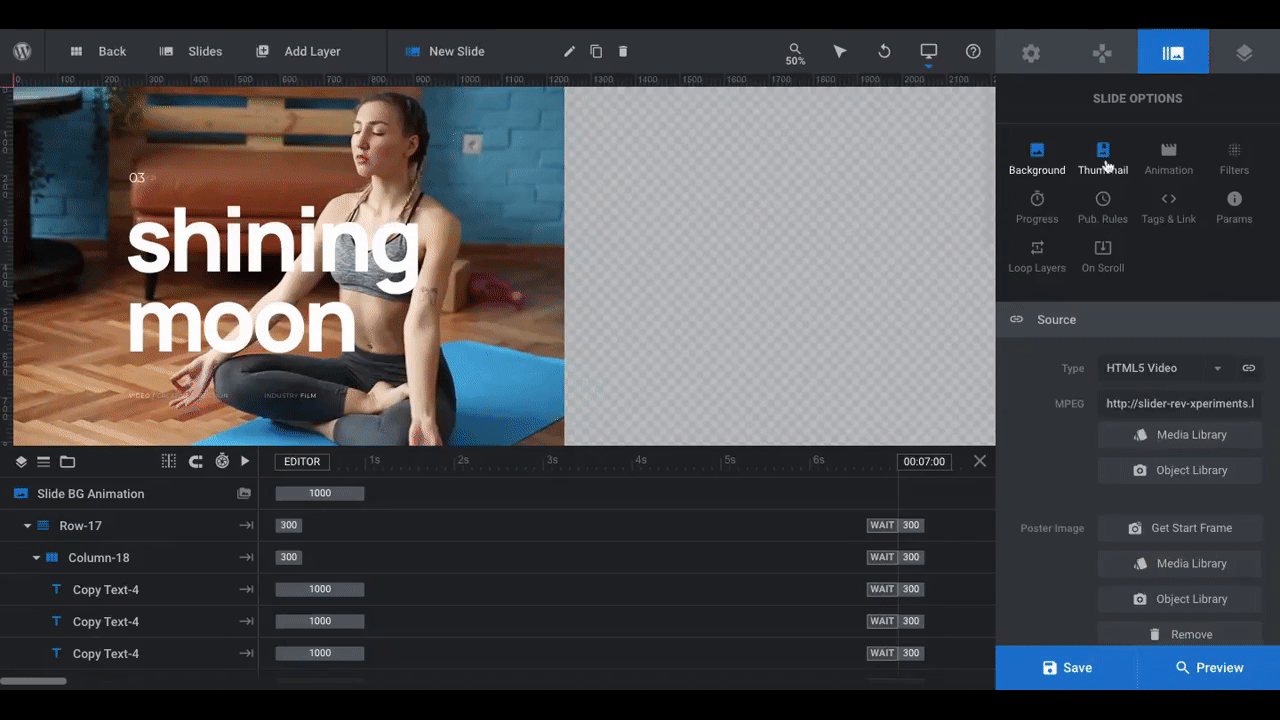
Notice here how it looks when only one of your thumbnails has been updated under Slides. So make sure you go through and update all of your thumbnails if you have multiple slides.
Learn More
Step 5: Customize the look of your video
In the same Background settings where you uploaded your video, scroll down. You can either preserve the HTML5 video settings from the template or customize them here.
You can change how the video fits into the space, set the video to loop, change the way the video transitions into the next, etc.
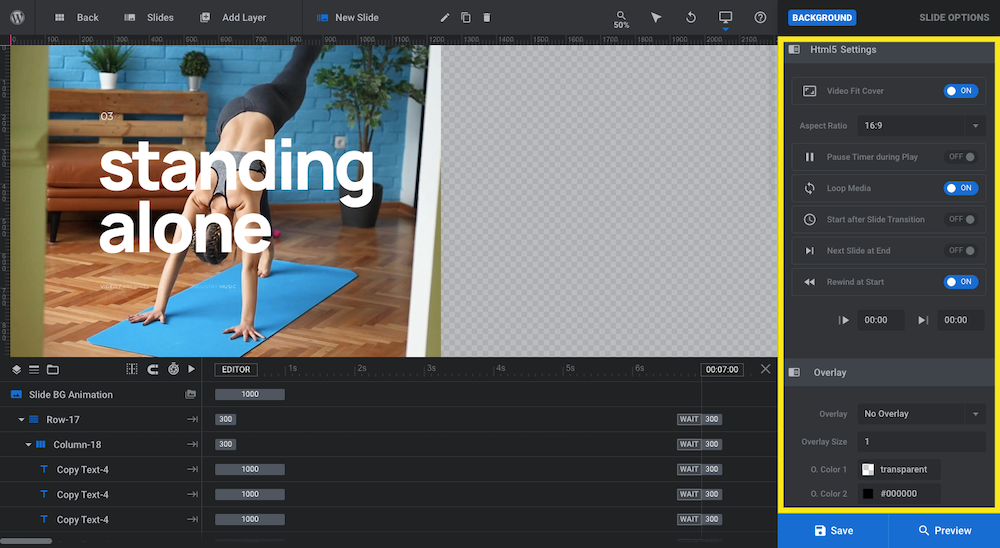
You can also apply an overlay to the video as we’ve done here:
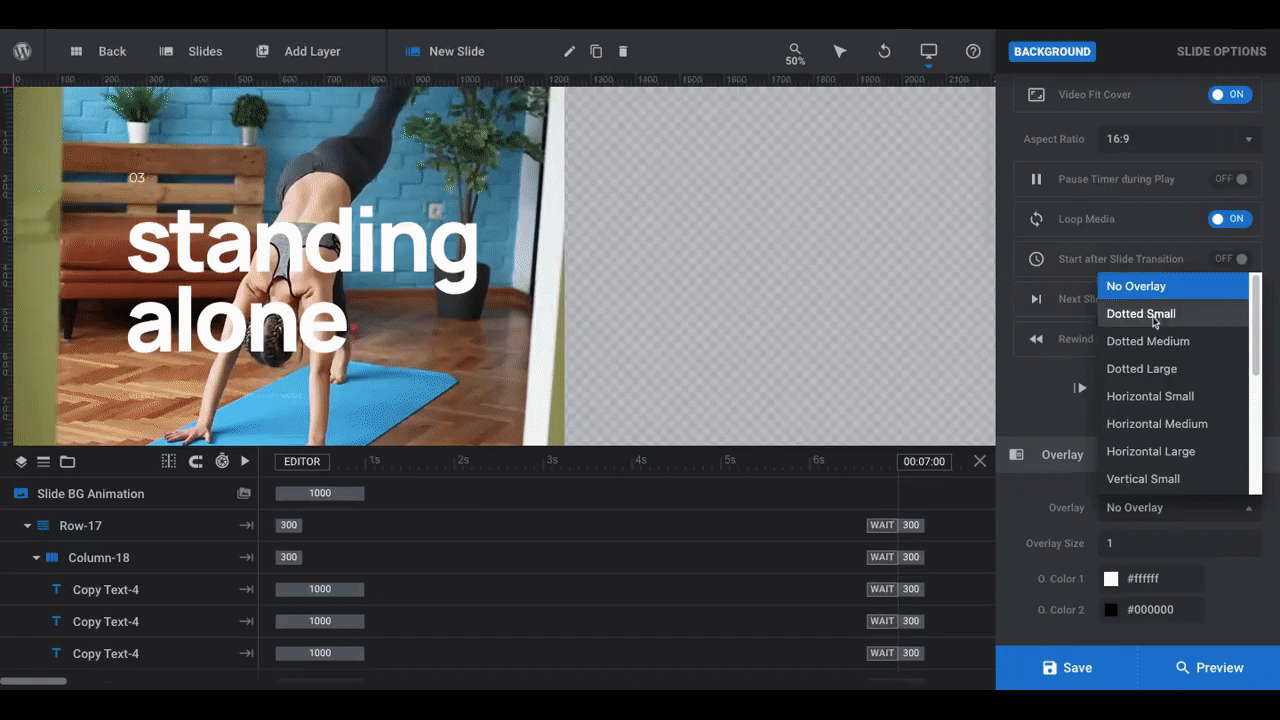
The last slide now has a 75% transparent pink overlay over the video. Compared to the first two videos, the overlay gives the third one a warmer feel.
If you’d prefer to change the color filter, go to the Filters tab instead.
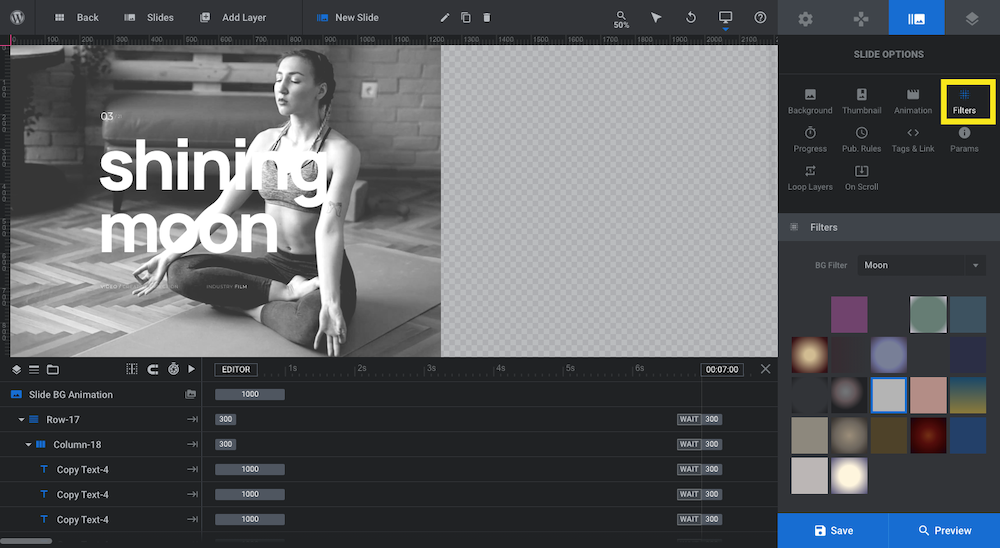
This is similar to preset image filters available in photo editing software or on Instagram. Again, color editing allows you to set the mood through color.
Bottom line: There’s no need to feel like you’re stuck using your raw video file. Slider Revolution makes it easy to edit videos once they’re inside of WordPress and you don’t need to be a pro photographer or videographer to do it either.
Learn More
Step 6: Change the animation
If you’re creating a video background with multiple slides, you’ll need an animation between them in order to ease the transition.
This template is already set up with a Base transition called “Auto Direction”. If you want to see how this transition or any of the others available work, simply hover over it and you’ll see it reflected on the left side of the screen.
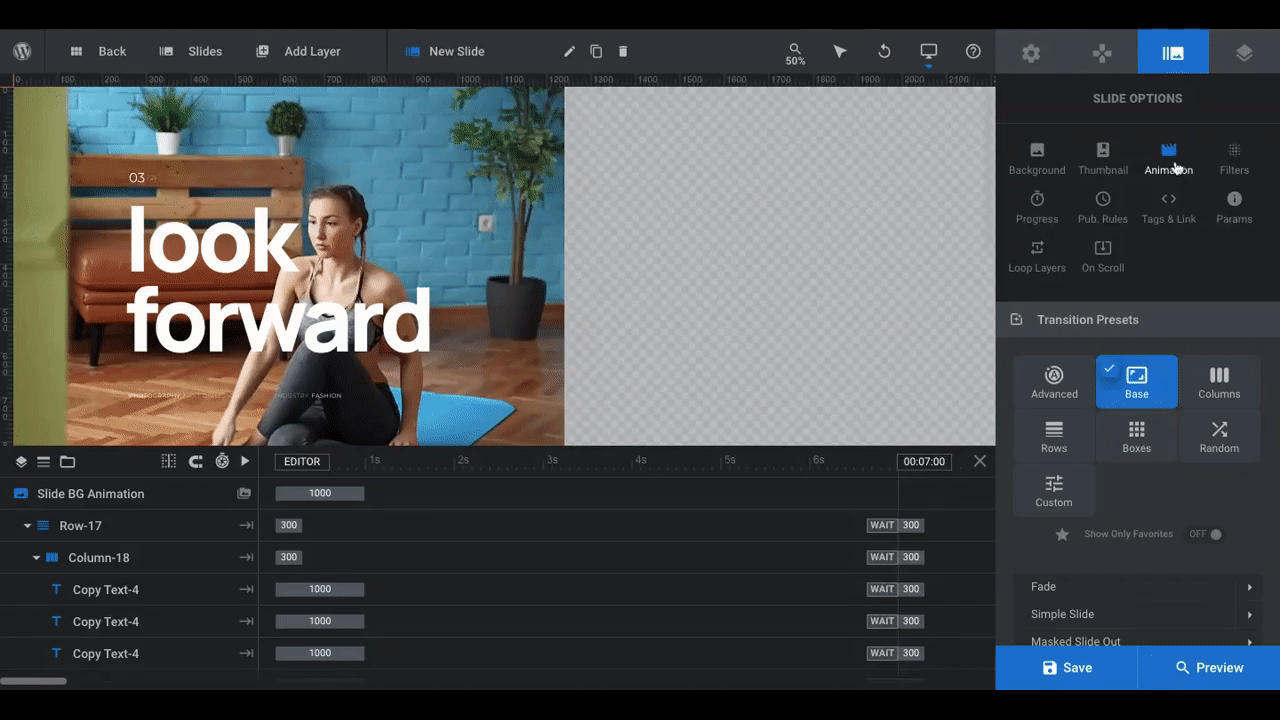
Because you’re transitioning from video to video, you don’t want to use a complicated transition effect. While there’s a lot to experiment with here, save that for your static image designs.
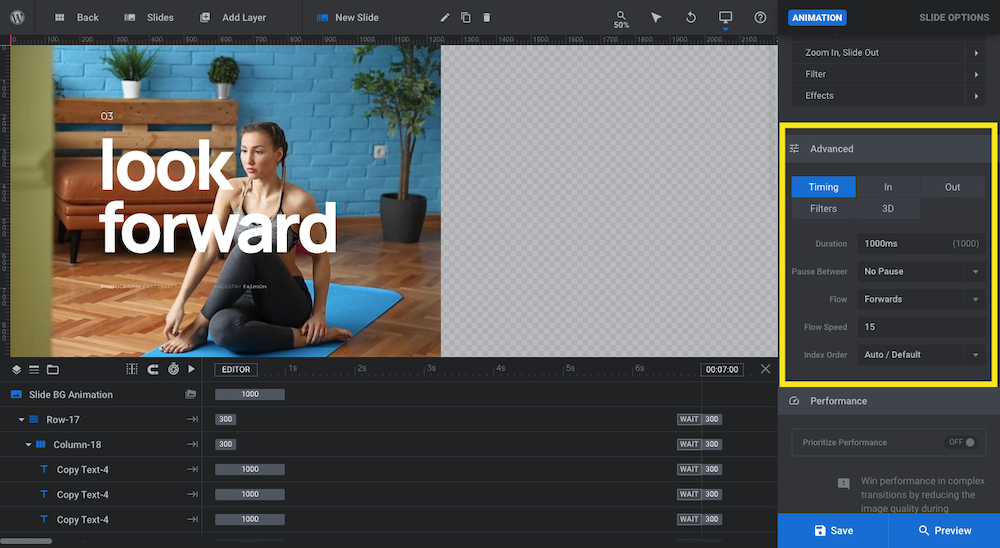
After you’ve chosen the transition effect you prefer, scroll down to the Advanced section. If you want to change how the slide duration, whether or not there’s a pause, as well as which direction it flows in, you can adjust that here (among other advanced configurations).
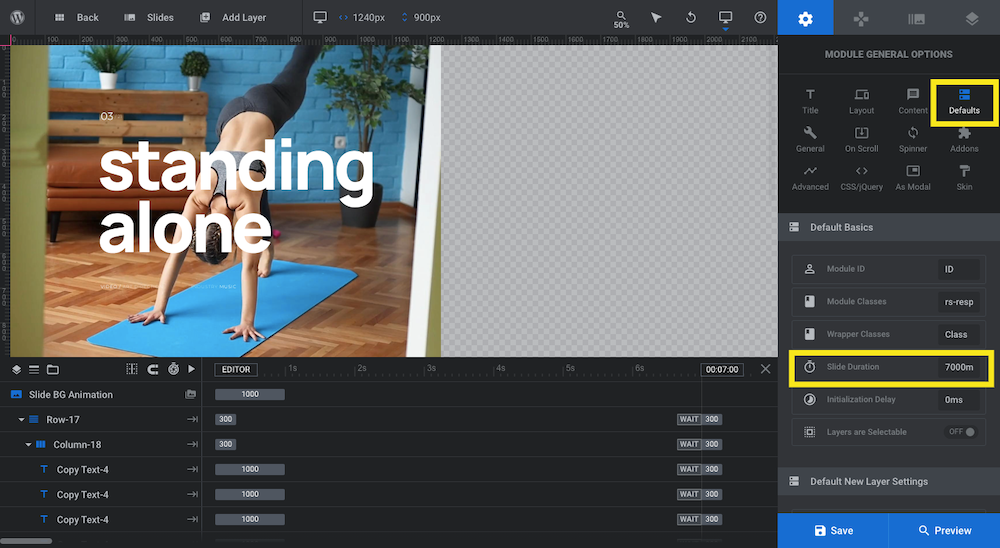
And if it’s the duration of the slide you want to edit and not just the type of animation, you can configure that from Module Settings under Defaults > Slider Duration.
You can also go to Slide Options > Progress and set the “Slide Length” to any millisecond value to adjust the timing of individual slides. This option also comes up if you click the endpoint label of the slide background (i.e. “Slide BG”) in the timeline below the visual editor.
If there are other aspects of the slider you want to customize and we haven’t covered them yet, you’ll likely find those settings under Module General Options as well.
Learn More
Step 7: Edit your slider navigation
With this slider template, you can create a video background using 1, 2, 3, or even 10 slides. If you’re going with a single slide, then you don’t need to worry about navigation. For the rest of you, you can manage this setting under Navigation Options.
The template comes with Previous and Next buttons on the left and ride sides of the slider, respectively. Those are custom navigation labels, by the way. We’ll look at how to remove or edit them in Step 10.
If you’d rather use a more traditional form of navigation, you can select one of those options here:
- Progress bar
- Arrows
- Bullets
- Tabs
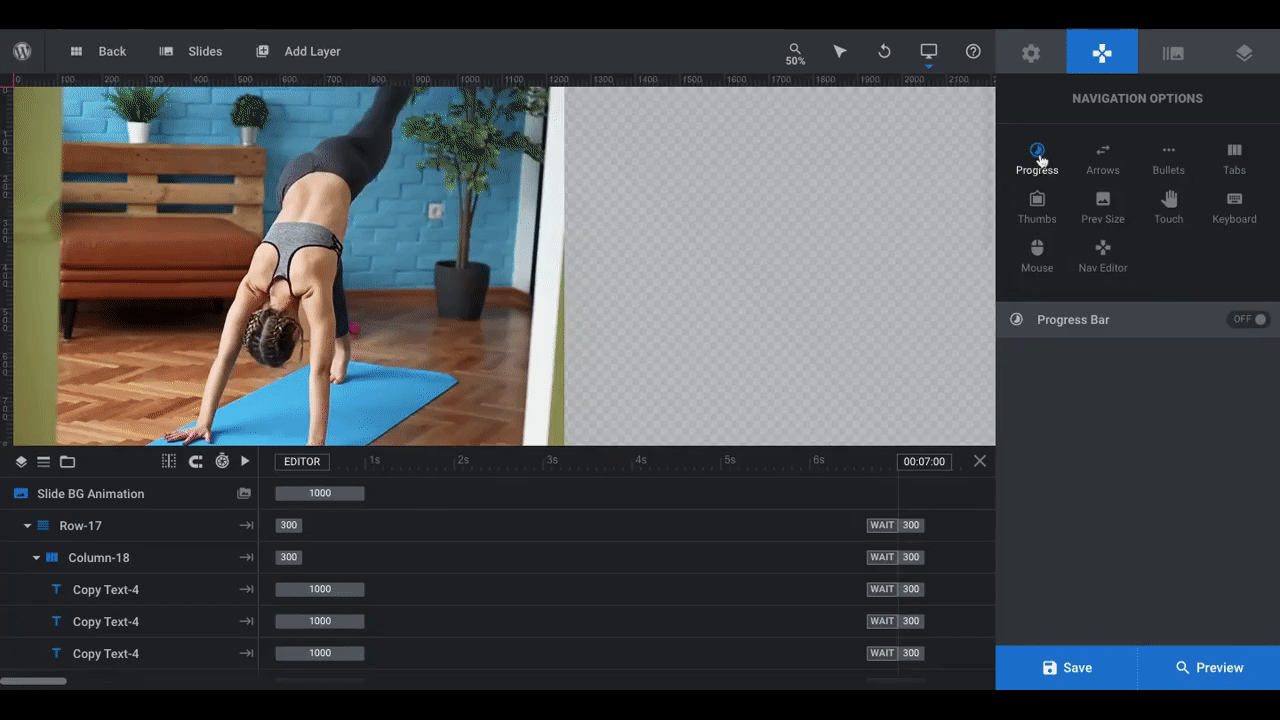
You can also use Navigation Options to customize how the slider works and how the next slide gets triggered on different devices. So if you want mobile users to be able to tap the screen or swipe to slide, for instance, make those edits now.
If you’d rather just let your slider naturally flow from video to video, you can do that as well. To set that up, go to Module General Options and click the “General” tab:

When you toggle on the “Auto Rotate” Slideshow” setting, the slider will automatically move to the next slide when each video finishes.
By the way, you can use this feature in addition to a navigation icon as well. That way, your visitors have the choice of sitting through and watching your videos or manually scrolling through them.
Learn More
Step 8: Add your copy
After you’ve finished customizing your video content, the last thing to do is edit the copy in each slide.
To do this, you’ll be working within the layers of your slide.
Within this template, there are multiple text layers. The big headline is the most obvious one. However, there are smaller bits of text for the slide number, the type of reel, and the industry. If you don’t need these details, delete them and just edit the headline as we’ve done here:
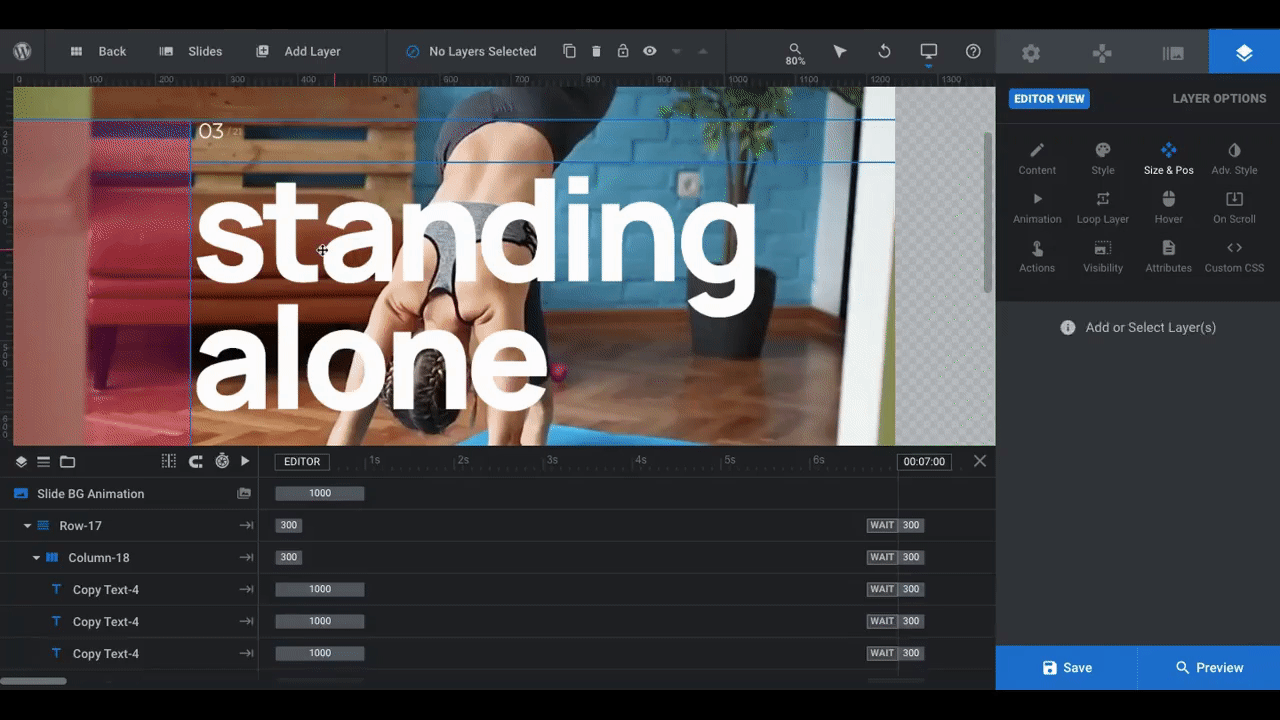
On the right side of the editor, make your changes to the content under Layer Options.
Superficial changes like font, color, transparency, and size are all fine to make. While you can use Layer Options to apply hover and animation effects to your text as well, that’s probably not a good idea when you’re creating a video slider. Visitors are already going to be captivated by the video background. Additional animations could easily make the whole thing overwhelming.
So stick to superficial edits if you plan on using this template.
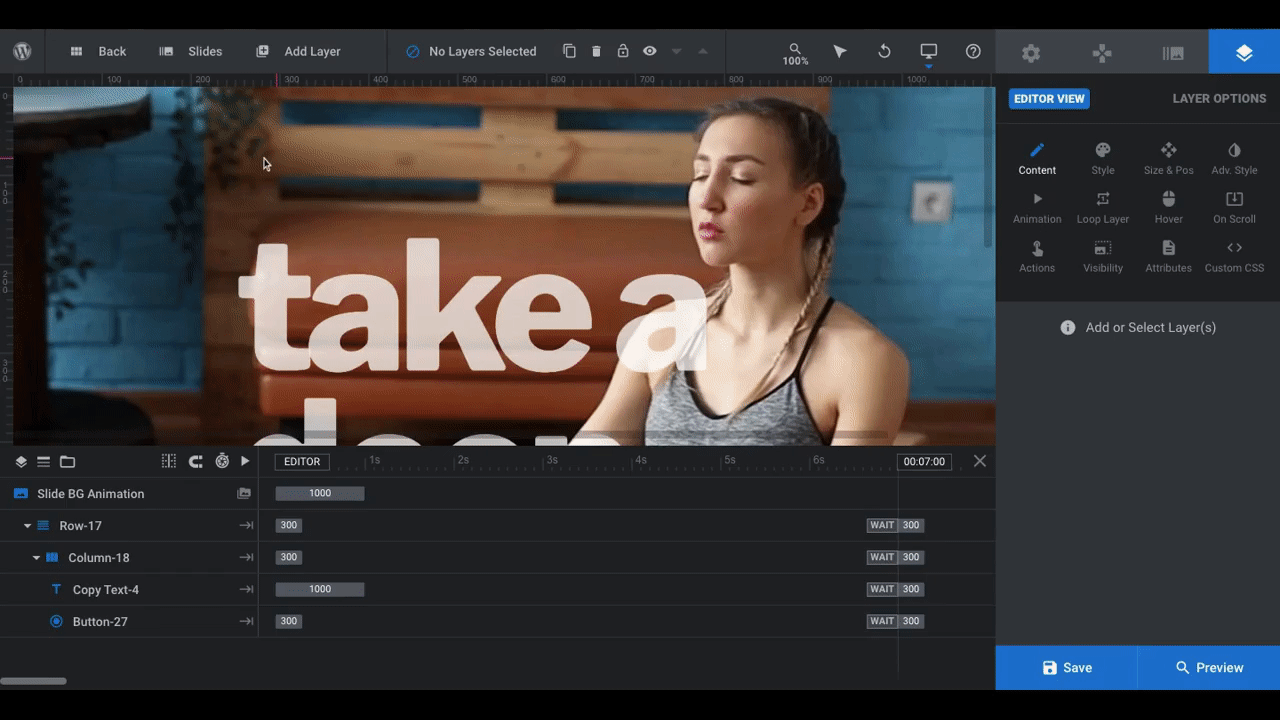
One other thing to keep in mind is that you don’t just have to delete or use only the text layers included in this template.
This design, for instance, is great for showing off portfolios internally on a website. For a hero image, though, you should have a call-to-action button and maybe even a description.
To add other content layers, go to Layers at the top of the editor and select the one you want. It will drop into the top-left corner of the page. Drag-and-drop it to the spot you want it to appear in:

In this example, we’ve added a “Sign Up” button and, more or less, kept the basic styles it came with. We did adjust its positioning, the font within it, as well as the size of it though.
Learn More
- Editing Text from Template Modules
- Importing Layers from the Library and Other Modules
- Quick Styled Headlines, Text Content, Buttons and Shadows
Step 9: Edit global layers
When you use a Slider Revolution template, there may be global layers — ones that appear on all slides — built in. You won’t be able to see them when working in the individual slides, but you will when you view the finished module.
This template has a number of these global layers, including a logo, navigation links, and social media.
To remove them, open the Slides dropdown and select “Global Layers” so you can see them in the editor:
You’ll see them on your slide as well as each of the layers broken down in the controller below the slide.
To edit them, click on the layer and use the Layer Options on the right to edit them as you have the other copy in the slide.
To remove them completely, click on the layer in your slide and hit the “Delete” button on your keyboard. This will remove it entirely.
When you’re done, save your changes.
Learn More
Ready to impress your visitors with a stunning video background?
When designed right, video backgrounds can instantly capture and hold the attention of your visitors. That’s especially important in this day and age when an endless supply of distractions are competing for your audience’s attention.
While video can be difficult to manipulate if you don’t have professional video editing software, Slider Revolution has removed the complexity from designing attractive and easy to use video backgrounds for your website. If you want to impress your visitors with beautiful video content, this is the tool to use.


