
Most websites today feature at least one image gallery. If you own or are creating a website, you need to know how to create a gallery in WordPress.
Is it difficult? Not at all! Creating a WordPress image gallery is much simpler than you may think.
With WordPress, you spend less time creating galleries and more time choosing your favorite images. This post is a step-by-step guide on how to create a gallery in WordPress.
It also looks at the Gutenberg method of creating photo galleries. By having all the information, you can choose the option that best suits your needs.
In addition, the article examines nine of the top WordPress gallery plugins. These boost the functionality of the native platform.
Let’s dive in!
How to Create a Gallery in WordPress
WordPress in its native form is not as extensive as when using it with a plugin. This makes WordPress suitable for those that want only a basic solution.
For example, you may want to create a simple image gallery for your blog.
To get started, go to the normal WordPress editor by creating or editing your content. Then follow the steps outlined below.
Steps to Creating an Image Gallery in WordPress
Step One: Upload Images to Your Library
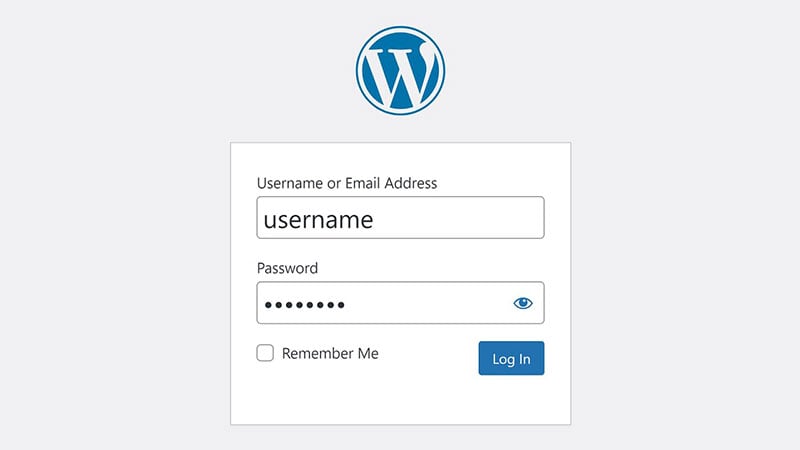
To upload your images to WordPress, start by logging into your WordPress dashboard.
Navigate to the ‘Media > Library’ tab. Then, click the ‘Add New’ button at the top of your screen.
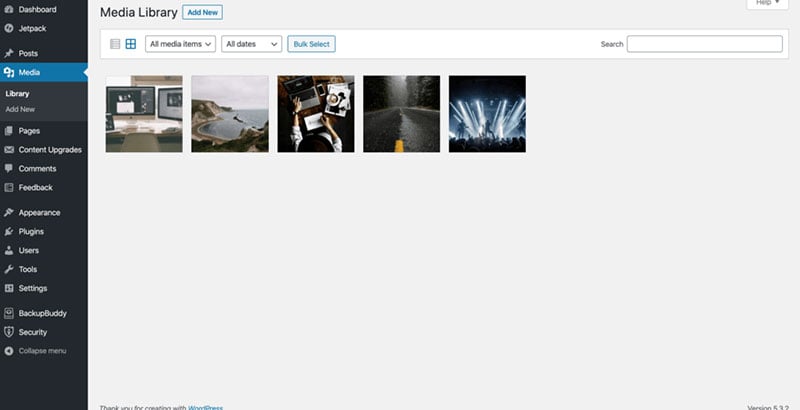
Next, click on ‘Select Files’. This will open your local file explorer. From here select the images you want to upload.
To speed up the process, upload all your selected images at once to your WordPress media library. When uploading multiple images together, WordPress shows the individual progress of each.
Step Two: Add Previously Uploaded Images to Your WordPress Image Gallery
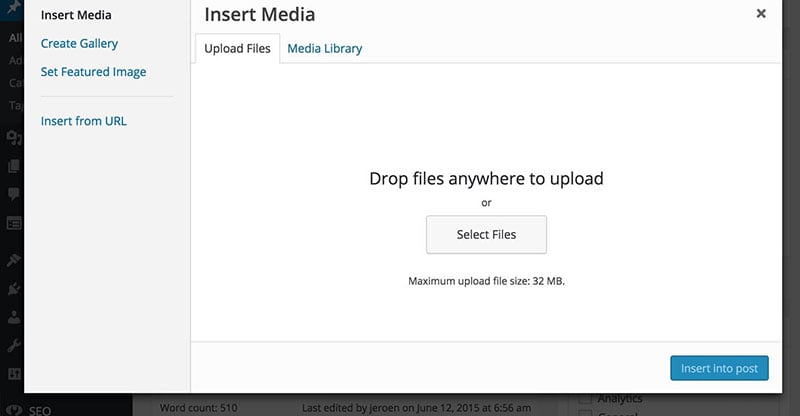
To begin step two, click the ‘Add Media’ button that you would normally click when inserting an image. An options menu will pop up on a new page.
This page includes options to:
- Create a gallery
- Create a media playlist
- Pull images from your media library
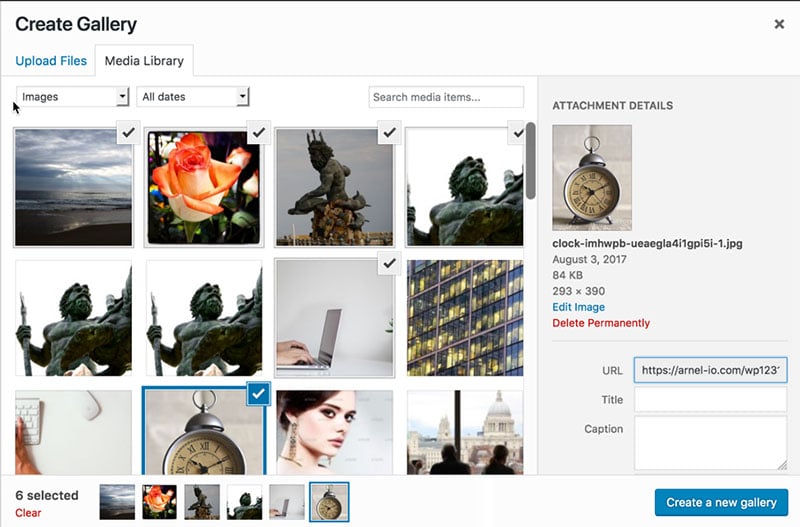
Select the option to create a gallery, and click the ‘Media Library’ tab that opens to the right. At this point, you’re almost through.
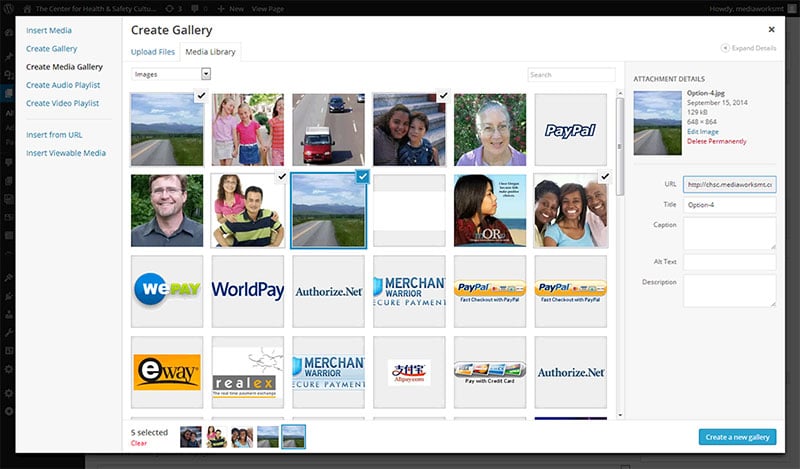
Select your preferred photos from those you previously uploaded to the media library. Then, add these to the gallery you created.
Next, from the left-hand side of your menu click, ‘Create Gallery’.
If you would like to add more images or use new images, go to the ‘Upload Files’ tab. Choose the images you want to upload to the gallery and tap ‘Create A New Gallery’ at the bottom right-hand corner.
Editing Your Image Gallery In WordPress
You can edit your new gallery before attaching it to your WordPress page or post.
To do this, click on the gallery you want to edit.
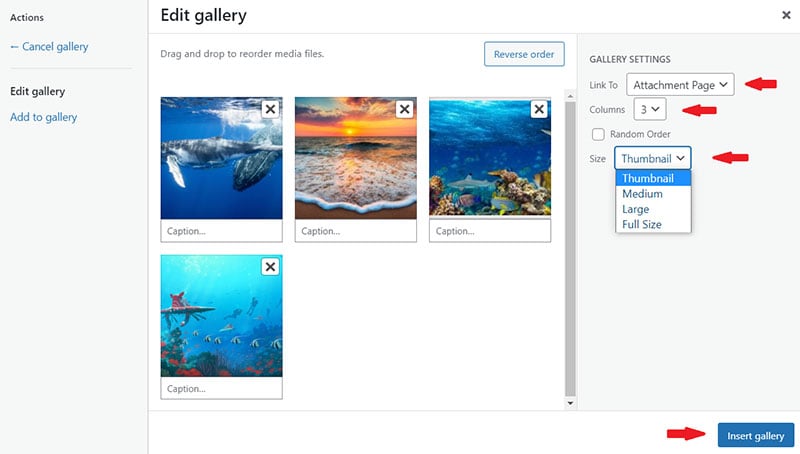
To open the ‘Edit Gallery’ page, select the pencil icon. From here you have several editing and settings options, including:
1. Reorder images by clicking the ‘Reverse order’ button. Or drag and drop them to the preferred position.
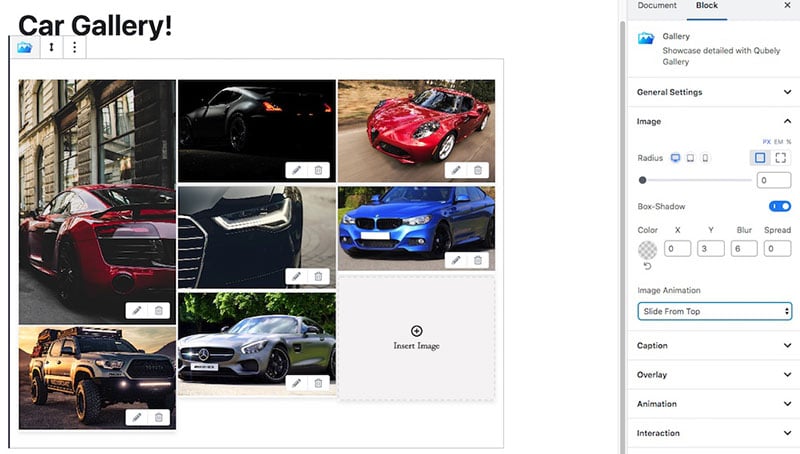
2. Add descriptive captions to each image. This will make them more relevant to your audience.
3. You can also add image properties by clicking on individual images.
4. In the ‘Gallery settings’ tab there are various options such as:
- Randomizing the order of images
- Selecting your ‘Link To’ preference
- Choosing the number of columns the gallery should display
- Altering image sizes
After editing your WordPress image gallery, click ‘Insert Gallery’. This will open up a live preview of your edited gallery.
Unfortunately, WordPress doesn’t let you re-use your galleries on other pages. So, to copy a gallery you’ll have to repeat the same process.
However, this won’t take long since the images are already up on your site.
Using a WordPress Gallery Widget
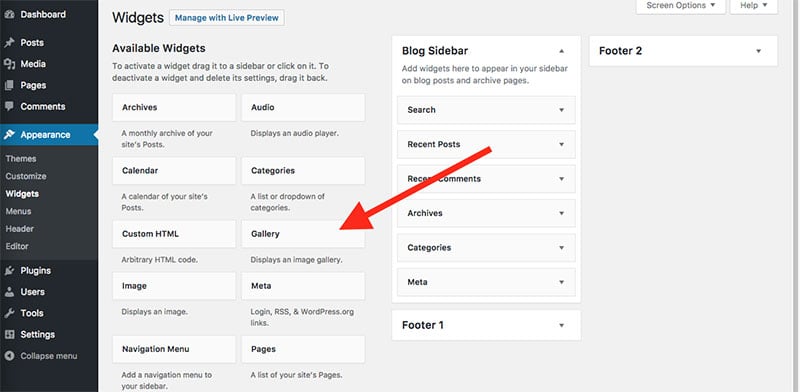
Besides images, you can add a WordPress gallery widget to your posts and pages. This can sit within your website’s sidebar or footer.
Adding the widget is easy. Simply go to the ‘Appearance > Widgets’ tab and highlight the gallery widget. Then drag and drop it to the desired place in your sidebar or footer.
The widget will prompt you to choose the images you want to include in your gallery. You can also add a caption to the widget, and give your gallery a title.
How to Create a Gallery in WordPress Using Plugins
Creating an image gallery in WordPress is quick and easy. Its gallery functionality is great for a basic system.
But some find this method is the least user-friendly. This is because the galleries you can create in WordPress aren’t rich in features.
For example:
- These galleries aren’t reusable. So to embed them elsewhere you have to create new ones.
- They also do not include customization options to manage the design of your gallery.
So, to level up your WordPress galleries and get more features, leverage plugins. Their extra features and functionalities help you create a more professional gallery.
Essential Grid WordPress Plugin

You can make a photo gallery in WordPress using the Essential Grid plugin. It creates beautiful galleries/grids that you can fill with almost every kind of content.
For instance, you can include:
- Images
- E-commerce products
- Videos
- Social media streams
- Audio
Essential Grid offers some amazing features. No wonder then that some view it as the best tool for creating an image gallery in WordPress.
Some of its features and benefits include:
- Boosting your Google rank
- Fast, responsive designs
- A drag and drop builder
- Plug and play templates
- An impressive grid layout
- Easy export and import
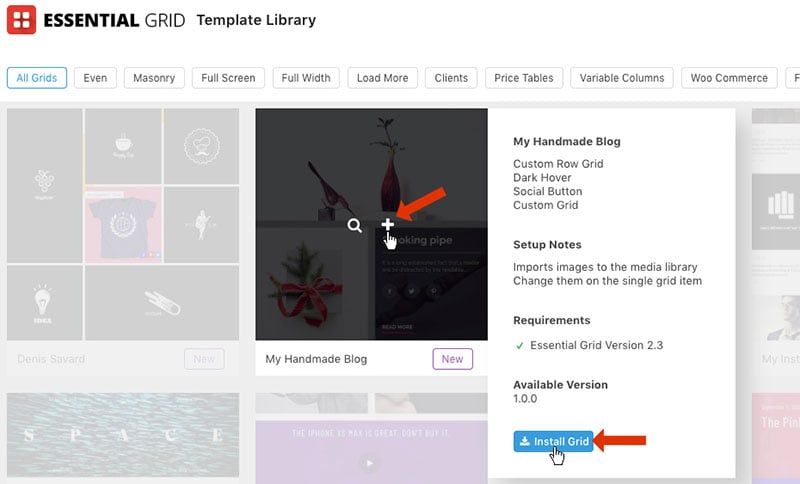
How to Add Essential Grid to Your WordPress Website
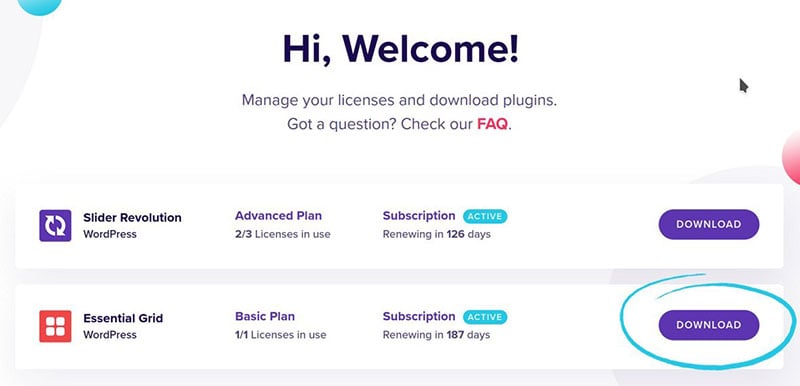
If you have purchased Essential Grid, log into your member dashboard. You will find this at: https://account.essential-grid.com
From there it’s possible to obtain a copy of the plugin to install. Download a copy by clicking the purple ‘Download’ button to the right of the ‘Essential Grid’ bar.
Next, install the plugin into your WordPress site. Go to your WordPress site’s admin area and click ‘Plugins > Add New’ in the left sidebar.
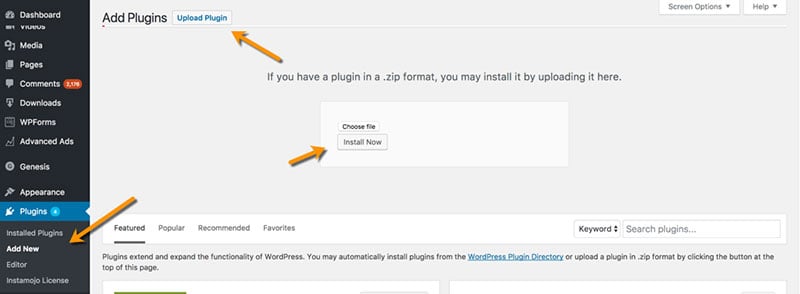
Select ‘Upload Plugin’ and tap the ‘Choose File’ or ‘Browse’ button. Then, hit ‘Install Now’ to install Essential Grid.
After completing the installation, tap ‘Activate Plugin’.
Once this is complete, go back to your WordPress site’s sidebar menu and click ‘Ess. Grid’. This will take you to the plugin’s admin area.
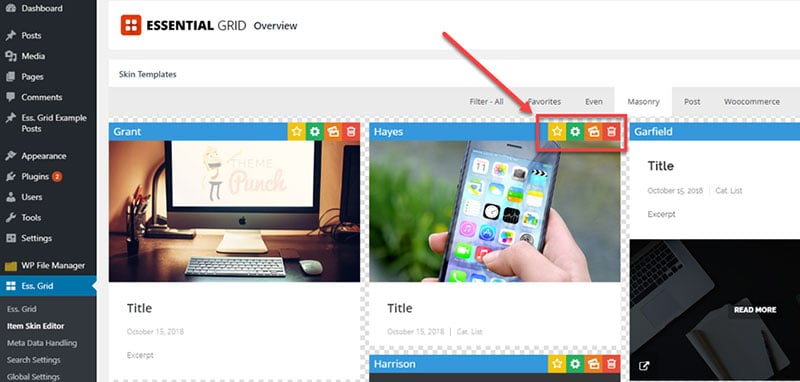
Half of working with Essential Grid is content, while the other half is the design. Essential Grid can showcase content from a variety of sources, such as:
- WooCommerce Product Displays
- Social Media and Multimedia
- WordPress Post and Image Content
Discover some of the ways to create designs with Essential Grid below.
Image Gallery Animations
You can determine how to animate the movement of grid items when they:
- Appear
- Are filtered or sorted
- Are hovered over
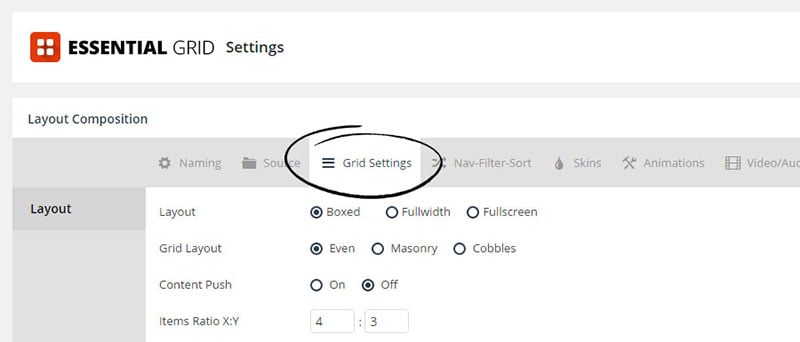
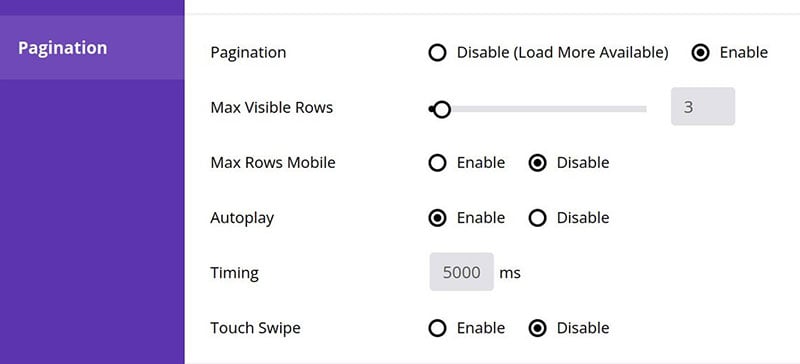
Once you’ve set this up to your liking, you need to decide how you want these grid items to behave. Here are some of the options found under the ‘Grid Settings’ tab:
- Smart Loading
- Media Playback
- Layout
- Pagination
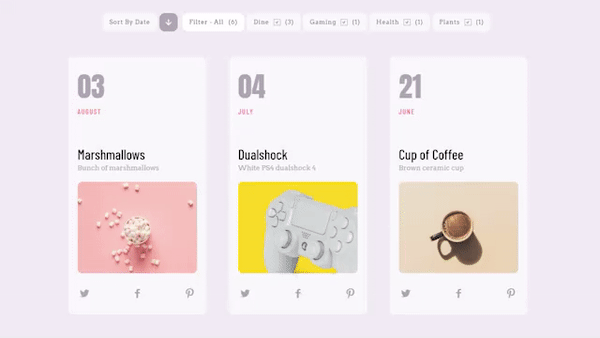
Filtering, Sorting, & Navigation
The plugin lets you split and sort a grid’s content into multiple navigable pages.
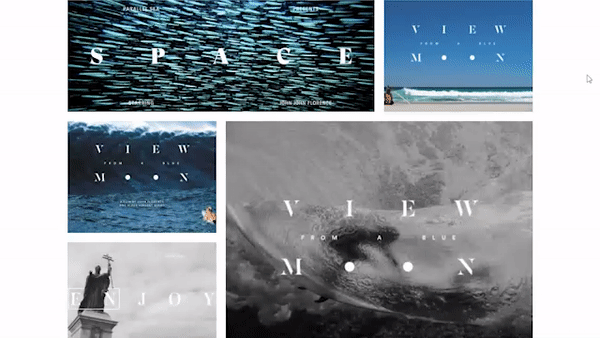
Layout Variations
You can set up grid layouts and responsive variations for different screen sizes.
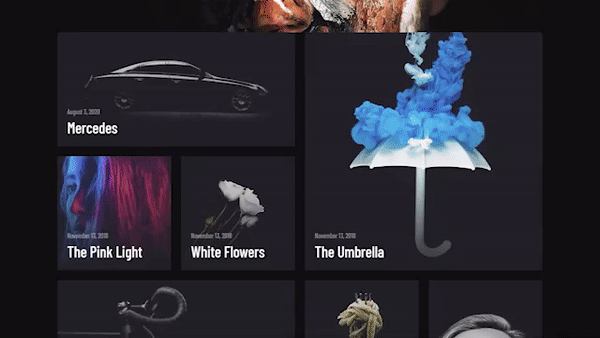
Creative Customization

Essential Grid’s powerful Item Skin Editor enables customization and creativity.
Pre-built Templates
The plugin offers ready-to-use templates so you can publish your grids in no time. Simply select and install a template and then tell it what content to use.
Here’s a glimpse of what you can do with Essential Grid:
Present your blog posts
Showcase your portfolio

Display unique products

Share audio files

Display videos
Show your Instagram stream
Other WordPress Gallery Plugins
This section outlines some additional plugins you can use to create an image gallery in WordPress.
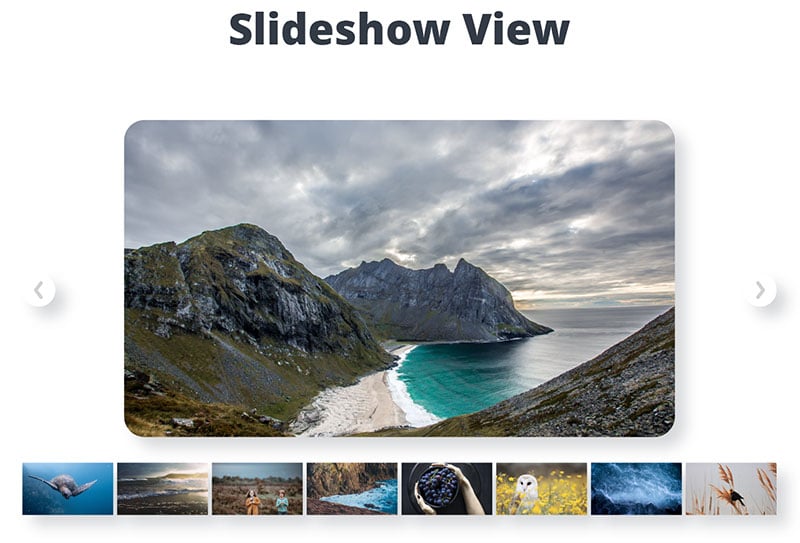
NextGEN Gallery
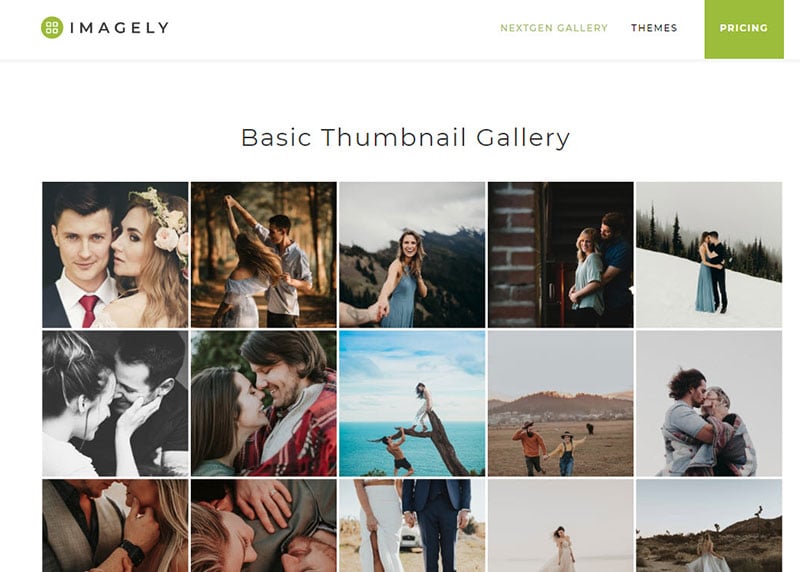
This plugin is available as a free version. The two main gallery styles offered with this version are slideshows and thumbnails.
It also features two album styles, compact and extended. All of these come with options for controlling:
- lightbox effects
- controls
- style
- transitions
- timing
- size
You can extend the plugin’s functionalities with premium bundles. These add a variety of gallery types and advanced features like:
- Image deep linking for lightbox galleries
- E-commerce functionality so that you can sell your images
- Image protection using watermarks, hotlink protection, and more
Envira Gallery
Are you an advanced WordPress site owner? Or are you a beginner with little to no coding knowledge?
Regardless of who you are, the Envira Gallery plugin is for you.
The drag and drop interface is great for all types of users. It lets you embed and adjust your images without having to touch code.
Envira Gallery aims to make creating and configuring multiple galleries a simpler process. This is why it provides features like:
- Social media sharing
- Slideshow functionality
- Multiple WordPress gallery templates
So, if you want a sleek, easy-to-use WordPress gallery plugin, choose Envira Gallery.
Modula Image Gallery

For a user-friendly plugin that can create exciting photo and video galleries, try Modula.
This plugin is customizable, so you’ll have total control over how your gallery looks.
For example, the custom grid features allow you to control and resize an image. You can adjust its height, width, and aspect ratio.
To do this, switch the gallery from ‘creative gallery’ to ‘custom grid’. Then click and drag from the bottom right-hand corner of each image.
Photo Gallery by 10web
This is another leading plugin for creating galleries quickly in WordPress.
Its free version lets you create basic galleries. If you go premium you get more sophisticated designs, like the ‘Masonic Arrangement’.
With this image gallery plugin, you can build unlimited images and video galleries or albums. You can also use images and videos in the same gallery.
WordPress offers users only one widget option. However, with this plugin you get several widget options to enjoy.
FooGallery
With FooGallery, you can create a very customizable gallery. Even in the free version, you can adjust your hover effects, borders, loading icons and effects.
You can then sort your galleries into albums to keep better track of your assets.
Place your gallery on your website by using a Gutenberg block or shortcode. FooGallery also includes a drag-and-drop interface for arranging gallery images.
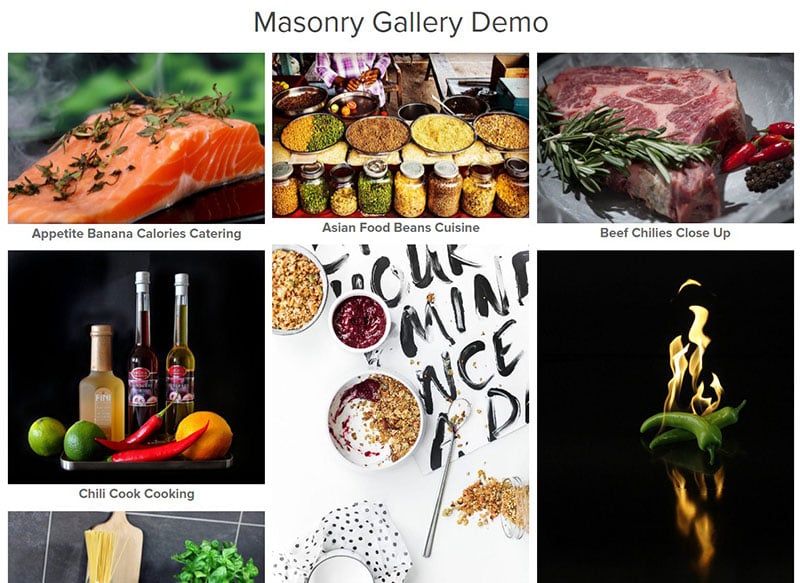
By installing a, free plugin from FooPlugins, you get an extra 6 gallery templates. These are responsive and include:
- Masonry Grid
- Thumbnail galleries
- Lightboxes
Jetpack
If you have a self-hosted WordPress website, this free plugin will add WordPress.com features to it.
Tiled Galleries module lets you showcase your images in the WordPress media library. Choose to display them in a rectangular or square mosaic, or a circular grid.
This multipurpose add-on is ideal for those already using Jetpack on their site. It’s especially useful if you don’t need as many features as come with more robust gallery options.
Also, Jetpack’s Site Accelerator (formerly Photon) helps pages load faster. It accomplishes this by leveraging WordPress.com’s CDN.
So, if your site has a lot of images or doesn’t have a CDN, this is the option for you.
Image Gallery by Robo
Here’s another simple, intuitive, and feature-rich plugin. It gives you full control of your gallery layouts and styles.
It is loaded with layout options, extensions, and a variety of widgets.
It also has a Gutenberg module for instant publication. This means you won’t need a gallery shortcode when using this plugin.
For more features and functionality, try its premium version. That comes with goodies like:
- Editable themes
- 15 lightbox effects
- Instagram integration
- Social sharing, and more
Gmedia Photo Gallery

This plugin is another solid choice if you want to create an image gallery in WordPress.
Gmedia doesn’t have as many downloads as other options in this list. However, Gutenberg users, tend to pay attention to it.
Gmedia Photo Gallery has four different gallery blocks to support your image displays. These are:
- Galleries
- Albums
- Categories
- Tags
It helps you create attractive galleries that are customizable via several back-end settings. So, if you don’t want dozens of tweakable settings, Gmedia may not be for you.
But, if you want tight control and don’t mind a large number of settings, give the free version a try.
How To Create a Gallery in WordPress Vs Gutenberg

WordPress’s gallery-adding feature lets you create image galleries for your desired post or page.
In the WordPress editor click the ‘Add Block’ or ‘+’ icon, then click ‘Gallery’. After adding the Gallery block to the WP editor, upload photos from your computer by clicking the ‘Upload’ button.
If you have previously uploaded photos to your media library you can also add these to the new gallery.
This process is simple, easy, and effective. Using the plugins listed, you can extend WordPress’s native functionality as you please.
But, you may want to explore other options before settling on a drag and drop gallery builder for your blog page. So let’s look at how to use Gutenberg to create an image gallery.
How to Create A Gallery in the Gutenberg Editor
Step One: Upload Images
To begin, click the ‘Upload button’ and upload one photo at a time. To add multiple images, press and hold the ‘Ctrl’ key on your keyboard, then choose your images.
You can then customize them by adding description, alt texts, captions, and titles. To do this, click on an image and input the details on the right side of your screen.
Then, select them all and click ‘Create A New Gallery’ at the bottom right corner of your site. For added customization, try rearranging the order the images appear in the gallery.
You can also use the input provided beneath each photo to caption it. After making your final edits, click ‘Insert Gallery’.
Step Two: Set Up the Gallery Block
Gutenberg will open up the ‘Gallery Settings’ section for the gallery block to the side of your screen. This section lets you:
- Choose where your images are linked
- Set the number of columns and rows
- Disable or enable the ‘Crop Images’ option
With the ‘Link To’ option, you can enable or disable the clicking feature for your images.
For example, click ‘None’ if you only want your visitors to view the photo. But, if you want the image file to open after they click it, select the ‘Media File’ option.
Likewise, you can enable/disable the ‘Attachment Page’ feature for your images. Here you can choose to let the attachment page open or not when your site visitors click an image.
Once you’re through with the gallery block settings, click ‘Preview’. This allows you to see how the finished product looks.
Pros Of Using Gutenberg
Although Gutenberg offers few layout options, it does create beautiful image galleries. Some also find the system more convenient to use.
Two major pluses of using Gutenberg are that it can:
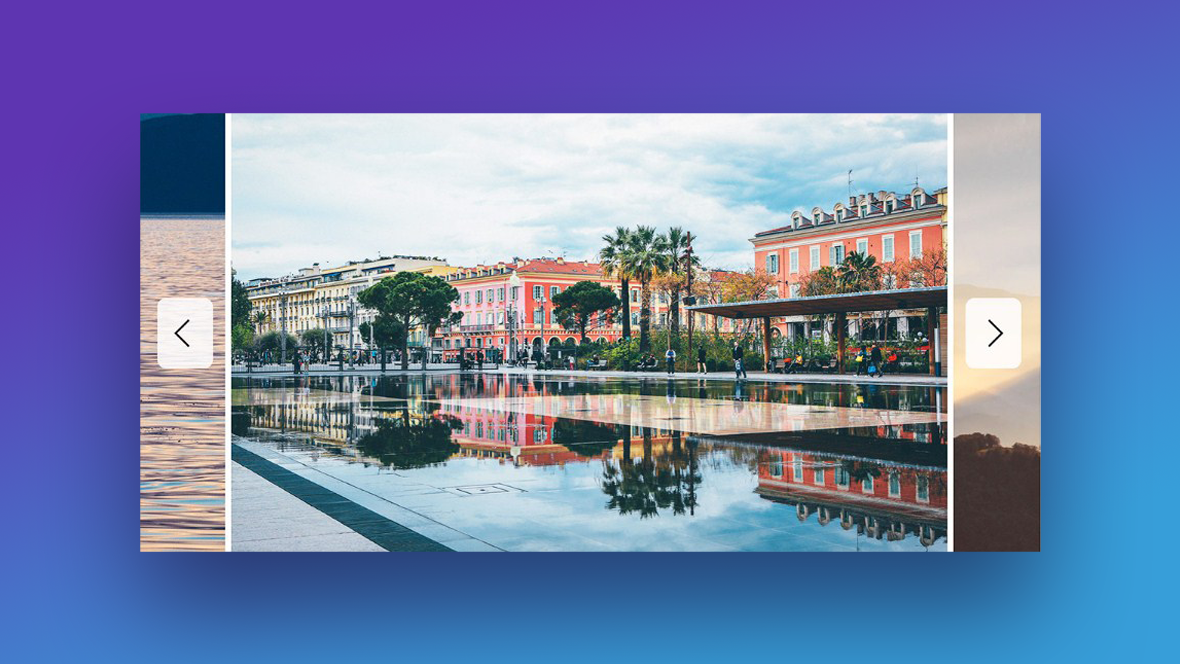
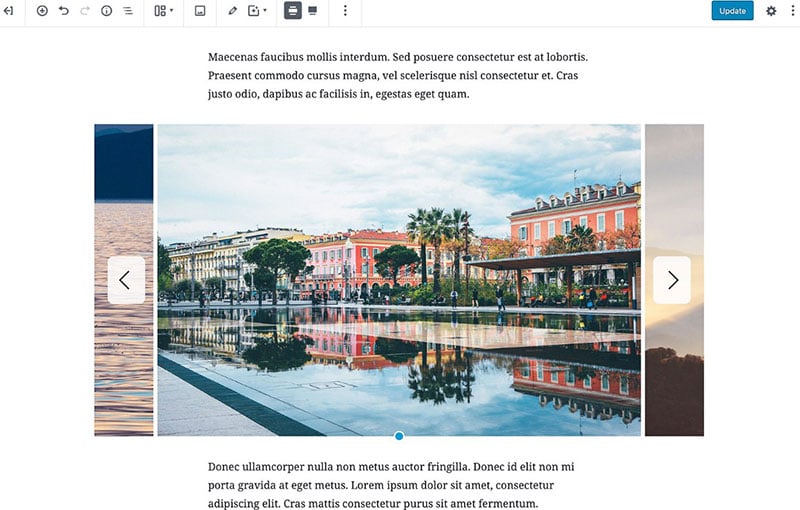
- Display full images, with navigation for ‘Next/Previous’ images.
- Prevent interruptions to the reading of the associated post. To that end, it shows images in a popup instead of loading new image pages.
Cons of Using Gutenberg
Gutenberg lacks certain essential features. So, if you regularly create image galleries, this option may not be for you.
Some of the cons of using Gutenberg include:
- Inability to organize your galleries into albums, tags, topics, etc.
- Lack of clickable images and images that open on a new page.
- Inability to store your gallery (to reuse a gallery you’ll have to recreate it)
- A single generic style for your gallery appearance (the look of the gallery is based on the theme)
- Lack of user-friendliness
- When you link gallery images to the media file or attachment page, visitors have to click the ‘Back’ button to view a gallery again
FAQ on Creating a Gallery in WordPress
Can I customize the look of my WordPress gallery?
Totally, customization is key. After you’ve selected your images, you’ll see the ‘Gallery Settings’ on the right. Want your pics to chill in a grid? Or maybe you’re feeling a masonry style gallery vibe?
You can adjust the columns, decide if the images should link to something, and even set the size of the thumbnails. And if you’re savvy with CSS, the sky’s the limit. You can sprinkle your own code magic to get that gallery looking exactly how you picture it.
What’s the best plugin for creating a gallery in WordPress?
Oh, plugins make life easy, don’t they? There’s a bunch, but let me tell you about a few fan favorites. Essential Grid is like the Swiss Army knife of gallery plugins – powerful and user-friendly.
How do I add a slideshow to my WordPress gallery?
Slideshows are slick for showing off your images. When you’re in the gallery settings, you’ll see an option to ‘Create a Slideshow’. If that’s not there, you might need a plugin.
Slideshow plugins are a dime a dozen, but look for one that’s responsive and plays nice with your theme. Once you’ve got the right plugin, it’s usually as simple as selecting ‘Slideshow’ as your gallery type. Then, customize the transition effects to give it that personal touch.
Is there a way to make my WordPress gallery responsive?
Absolutely, because nobody likes a gallery that looks wonky on mobile, right? Most themes these days come out of the box ready to make your gallery look great on any device.
If your theme’s a bit behind the times, a plugin can save your bacon. Look for responsive gallery plugins, and they’ll do the heavy lifting, making sure your images snap into place no matter the screen size.
How can I protect my images in a WordPress gallery?
Protecting your work is big, especially when it’s out there for the world to see. Watermarking is one way to go. Some gallery plugins let you slap your mark right on your images. If you’re more about keeping things download-proof, disabling right-clicks can deter folks from saving your pics.
And don’t forget to adjust your media settings to prevent hotlinking, where others leech off your server to display your images on their sites.
Can I link my WordPress gallery to my social media?
Linking to social media is a smart move. You want your images to get some love on the socials, right? Some plugins come with social sharing buttons that let visitors share your images directly from the gallery.
If your plugin doesn’t have that feature, you can always add social sharing plugins to your site. Just make sure they play nice with your gallery setup, and you’ll be getting those likes and shares in no time.
How do I add captions or titles to my WordPress gallery images?
Captions can add so much context to your images. When you’re uploading photos to your gallery, you’ll see fields where you can enter titles and captions. Fill those in, and they’ll show up with your images. If you’re going back to add captions to existing images, no sweat.
Just click on the image in the gallery settings, and you’ll see where you can add or edit the text. It’s a simple touch that can give your audience more insight into your work.
What’s the deal with image optimization in WordPress galleries?
Image optimization is a biggie—it keeps your site speedy and your viewers happy. Before you upload, shrink those file sizes with an image editor, but keep the quality crisp. WordPress does its part by creating different sizes of your images, which helps with load times.
And if you want to get really into it, there are plugins that will optimize every image you upload. They’ll compress the files and even serve up the right size for the viewer’s screen.
How do I update or change images in my WordPress gallery?
Changing up your gallery keeps it fresh. Just head to the post or page with your gallery and hit ‘Edit’. Click on the gallery and then the pencil icon to tweak it. From here, you can add new images, remove the old ones, or shuffle them around until it feels just right.
Don’t forget to hit ‘Update Gallery’, and then ‘Update’ on your post or page to make sure your changes stick. It’s like giving your gallery a mini-makeover.
Conclusion on how to create a gallery in WordPress
After this examination of how to create a gallery in WordPress, are you ready to make a decision?
Setting up a WordPress photo gallery is quick and easy. You can spend time handpicking your favorite photos and with a few clicks you’re done.
For your basic gallery needs the native WordPress gallery function is fine. But, for more customization and gallery functionality, use dedicated WordPress gallery plugins.
Jetpack modules are especially handy for enhancing WordPress. So, if you want to display images on your page, choose WordPress and its awesome plugins.
If you liked this article on how to create a gallery in WordPress, you should check out this article about Vimeo WordPress plugins.
There are also similar articles discussing Facebook WordPress plugins, YouTube WordPress plugins, Twitter WordPress plugins, and WordPress Flickr plugins.
And let’s not forget about articles on WordPress Instagram plugins, WooCommerce product grid plugins, WordPress image plugins, and WordPress grid plugins.


Hi,
I cannot find the gallery block at the “How To Create a Gallery in WordPress Vs Gutenberg” part mentioned. Do you install some kind plugin?
Thanks
Mike
Hi,
do you mean our plugin Essential Grid?
Cheers, Dirk @ Slider Revolution
hi
First of all, I apologize if my English is not good.
I have a very big problem with one of these grid builder plugins(the grid)
My problem is that instead of opening the gallery photos one by one, this plugin opens them all at once. And this causes the site to be displayed late. Because there are many photos on each page and it takes a long time to download them all.
Is there no way to open the photos one by one through coding CSS or anything else?
Thank you for helping me.
Thank You
Yes, we know “The Grid”. It is a cheap copy of the Essential Grid plugin but without the thought process behind it. I would recommend using one of the options presented here in this blog article. Especially Essential Grid has lazy loading and cache options that will help you to generate a fast-loading page.
Best regards, Dirk @ Slider Revolution
thank you very much