
Adding and Configuring Image Layers
On this page of the manual, learn all about the extra ways you can work with image layers.
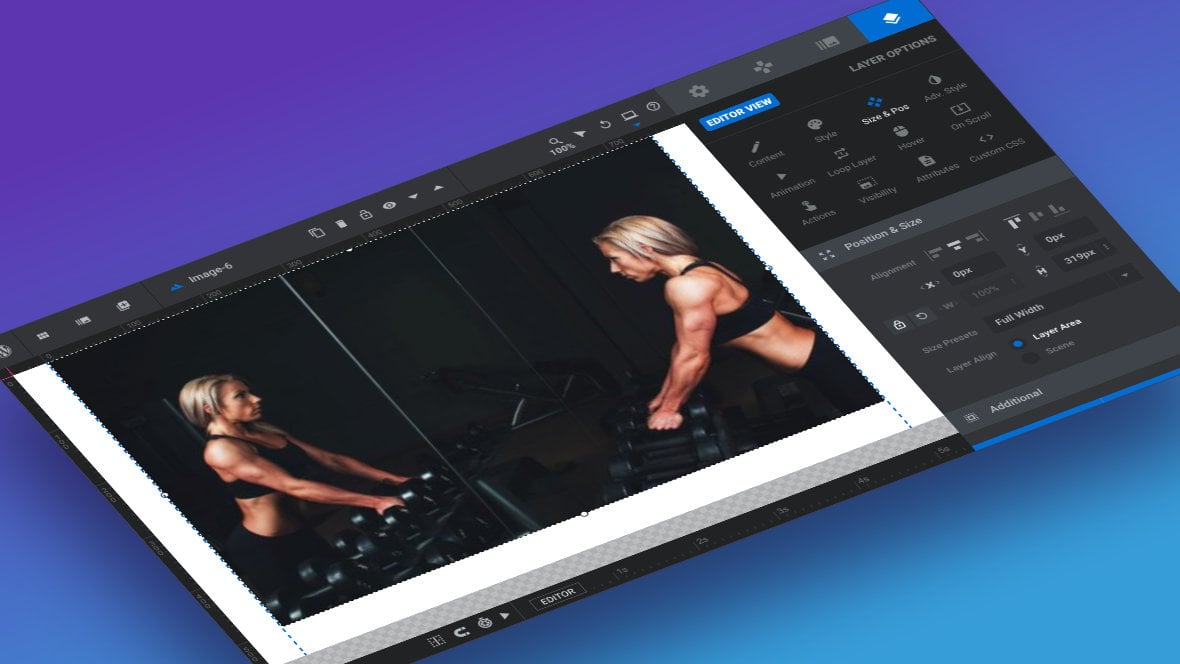
Table of Contents
- Add a New Image Layer
- Topic Recap: Image Selection and Resizing
- Additional Content Options
- Additional Position & Size Options
Add a New Image Layer
To add a new image layer [?]
Layers are containers for visual, audio or layout items and are added to slides. For example, text, button, image, audio, video, group and row are all types of layers.
Layers are added to slides via the module editor. go to the Add Layer button in the top toolbar, then click the Image button:
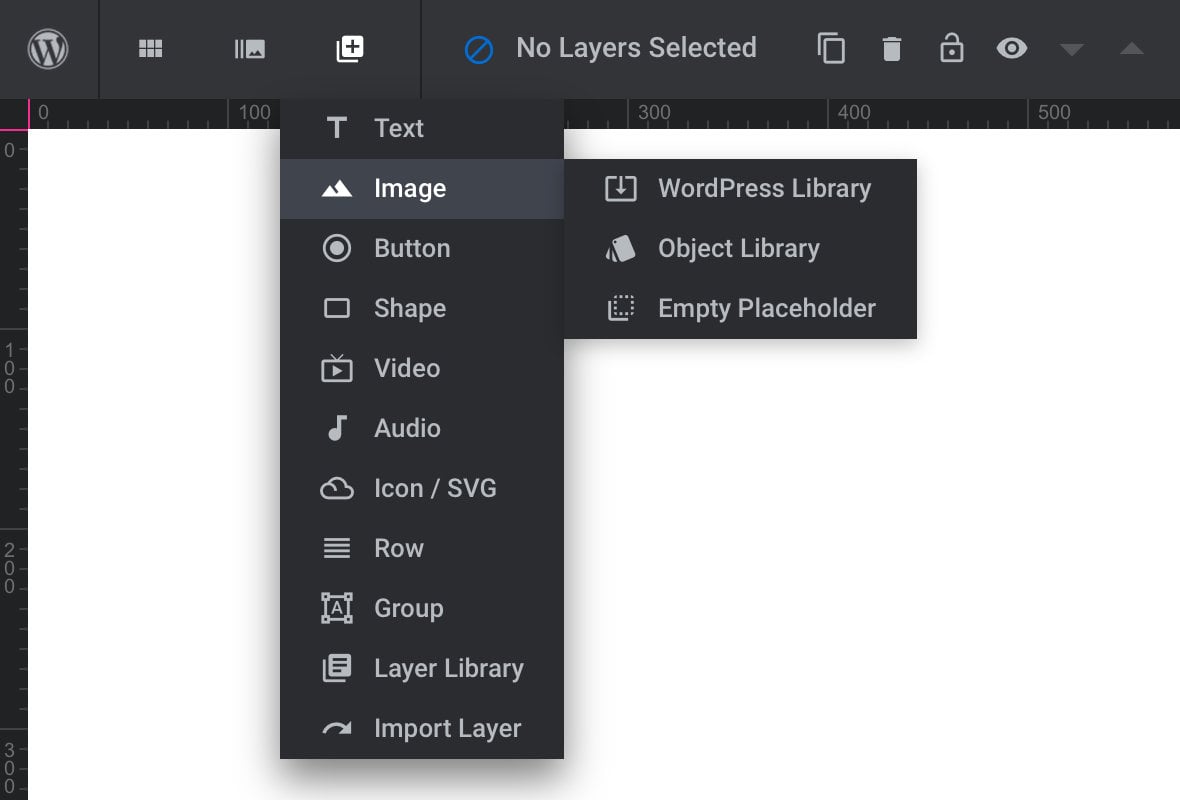
This will add an empty placeholder to the canvas [?]
The canvas is the point and click design space in the module editor. It forms the largest area of the module editor.
In this area layers can be selected, moved and resized. Animations can also be previewed., ready for an image to be inserted into it:
Topic Recap: Image Selection and Resizing
There are a couple of topics relevant here that we’ve already covered earlier in the manual. Those topics, and links to the relevant manual pages, are as follows.
Select an Image to Display
Once an image placeholder is added you can select an image to display within it using the same process as you would if you were replacing an image from a template.
You can refer to the instructions given earlier in the manual to learn how to add an image either from the WordPress media library or the Slider Revolution object library.
Alternatively, instead of inserting a placeholder you can click directly on WordPress Library or Object Library to speed up the process of adding images.
Resizing an Image
After selecting an image to display, you will likely want to resize it.
Take a look earlier in the manual for a refresher on how to control image dimensions and aspect ratio.
Additional Content Options
Now that our recap is all done, let’s check out some options you haven’t learned about yet.
Image From Stream if Exist
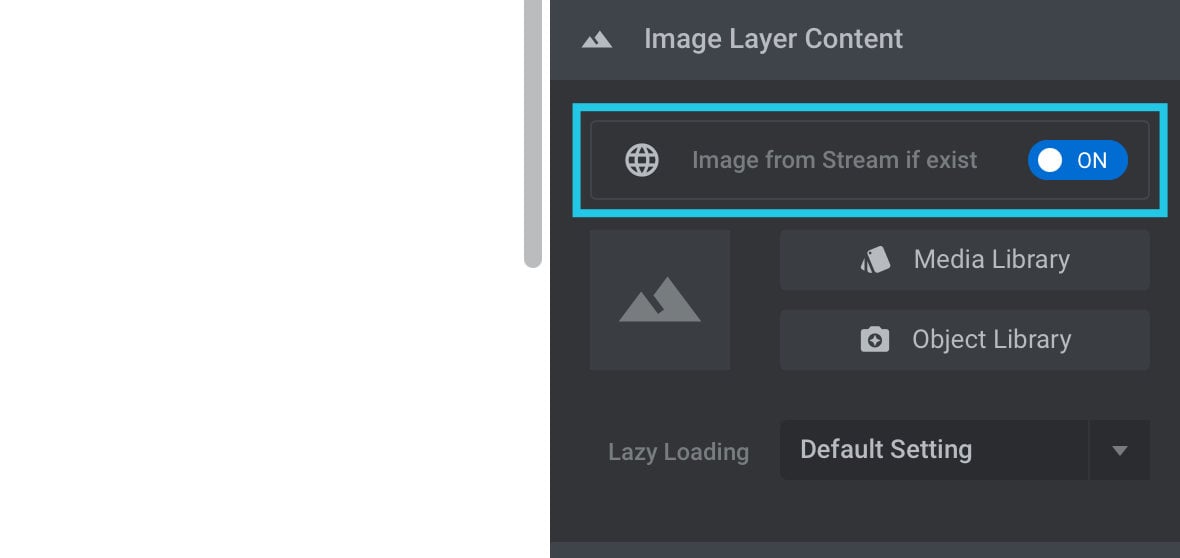
When toggled to ON this setting allows you to pull in an image from a stream you have already setup in the module, such as a stream of Twitter posts or Flickr photos.
Note: We’ll be stepping through how to set up streams later in the manual.
Lazy Loading
Lazy loading is useful if you have images in a module that won’t be seen right away, because it allows you to defer their loading until they are actually needed.
For example, images on the second slide of a module aren’t needed right away, but the images on the first slide are. Lazy loading will prioritize downloading those images so the first slide is ready as quickly as possible, and will wait to download the images of the second slide afterwards.
Lazy loading can be enabled on a module-wide level, something we’ll cover in an upcoming manual page, but you can also control it for an individual image layer via the Lazy Loading option in its Content sub-section, in the Image Layer Content panel:
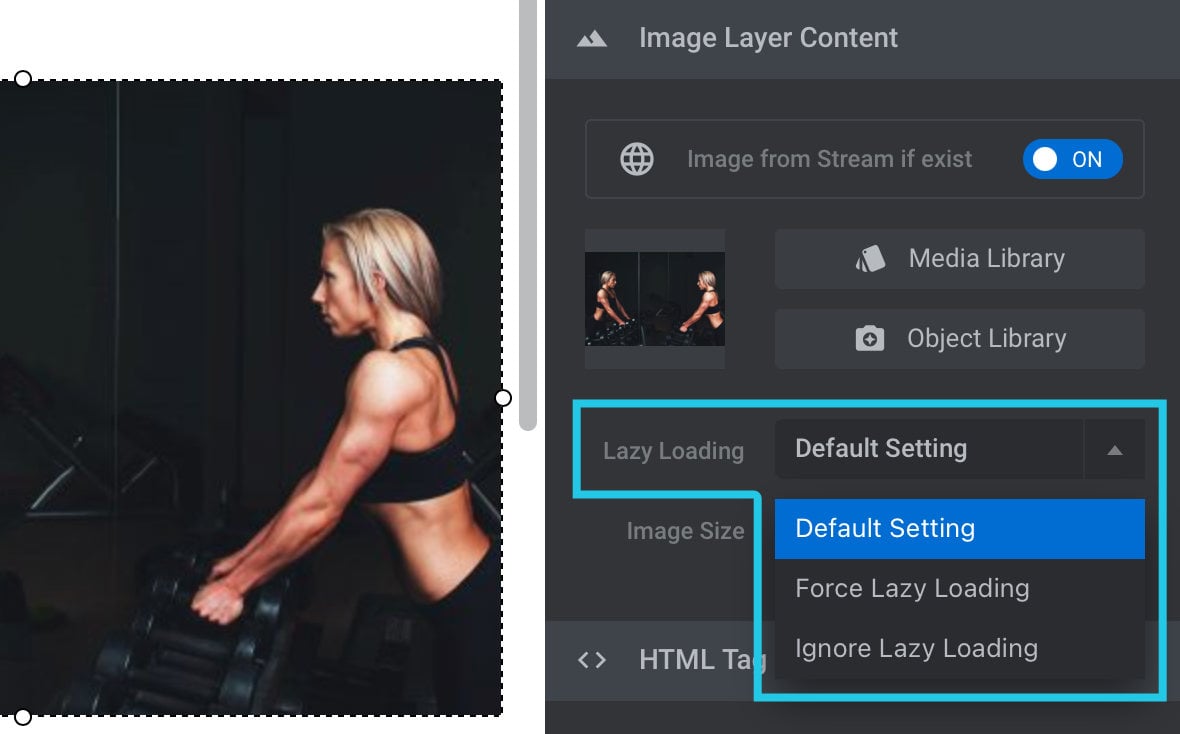
There are three settings available:
1) Default Setting – falls back to whatever the module level lazy loading settings are.
2) Force Lazy Loading – means the image will always lazy load, regardless of module settings.
3) Ignore Lazy Loading – means the image will never lazy load, regardless of module settings.
Image Size
Even though you can resize an image on the canvas, this process only changes the size the image appears to be, it doesn’t change the actual dimensions of the image file itself.
The larger the dimensions of an image, the larger the file size will be and the slower to load, while having higher image quality. And the smaller the dimensions, the smaller and faster loading the file will be, but it will have lower image quality.
This means that if you add a large image to a layer and only shrink it down visually on the canvas, the file size is unchanged and hence larger and slower than it needs to be. And if you add a small image and enlarge it on the canvas, it may appear blurry.
For that reason, if you add and visually shrink or enlarge an image you should choose an alternative setting from the Image Size option, in order to load as small a version of the image as possible while maintaining decent image quality.

View each Image Size setting from smallest to largest, then choose the smallest one that doesn’t cause any visible artefacts or quality problems at the size you’re using it on the canvas.
HTML Tag
In the case of image layers there is generally no need to change this setting from the default. This setting is more relevant to SEO for text layers.
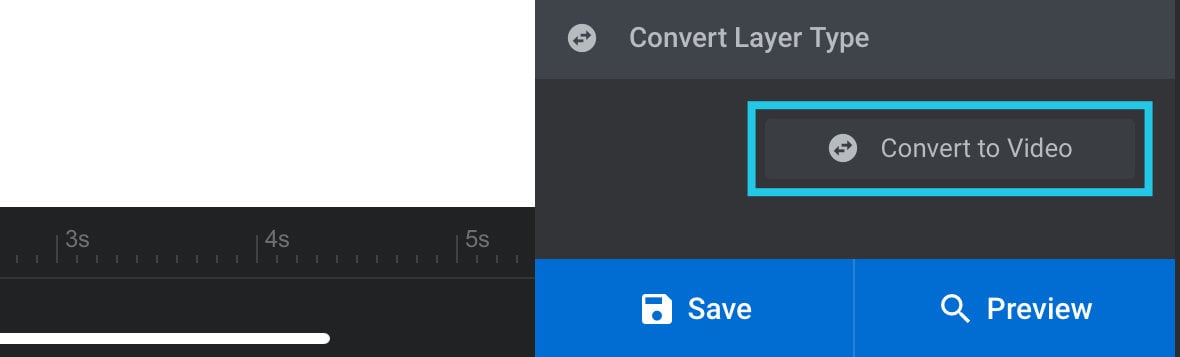
Convert Layer Type
Image and video layers have a lot in common, so in the Convert Layer Type sub-section you’ll find a button that lets you convert your image layer into a video layer, retaining many of its current settings:
Additional Position & Size Options
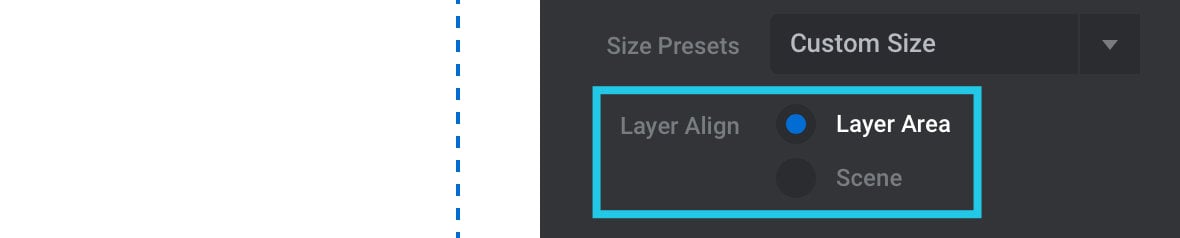
Size Presets
Size presets give you a quick and easy way to set the size of an image layer:
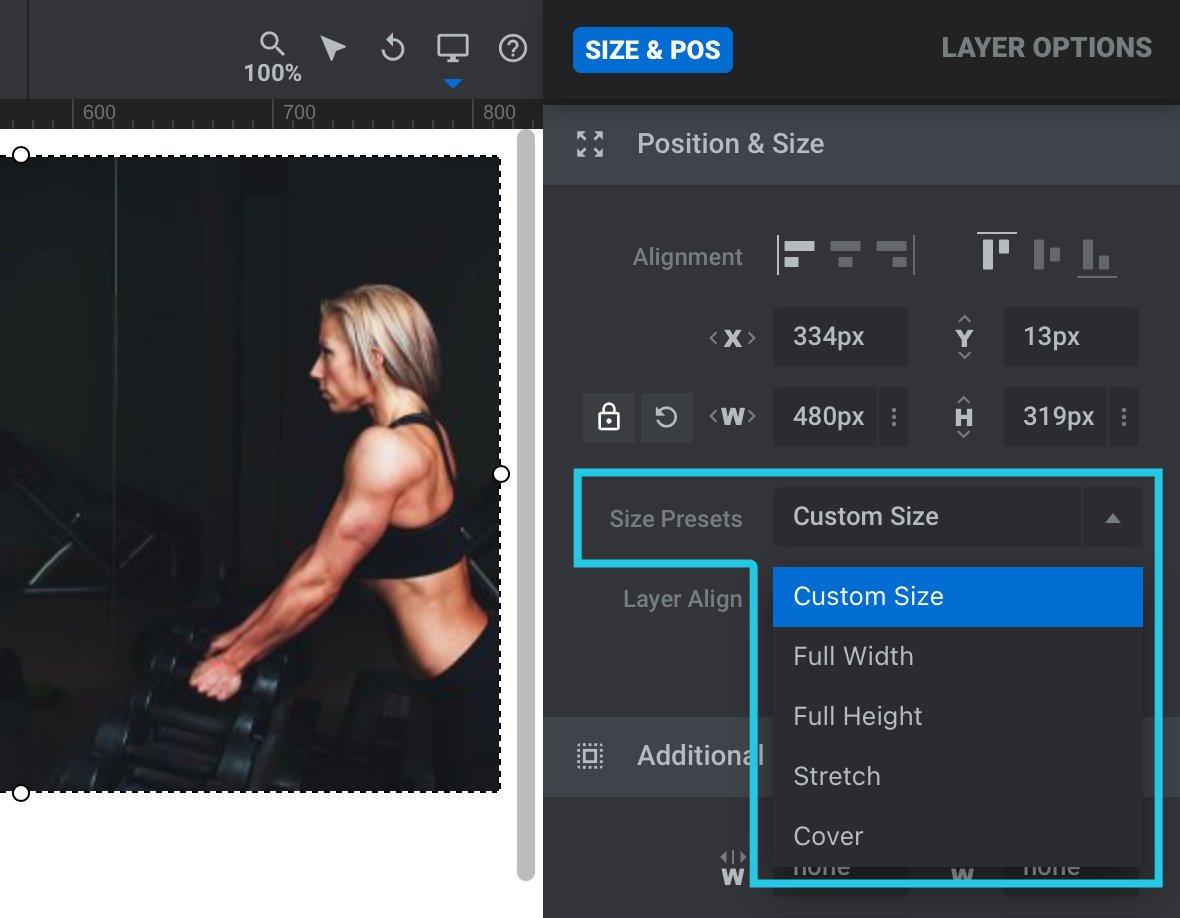
There are five settings available:
1) Custom Size – is the default and should be used if you want to set the layer size manually:
2) Full Width – sets the width of the layer to match the width of the bounds:
3) Full Height – sets the height of the layer to match the height of the bounds:
4) Stretch – sets both the layer’s width and height to match the width and height of the bounds, ignoring the aspect ratio of the image:
5) Cover – maintains the aspect ratio of the image, and sets the layer’s width and height large enough that the whole bounds will be covered. A portion of the image may be clipped to achieve this.
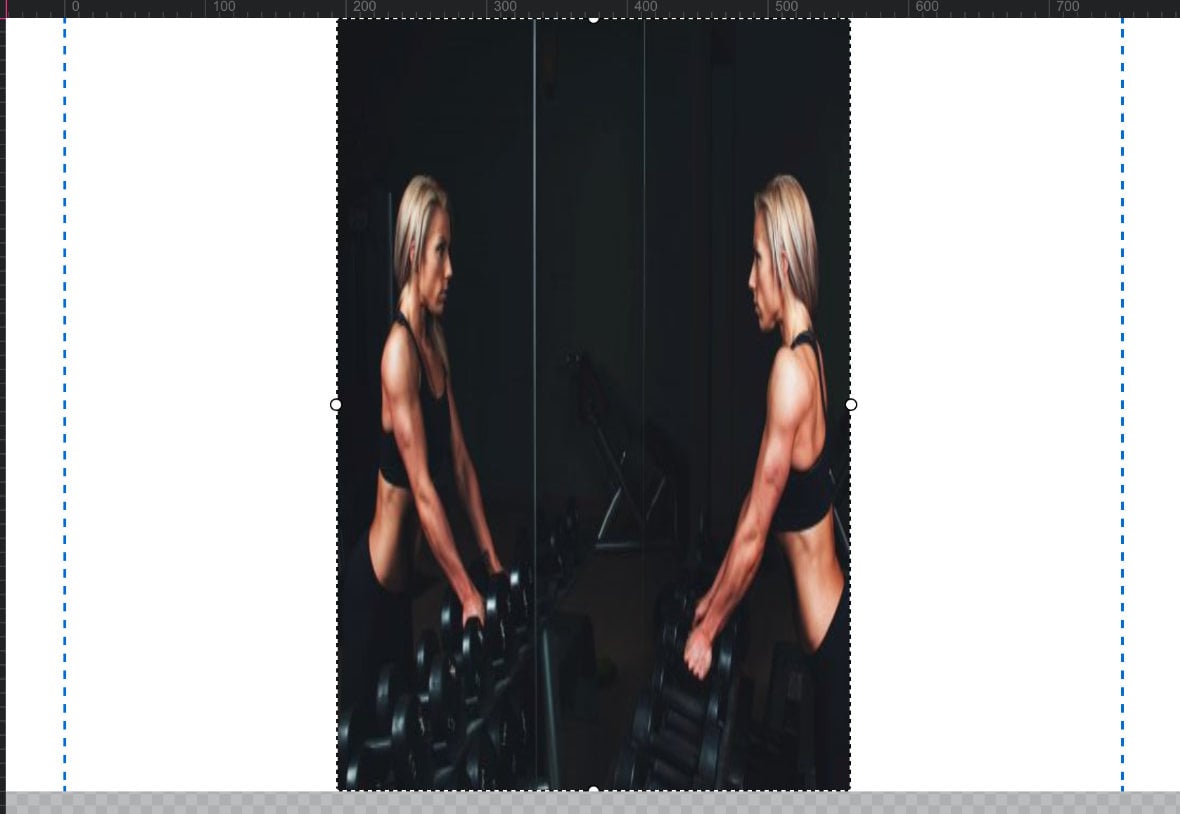
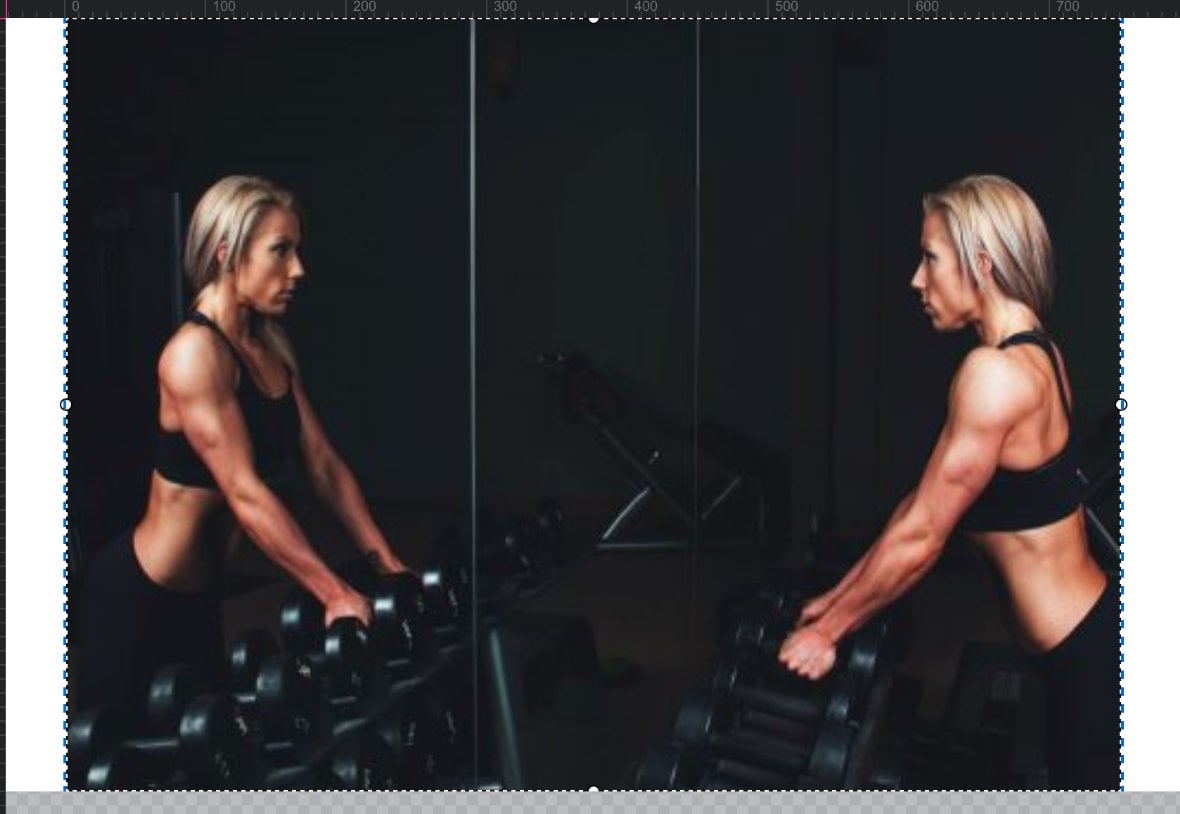
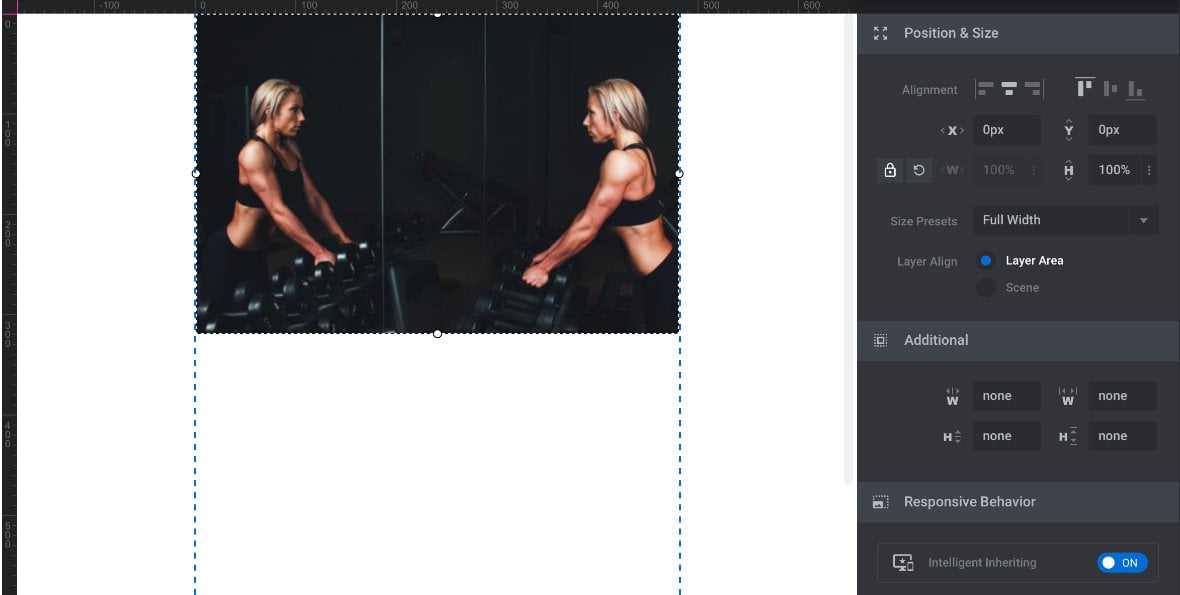
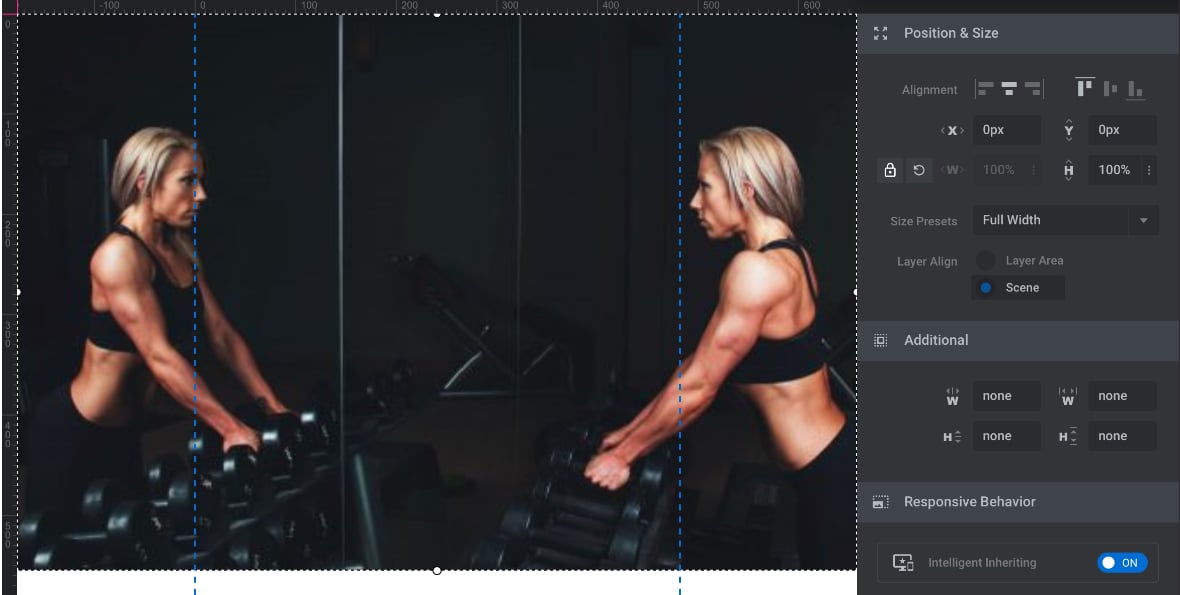
Layer Align
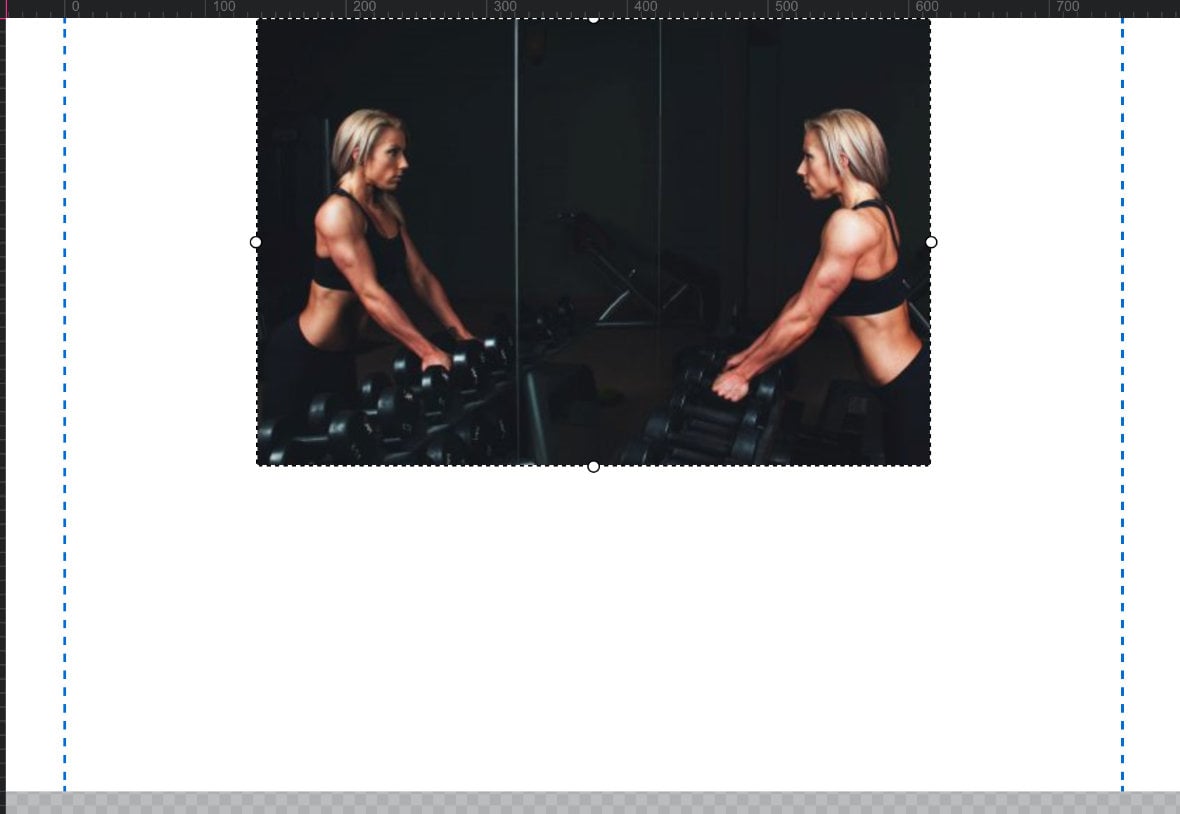
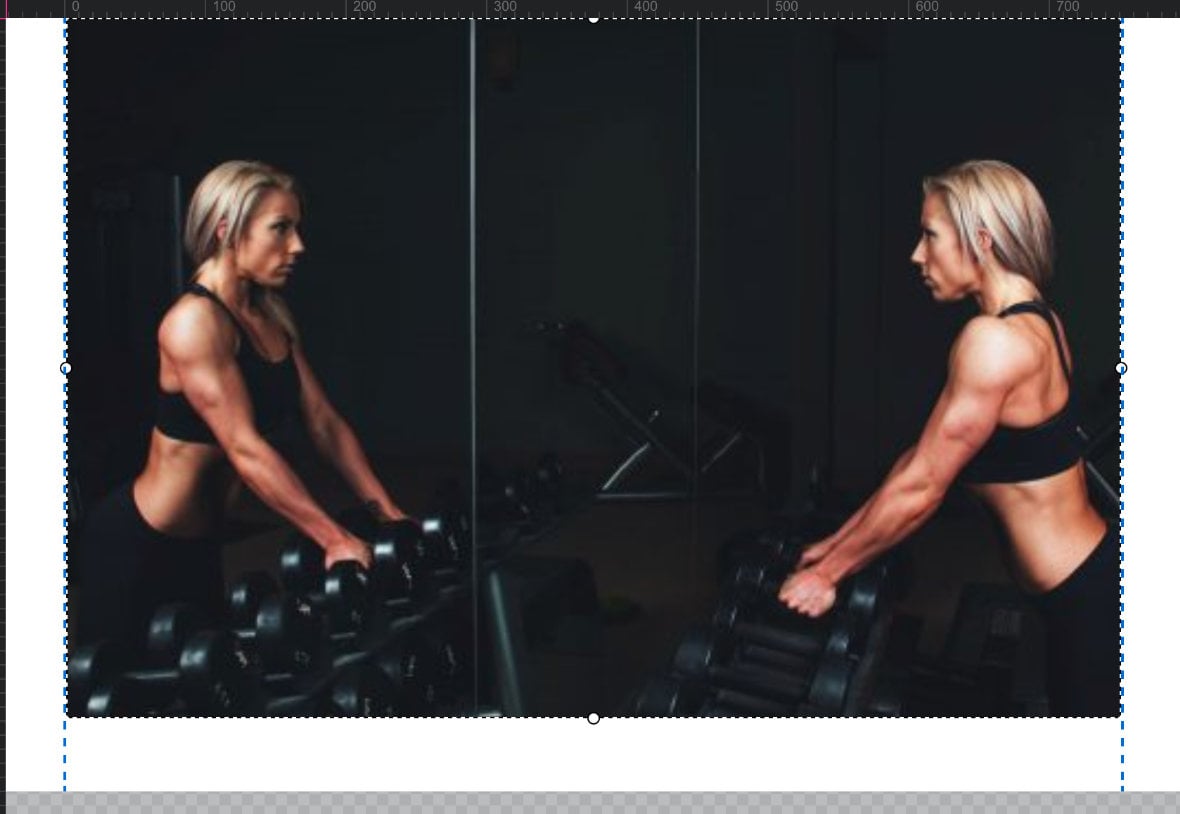
You may have noticed in the previous section we referred to image size presets being relative to “the bounds”, and wondered which bounds we were talking about. The answer depends on the setting you choose in the Layer Align option.
The bounds height will be the same in both cases (being the height of the canvas), but the bounds width will change:
If you select Layer Area the bounds width will be constrained by the dashed blue lines:
If you select Scene the bounds width will be the entire area of the scene:
Next Up: Button Layers
Buttons provide a fast and straight forward way to add layers that are clearly meant for interactivity.
In the next guide on Adding and Configuring Button Layers, you’ll learn how to create buttons and style them to look just the way you want.