
Paintbrush Addon Guide
Create fun, interactive "painting" experiences for your visitors with the Paintbrush addon
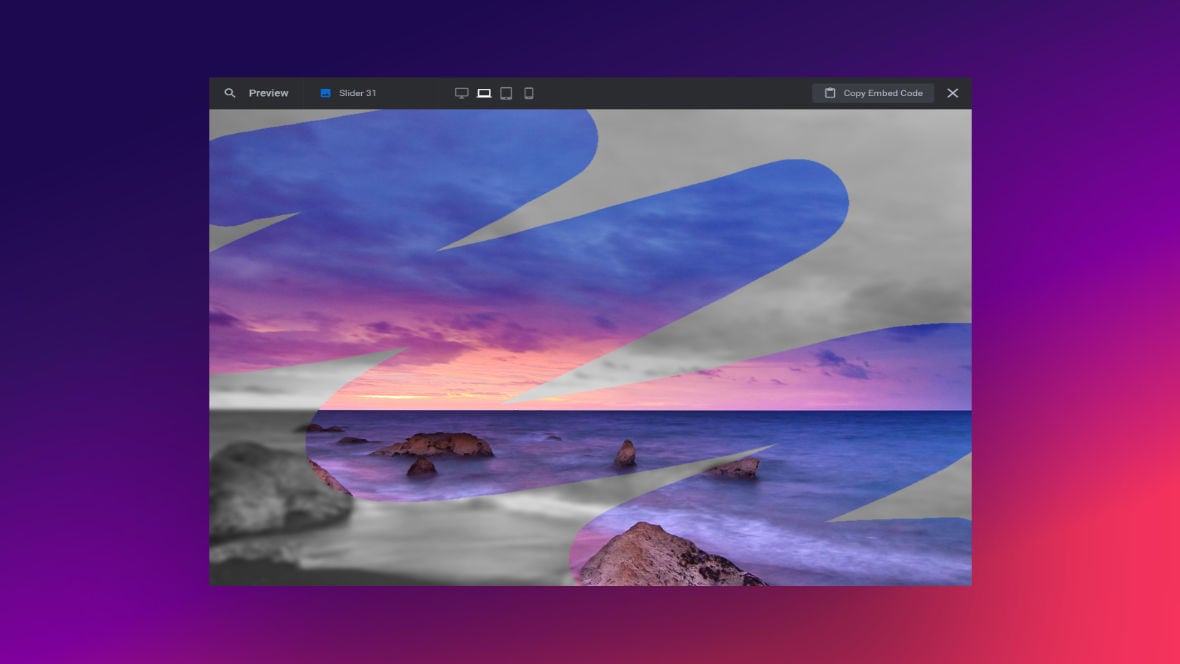
Table of Contents
What Does the Paintbrush Addon Do?
The Paintbrush addon [?]
Addons extend the functionality of Slider Revolution, adding new controls to the module editor and allowing you to do extra things with your design.
For example, using the particle addon you can create effects such as falling snow, and using the distortion addon you can create shimmering effects such as simulating being underwater.
There are dozens of addons available, all included with the full version of Slider Revolution. creates the effect of “painting” on a slide [?]
A "slide" in Slider Revolution is a container into which multiple layers can be added, with layers in turn acting as containers for various forms of media such as images, text, video, audio, buttons, and special effects.
Slides are added to modules and edited via the module editor.
Within the module editor, each slide has its own animation timeline, background and collection of layers.
A single module can have one or many slides. A module with one slide is called a scene, and a module with multiple slides is called a slider or carousel. background [?]
A "background" in Slider Revolution is a type of layer that is always present in every module, and is always visually behind all other layers.
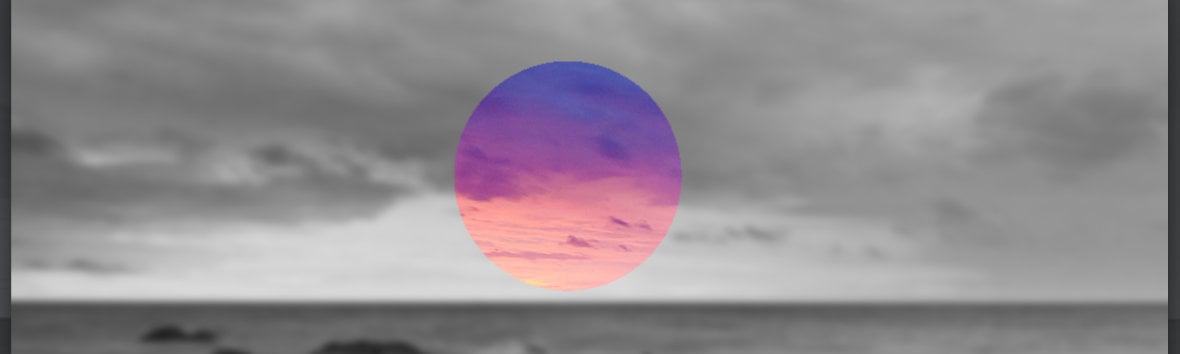
A background can be transparent, a flat color, a gradient, an image, or a video. It can be animated in the same way as other layers can be, however it cannot be deleted. using the mouse. The effect is created by combining three elements.
A regular slide background:
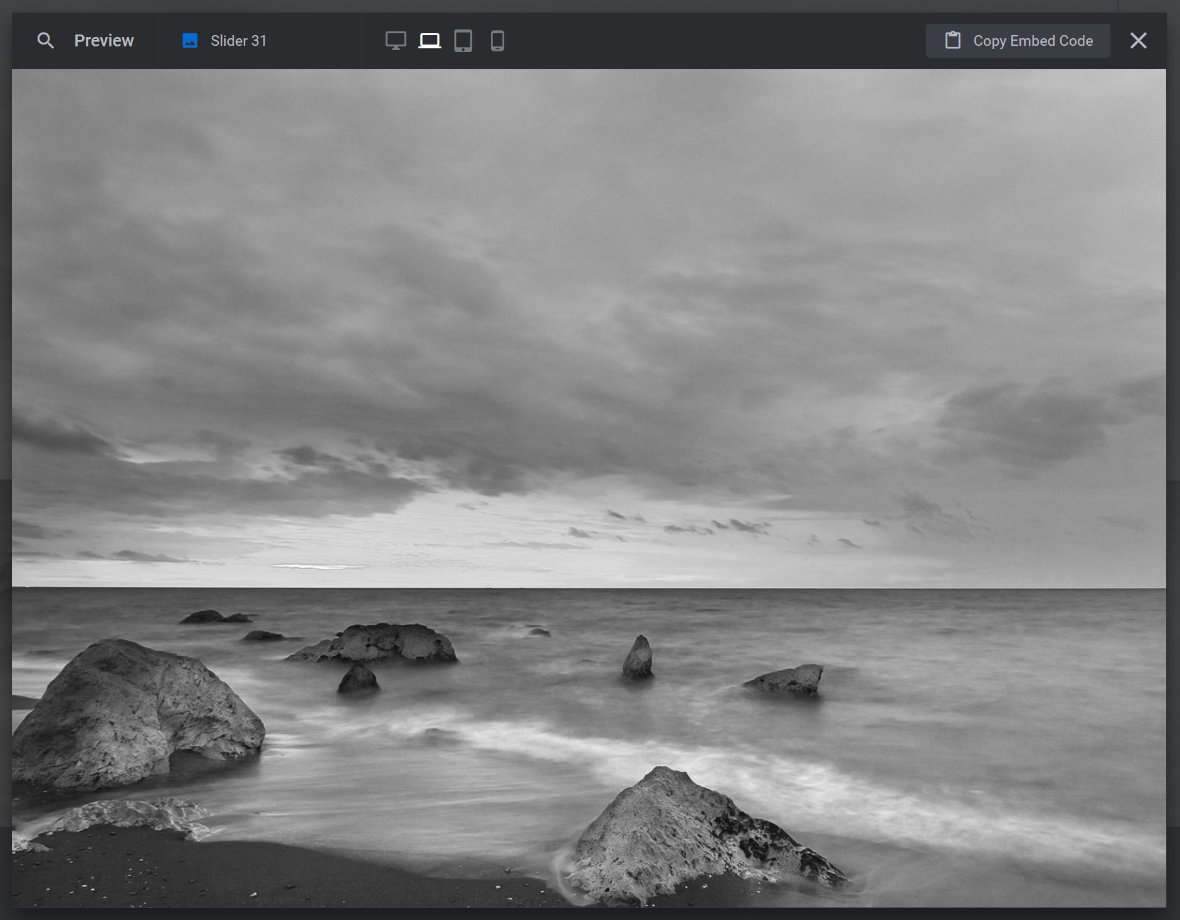
A second slide background, which will initially be invisible:
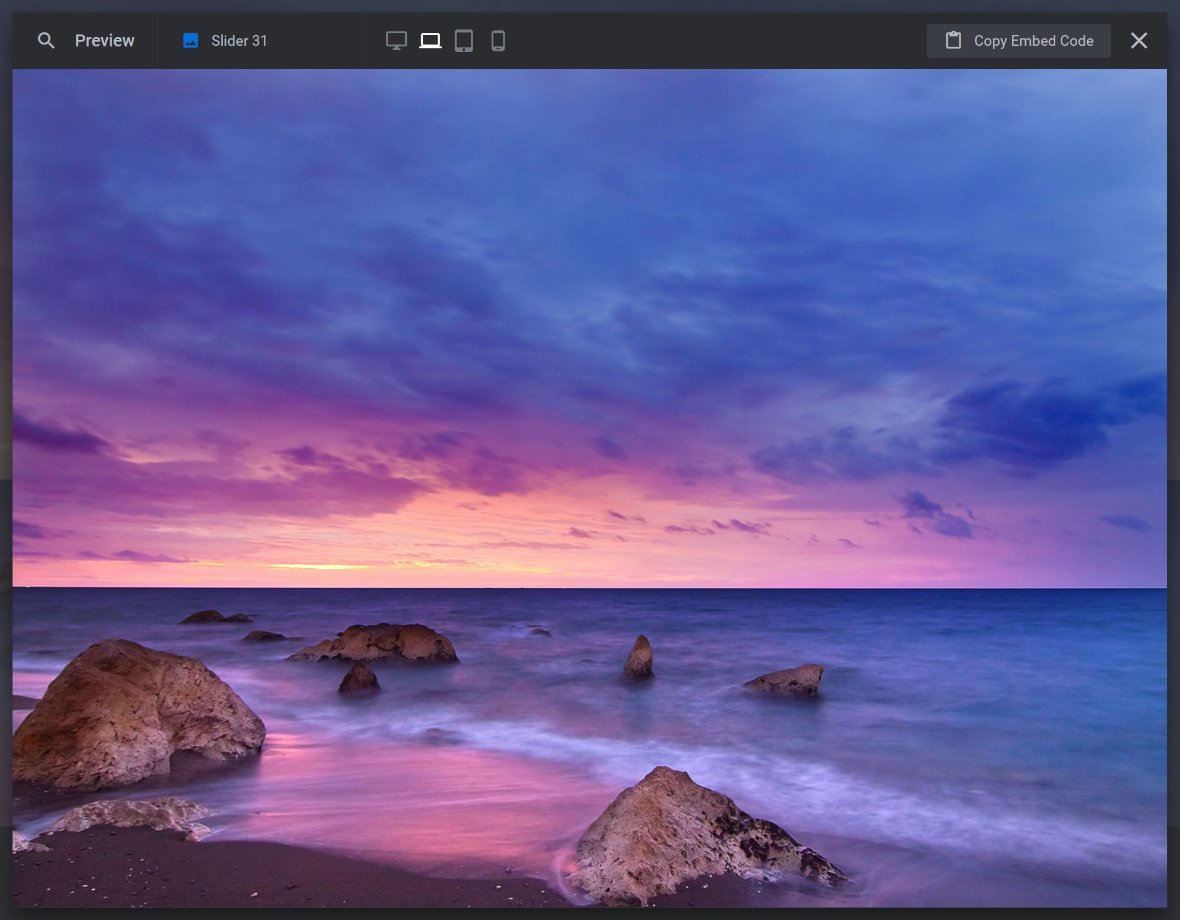
A brush shape that can be moved around the slide, revealing the hidden second slide background anywhere it goes, hence generating the effect of leaving behind a brush stroke:
Getting Started
To get started with the Paintbrush addon you’ll first need to install and enable it:
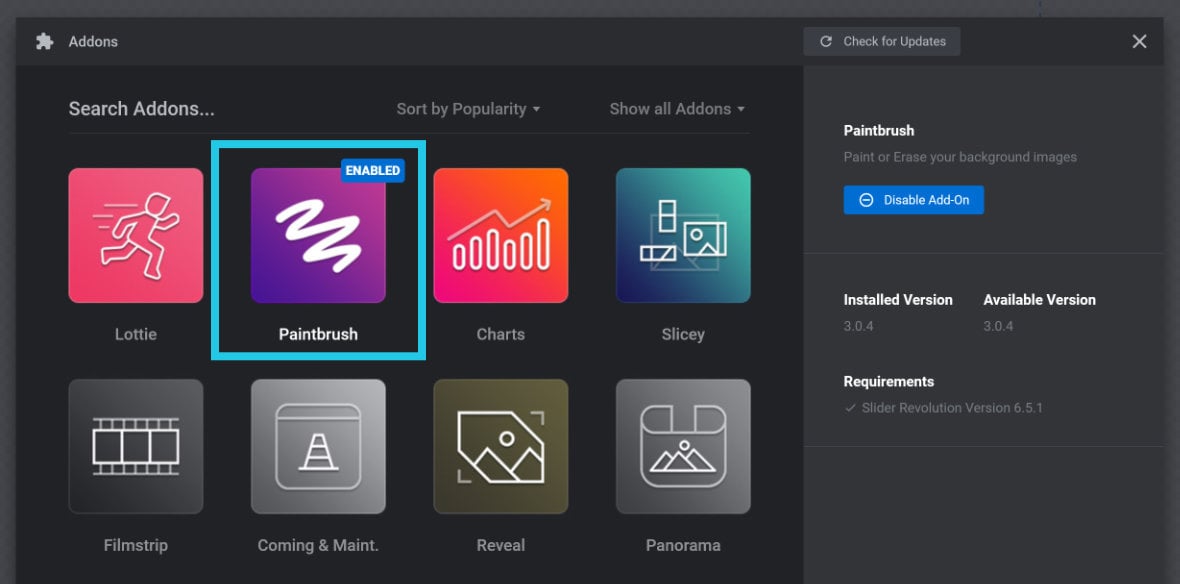
The process for doing this is the same as with all addons, so please begin by following the steps in our guide on how to Browse, Install and Enable Addons.
Activate Per Slide
After installing and enabling the Paintbrush addon, you’ll need to activate it within your module [?]
A module in Slider Revolution acts as a container for slides, which in turn act as containers for layers. Modules are created and edited with the module editor.
A "module" is a single, self contained piece of content. You can think of this as being similar to the way a post or page in regular WordPress is a self contained piece of content.
A module can represent any kind of content Slider Revolution is capable of creating, such as a slider, carousel, hero unit, navigation menu, posts display and so on.
Multiple modules can be combined to form rich content such as complete sites and landing pages..
The Paintbrush addon is activated on a per slide basis. This allows you to create modules where some slides can have a paintbrush effect while others don’t, giving you complete control.
For each slide on which you want to create a paintbrush effect, go to the Slide Options tab, then the Paintbrush sub-section, and in the Image Settings panel toggle the Active option to ON:
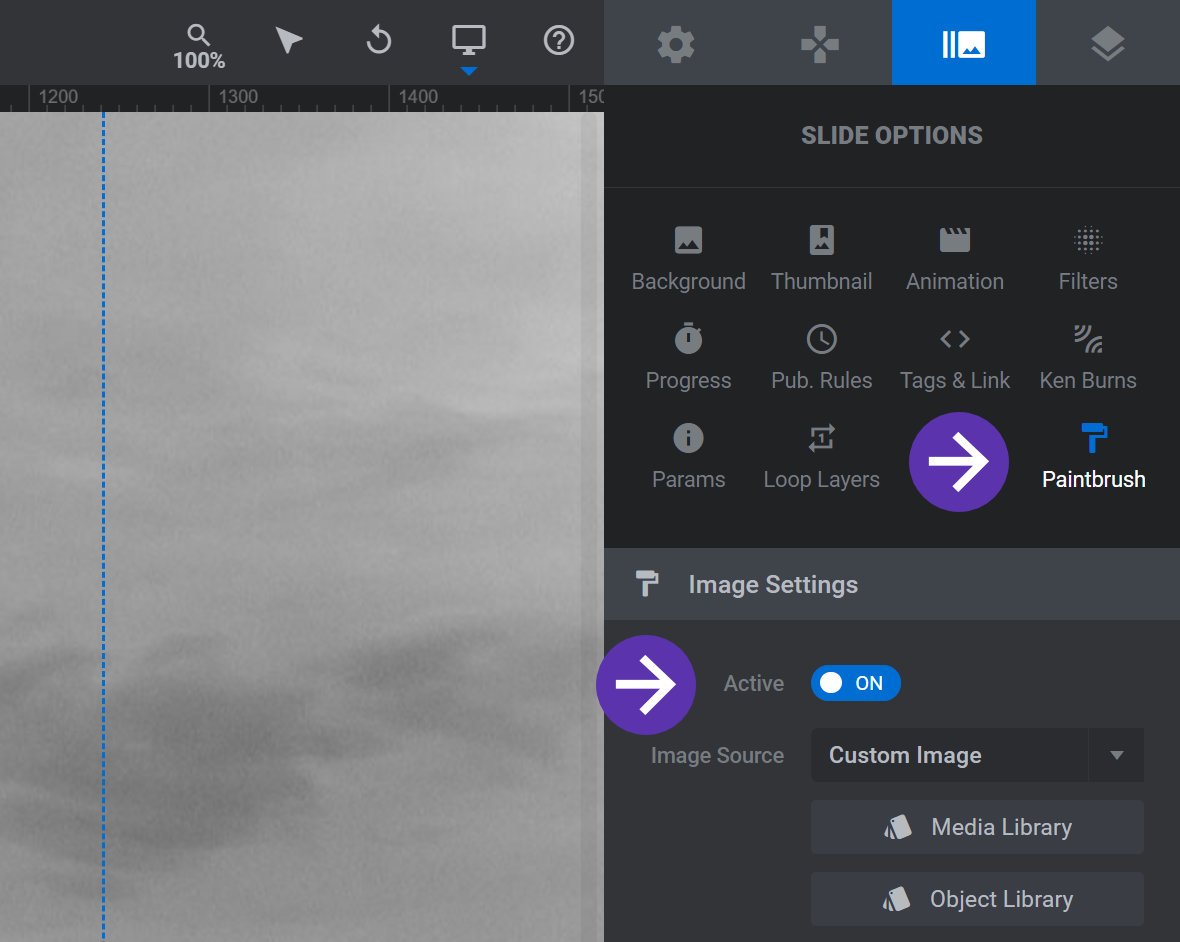
You will then see additional options appear in the Image Settings panel, and the Brush Settings and Mobile Settings panels will appear below:
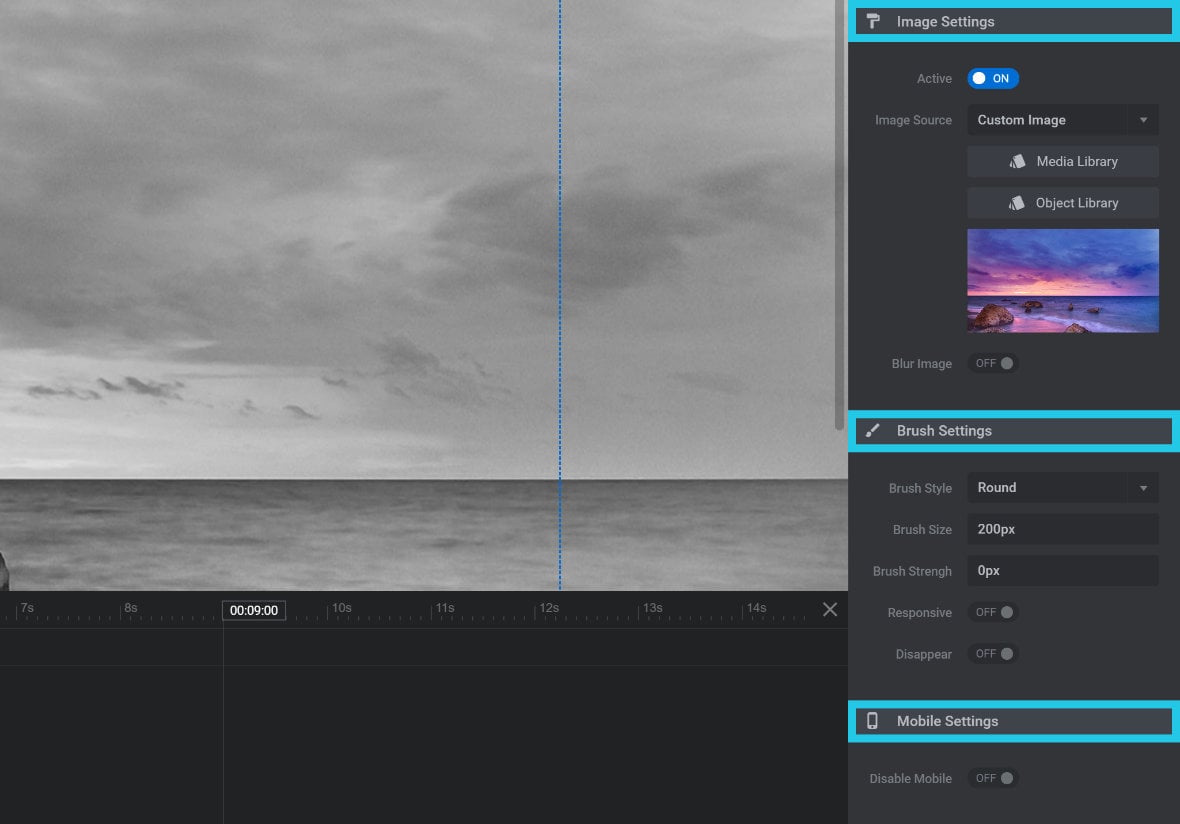
Image Settings Panel
Below the Active option, there are six options available in the Image Settings panel:

Image Source
Use the Image Source option to select an image that will be revealed by the visitor when they “paint” with their mouse:

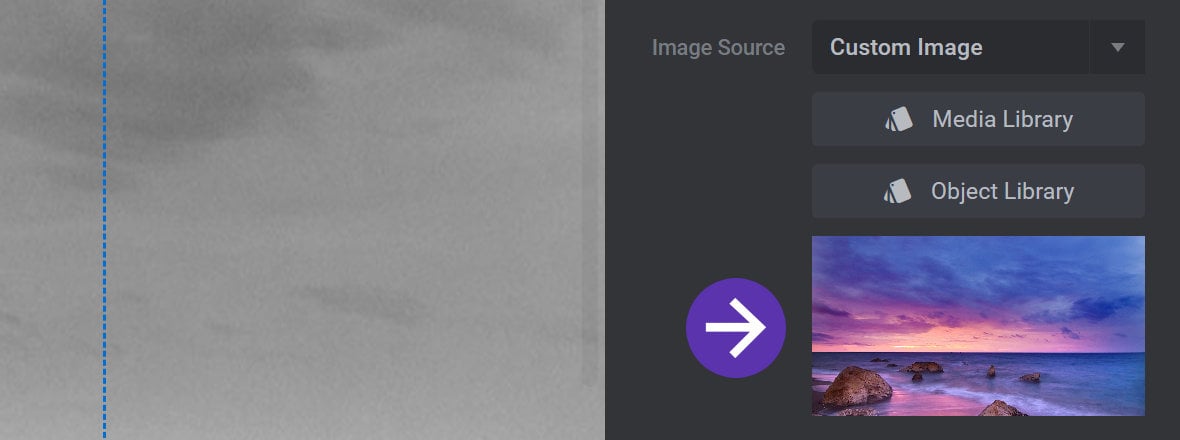
To set an image of your choice to be revealed by the paintbrush effect, select Custom Image:

Then click either the Media Library or Object Library button and choose your image:

Alternatively, if you want the paintbrush effect to work with your existing slide background image, select Slide Background:
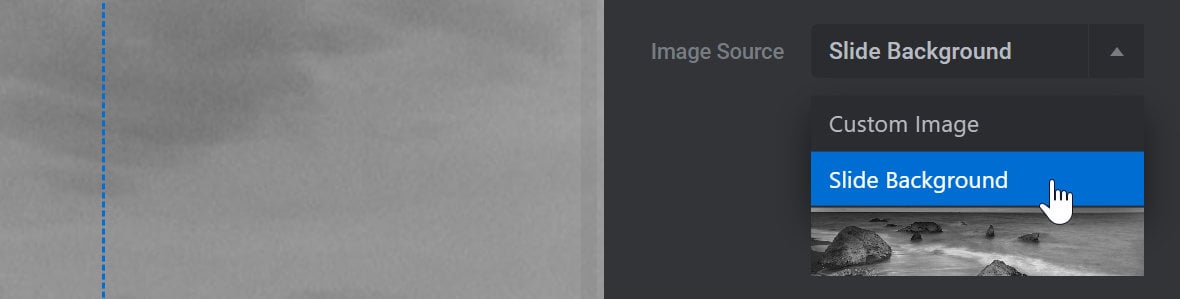
In either case your selected image will appear as a thumbnail below the Image Source option:
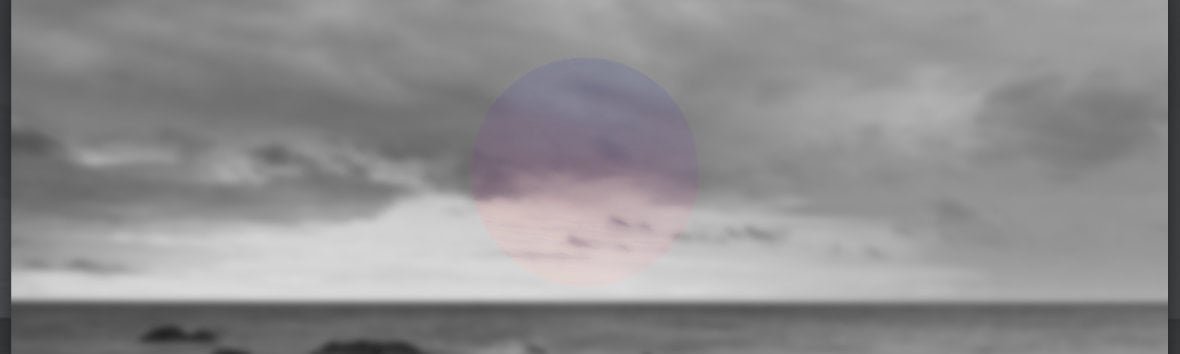
Blur Image
Toggle the Blur Image option to ON if you would like your slide to appear blurred before the paintbrush effect is applied:

This blurring applies to the slide background image, not the paintbrush effect image.
As such, this option is particularly useful if you have Image Source set to Slide Background, because that slide background image will appear blurred, then clear when “painted” over:
When Blur Image is toggled to ON, three additional options will appear below to allow for configuration of the blur effect:
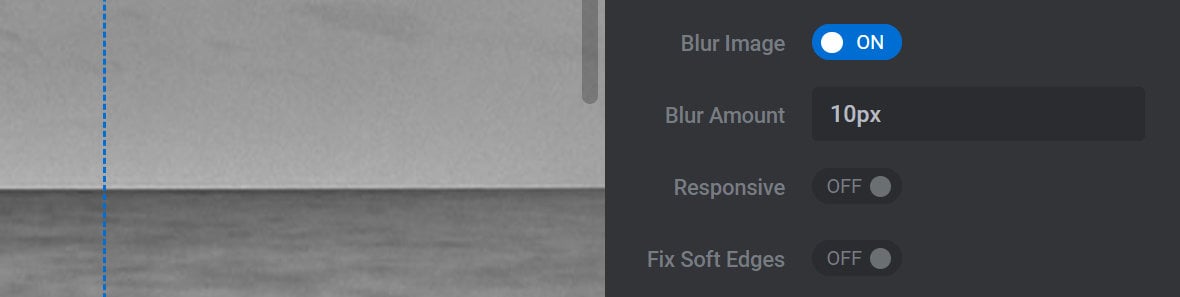
Blur Amount
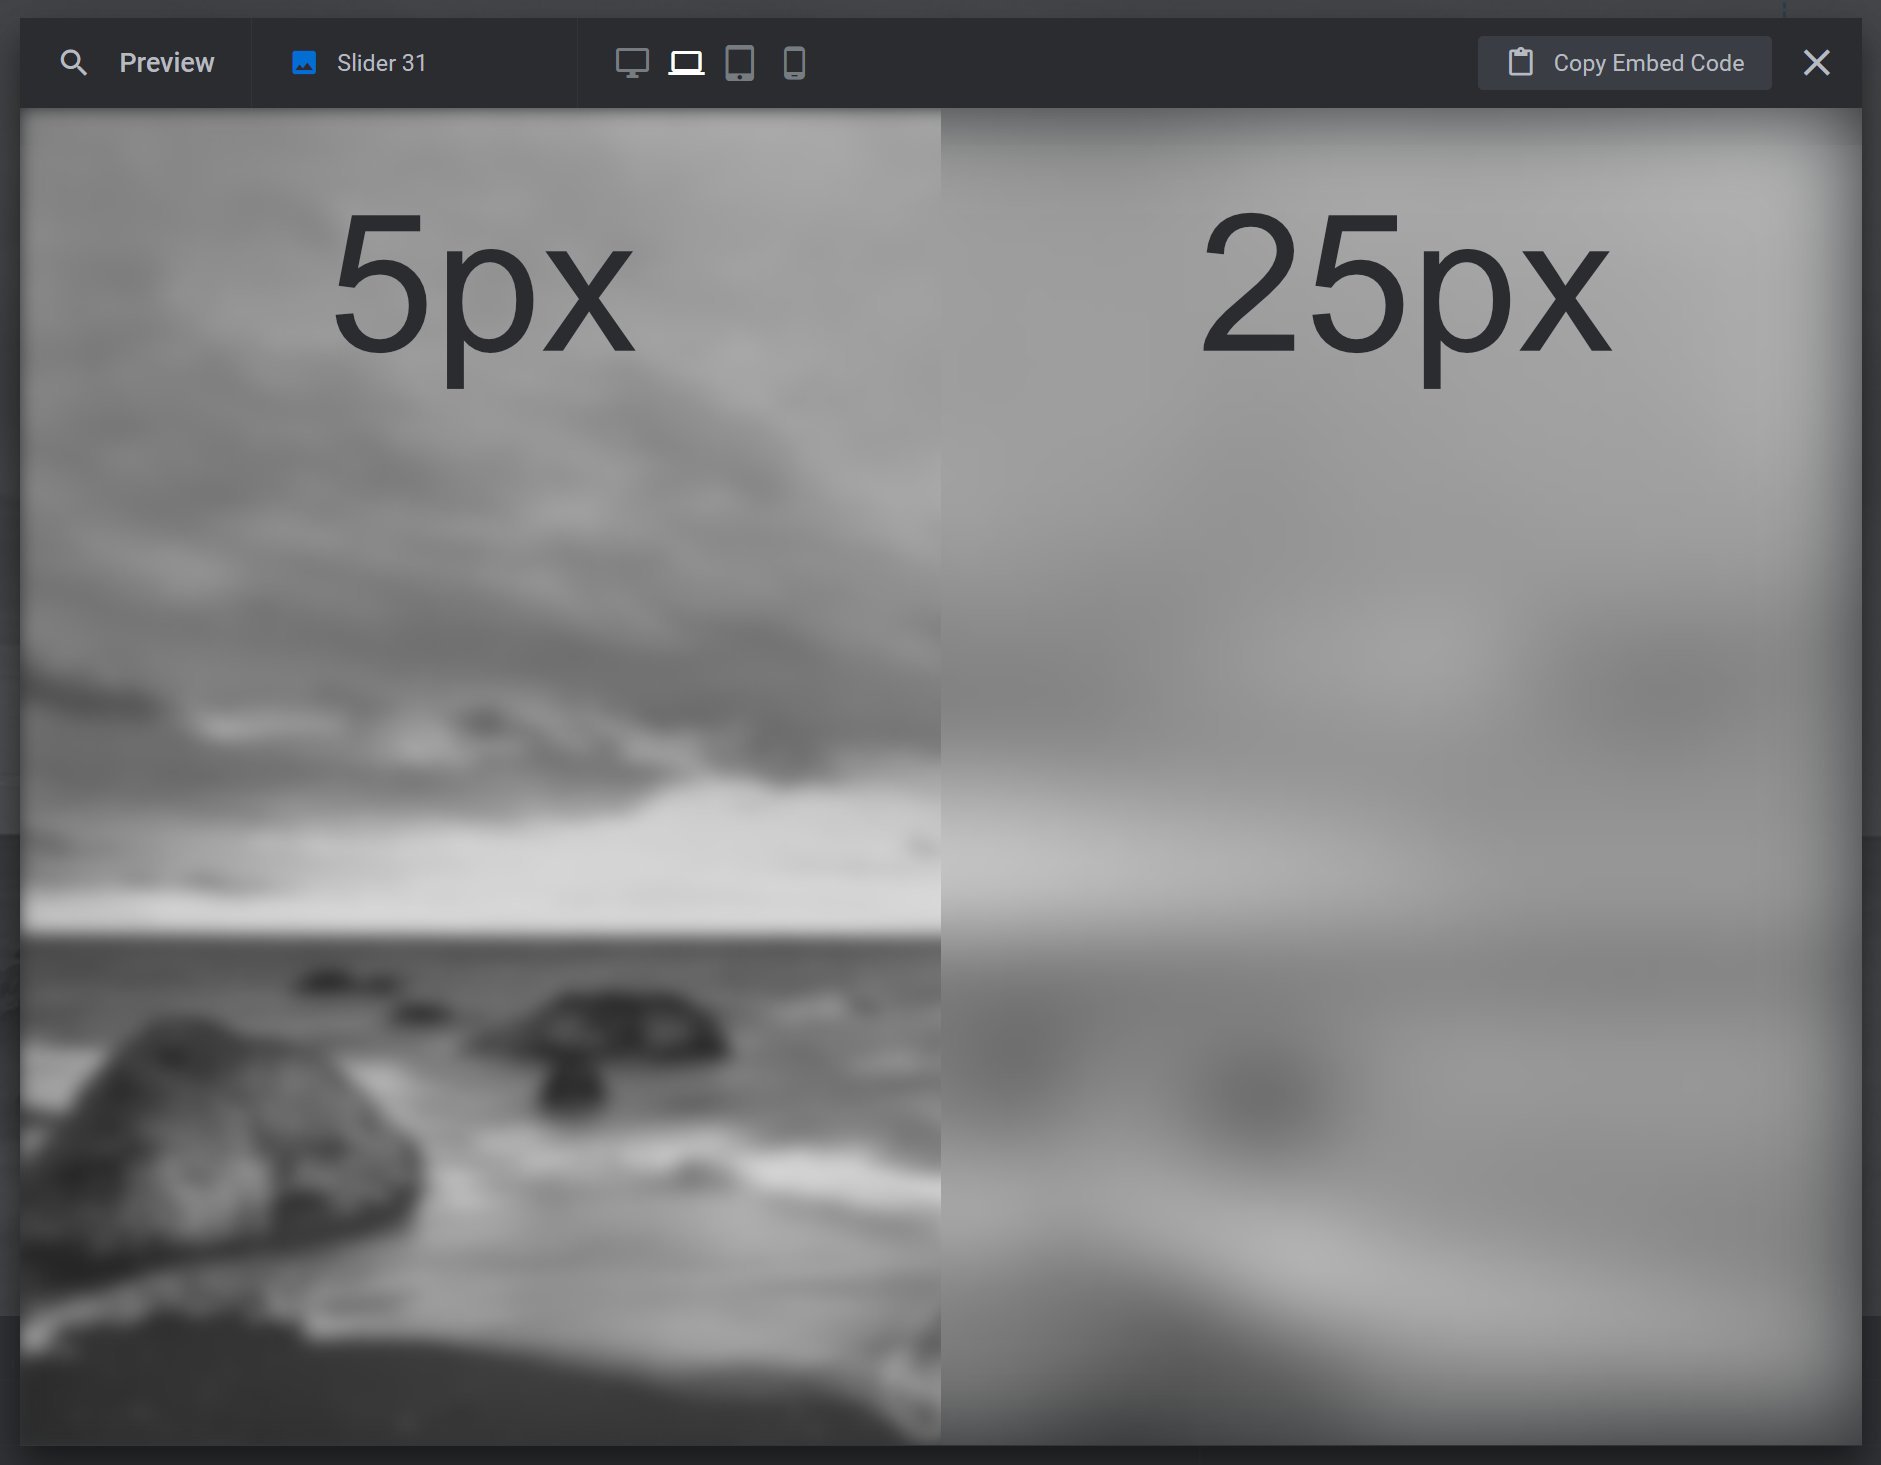
The Blur Amount option sets how strong the blur effect should be, in pixels(px):

The higher the value, the stronger the blur will be. For example, below is a 5px blur versus a 25px blur:
Responsive
Toggle the Responsive option to ON and the blur effect will be scaled along with the size of the module:

This helps to keep the blur effect looking consistent across all viewport sizes.
Fix Soft Edges
Sometimes, blurring an image can cause a soft edge to appear around its outside:
This can be solved by toggling the Fix Soft Edges option to ON:

The solution works by stretching the image’s size so the outer edges are no longer visible:
Stretch By
When Fix Soft Edges is toggled to ON, the Stretch By option will appear, in which you can set how much the image should be enlarged, as a percentage(%):

The higher the Blur Amount you use, the softer your image edges will be, and hence the higher you will likely need to set the Stretch By option in order to hide those edges.
Brush Settings Panel
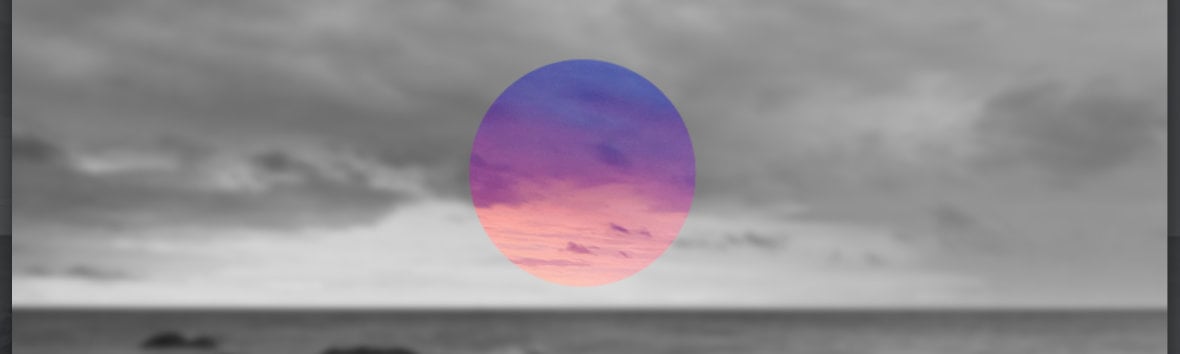
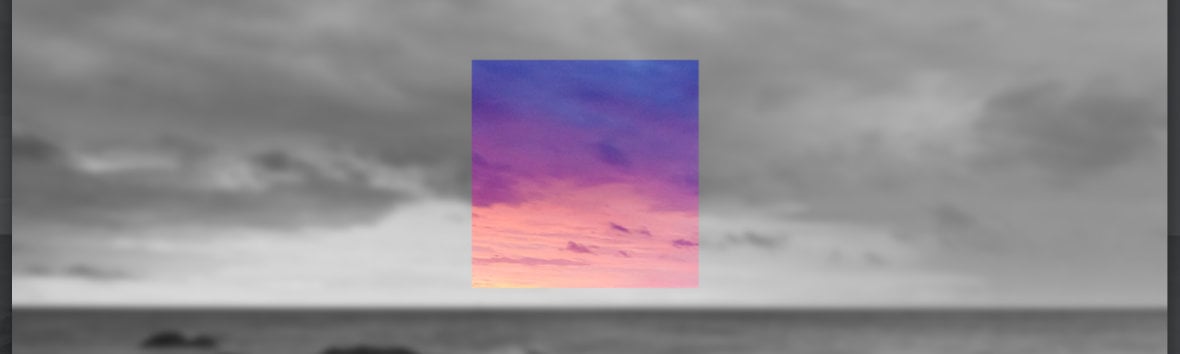
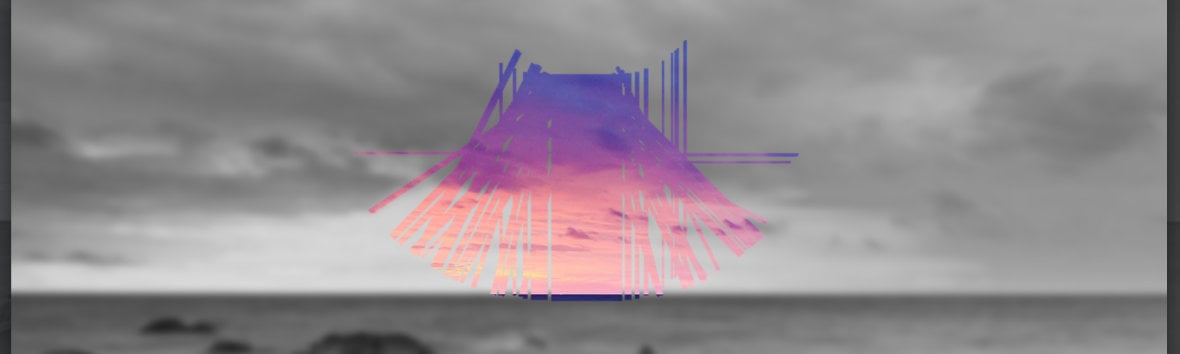
Brush Style
The Brush Style option determines the shape used in the paintbrush effect:
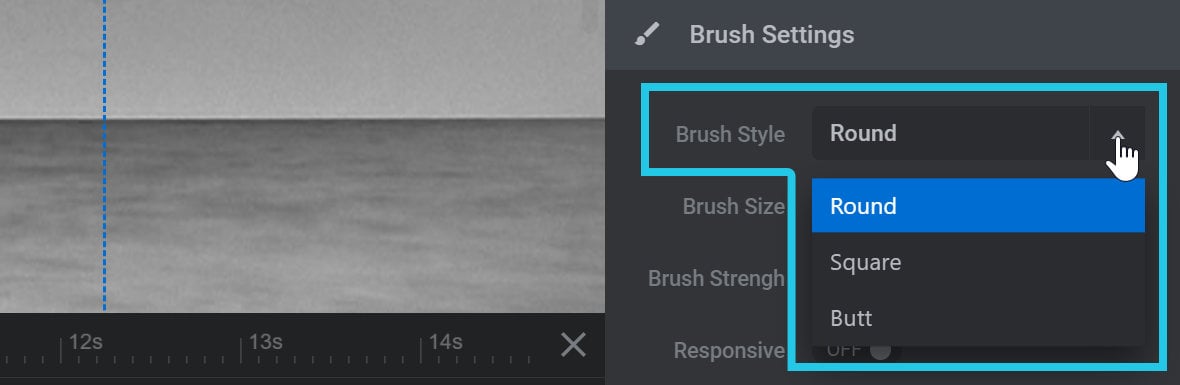
There are three settings to choose from, each illustrated below.
Round:
Square:
Butt:
Brush Size
Use the Brush Size option to set how large your brush should be, i.e. the width of the brush stroke, in pixels(px):

Brush Strength
The Brush Strength option allows you to determine the strength of the brush effect. A lower number creates the strongest possible effect while a higher number creates a softer effect.
Set the strength, in pixels(px):

For example, a Brush Strength of 0px creates a vivid brush effect:
While a Brush Strength setting of 500px creates a less vivid, slightly transparent effect:
Responsive
Toggle the Responsive option to ON and the brush size will be scaled along with the size of the module:

This helps to keep the brush effect looking consistent across all viewport sizes.
Disappear
When set to OFF the Disappear option will maintain all brush strokes on screen for as long as the slide is on screen. Toggle it to ON to have the paintbrush effect disappear after a period of time:

Fade Time
If the Disappear option is toggled to ON, the Fade Time option will appear below:

Use this option to set the amount of time, in milliseconds(ms), before the brush stroke fades and disappears.
For example, a Fade Time of 2000ms creates the following effect:
Mobile Settings Panel
Disable Mobile
Toggle the Disable Mobile option to ON to disable the paintbrush effect on mobile devices:

Use Fallback
If the Disable Mobile option is toggled ON, the Use Fallback option will appear below:

If you toggle Use Fallback to ON, the image selected under the Image Source option will be used as the main slide background on mobile devices, instead of the regular slide background.
Learn More from Templates
To learn more about the Paintbrush addon, there’s nothing better than looking through some ready-made templates [?]
A "Template" is a premade module. It has pre-configured layers already in place.
It is designed to be ready for use, either as is or after being modified in the module editor.
Slider Revolution comes with several templates you can use, or alternatively you can create your own templates, thereby allowing you to easily reuse modules you have produced. and seeing how the effect is used in practical application.
Try starting with the Paintbrush Addon Template. Then check out the Paintbrush Effect Template, which also integrates the Mousetrap addon to add custom mouse graphics and boost the effect even further.