
Advanced Word Animations Tab
In this guide we’ll cover advanced options for creating and modifying word animations.
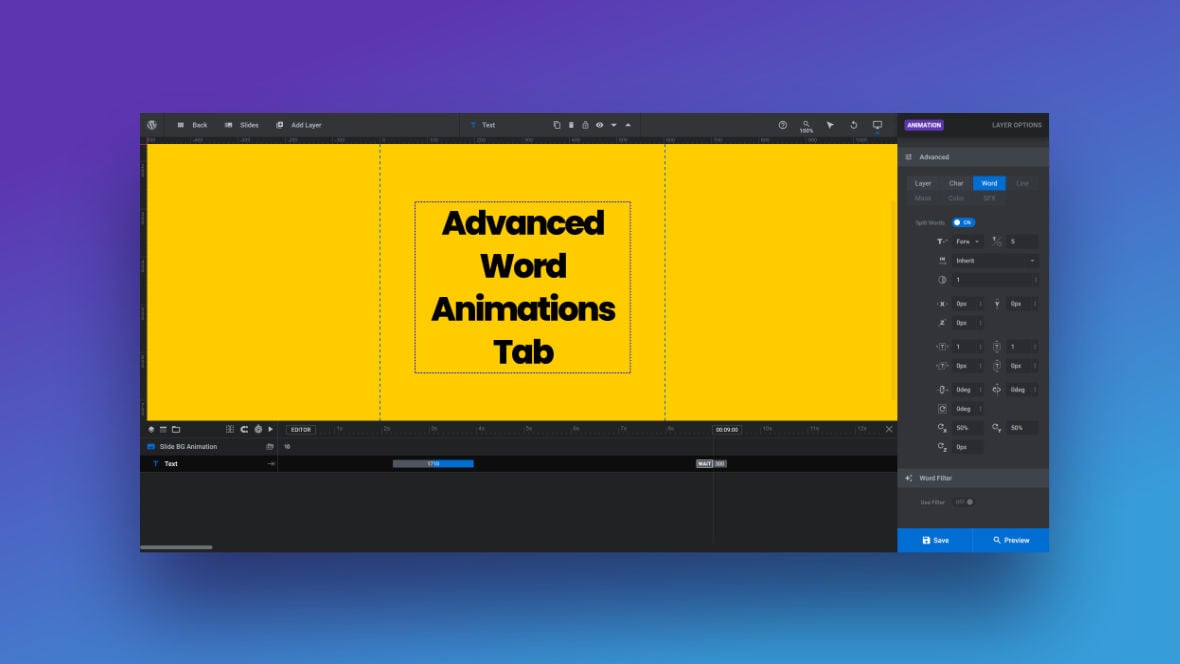
Table of Contents
Advanced Word Animation Options
Word animation is designed for use with text layers [?]
Layers are containers for visual, audio or layout items and are added to slides. For example, text, button, image, audio, video, group and row are all types of layers.
Layers are added to slides via the module editor., and allows you to animate each individual word in the text, one at a time:
This type of animation is generally best suited to medium length text, such as headlines or short paragraphs.
In this guide we’ll step through the options contained in the Word tab of the Advanced panel:
We’ll also cover the two additional panels that appear when the Word tab is selected: Word Filter panel, and Slide Direction Based Mirroring panel.
Word Tab
Split Words
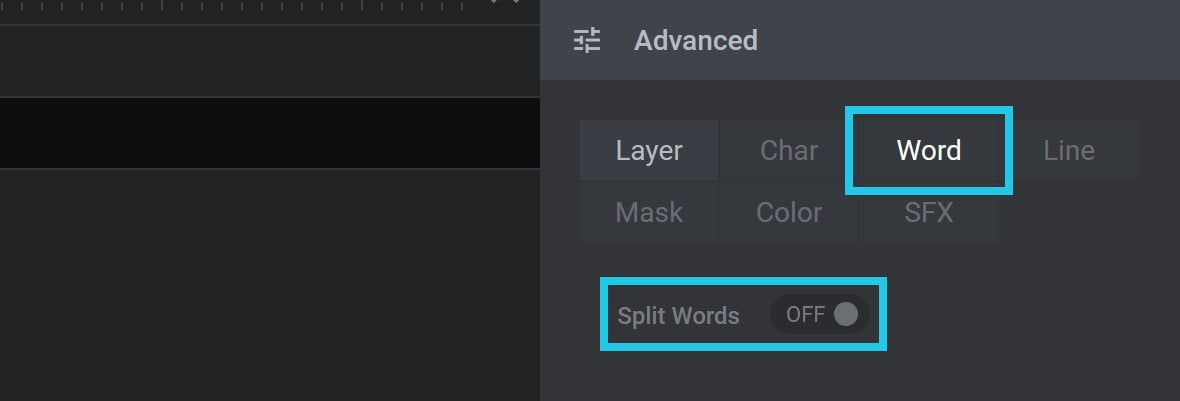
Upon clicking the Word tab for the first time, you will see the Split Words option set to OFF:
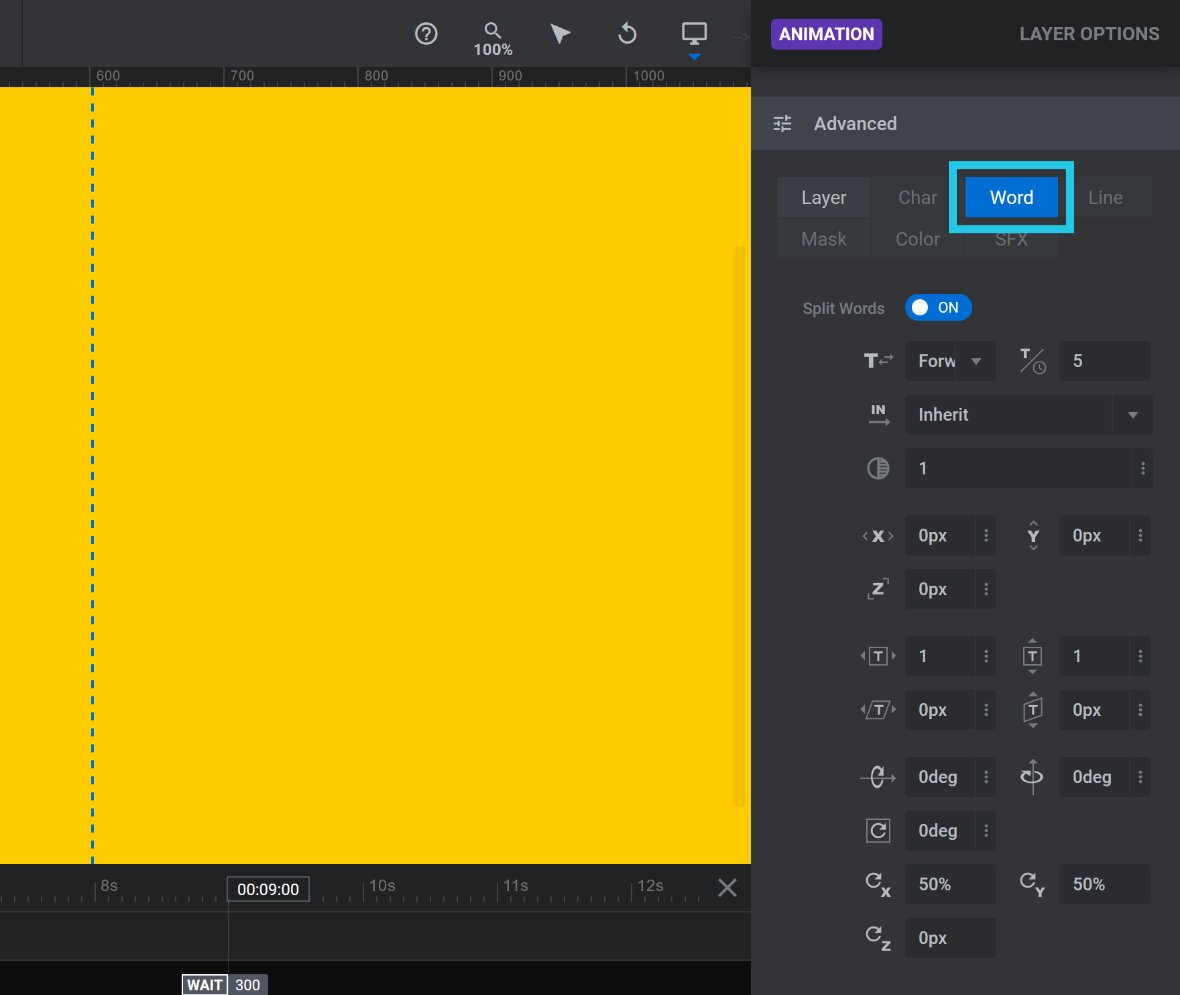
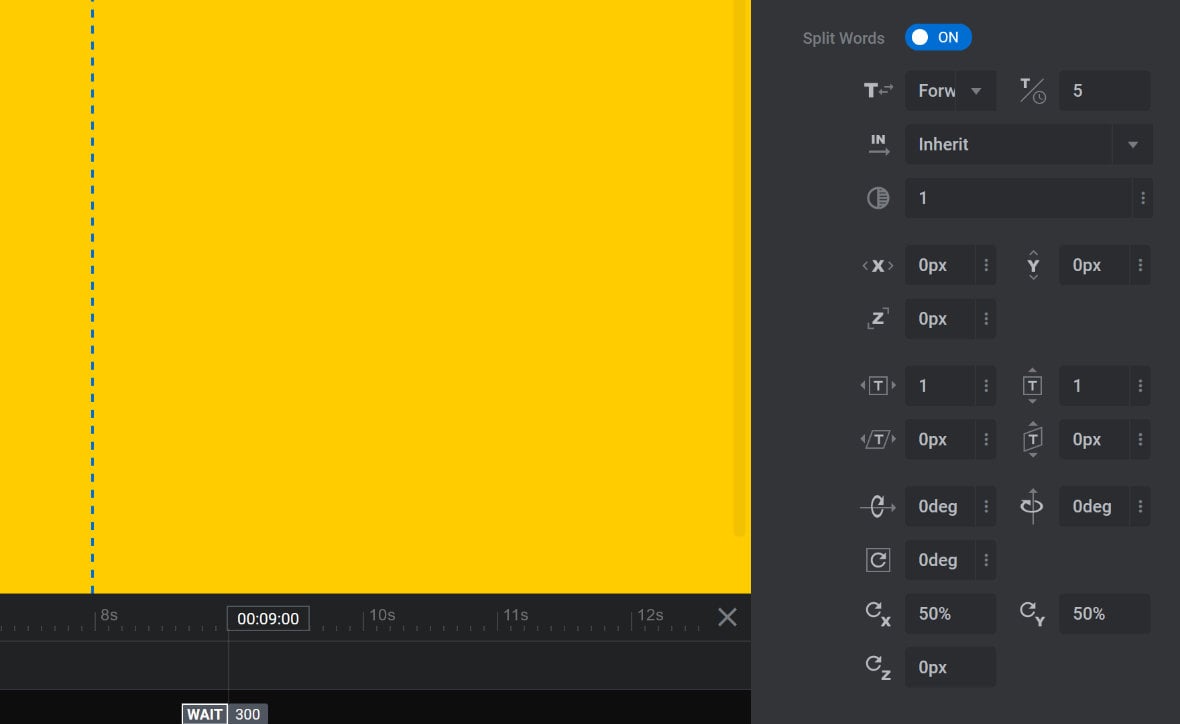
To enable word animation, toggle the Split Words option to ON:

After doing so, a group of additional animation options will be displayed in the Advanced panel:
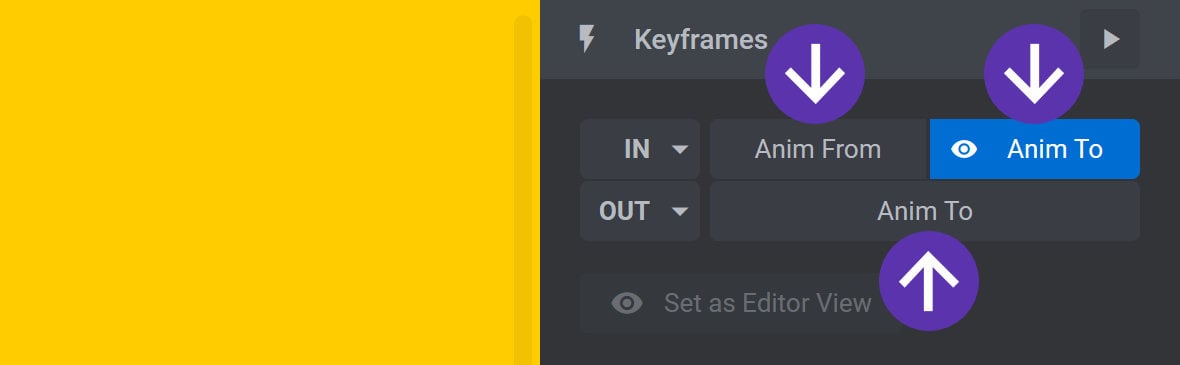
Note: The options displayed in the Advanced panel will vary slightly, depending on whether you have selected an Anim From or an Anim To keyframe:
Initially, when you activate Split Words on a text layer animation strip [?]
Animation strips look like little grey bars in the module editor's timeline:
A strip represents something about a layer changing over time, animating the change along the way. For exmple, a strip might animate a layer changing from being completely transparent to fully opaque.
The width of the strip determines how long the animation will run. The wider the strip, the longer the animation will take to complete. you will not see any effect appear on its words. This is because by default there are no differences between the strip’s From and To word animation settings.
The easiest way to see word animation in action on a text layer is to first activate Split Words on the layer’s IN animation, then select the IN animation’s Anim From keyframe, and change the word animation Opacity option from inherit to 0:
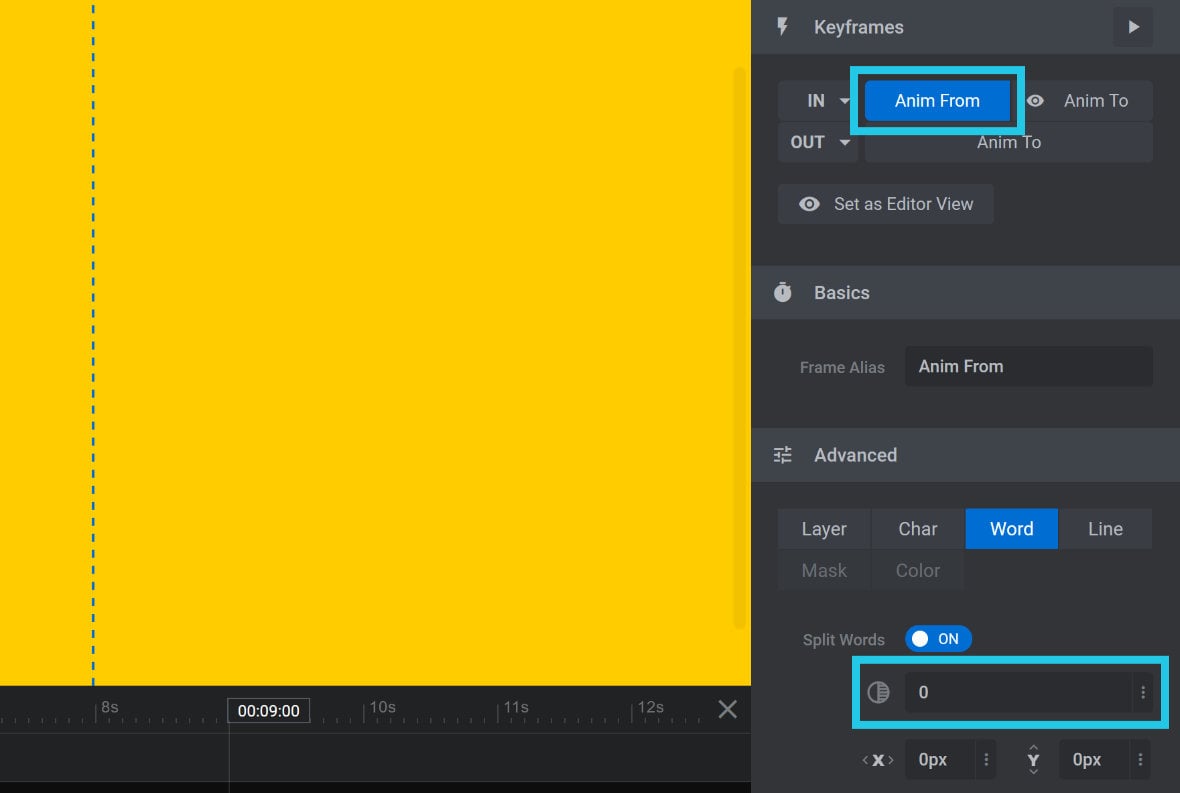
The IN animation’s Anim To keyframe already has a default word Opacity setting of 1, so now when you play back the animation you will see the text layer’s words sequentially fading in:
Split Direction
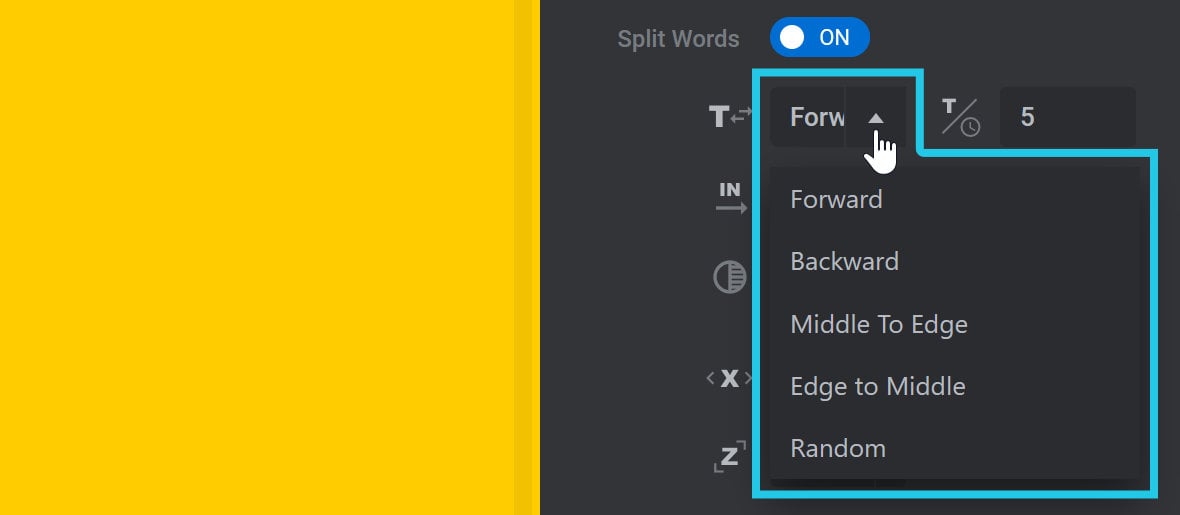
The Split Direction option is used to set the direction of word animations:

Note: The Split Direction option only appears on Anim To keyframes.
Click the down-arrow to display drop-down options for priming the Split Direction field: Forward, Backward, Middle to Edge, Edge to Middle, Random:
Forward
Selecting Forward will animate the first word of the layer through to the last word.
Backward
Selecting Backward will animate the last word of the layer through to the first word.
Middle to Edge
Selecting Middle to Edge will animate the center most word of the layer through to the outermost words.
Edge to Middle
Selecting Edge to Middle will animate the outermost word of the layer through to the center most words.
Random
Selecting Random will animate the words in a random order.
Split Delay
The Split Delay option allows you to set the delay time between each word animation:

The higher the value, the longer the delay between word animations. A delay is required for the effect to take place.
When you change the Split Delay setting you may notice the animation strip changes length. This is because the correct length is being automatically calculated through multiplying the number of words in your layer by the Split Delay time.
If you add or remove words from the layer you will also see the duration of the animation strip automatically update.
Animation Easing
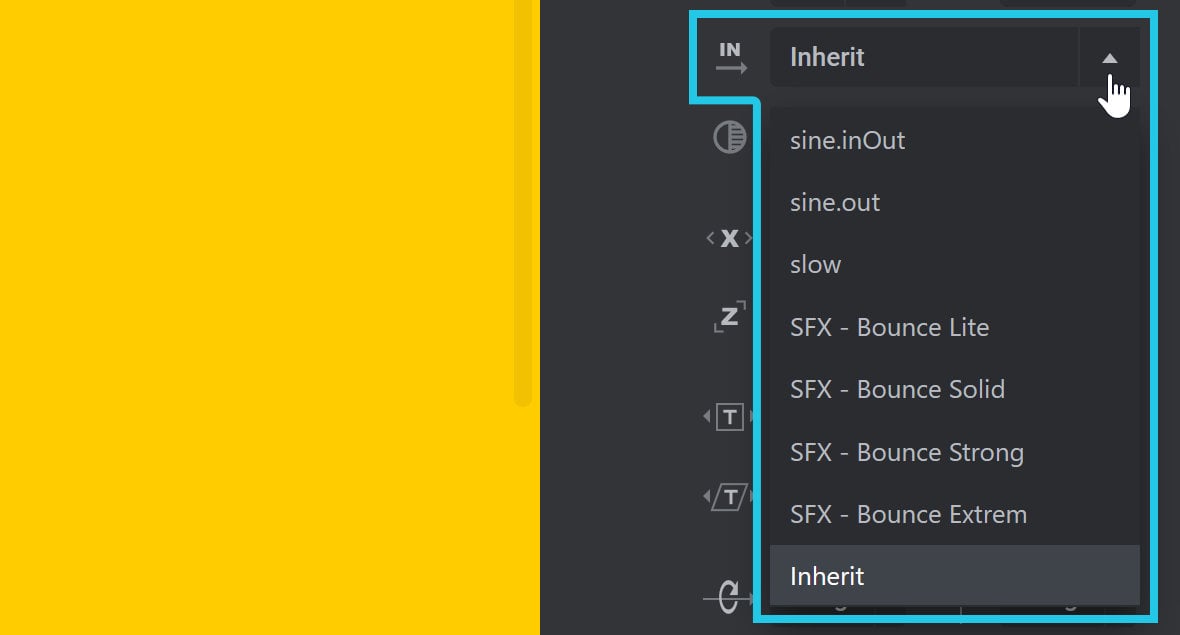
Easing equations help smooth out animations by influencing their starting speed and the speed of deceleration at their end. The Animation Easing option allows you to select the easing equation that should be applied to word animations:

By default Animation Easing is set to Inherit, meaning it will inherit whatever easing type was used on the last animation strip. If there is no other animation strip to inherit from, there will be no animation easing applied.
To change easing type, click the Animation Easing drop-down, then select your preferred easing preset:
Note: The Animation Easing option only appears on Anim To keyframes.
Opacity
The Opacity option is used to set the transparency of words at the currently selected keyframe:

Opacity can be set between 0, meaning completely transparent, and 1, meaning completely opaque.
If a keyframe is set to 0 Opacity and the next is set to 1, the words will fade in from transparent to opaque:
Conversely if a keyframe is set to 1 Opacity and the next keyframe is set to 0, the words will fade out from opaque to transparent:
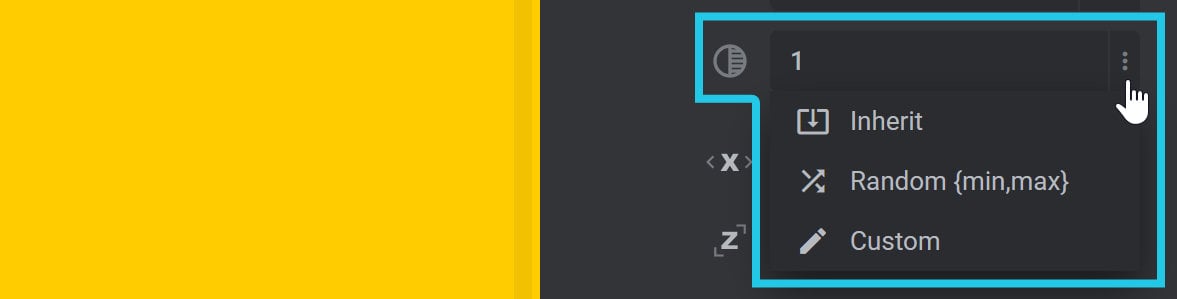
Clicking the three dots at the right end of the Opacity field opens a drop-down with three shortcuts for priming the value: Inherit, Random {min,max}, and Custom:
Inherit
The Inherit setting inherits an Opacity value from the previous keyframe.
For example, the IN animation’s Anim From keyframe might have its Opacity set to 0.5:
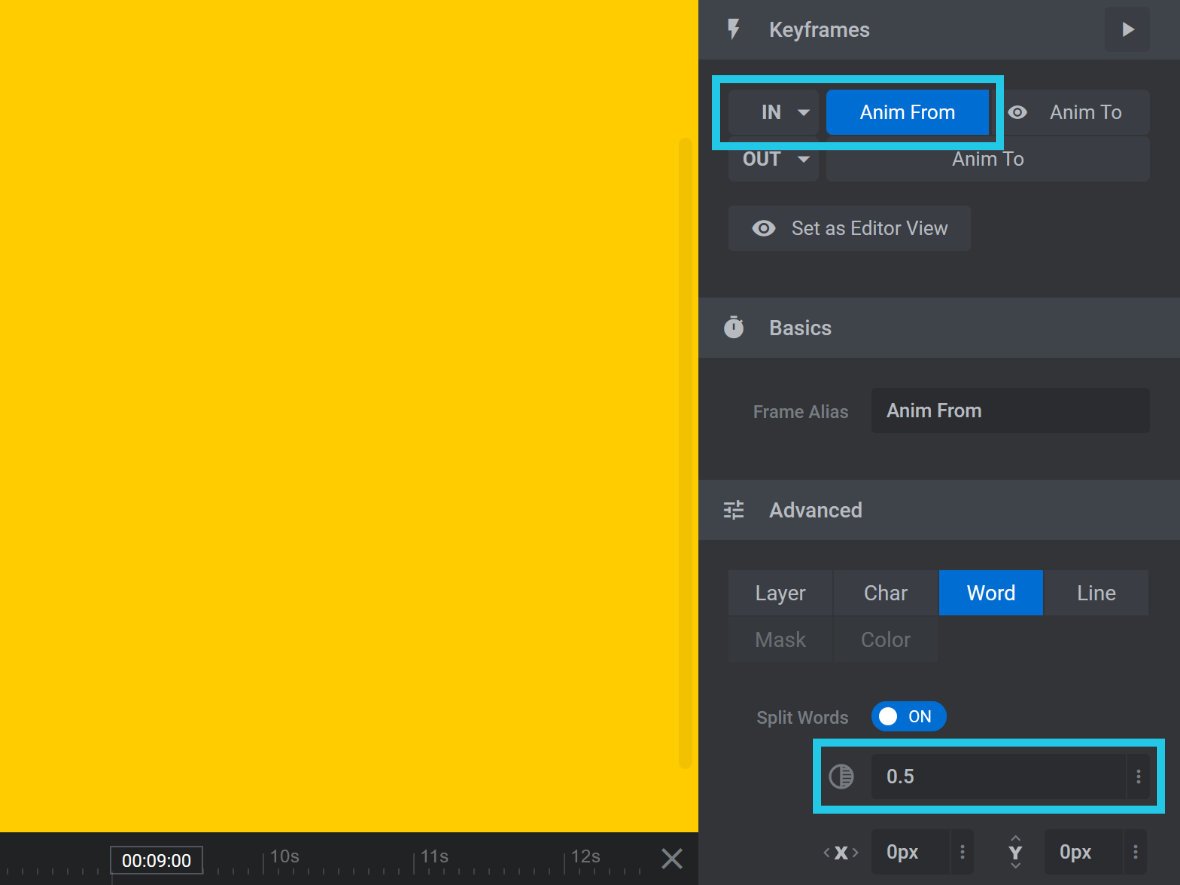
In this case, the next keyframe is the IN animation’s Anim To keyframe.
If that Anim To keyframe has its Opacity set to Inherit, it will automatically inherit the previous value of 0.5 from the Anim From keyframe:
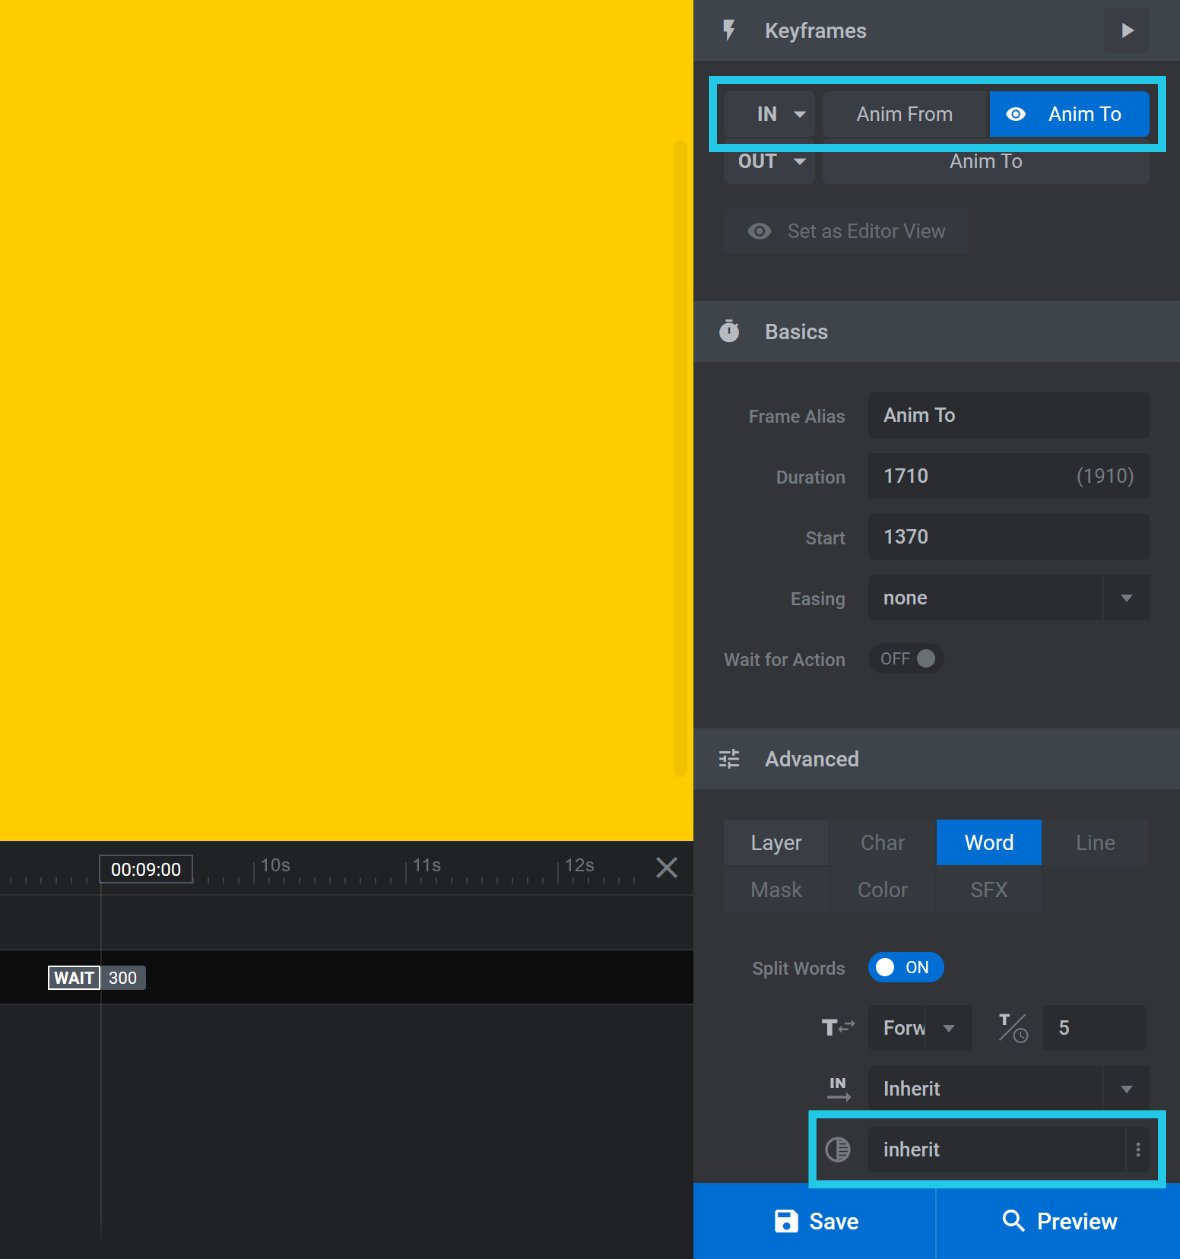
Random {min,max}
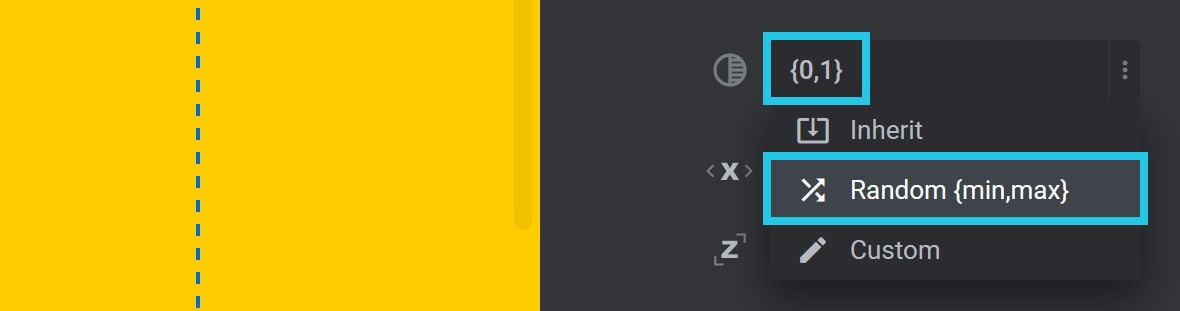
The Random {min,max} setting allows you to give each word at the keyframe a random Opacity value each time the animation runs. The value is set as a range, in the format {min,max}, where min is the minimum Opacity and max is the maximum Opacity.
For example, a setting of {0,1} means each word will get a random Opacity value between 0 and 1:
When the animation runs every word might appear anywhere between fully transparent to fully opaque:
0,1} means each word gets a random Opacity value between 0 and 1.A setting of {0.2,0.8} means the words will get a random Opacity value anywhere between 0.2 and 0.8. When the animation runs the words might appear anywhere between mostly transparent to mostly opaque:
{0.2,0.8} means each word gets a random Opacity value between 0.2 and 0.8.Custom
The Custom option allows you to manually set the value in the Opacity field:
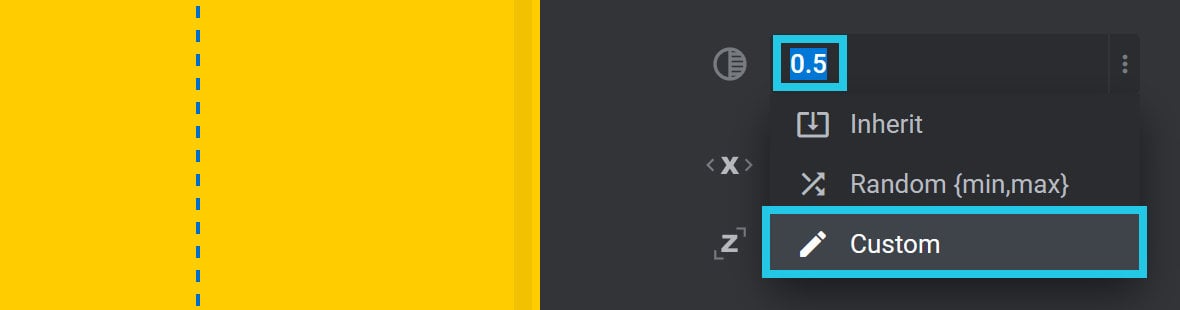
0.5Note: Typing a value directly into the Opacity field at any time will automatically switch the field to the Custom setting.
TranslateX
The TranslateX option allows you to set the horizontal position of words at the currently selected animation keyframe:
A positive value will shift the position of the words horizontally to the right.
A negative value will shift the position of the words horizontally to the left.
Clicking the three dots at the right end of the TranslateX field opens a drop-down with eight shortcuts for priming the value: px, %, Inherit, Random {min,max}, Wrapper Left, Wrapper Right, Wrapper Center, and Cycles [val|val|val]:
px
Choosing the px shortcut primes the TranslateX field for input of a pixel based value:
Modify by replacing the primed value with a new value followed by a px at the end.
%
Choosing the % shortcut primes the TranslateX field for input of a percentage based value:
Modify by replacing the primed value with a new value followed by a % at the end.
A percentage based TranslateX value will be relative to the width of the text layer.
For example, if the layer is 600px wide and the TranslateX value is 50%, the words will each be offset to the right by 300px:
600px wide and the TranslateX value is 50%, which offsets the words right by 300px.Inherit
The Inherit setting inherits a TranslateX value from the previous keyframe:
Random {min,max}
The Random {min,max} setting allows you to give each word at the keyframe a random TranslateX value each time the animation runs. The value is set as a range, in the format {min,max}, where min is the minimum TranslateX value and max is the maximum TranslateX value:
{-15,15}.For example, by adjusting the default values to a setting of {-30,30} , the keyframe will get a random TranslateX value between -30px and 30px. When the animation runs, individual words might be offset anywhere between 30px to the left and 30px to the right:
{-30,30} means the keyframe will get a random TranslateX value between -30px and 30px.Wrapper Left
Selecting Wrapper Left will offset the words to the left by the width of the wrapper:
The left edge of the wrapper is determined by whether Layer Align is set to Layer Area or Scene for the layer:
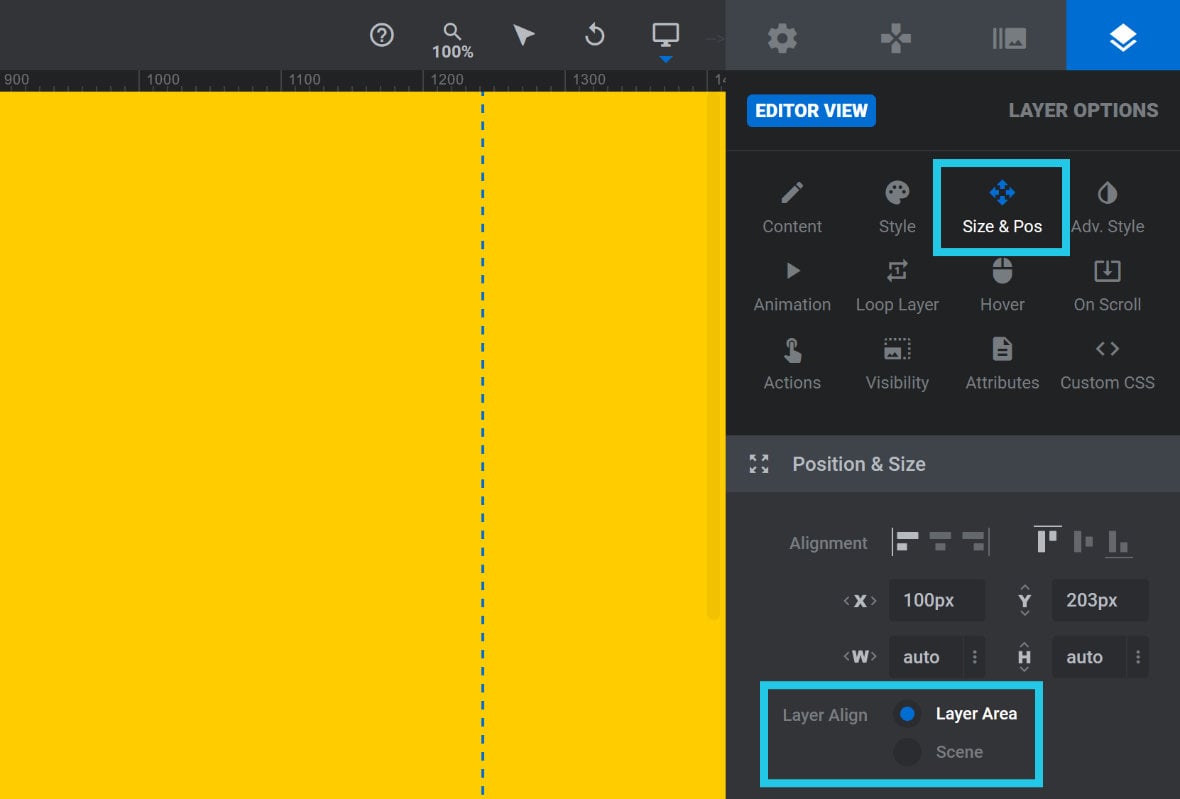
The width of the wrapper can be seen on the canvas as the space between the two vertical blue-dotted lines, which also varies depending upon device layout. You can identify and/or adjust the wrapper width for each device layout by going to the Layer Area Size panel in the Module General Options tab.
In the following example, Layer Align is set to Layer Area, and Wrapper Left has been applied to our ‘Wrapper Left’ text layer, resulting in the right edge of the layer aligning with the left edge of the wrapper:

Applying the above Wrapper Left settings to the Anim To keyframe of our text layer results in the following animation:
Note 1: In the above example, Split Delay has been set to 5 to more clearly illustrate how each word is actually animated separately.
Note 2: You can learn more about Layer Align in the following intermediate editing tutorial: Adding and Configuring Image Layers.
Wrapper Right
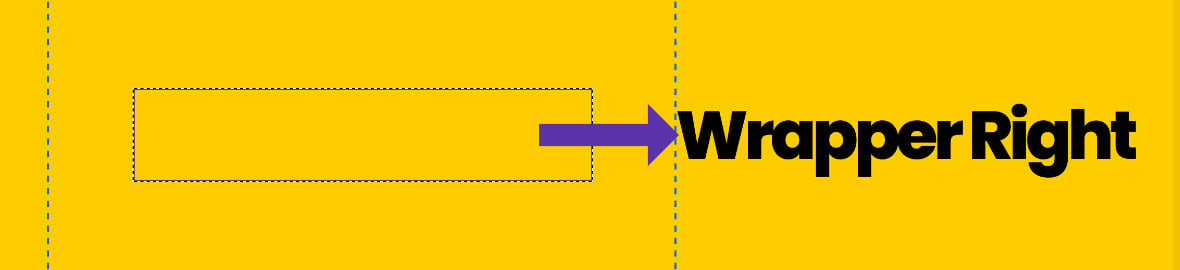
Selecting Wrapper Right will offset the words to the right by the width of the wrapper:
Just as described above under Wrapper Left, the right edge of the wrapper is determined by whether Layer Align is set to Layer Area or Scene for the layer, and the width of the wrapper can be seen on the canvas as the space between the two vertical blue-dotted lines for each device layout.
In the following example, Layer Align is set to Layer Area, and Wrapper Right has been applied to our ‘Wrapper Right’ text layer, resulting in the right edge of the layer aligning with the right edge of the wrapper:
Applying the above Wrapper Right settings to the Anim To keyframe of our text layer results in the following animation:
Note: To mirror the animation movement seen in our Wrapper Left animation example, Split Direction has been set to Backward in the above Wrapper Right animation.
Wrapper Center
Selecting Wrapper Center will offset the words to the center of the wrapper:
Cycles [val|val|val]
The Cycles [val|val|val] setting format allows you to set multiple TranslateX values to transition through across the course of the keyframe. Each value should be added between square braces, separated by pipe symbols [val|val]:
[-50|50].The default TranslateX Cycles value is [-50|50], which will adjust the horizontal position of the first word in the layer to the left by a value of -50px, and then adjust the horizontal position of the second word in the layer to the right by a value of 50px. These values will apply in a cycle to any subsequent words in the same layer, as the following example illustrates:
If you want to apply specific values to multiple words in a single layer, you can expand the number of values separated by pipe symbols. For example, if we apply four separate values to our four word example, such as [-50|-50|100|100], we get the following result:
You can specify as few or as many Cycles values as you would like, bearing in mind that the number of values specified should be equal to or less than the number of words on the layer.
TranslateY
The TranslateY option allows you to set the vertical position of words at the currently selected animation keyframe:
A positive value will shift the position of the words vertically downward.
A negative value will shift the position of the words vertically upward.
Clicking the three dots at the right end of the TranslateY field opens a drop-down with eight shortcuts for priming the value: px, %, Inherit, Random {min,max}, Wrapper Top, Wrapper Bottom, Wrapper Middle, and Cycles [val|val|val]:
px
Choosing the px shortcut primes the TranslateY field for input of a pixel based value:
Modify by replacing the primed value with a new value followed by a px at the end.
%
Choosing the % shortcut primes the TranslateY field for input of a percentage based value:
Modify by replacing the primed value with a new value followed by a % at the end.
A percentage based TranslateY value will be relative to the height of the text layer.
For example, if the layer is 800px high and the TranslateY value is 50%, the words will each be offset downward by 400px:
Inherit
The Inherit setting inherits a TranslateY value from the previous keyframe:
Random {min,max}
The Random {min,max} setting allows you to give each word at the keyframe a random TranslateY value each time the animation runs. The value is set as a range, in the format {min,max}, where min is the minimum TranslateY value and max is the maximum TranslateY value:
For example, if we adjust the default values to a setting of {-30,30} , the keyframe will get a random TranslateY value between -30px and 30px. When the animation runs individual words might be offset anywhere between 30px upward and 30px downward:
{-30,30} offsets each line randomly between 30px up and 30px down.Wrapper Top
Selecting Wrapper Top will offset the words to the top edge of the wrapper:
The top edge of the wrapper is determined by whether Layer Align is set to Layer Area or Scene for the layer. You can learn more about Layer Align in the following intermediate editing tutorial: Adding and Configuring Image Layers.
Note: When the bottom edge of a layer is aligned with the top edge of the wrapper, the layer is positioned outside the wrapper and is therefore not visible.
Wrapper Bottom
Selecting Wrapper Bottom will offset the words to the bottom edge of the wrapper:
The bottom edge of the wrapper is determined by whether Layer Align is set to Layer Area or Scene for the layer. You can learn more about Layer Align in the following intermediate editing tutorial: Adding and Configuring Image Layers.
Note: When the top edge of a layer is aligned with the bottom edge of the wrapper, the layer is positioned outside the wrapper and is therefore not visible.
Wrapper Middle
Selecting Wrapper Middle will offset the words to the middle of the wrapper:
Note: Selecting Wrapper Middle will prime the TranslateY field with the center value.
Cycles [val|val|val]
The Cycles [val|val|val] setting format allows you to set multiple TranslateY values to transition through across the course of the keyframe. Each value should be added between square braces, separated by pipe symbols [val|val]:
[-50|50].The default TranslateY Cycles value is [-50|50], which will adjust the vertical position of the first word in the layer to the top by a value of -50px, and then adjust the vertical position of the second word in the layer to the bottom by a value of 50px. These values will apply in a cycle to any subsequent words in the same layer, as the following example illustrates:
If you want to apply specific values to multiple words in a single layer, you can expand the number of values separated by pipe symbols. For example, if we apply four separate values to our four word example, such as [-50|-50|50|50], we get the following result:
You can specify as few or as many Cycles values as you would like, bearing in mind that the number of values specified should be equal to or less than the number of words on the layer.
TranslateZ
The TranslateZ option allows you to modify the size of words at the currently selected animation keyframe. It can be used to give the layer the appearance of words having 3D depth, with the ability to come closer or move further away:
A positive value will increase the size of the words, making them seem to come closer or zoom in.
A negative value will reduce the size of the words, making them seem to move further away or zoom out.
The strength of the zooming effect depends on the value of the module’s [?]
A module in Slider Revolution acts as a container for slides, which in turn act as containers for layers. Modules are created and edited with the module editor.
A "module" is a single, self contained piece of content. You can think of this as being similar to the way a post or page in regular WordPress is a self contained piece of content.
A module can represent any kind of content Slider Revolution is capable of creating, such as a slider, carousel, hero unit, navigation menu, posts display and so on.
Multiple modules can be combined to form rich content such as complete sites and landing pages. Layer Perspective Globally option, found under the Module General Options tab, Layout sub-section, Advanced Settings panel:

The lower the perspective value the more intense the zooming will be, and the higher the perspective value the less intense the zooming will be.
Clicking the three dots at the right end of the TranslateZ field opens a drop-down with four shortcuts for priming the value: px, Inherit, Random {min,max}, and Cycles [val|val|val]:
px
Choosing the px shortcut primes the TranslateZ field for input of a pixel based value:
Modify by replacing the primed value with a new value followed by a px at the end.
Inherit
The Inherit setting inherits the TranslateZ value from the previous keyframe:
Random {min,max}
The Random {min,max} setting allows you to give the keyframe’s TranslateZ a random value each time the animation runs. The value is set as a range, in the format {min,max}, where min is the minimum TranslateZ value and max is the maximum TranslateZ value:
-50 is the Random {min} value, and 50 is the Random {max} value.Cycles [val|val|val]
The Cycles [val|val|val] setting format allows you to set multiple TranslateZ values to transition through across the course of the keyframe. Each value should be added between square braces, separated by pipe symbols [val|val]:
[-50|50].The default TranslateZ Cycles values are [-50|50], which will decrease the size of the first word in the layer by the first value specified, and then increase the size of the second word in the layer by the second value specified. These values will apply in a cycle to any subsequent words in the same layer.
If you want to apply specific values to multiple words in a single layer, you can expand the number of values separated by pipe symbols. For example, [val|val|val|val].
You can specify as few or as many Cycles values as you would like, bearing in mind that the number of values specified should be equal to or less than the number of words on the layer.
scaleX
The scaleX option is used to scale word width at the selected animation keyframe:

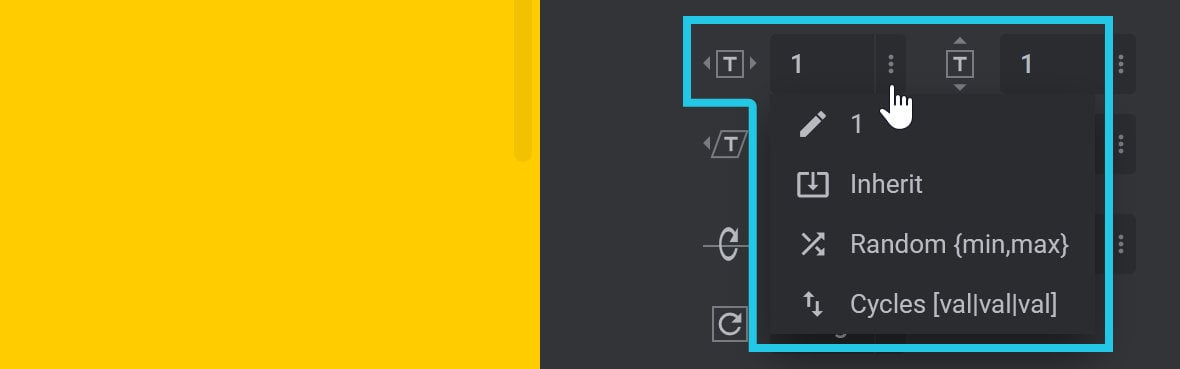
Clicking the three dots at the right end of the scaleX field opens a drop-down with four shortcuts for priming the value: 1, Inherit, Random {min,max}, and Cycles [val|val|val]:
1
By default, the scaleX field is set to 1, which means the words will have 100% of their default width:

A value higher than 0 and lower than 1 will scale the width down. For example, if we leave the Anim From keyframe for scaleX at its default value of 1, and then set the Anim To value for scaleX to 0.5, words will scale down to 50% of their default width:
A value above 1 will scale the width up. For example, if we set the Anim From value for scaleX to 2, and leave its corresponding Anim To value at its default value of 1, words will scale from 200% down to their default width:
A value of 0 will scale the words to zero, effectively making them invisible.
Inherit
The Inherit setting inherits the scaleX value from the previous keyframe:

Random {min,max}
The Random {min,max} setting allows you to give words a random scaleX value each time the animation runs. The value is set as a range, in the format {min,max}, where min is the minimum scaleX value and max is the maximum scaleX value:

0 is the Random {min} value, and 2 is the Random {max} value.For example, a setting of {0,2} means the words will get a random scaleX value between 0 and 2. When the animation runs the words might either shrink to nothing or grow to double width.
Cycles [val|val|val]
The Cycles [val|val|val] setting format allows you to set multiple scaleX values to transition through across the course of the keyframe. Each value should be added between square braces, separated by pipe symbols [val|val]:

[0.5|1].The default scaleX Cycles values are [0.5|1], which will scale the width of the first word in the layer by a value of 0.5, and then scale the width of the second word in the layer by a value of 1. These values will apply in a cycle to any subsequent words in the same layer, as the following example illustrates:
[0.5|1] apply to the 1st and 2nd word in a layer, then to the 3rd and 4th words, and so on.If you want to apply specific values to multiple words in a single layer, you can expand the number of values separated by pipe symbols. For example, if we apply six separate values to our six word example, such as [0.2|0.3|0.5|0.6|0.7|1], we get the following result:
[0.2|0.3|0.5|0.6|0.7|1] to a layer of six separate words.You can specify as few or as many scaleX Cycles values as you would like, bearing in mind that the number of values specified should be equal to or less than the number of words on the layer.
You will notice when scaleX values are adjusted in isolation, words can appear stretched or squashed. If you want to retain the correct font shape in your words, then any value change applied to scaleX should also be applied to scaleY.
scaleY
The scaleY option is used to scale the words height at the selected animation keyframe:

Clicking the three dots at the right end of the scaleY field opens a drop-down with four shortcuts for priming the value: 1, Inherit, Random {min,max}, and Cycles [val|val|val]:
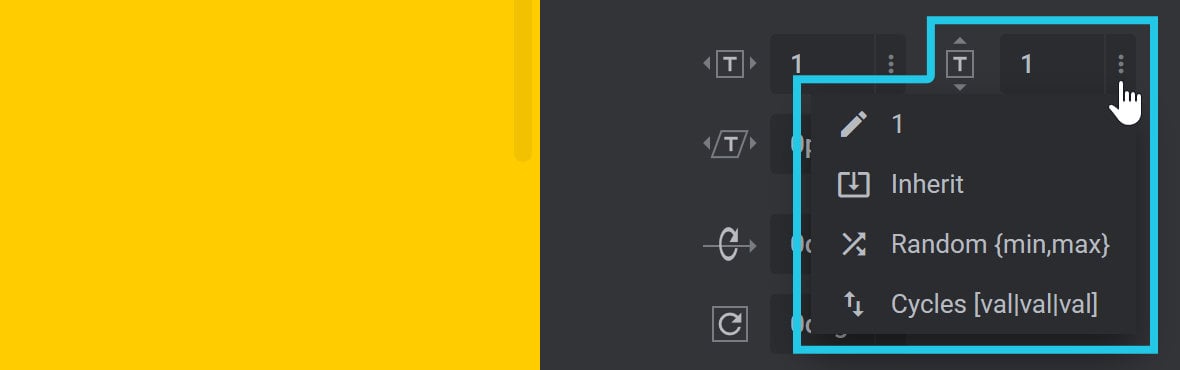
1
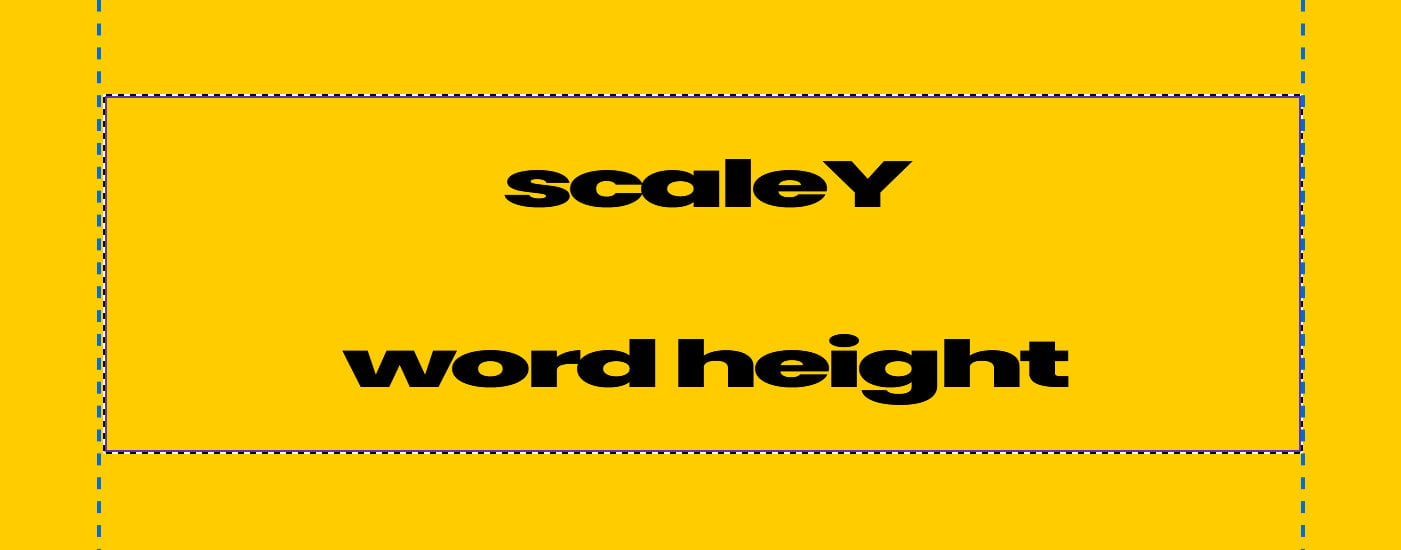
By default, the scaleY field is set to 1, which means the words will have 100% of their default height:

A value higher than 0 and lower than 1 will scale the height down. For example, a value of 0.5 will scale words to 50% of their default height:
0.5 scales word height to 50% of their default height.A value above 1 will scale the height up. For example, a value of 1.5 will scale words to 150% of their default height:
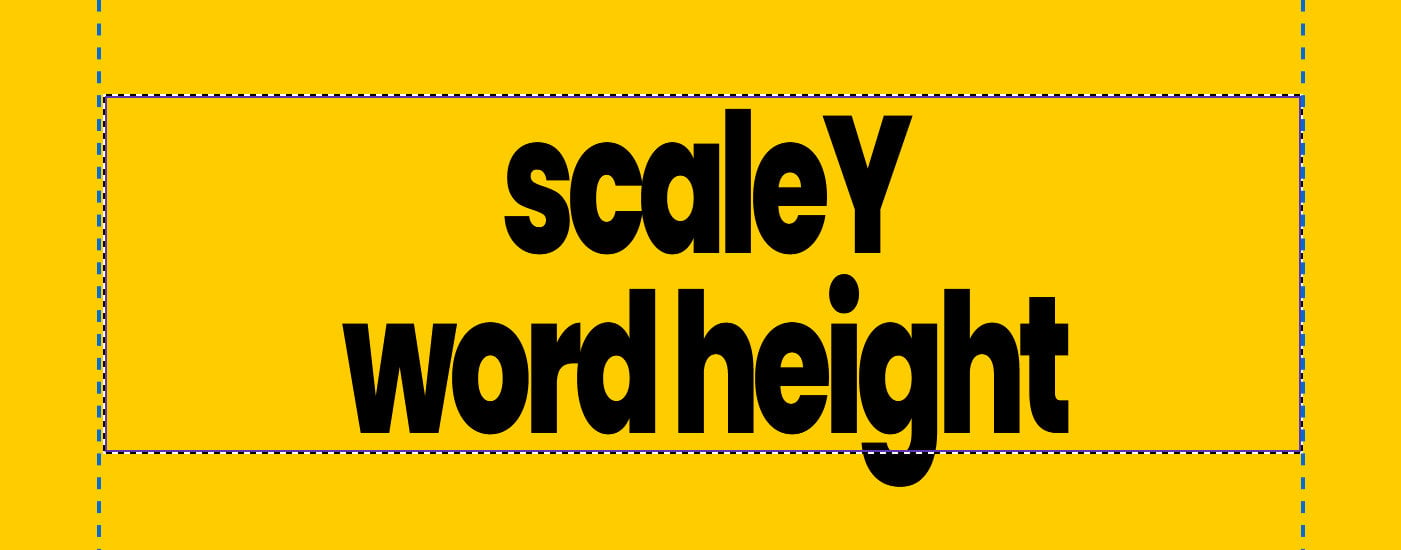
1.5 scales word height to 150% of their base height.A value of 0 will scale the words to zero, effectively making them invisible.
Inherit
The Inherit setting inherits the scaleY value from the previous keyframe:

Random {min,max}
The Random {min,max} setting allows you to give words a random scaleY value each time the animation runs. The value is set as a range, in the format {min,max}, where min is the minimum scaleY value and max is the maximum scaleY value:

0 is the Random {min} value, and 2 is the Random {max} value.For example, a setting of {0,2} means the words will get a random scaleY value between 0 and 2. When the animation runs the words might either shrink to nothing or grow to double height.
Cycles [val|val|val]
The Cycles [val|val|val] setting format allows you to set multiple values to transition through across the course of the keyframe. Each value should be added between square braces, separated by pipe symbols [val|val]:

The default scaleY Cycles values are [0.5|1], which will scale the height of the first word in the layer by a value of 0.5, and then scale the height of the second word in the layer by a value of 1. These values will apply in a cycle to any subsequent words in the same layer, as the following example illustrates:
[0.5|1] apply to the 1st and 2nd word in a layer, then to the 3rd and 4th words, and so on.If you want to apply specific values to multiple words in a single layer, you can expand the number of values separated by pipe symbols. For example, if we apply six separate values to our six word example, such as [0.2|0.3|0.5|0.6|0.7|1], we get the following result:
[0.2|0.3|0.5|0.6|0.7|1] to a layer of six separate words.You can specify as few or as many scaleY Cycles values as you would like, bearing in mind that the number of values specified should be equal to or less than the number of words on the layer.
skewX
The skewX option is used to skew word shape horizontally at the selected animation keyframe:

A positive value will skew the words to the left, i.e. the top of the words will move left while the bottom moves right:

20px skewing each word from top left to bottom right.A negative value will skew the words to the right, i.e. the top of the words will move right while the bottom moves left:

-20px skewing each word from top right to bottom left.Clicking the three dots at the right end of the skewX field opens a drop-down with four shortcuts for priming the value: px, Inherit, Random {min,max}, and Cycles [val|val|val]:
px
Choosing the px shortcut primes the skewX field for input of a pixel based value:

Modify by replacing the primed value with a new value followed by a px at the end.
Inherit
The Inherit setting inherits the skewX value from the previous keyframe:

Random {min,max}
The Random {min,max} setting allows you to give the words a random skewX value each time the animation runs. The value is set as a range, in the format {min,max}, where min is the minimum skewX value and max is the maximum skewX value:

0 is the Random {min} value, and 2 is the Random {max} value.Cycles [val|val|val]
The Cycles [val|val|val] setting format allows you to set multiple values to transition through across the course of the keyframe. Each value should be added between square braces, separated by pipe symbols [val|val]:

[-50|50].The default skewX Cycles values are [-50|50], which will skew the the first word in the layer to the top right and bottom left by -50px , and then skew the second word in the layer to the top left and bottom right by 50px. These values will apply in a cycle to any subsequent words in the same layer.
If you want to apply specific values to multiple words in a single layer you can expand the number of values separated by pipe symbols, eg. [val|val|val|val].
You can specify as few or as many Cycle values as you would like, bearing in mind that the number of values specified should be equal to or less than the number of words on the layer.
skewY
The skewY option is used to skew word shape vertically at the selected animation keyframe:

A positive value will skew the words down, i.e. the right edge of the words will move down while the left edge moves up:
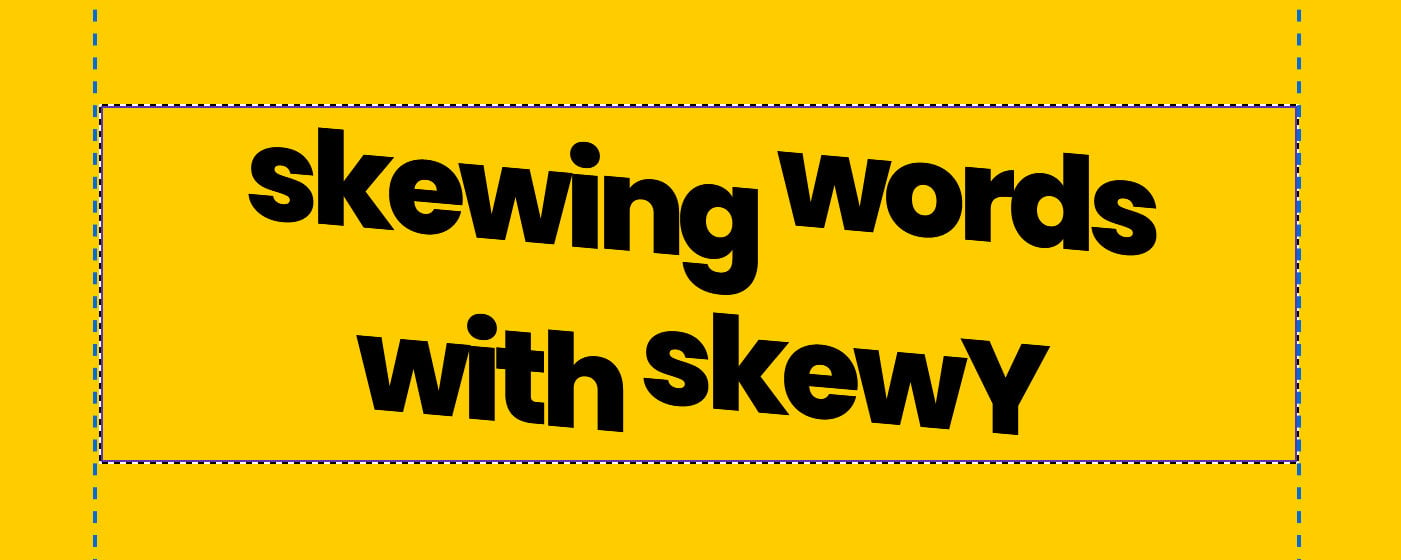
5px skewing each word’s left edge up and their right edge down.A negative value will skew the words up, i.e. the right edge of the words will move up while the left edge moves down:

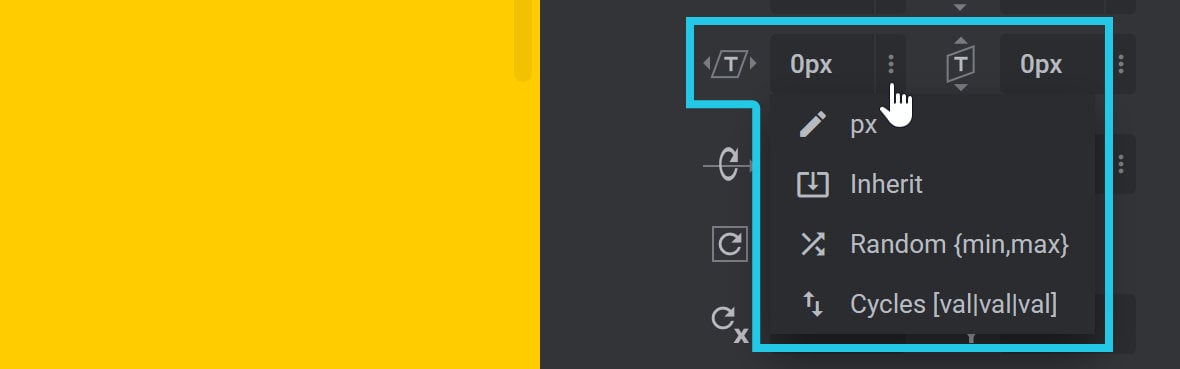
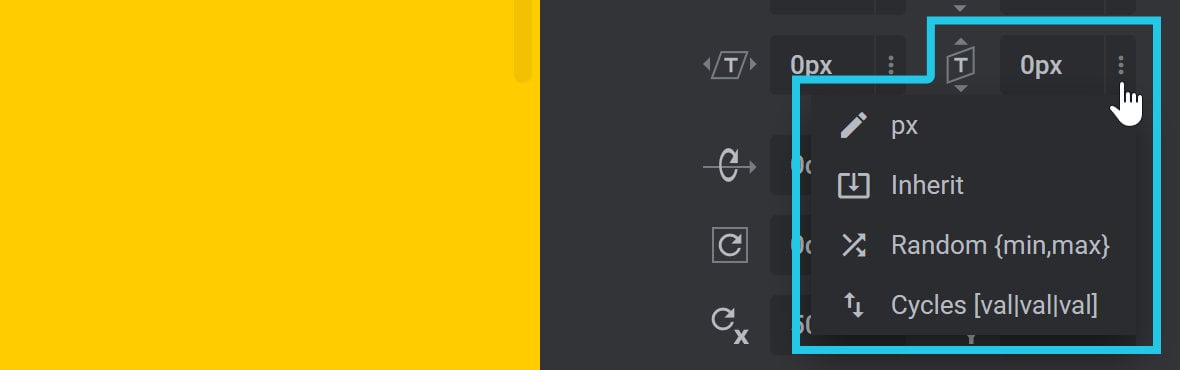
-5px skewing the word’s left edge down and right edge up.Clicking the three dots at the right end of the skewY field opens a drop-down with four shortcuts for priming the value: px, Inherit, Random {min,max}, and Cycles [val|val|val]:
px
Choosing the px shortcut primes the skewY field for input of a pixel based value:

Modify by replacing the primed value with a new value followed by a px at the end.
Inherit
The Inherit setting inherits the skewY value from the previous keyframe:

Random {min,max}
The Random {min,max} setting allows you to give the words a random skewY value each time the animation runs. The value is set as a range, in the format {min,max}, where min is the minimum skewY value and max is the maximum skewY value:

Cycles [val|val|val]
The Cycles [val|val|val] setting format allows you to set multiple values to transition through across the course of the keyframe. Each value should be added between square braces, separated by pipe symbols [val|val]:

[-50|50].The default skewY Cycles values are [-50|50], which will skew the first word in the layer’s right edge up and left edge down by -50px, and then skew the second word in the layer’s right edge down and left edge up by 50px. These values will apply in a cycle to any subsequent words in the same layer.
If you want to apply specific values to multiple words in a single layer you can expand the number of values separated by pipe symbols, eg. [val|val|val|val].
You can specify as few or as many Cycle values as you would like, bearing in mind that the number of values specified should be equal to or less than the number of words on the layer.
rotateX
The rotateX option is used to rotate words around the X axis, i.e. the horizontal axis:

The option is set in degrees(deg) of rotation.
A positive value will appear to tip words forwards in 3d space.
A negative value will appear to tip lines forwards in 3d space.
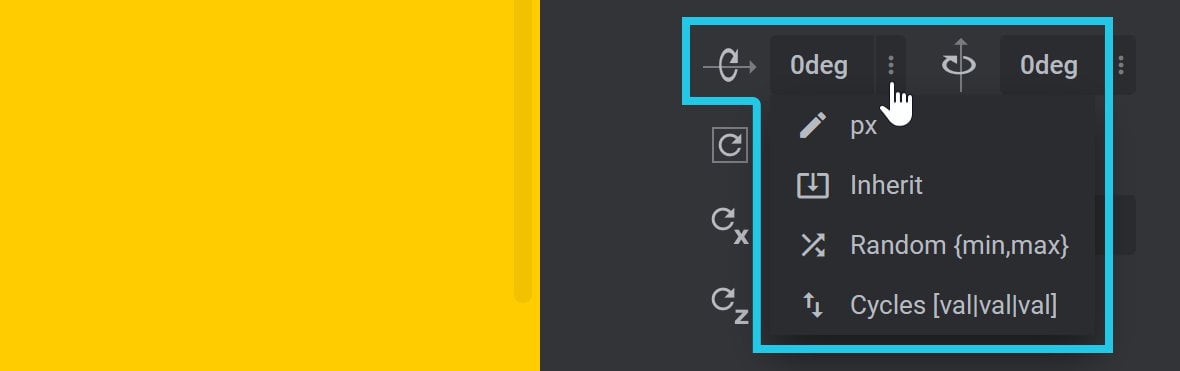
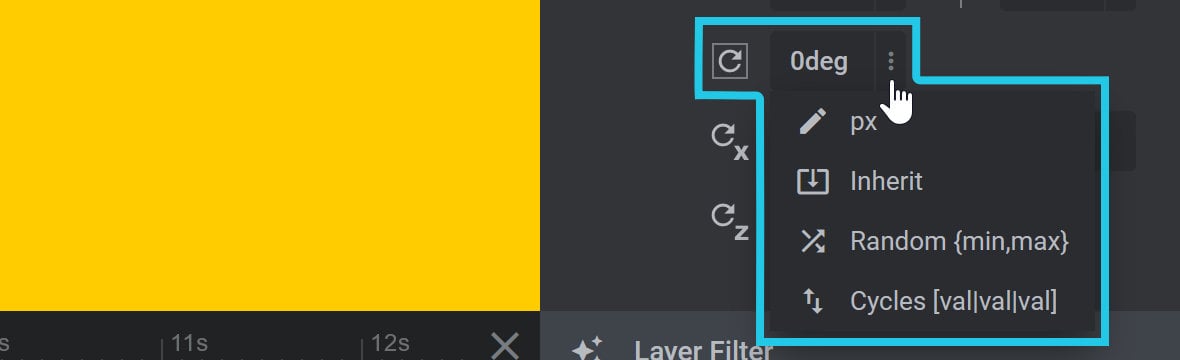
Clicking the three dots at the right end of the rotateX field opens a drop-down with four shortcuts for priming the value: px, Inherit, Random {min,max}, and Cycles [val|val|val]:
px
Despite the fact px typically represents pixel values, in this case choosing the px shortcut primes the rotateX field for input of a degrees(deg) based value:

Modify by replacing the primed value with a new value followed by a deg at the end.
Inherit
The Inherit setting inherits the rotateX value from the previous keyframe:

Random {min,max}
The Random {min,max} setting allows you to give words a random rotateX value each time the animation runs. The value is set as a range, in the format {min,max}, where min is the minimum rotateX value and max is the maximum rotateX value:

[-15|15].Cycles [val|val|val]
The Cycles [val|val|val] setting format allows you to set multiple values to transition through across the course of the keyframe. Each value should be added between square braces, separated by pipe symbols [val|val]:

[-50|50].The default rotateX Cycles value is [-50|50], which will rotate the height of the first word in the layer by a value of -50deg, and then rotate the height of the second word in the layer by a value of 50deg. These values will apply in a cycle to any subsequent words in the same layer.
If you want to apply specific values to multiple words in a single layer you can expand the number of values separated by pipe symbols, eg. [val|val|val|val].
You can specify as few or as many Cycles values as you would like, bearing in mind that the number of values specified should be equal to or less than the number of words on the layer.
rotateY
The rotateY option is used to spin words around the Y axis, i.e. the vertical axis:

The option is set in degrees(deg) of rotation.
A positive value will appear to spin words counter clockwise in 3d space, i.e. the right edge will appear to move away while the left edge comes closer.
A negative value will appear to spin words clockwise in 3d space, i.e. the left edge will appear to move away while the right edge comes closer.
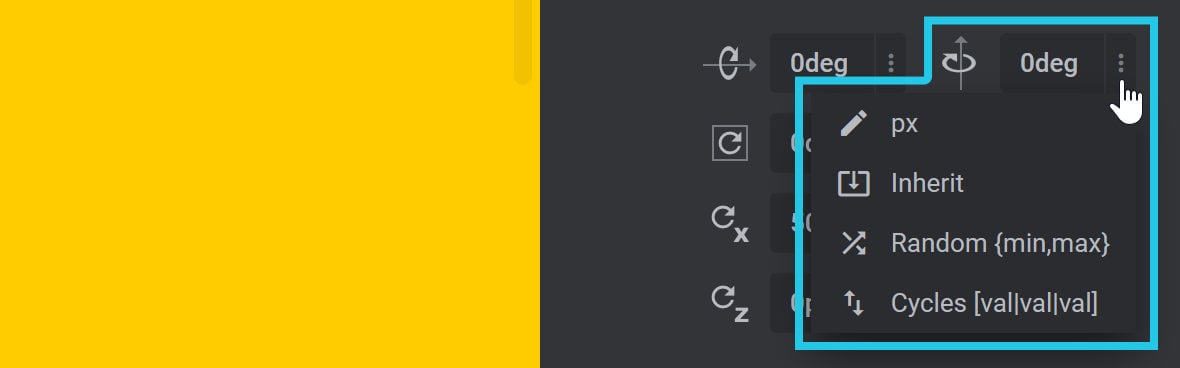
Clicking the three dots at the right end of the rotateY field opens a drop-down with four shortcuts for priming the value: px, Inherit, Random {min,max}, and Cycles [val|val|val]:
px
Despite the fact px typically represents pixel values, in this case choosing the px shortcut primes the rotateY field for input of a degrees(deg) based value:

Modify by replacing the primed value with a new value followed by a deg at the end.
Inherit
The Inherit setting inherits the rotateY value from the previous keyframe:

Random {min,max}
The Random {min,max} setting allows you to give words a random rotateY value each time the animation runs. The value is set as a range, in the format {min,max}, where min is the minimum rotateY value and max is the maximum rotateY value:

-15 is the Random {min} value, and 15 is the Random {max} value.Cycles [val|val|val]
The Cycles [val|val|val] setting format allows you to set multiple values to transition through across the course of the keyframe. Each value should be added between square braces, separated by pipe symbols [val|val]:

[-50|50].The default rotateY Cycles value is [-50|50], which will rotate the first word in the layer clockwise around the Y axis by a value of -50deg, and then rotate the second word in the layer counter clockwise around the Y axis by a value of 50deg. These values will apply in a cycle to any subsequent words in the same layer.
If you want to apply specific values to multiple words in a single layer you can expand the number of values separated by pipe symbols, eg. [val|val|val].
You can specify as few or as many Cycles values as you would like, bearing in mind that the number of values specified should be equal to or less than the number of words on the layer.
2D Rotation
The 2D Rotation option is used to rotate words in 2D space.
The option is set in degrees(deg) of rotation:

A positive value will appear to spin words clockwise:
A negative value will appear to spin words counter clockwise:
Clicking the three dots at the right end of the 2D Rotation field opens a drop-down with four shortcuts for priming the value: px, Inherit, Random {min,max}, and Cycles [val|val|val]:
px
Despite the fact px typically represents pixel values, in this case choosing the px shortcut primes the 2D Rotation field for input of a degrees(deg) based value:

Modify by replacing the primed value with a new value followed by a deg at the end.
Inherit
The Inherit setting inherits the 2D Rotation value from the previous keyframe:

Random {min,max}
The Random {min,max} setting allows you to give the keyframe’s 2D Rotation a random value each time the animation runs. The value is set as a range, in the format {min,max}, where min is the minimum 2D Rotation value and max is the maximum 2D Rotation value:

Cycles [val|val|val]
The Cycles [val|val|val] setting format allows you to set multiple values to transition through across the course of the keyframe. Each value should be added between square braces, separated by pipe symbols [val|val]:

[-50|50].The default 2D Rotation Cycles value is [-50|50], which will apply a -50deg counter clockwise spin effect to the first word in the layer, and then will apply a 50deg clockwise spin effect to the second word in the layer. These values will apply in a cycle to any subsequent words in the same layer.
To illustrate how this works more clearly, the following example shows the result of setting 2D Rotation Cycles to a value of [-360|360]:
If you want to apply specific values to multiple words in a single layer you can expand the number of values separated by pipe symbols, eg. [val|val|val].
For example, if we apply five separate values to our five word example, such as [20|-15|15|40|-20], we get the following result:
You can specify as few or as many Cycles values as you would like, bearing in mind that the number of values specified should be equal to or less than the number of words on the layer.
Transform Origin X/Y/Z
Each of the options described above that performs scaling, skewing or rotating applies a kind of operation to words called a “transform”.
Whenever a transform is applied, it is made relative to a set of invisible axes in 3D space called the “transform origin”. The three axes that make up the transform origin are the X axis (horizontal), Y axis (vertical), and Z axis (depth).
The transform origin determines the word’s position of origin in 3D space, and behaves like an anchor around which transforms are made. That in turn affects how the word transformation appears.
By default, a word’s transform origin sets each of the three axes directly through its center.
However, the X axis (horizontal), Y axis (vertical), and Z axis (depth) that make up the transform origin can be modified by altering the following three options, respectively: Transform Origin X, Transform Origin Y and Transform Origin Z:
For example, if you set scaleX to animate from 0 to 1, each word will appear to grow out from their centers. This is because the default origin at their centers acts like an anchor:
However if you change Transform Origin X, (on both the From and To keyframes), from the default of 50% down to 0% the X axis will be moved to the left edge of each word. The effect of animating scaleX from 0 to 1 will then make the words appear to grow out from their left edge instead:
Conversely if you change Transform Origin X to 100% the X axis will be moved to the right edge of each word. The effect of animating scaleX from 0 to 1 will then make the words appear to grow out from their right edge:
Word Filter Panel
When using the options available in the Word tab, the Word Filter panel will appear below the Advanced panel. Here you will find the Use Filter option:
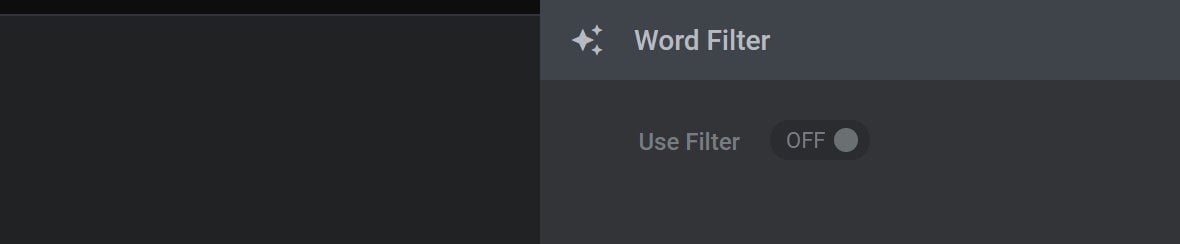
Use Filter
The Use Filter option will be OFF by default. Toggle User Filter to ON to display three additional options: Blur Filter, Grayscale, Brightness:
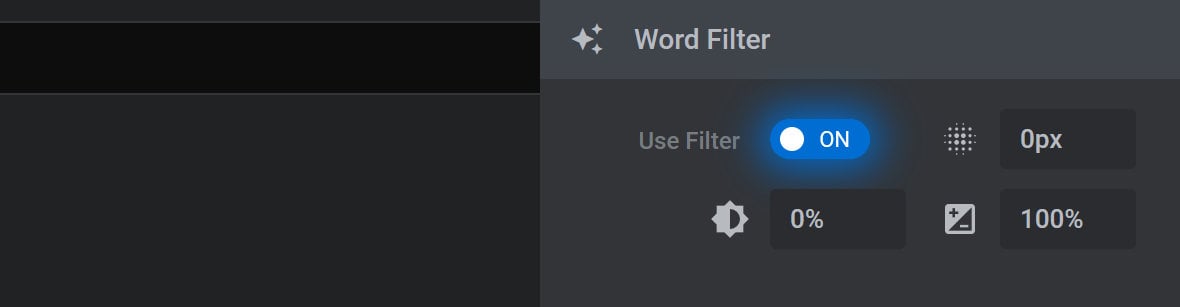
These additional options allow you to animate blur, grayscale and/or brightness of words in the selected animation frame.
Blur Filter
The Blur Filter option allows you to apply a Gaussian blur to the words in the selected animation frame:

Grayscale
The Grayscale option allows you to convert the words in the selected animation frame to grayscale:

Brightness
The Brightness option allows you to apply a linear multiplier value to the words in the selected animation frame:

This can be used to make words appear brighter or darker.
Slide Direction Based Mirroring Panel
It’s possible to take an IN or OUT word animation that moves in a certain direction and have it play in a mirrored direction, depending on whether a visitor is moving forward or backwards through a module.
For example, you might have words that slide in from the left during the IN animation. By activating Slide Direction Based Mirroring, when the slider is made to go backwards the words would mirror their IN animation and slide in from the right side instead.
Because this functionality only relates to IN and OUT animations, the Slide Direction Based Mirroring panel only appears when the Anim From keyframe of the IN animation, or the Anim To keyframe of an OUT animation, is selected:
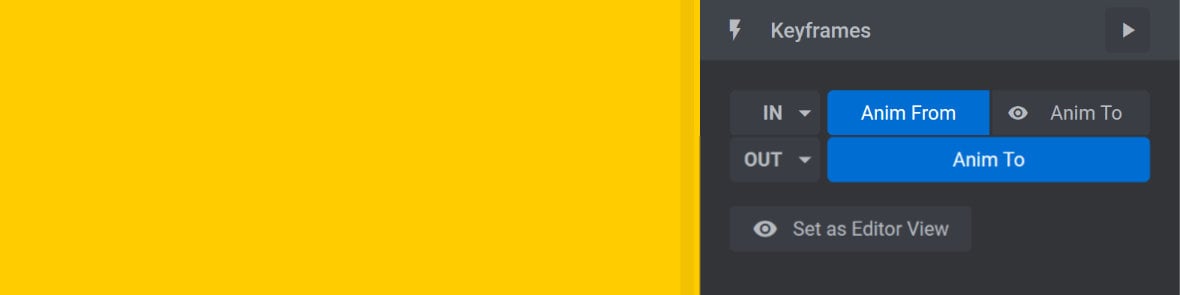
The panel can be found below the Word Filter panel:
Note: You will not see the Slide Direction Based Mirroring panel below the Word Filter panel if you are editing the Anim To keyframe of an IN animation.
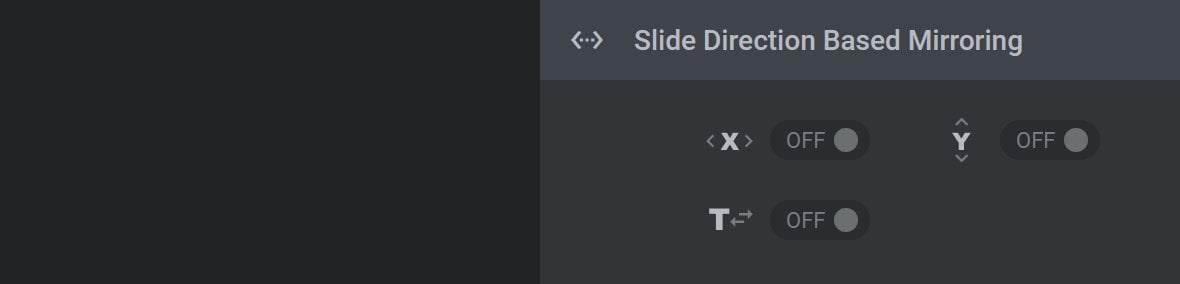
Here you will find three toggle-based options: TranslateX, TranslateY and Split Direction.
You can decide which of these options to toggle to ON depending on the kind of movement used in the IN or OUT word animation you wish to mirror.
For example, if the animation slides words horizontally that means they are translating on the X axis, so you should activate the TranslateX option: